This easy drawing tutorial shows how to draw a cute brain step by step. We will build a simple cartoon brain using soft shapes and gentle details. Take your time, and enjoy a calm drawing for beginners.
What You Will Need
- Pencil
- Eraser
- Black marker or pen
- Coloring tools (crayons, colored pencils, or markers)
- Plain drawing paper
Here are my RECOMMENDED Art Supplies!
- Crayola Coloring Set (140 Pieces – Mega Value!)
- 24 Colored Crayon Set
- A4 Printer Paper
- Crayola Coloring Pencils
- HP Home Printer with Instant Ink!
Time needed:
26 minutes.
Step-by-Step Drawing Guide
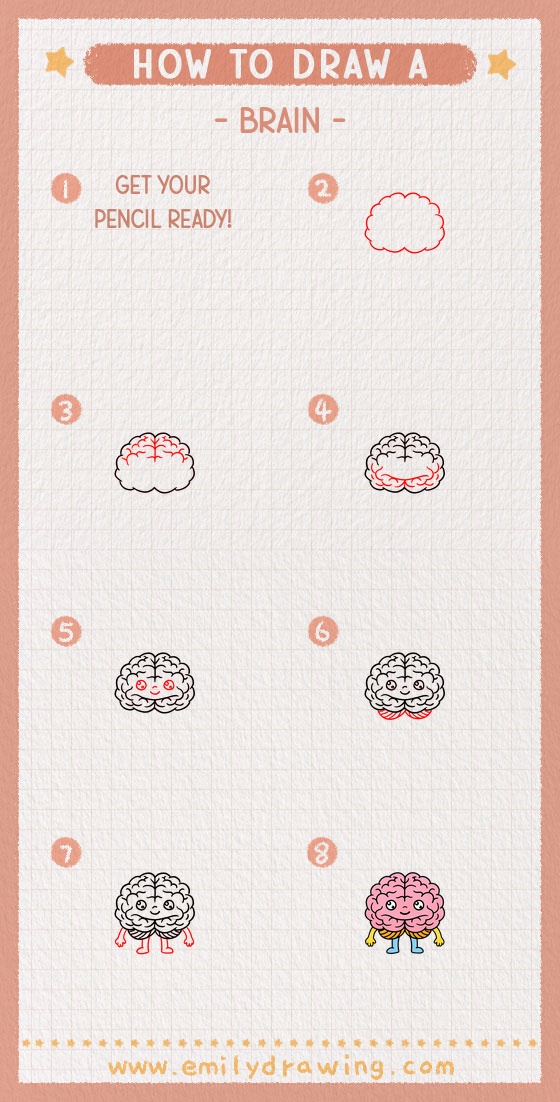
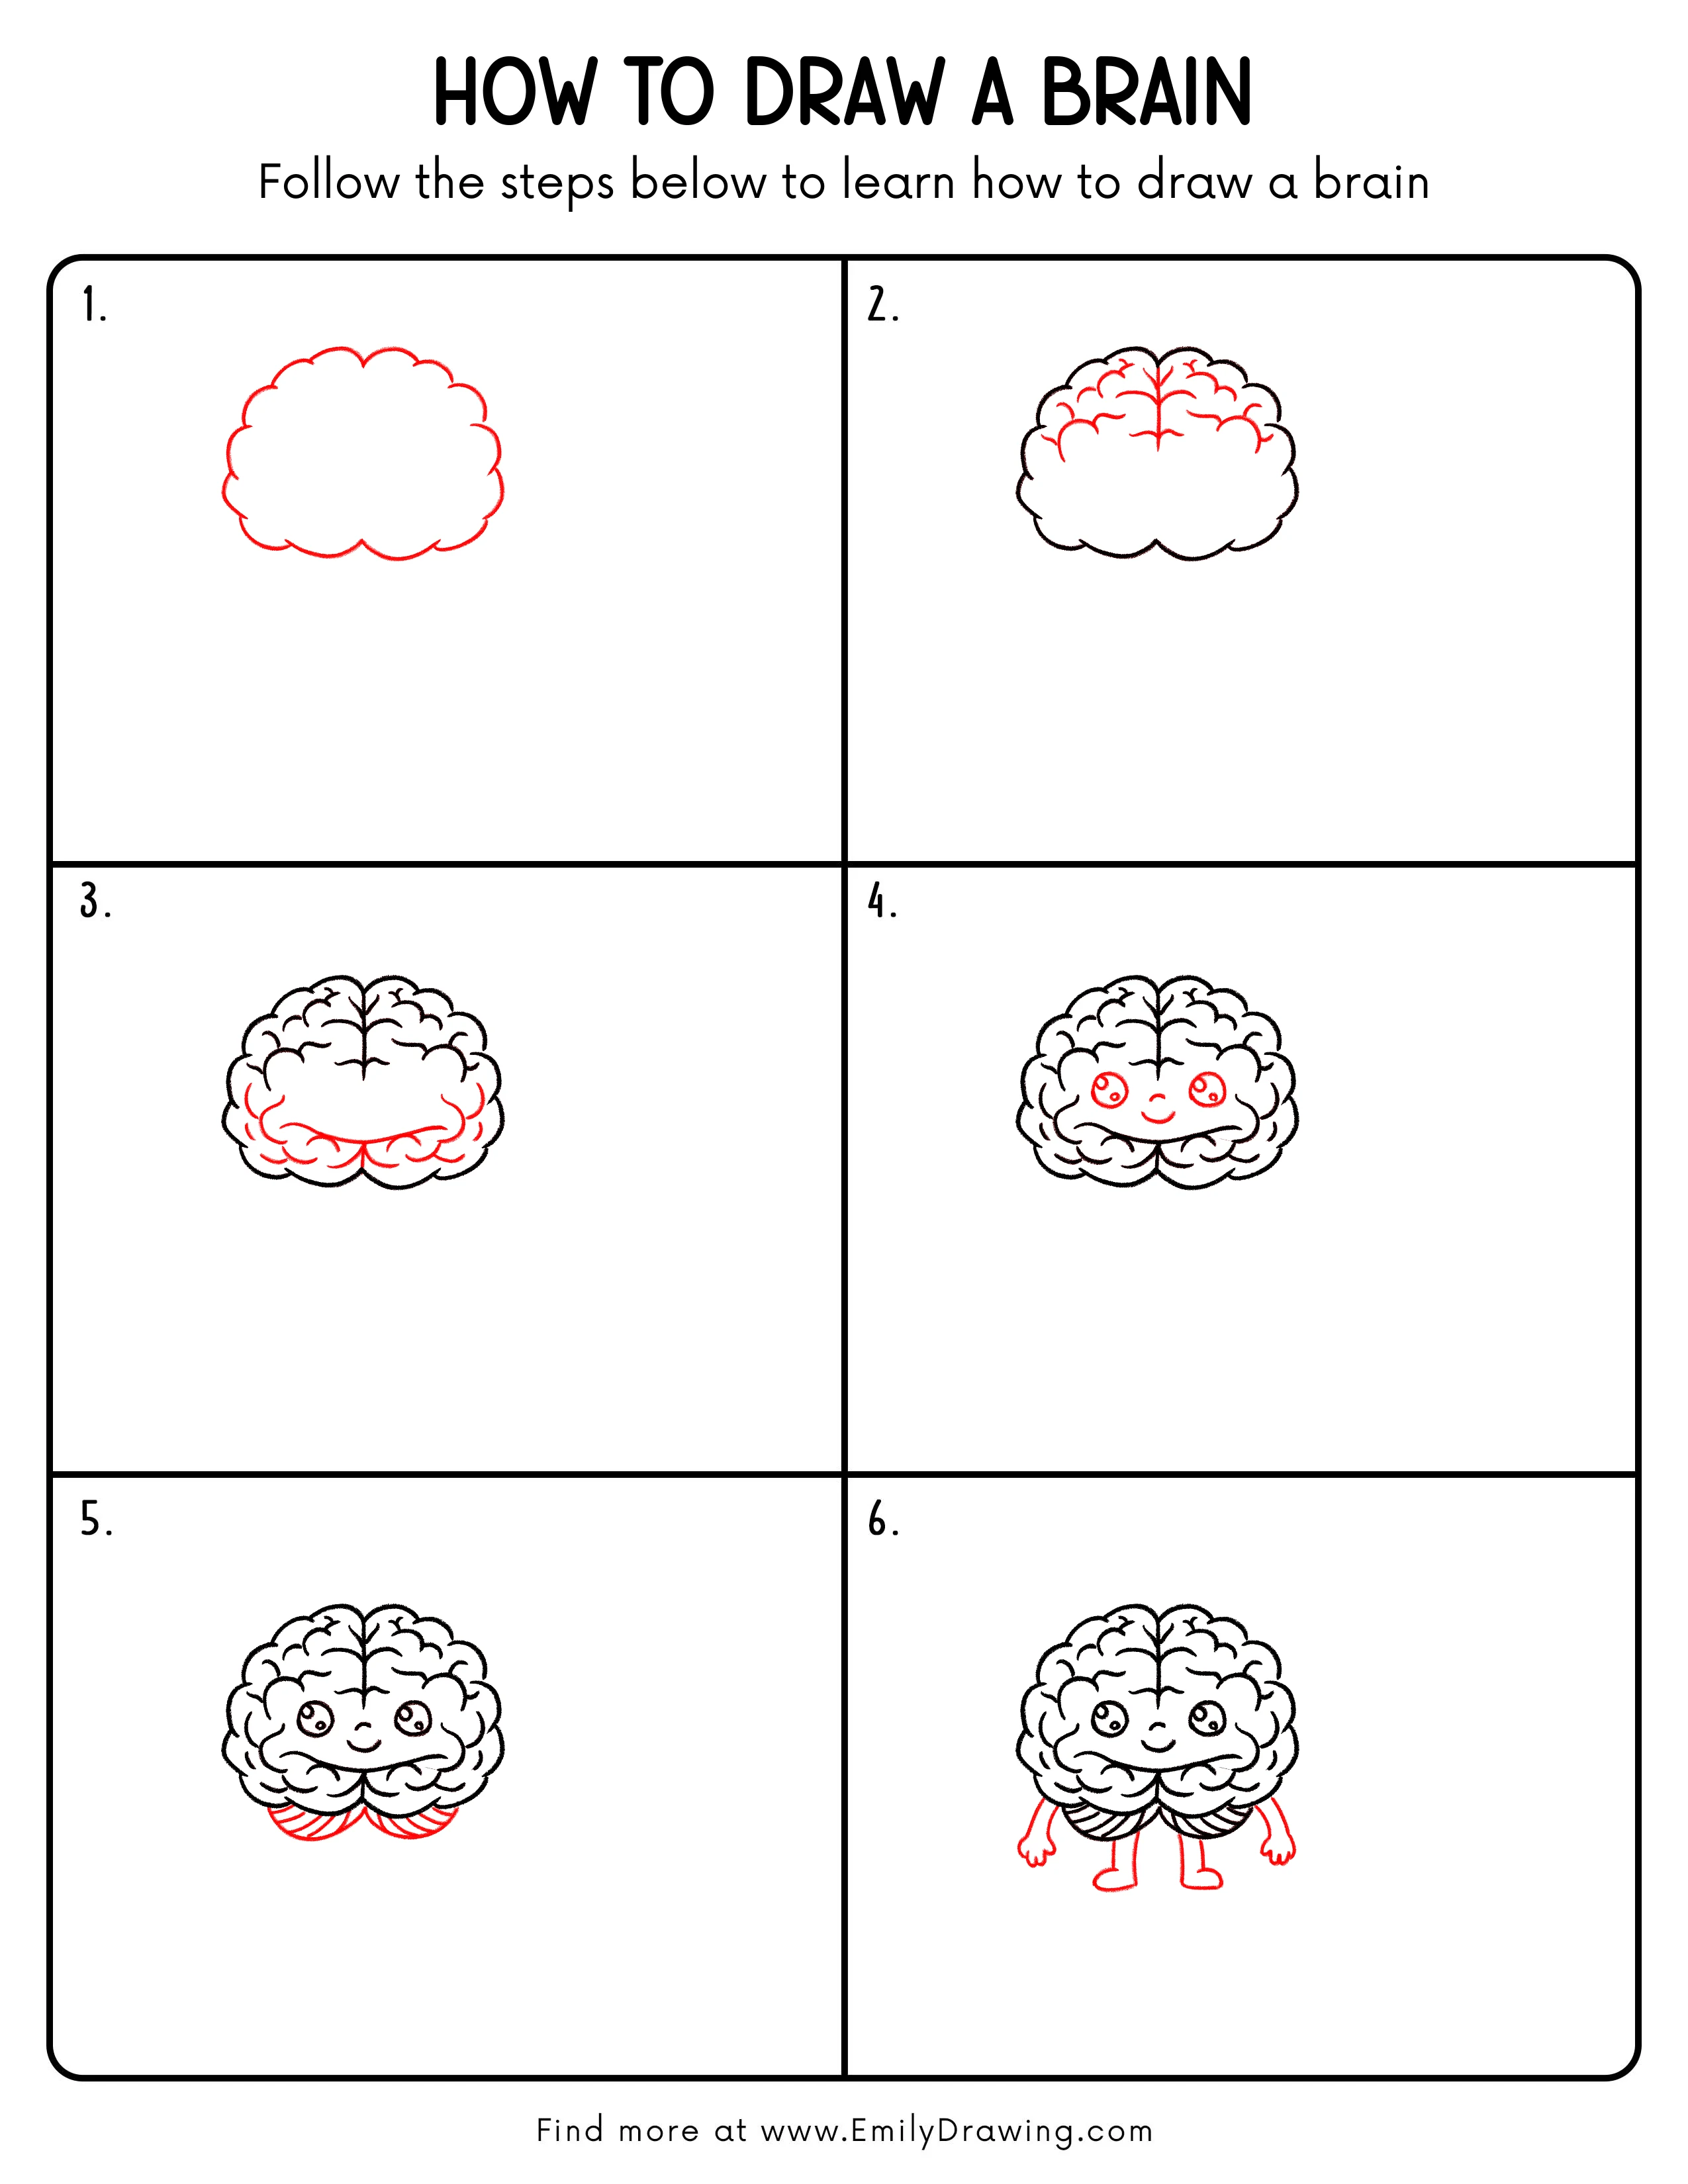
Step 1: Draw the Brain’s Outer Shape
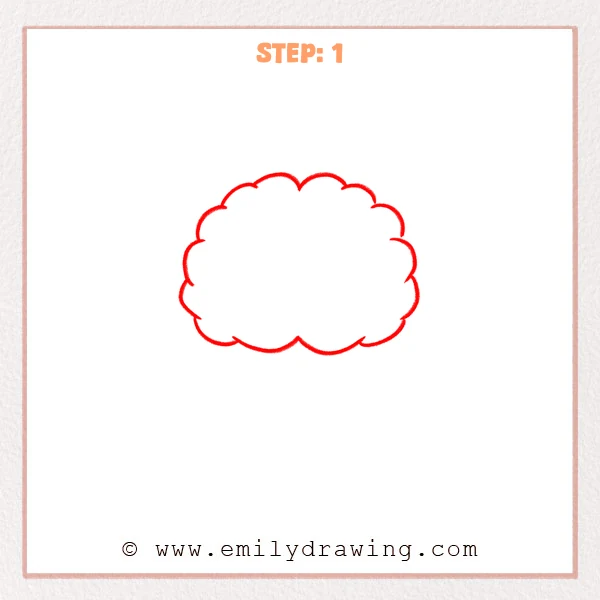
Start with a wide, cloud-like outline to form the overall brain shape. Connect small rounded bumps all around so the edge feels soft and puffy. Add a few larger curves along the bottom to keep the shape balanced.
Pro Tip: Keep the bumps fairly even on both sides for a balanced look.
Alt Text: A simple, cloud-like outline sketch forming the basic outer shape of a brain.
Step 2: Add the Center Split and Top Folds
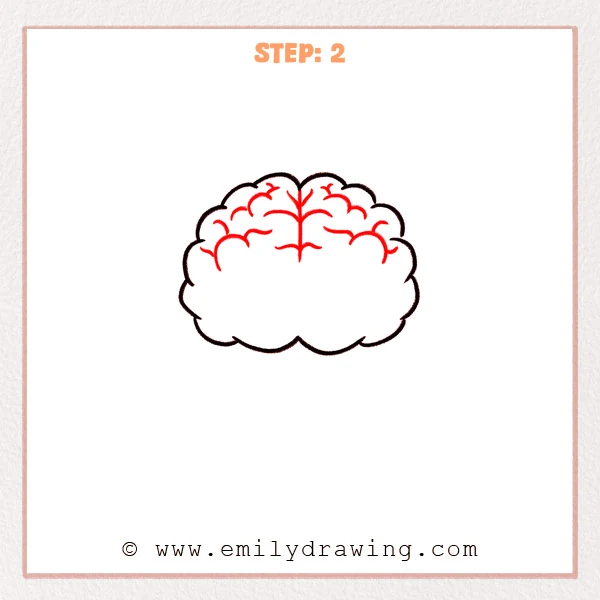
Draw a thin vertical line down from the top center to split the brain into two halves. Then add a few short curved and wavy lines near the top area, following the outer shape to suggest soft folds. Leave small gaps so the details do not feel crowded.
Pro Tip: Keep the fold lines short and curved, not long and straight.
Alt Text: A brain outline with a central dividing line and a few curved fold lines added across the upper area.
Step 3: Fill In Side and Lower Brain Folds
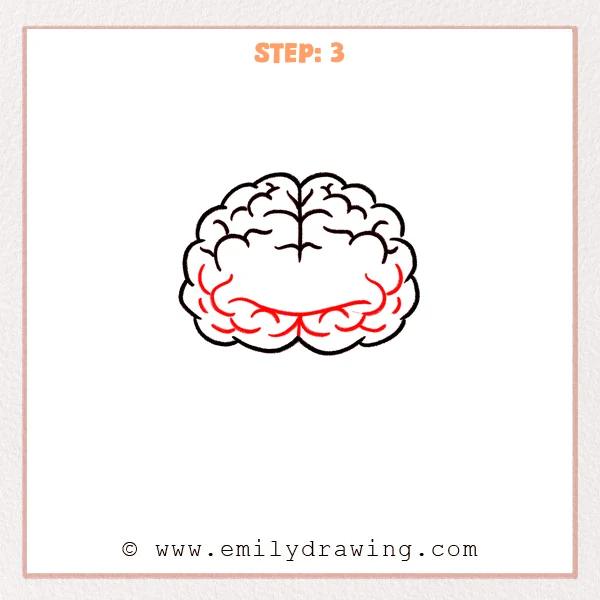
Add more short curved lines along both sides and the lower half to spread the texture outward. Then draw a gentle curved line across the lower middle to separate the bottom area into two parts, and place a few small curl-like lines near it for extra folds. Keep the curves flowing in the same direction as the outer edge.
Pro Tip: Make the lower folds slightly larger so they feel different from the top.
Alt Text: A brain drawing with added fold lines along the sides and lower half, plus a curved divider and extra curls in the bottom center.
Step 4: Add a Cute Face
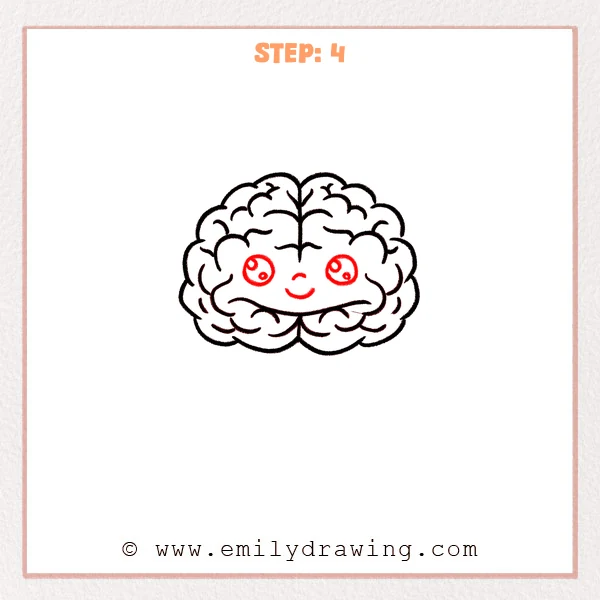
Draw two large round eyes in the upper middle area, one on each side, keeping them similar in size. Add small highlight circles inside each eye, then sketch a tiny nose and a curved smile for a friendly look. Keep the features slightly close together to make it extra cute.
Pro Tip: Lightly mark both eye heights first, then draw the circles for better symmetry.
Alt Text: A cute cartoon brain with big sparkling eyes, a small nose, and a smiling mouth added to the detailed folds.
Step 5: Add Two Small Bottom Lobes and Shade Them
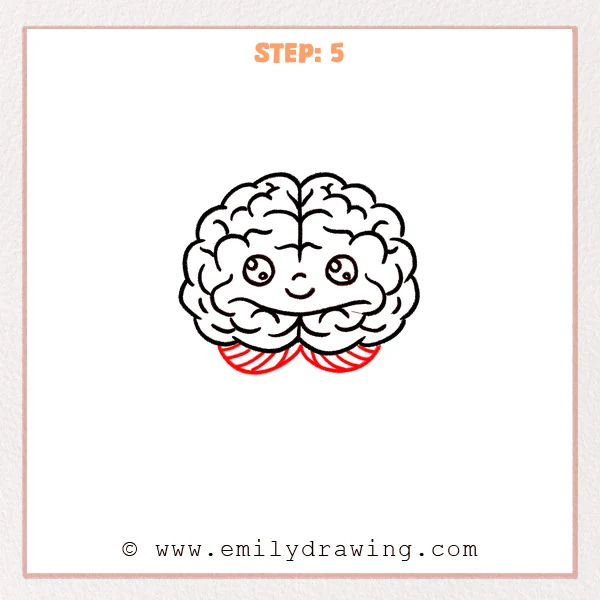
At the bottom center of the brain, draw two rounded, puffy lobes peeking out underneath, one on each side. Make these shapes slightly thicker and rounder, with a small overlap where the brain edge sits in front. Finish by adding a few short diagonal lines inside each lobe to suggest simple shading texture.
Pro Tip: Keep the top curves close to the center so they read as a pair.
Alt Text: A cute cartoon brain with a face and folds, now showing two rounded bottom lobes peeking out underneath with diagonal shading lines.
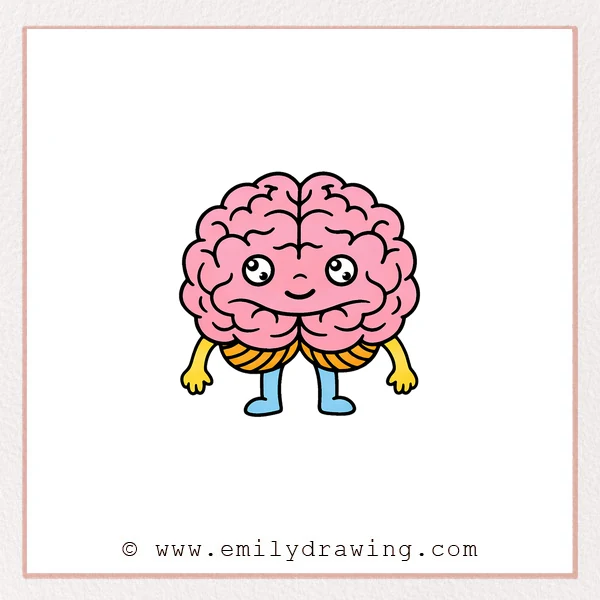
Step 6: Add Little Arms and Legs

Draw a curved arm on each lower side of the brain, letting the lines hang like soft noodles. Shape the hands like small mittens and separate three to four rounded fingers. Then add two short legs underneath and finish with simple rounded shoes so it can stand firmly.
Pro Tip: Keep the legs fairly close together so the character feels cute and compact.
Alt Text: A cute cartoon brain character with a smiling face, detailed folds, two shaded bottom lobes, and simple arms and legs added.
Step 7: Color in your drawing!
Fun Facts
- Your brain has two halves, often called the left and right hemispheres.
- The wrinkly folds help the brain fit more surface area into a small space.
- Cartoon brains are often drawn with big folds because it makes the idea clear fast.
Pin it now, Draw later!
You have now learned how to draw a brain step by step, from a soft outline to a full character. If you want color, try light pinks or purples and add gentle shading under the folds and along the bottom lobes. A common beginner mistake is adding too many long lines, which can make the folds look messy, so keep your texture lines short and curved.
Practice this easy drawing tutorial a few times, then try changing the face or adding a tiny hat or bow. When you are ready, explore more step by step drawing ideas and keep building your drawing for beginners skills.
Get the FREE Printable Drawing Guide
FREE Download Printable Brain Drawing Tutorial
Frequently Asked Questions
How do I make the brain folds look neat?
Use short curved lines and leave small gaps. Too many long lines can make the texture look tangled.
What if my brain outline looks uneven?
That is normal at first. Lightly sketch the shape, adjust the bumps, and then trace your favorite outline with a marker.
Can I color the brain in a fun way?
Yes. Try soft pastel colors, add darker shading in the fold gaps, and keep highlights lighter near the top.