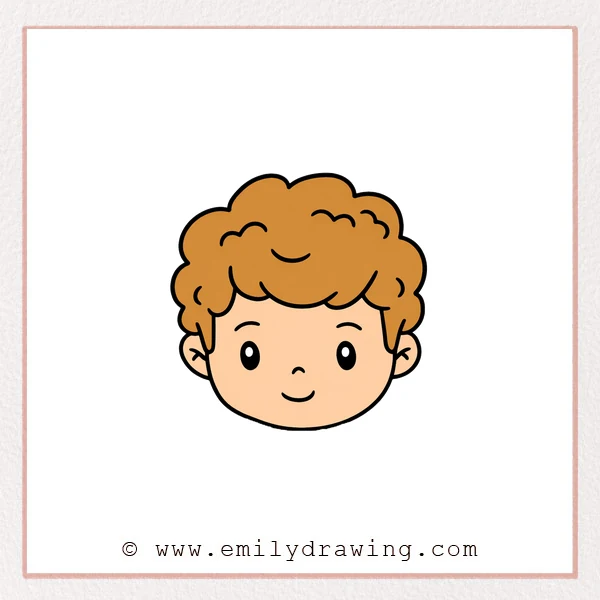
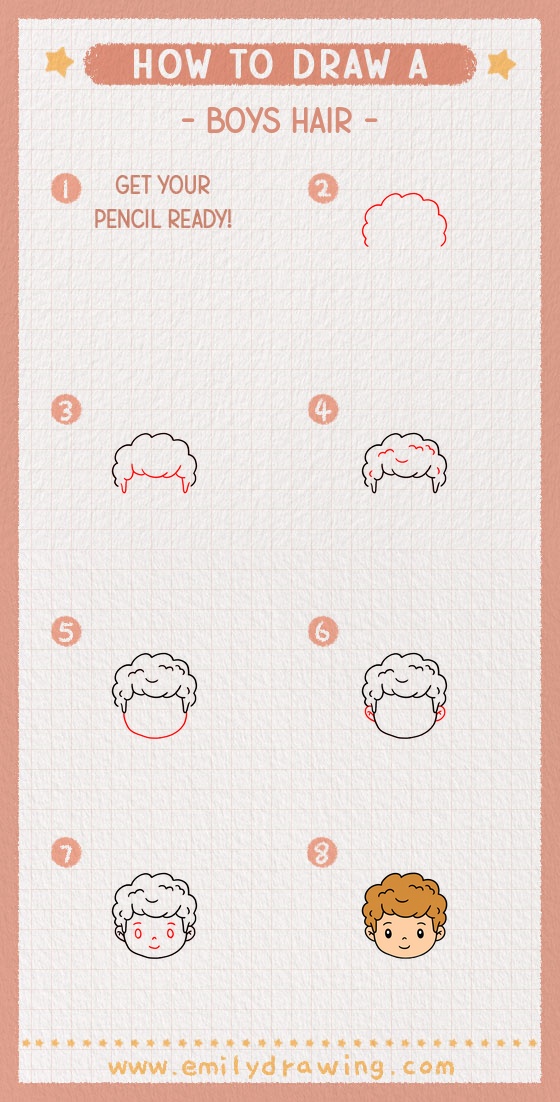
This easy drawing tutorial shows how to draw a boy’s hair with a soft, fluffy style. You will build it step by step, then add a simple face that fits neatly under the hairstyle. This is a calm, beginner-friendly drawing for kids and anyone learning to sketch.
What You Will Need
- Pencil
- Eraser
- Black pen or marker (optional for outlining)
- Paper
- Coloring tools (colored pencils, crayons, or markers)
Here are my RECOMMENDED Art Supplies!
- Crayola Coloring Set (140 Pieces – Mega Value!)
- 24 Colored Crayon Set
- A4 Printer Paper
- Crayola Coloring Pencils
- HP Home Printer with Instant Ink!
Time needed:
11 minutes.
Step-by-Step Drawing Guide
Step 1: Sketch the Fluffy Hair Top Outline
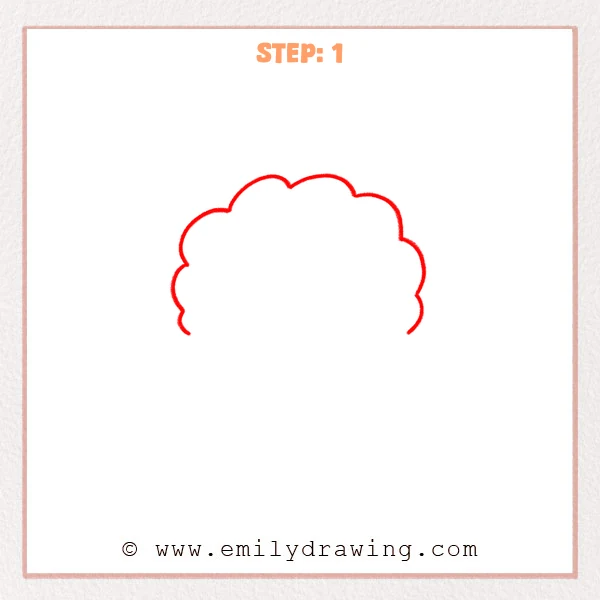
Start near the top of your page and draw a cloud-like wavy line for the boy’s hair outline. Vary the bumps slightly so the hair feels soft and natural, and leave small open ends on both sides for now.
Pro Tip: Keep the curves rounded, not pointy, to make the hair look soft.
Step 2: Add the Inner Bang Line and Side Strands
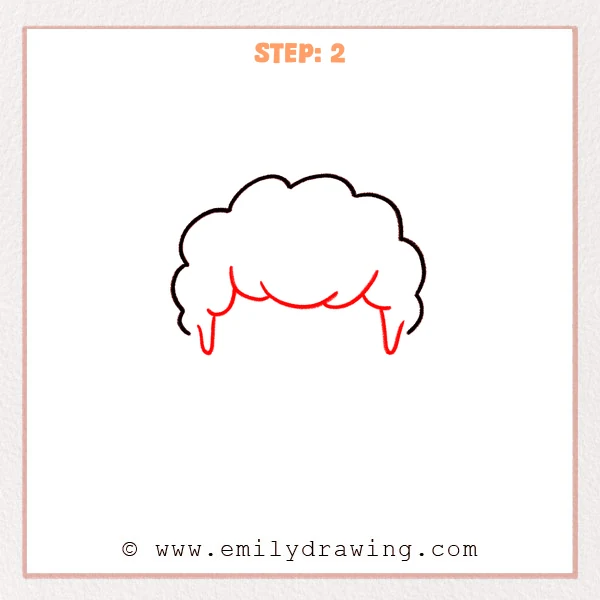
Inside the fluffy outline, add a gentle curved line to show the inner edge of the bangs. Then draw the side strands dropping down on both sides, finishing each side with a small pointed tip for a natural hair end.
Pro Tip: Keep both side strands at a similar height for a balanced look.
Step 3: Add Small Curves for Hair Texture
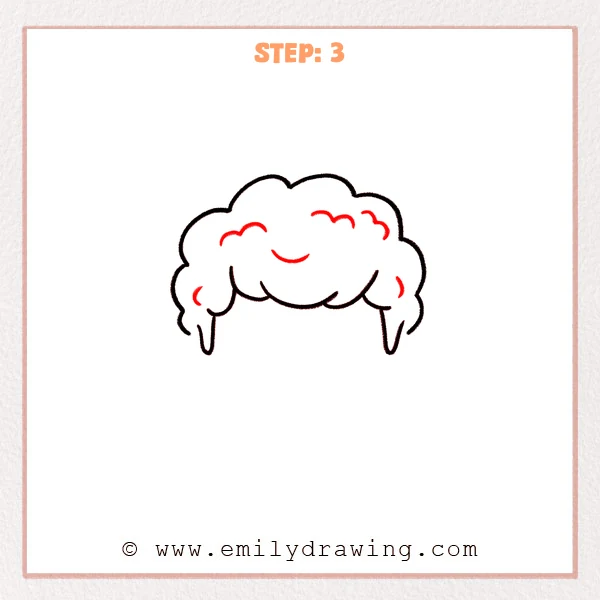
Inside the top area, add a few short curved strokes like tiny waves to suggest fluffy hair texture. You can also place a small curved line in the center as a gentle “style smile” detail to make it feel friendly.
Pro Tip: Keep these texture curves light and few so the hair stays neat.
Step 4: Draw the Round Face Outline
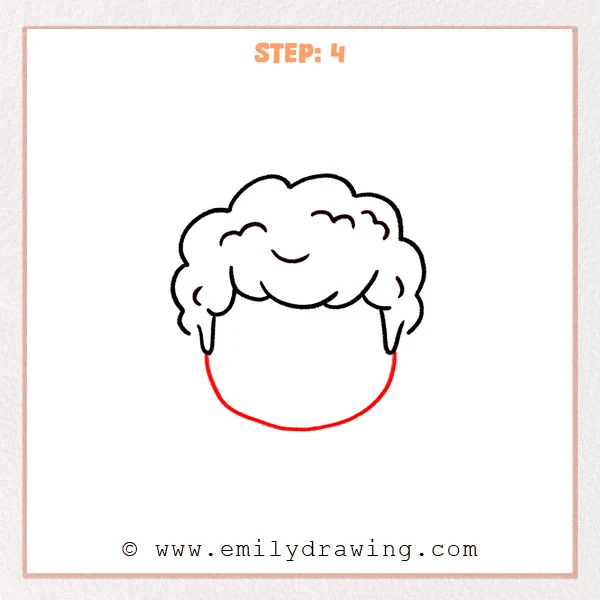
Start just under the left side strand and draw a large, smooth curve down and around to form the boy’s round cheeks and chin. Keep the top of the face tucked under the hair, and let the sides meet near the hanging strands.
Pro Tip: Make the chin curve extra rounded to keep a cute cartoon look.
Step 5: Add the Ears and Inner Ear Lines
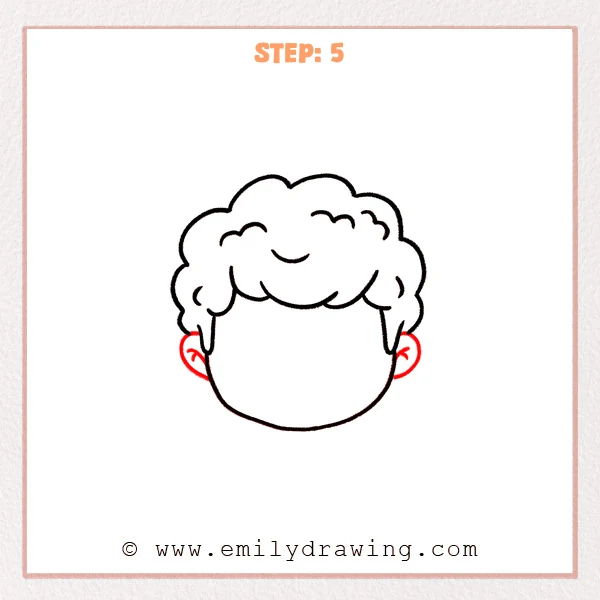
On both sides of the face, near the lower edge of the hair, draw small half-oval ears peeking out from the head. Inside each ear, add two or three short curved lines to suggest the inner ear folds.
Pro Tip: Keep the ears small, about the size of the hair tips, for balance.
Step 6: Add the Eyes, Eyebrows, and a Gentle Smile
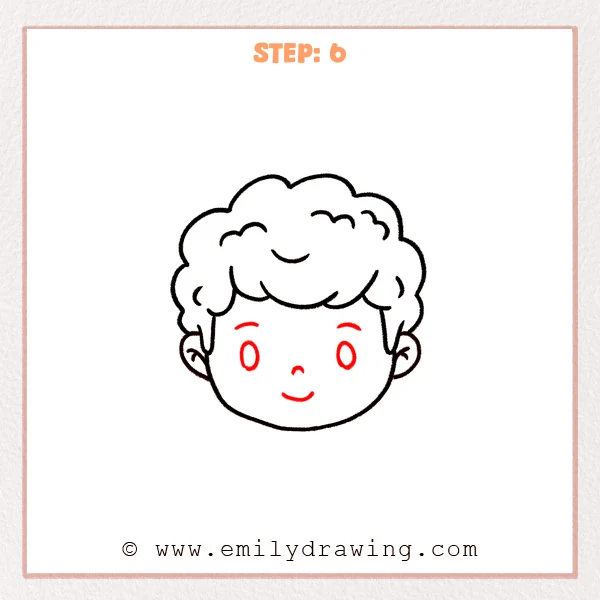
Near the upper middle of the face, add two short curved lines for eyebrows to soften the expression. Draw two small vertical ovals for the eyes, place a tiny curved mark for the nose, then finish with a slightly upturned smiling mouth.
Pro Tip: Keep the eyes level, and leave space between them for the nose.
Step 7: Color in your drawing!
Fun Facts
- Fluffy hairstyles are often drawn with “cloud” bumps because soft curves look gentle.
- Cartoon faces usually feel friendlier with round chins and simple features.
- A few tiny texture lines can suggest hair without making it look messy.
Pin it now, Draw later!
Now you have a complete step by step drawing of a cute boy’s hair and face. If you want to color, try a light base color first, then add darker shading under the hairline and near the side strands. A common beginner mistake is adding too many texture lines, which can make the hairstyle look crowded. Keep practicing this drawing for beginners, and try changing the hair shape to create new styles in your next easy drawing tutorial.
Get the FREE Printable Drawing Guide
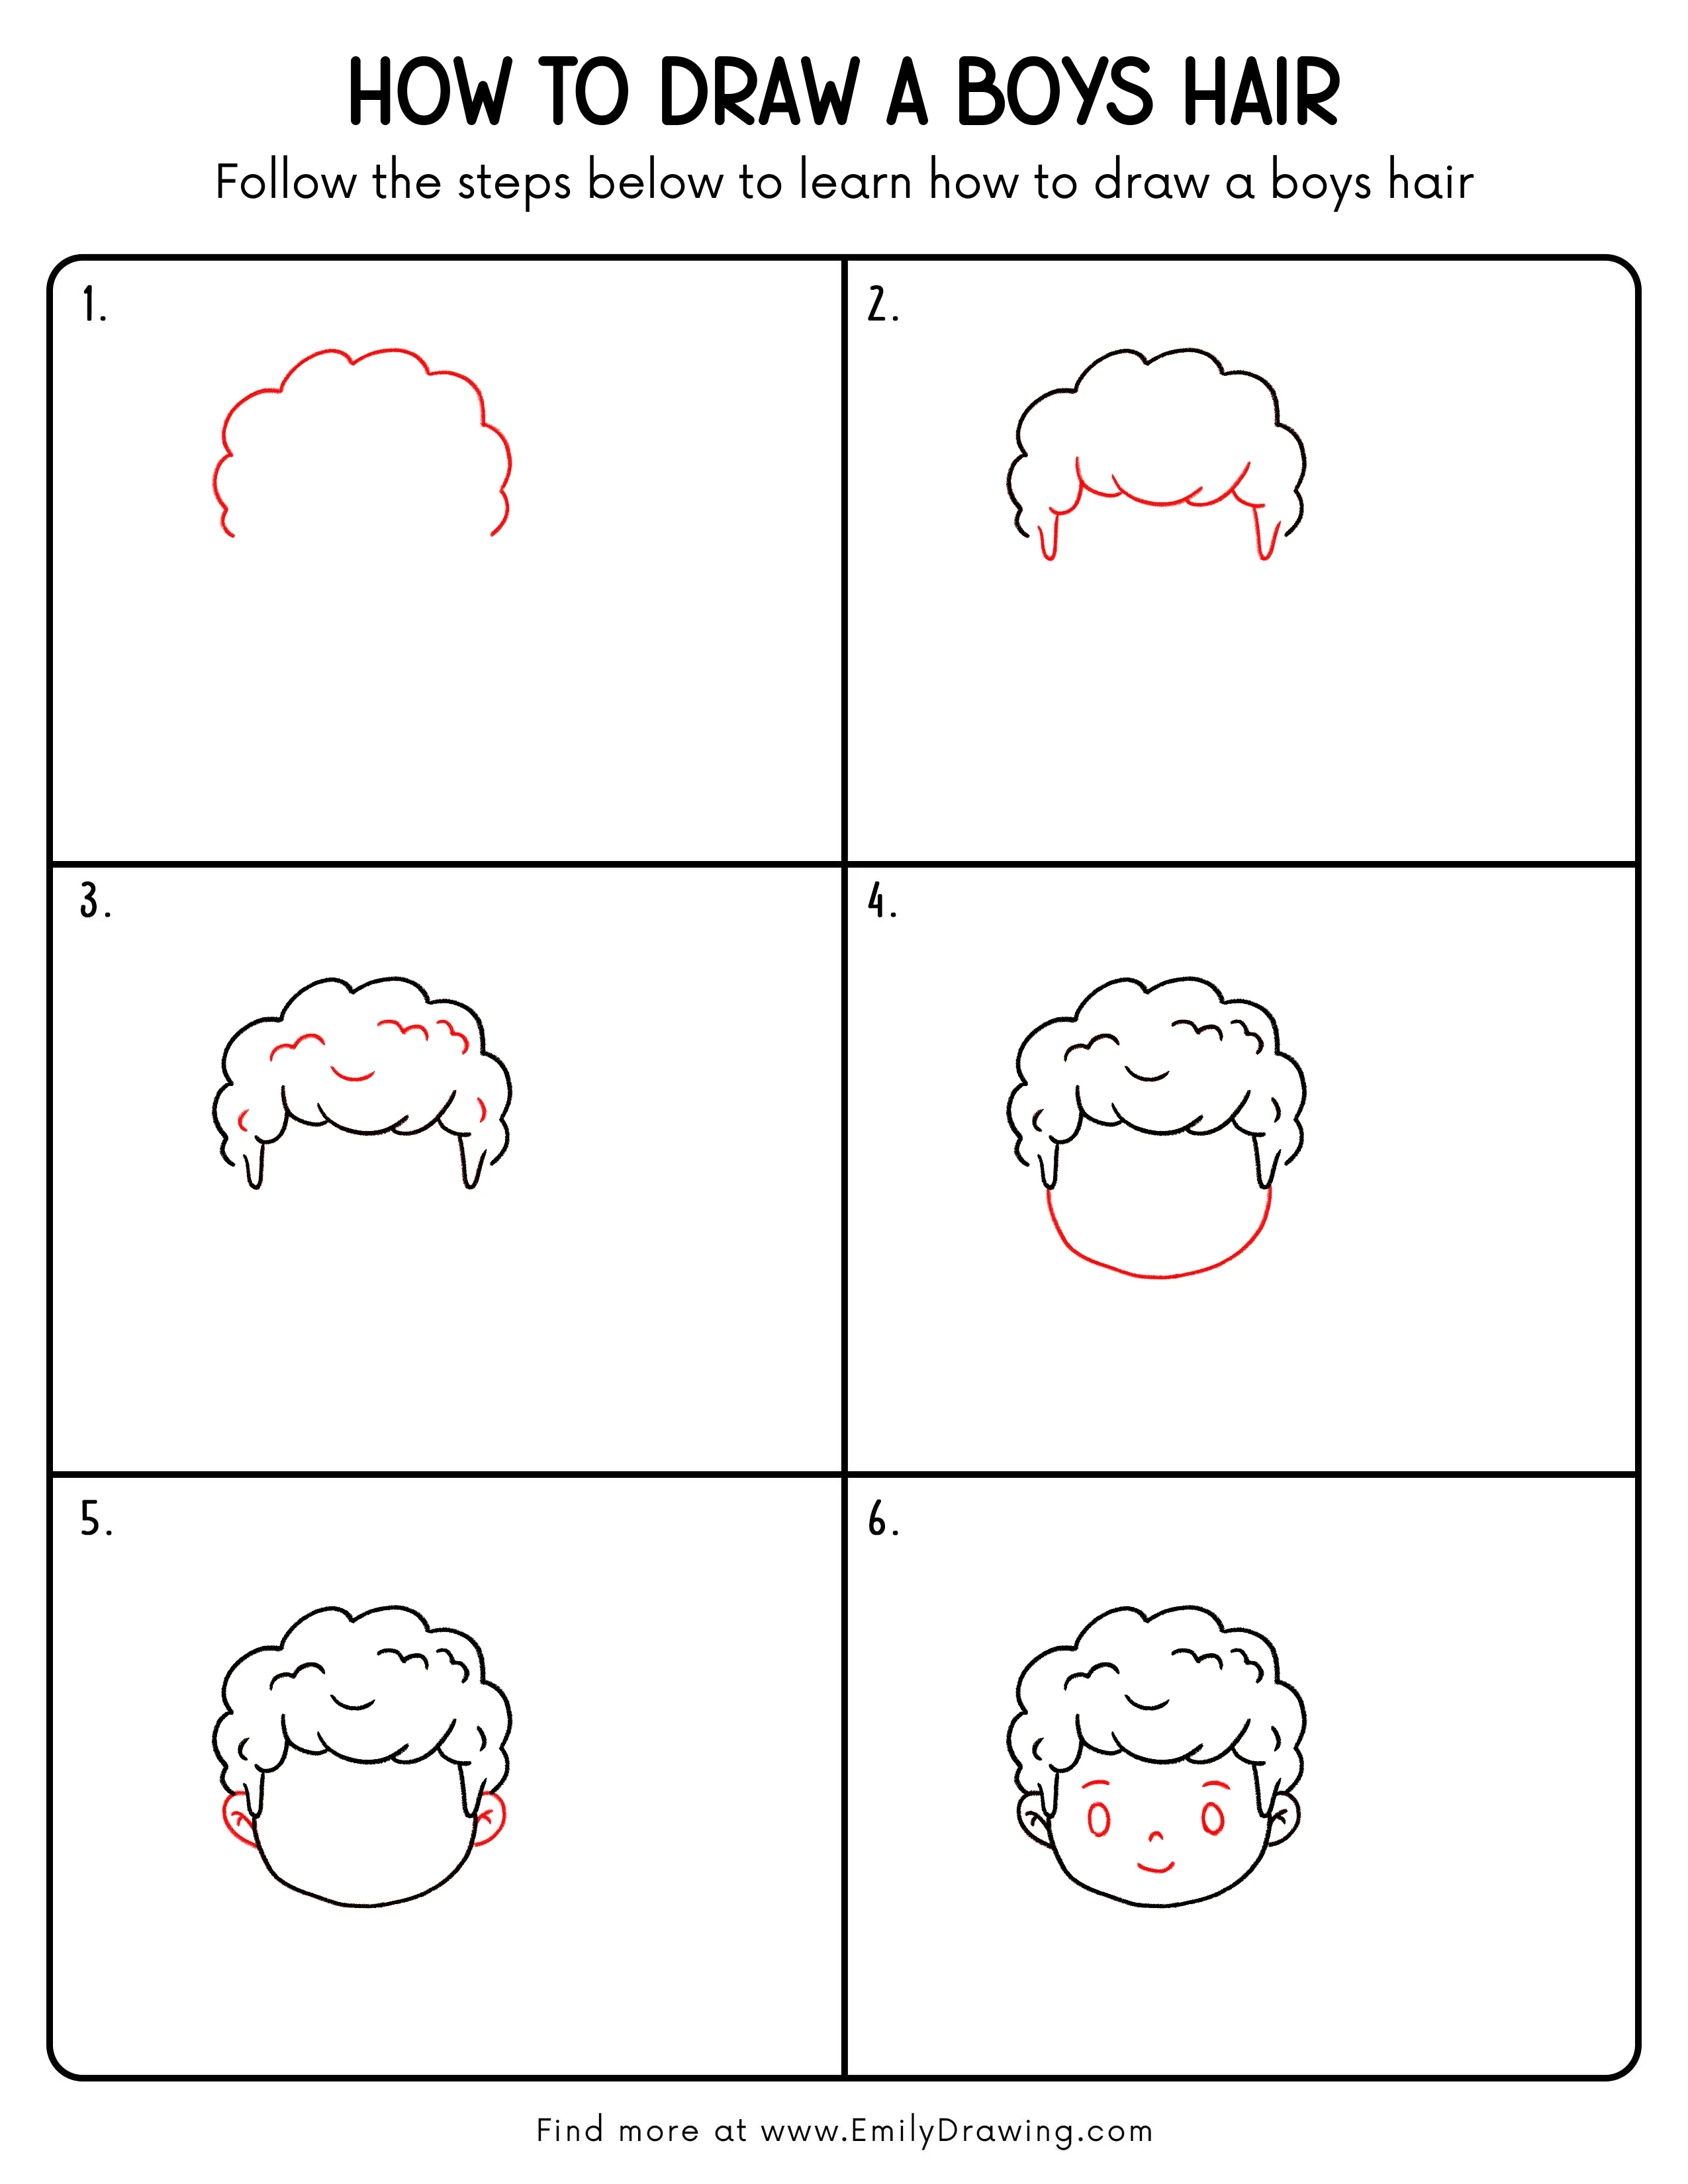
FREE Download Printable Boys Hair Drawing Tutorial
Frequently Asked Questions
How do I make the boy’s hair look more curly?
Add a few extra small curved bumps along the outline and slightly more texture strokes inside.
What if my face outline does not fit under the hair?
Make the face a little smaller and keep the top edge tucked under the bangs line.
How can I change the expression easily?
Tilt the eyebrows, change the mouth curve, or make the eyes slightly bigger or smaller.