If you want to learn how to draw boxing gloves, this calm, easy drawing tutorial will guide you. We will build two cute boxing gloves using simple shapes and gentle lines. Take your time, and enjoy this step by step drawing for beginners.

What You Will Need
- Pencil
- Eraser
- Black pen or marker (optional for outlining)
- Coloring tools (colored pencils, markers, or crayons)
- Paper
Here are my RECOMMENDED Art Supplies!
- Crayola Coloring Set (140 Pieces – Mega Value!)
- 24 Colored Crayon Set
- A4 Printer Paper
- Crayola Coloring Pencils
- HP Home Printer with Instant Ink!
Time needed:
23 minutes.
Step-by-Step Drawing Guide
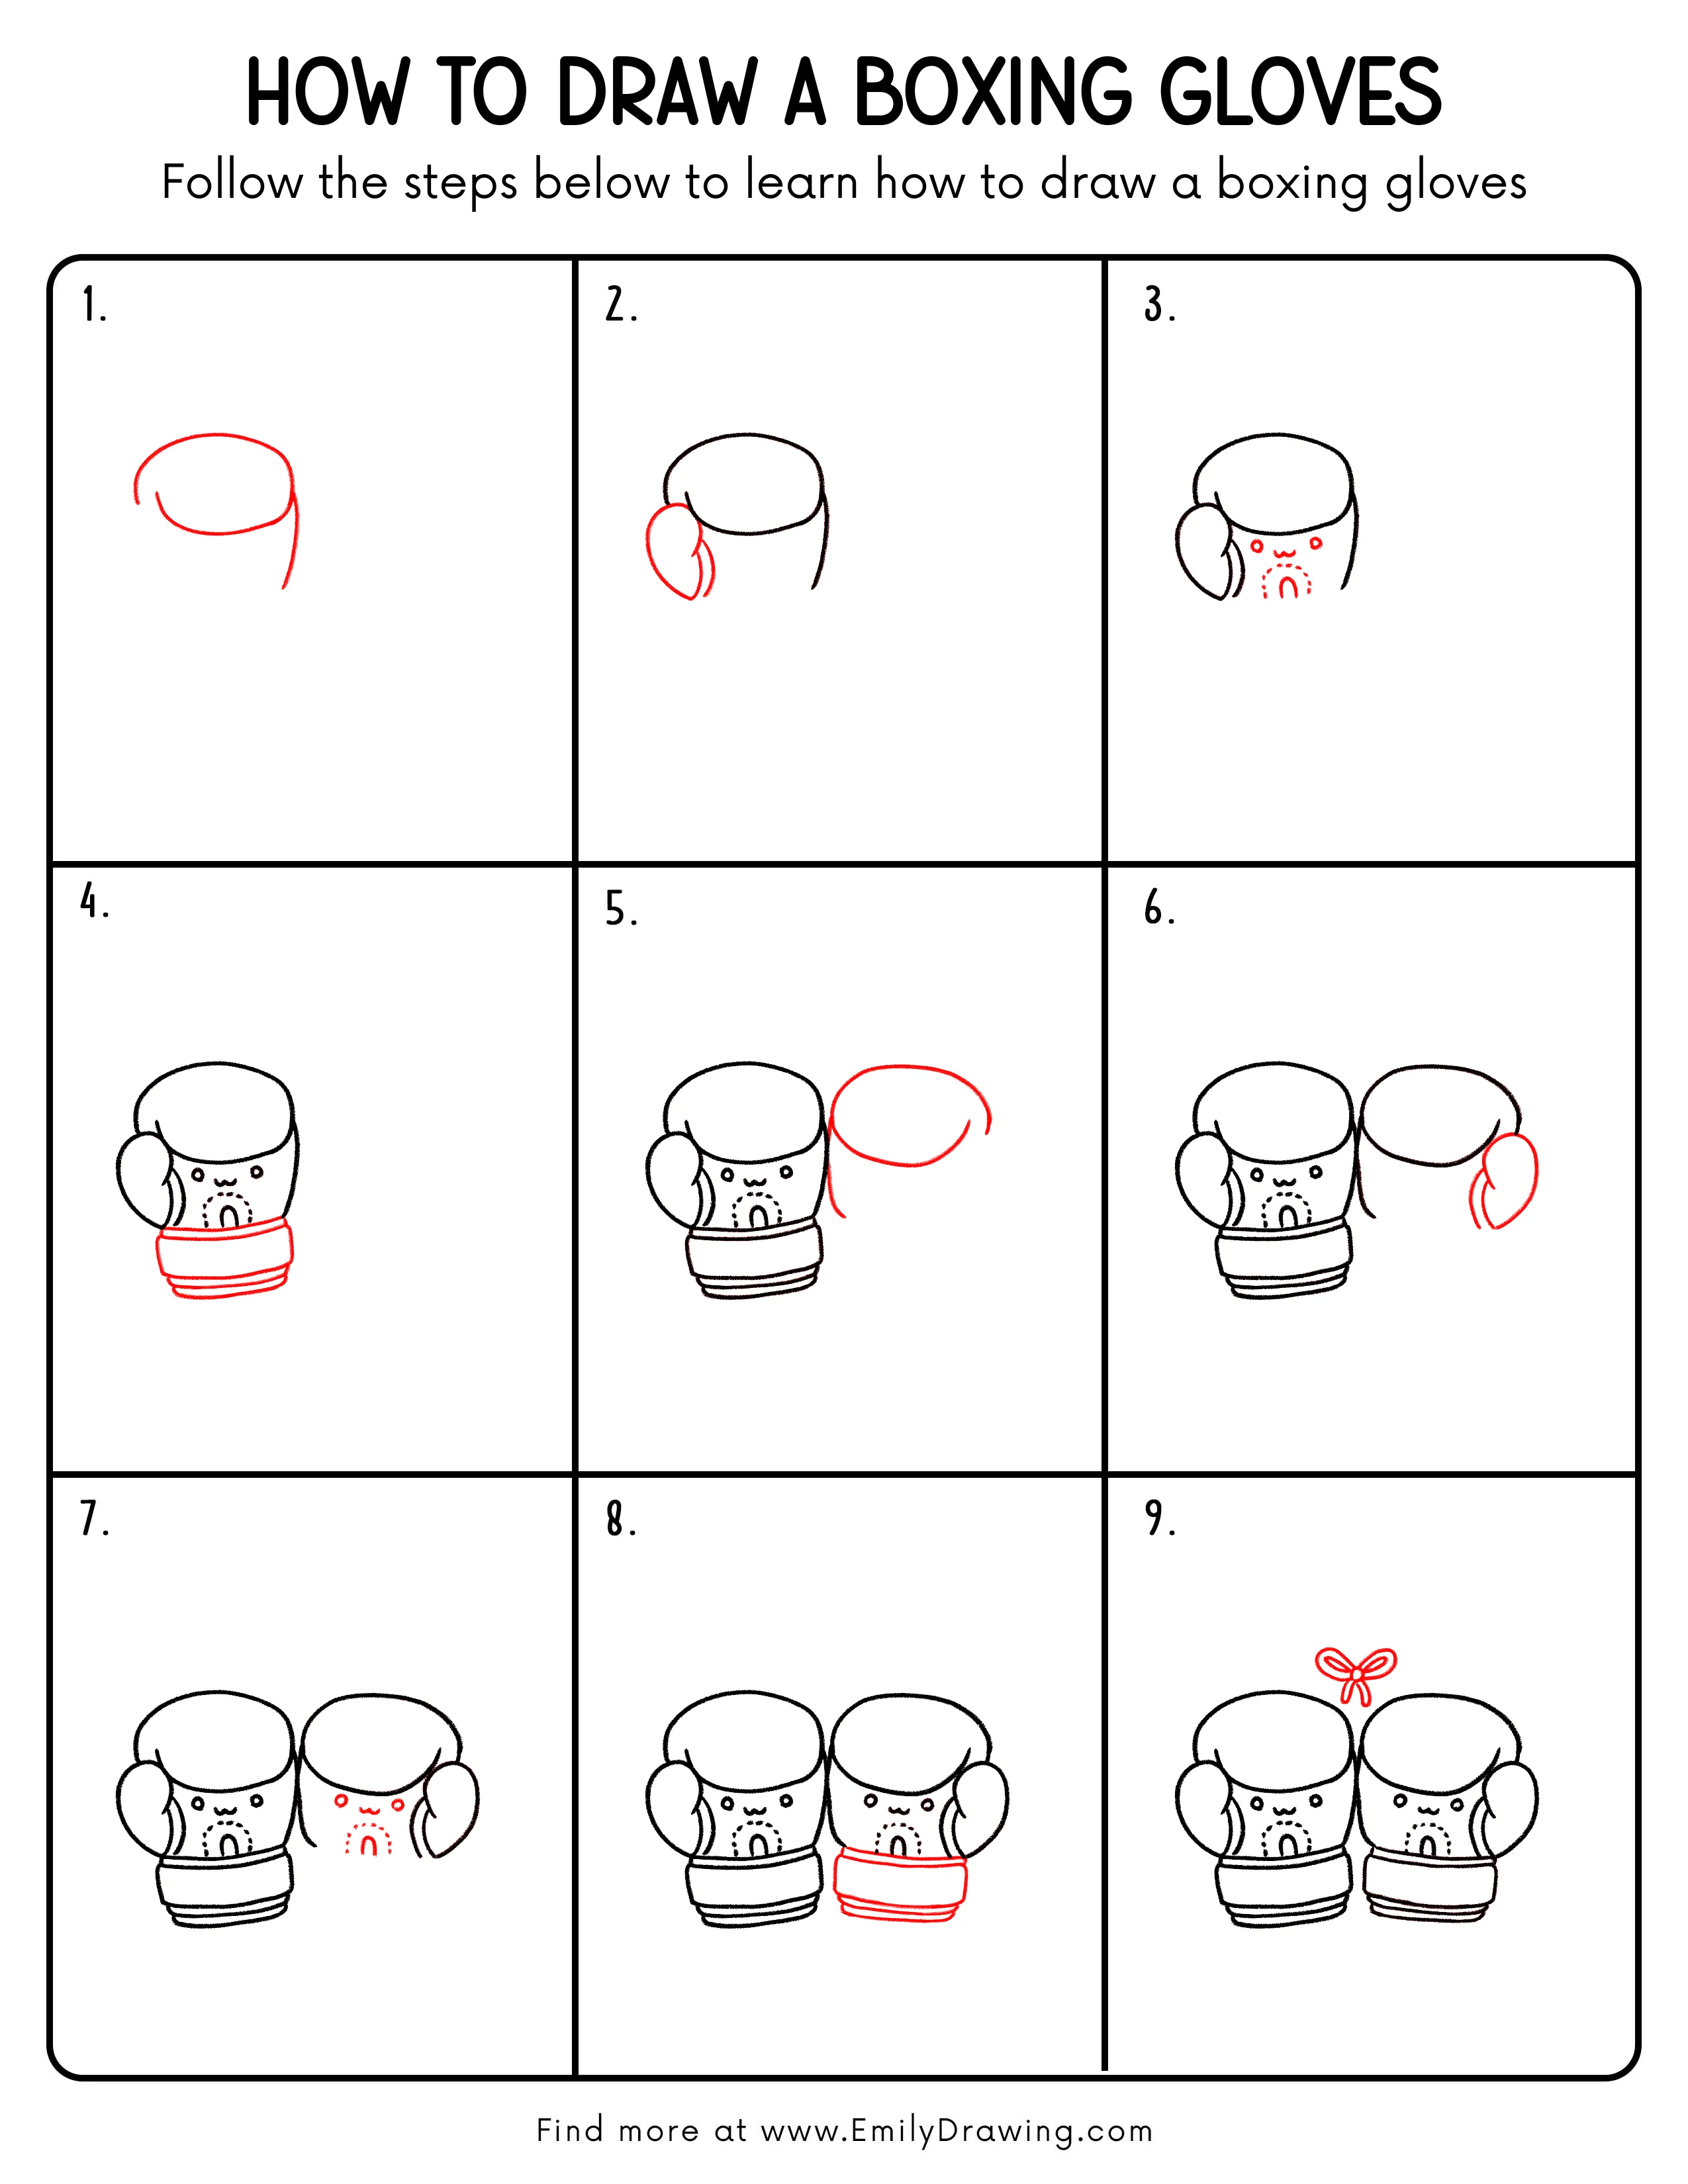
Step 1: Sketch the glove opening and side edge

Start with a wide, slightly flattened oval for the opening of the boxing glove.
Add a curved line dropping down on the right side to suggest the glove’s outer edge, leaving space below for the rest.
Pro Tip: Keep the oval rounded, not pointy, to feel padded.
Step 2: Add the thumb pad shape
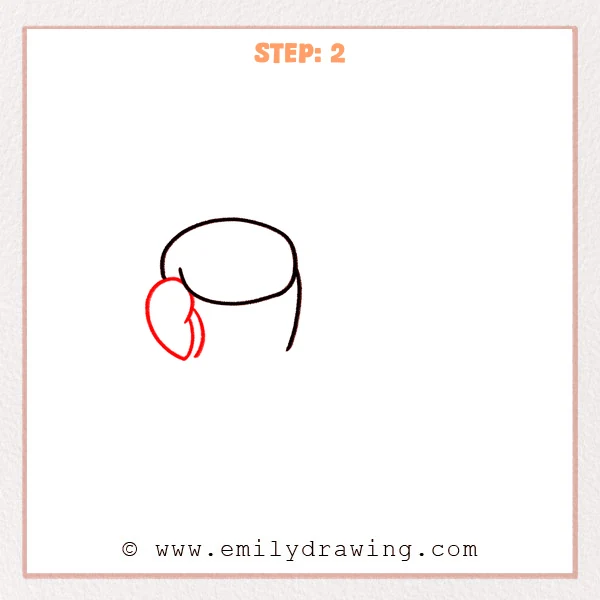
Attach a small oval on the left side of the opening, like a soft bean shape for the thumb pad.
Then add a curved inner line below it to connect the thumb area to the main glove smoothly.
Pro Tip: Let the thumb pad overlap the opening edge slightly, so it feels stitched on.
Step 3: Add a cute face and a stitched detail
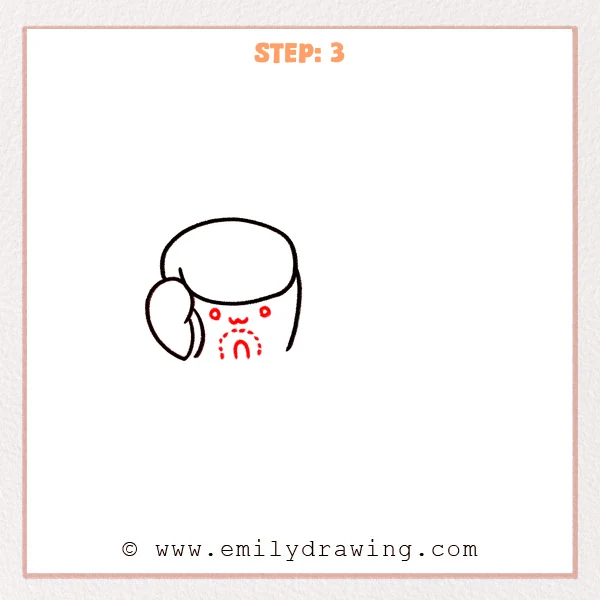
Place two small dots on the front of the boxing glove for eyes, keeping them evenly spaced.
Add a tiny “w”-shaped mouth below, then draw a dotted half-circle and a small curved mark inside it to look like a stitched patch.
Pro Tip: Keep the eyes fairly close, about one eye-width apart.
Step 4: Draw the wrist cuff and layered bands
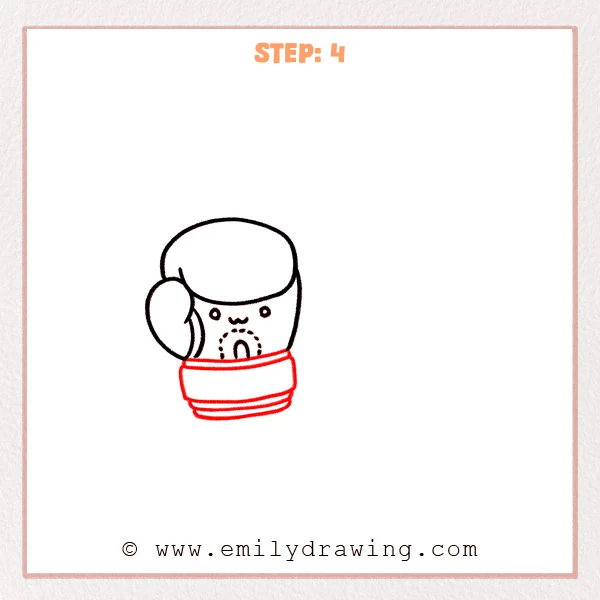
Add a wide, rounded rectangle band under the glove to form the wrist cuff, keeping it snug to the sides.
Then draw two curved horizontal lines near the bottom to show layered padding and thickness.
Pro Tip: Curve the top edge of the cuff slightly upward to match the glove’s rounded form.
Step 5: Sketch the top of the second glove
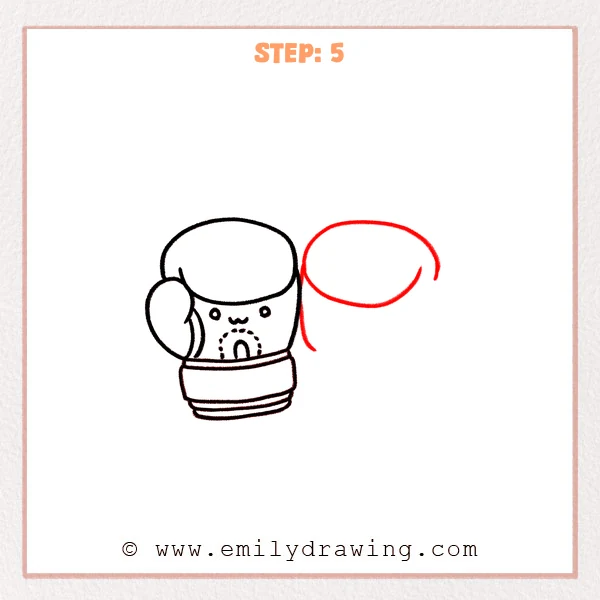
On the right side, add a large, flattened oval to form the padded front of the second boxing glove.
Then draw a gently curved line dropping down where the two gloves meet, to place the second glove’s side.
Pro Tip: Make the second oval similar in size, with only a small gap between gloves.
Step 6: Add the thumb pad on the second glove
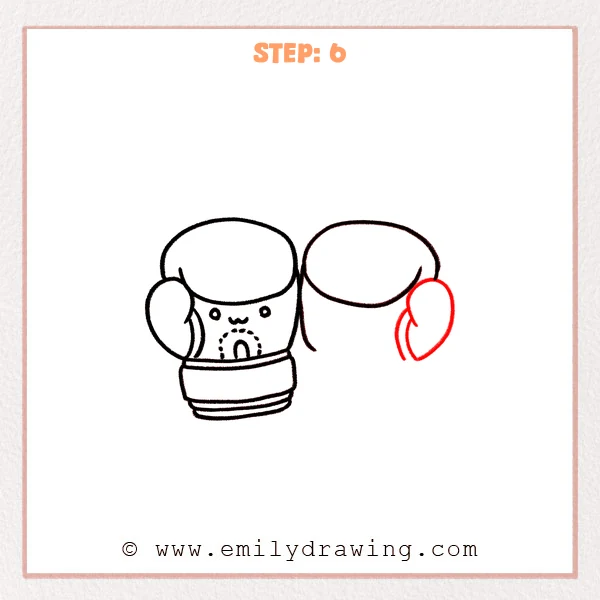
On the outer right edge of the second glove, attach a small oval bean shape for the thumb pad.
Add one or two short curved lines inside it to show the padded fold and the inner edge.
Pro Tip: Align the top of the thumb pad with the lower curve of the glove front.
Step 7: Add the same face and patch on the second glove
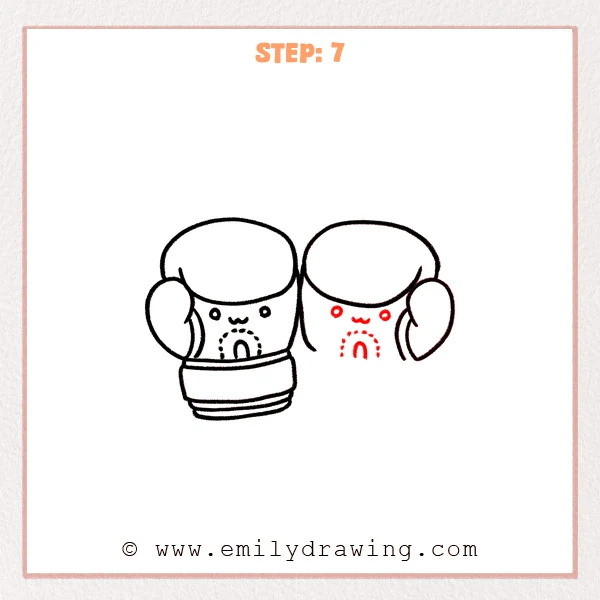
Add two small dot eyes on the front of the second glove, matching the height of the first one.
Draw a tiny “w” mouth, then add a dotted half-circle with a small curved mark inside to repeat the stitched patch detail.
Pro Tip: Use an imaginary center line to keep the face neatly placed.
Step 8: Finish the second glove’s cuff and layers
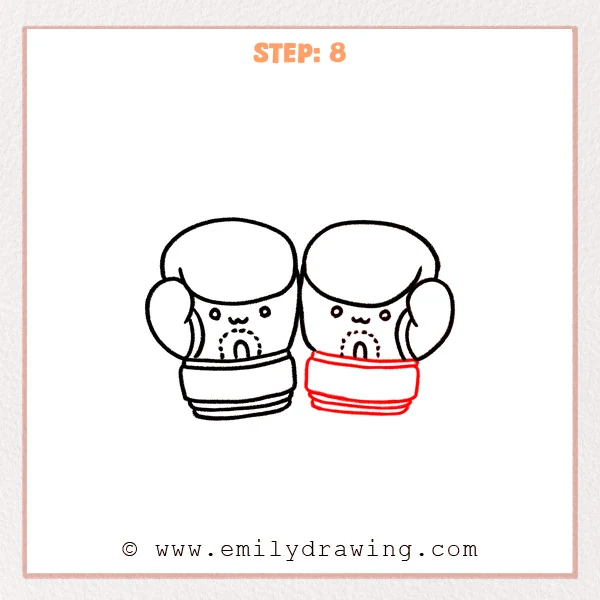
Add a wide rounded cuff band under the second glove, keeping it snug against the sides.
Then draw two curved horizontal lines near the bottom to match the layered padding on the first glove.
Pro Tip: Keep both cuffs the same height and use similar curve shapes.
Step 9: Add a small bow above the gloves
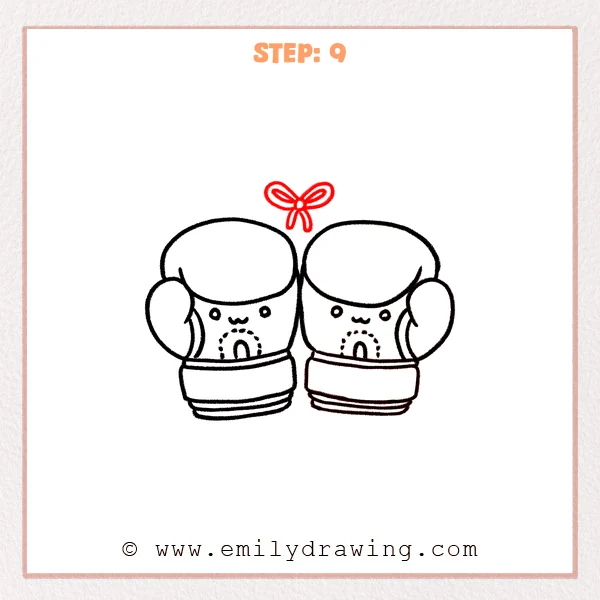
Draw a tiny circle centered above the two gloves for the knot.
Add one oval loop on each side, then draw two slim ribbon tails hanging down to show it tied.
Pro Tip: Keep the bow small and centered so the whole pair feels balanced.
Step 10: Color in your drawing!
Fun Facts
- Boxing gloves are padded to help protect hands and reduce injuries during training.
- Gloves often use a wrist strap to keep the hand stable and secure.
- Different glove sizes and padding weights are used for sparring, bag work, and matches.
Pin it now, Draw later!

You have now completed an easy boxing gloves drawing, step by step, using simple shapes.
Try outlining your favorite lines with a pen, then erase extra pencil marks softly.
For color, add gentle shading under the glove tops and along the cuffs to show round padding.
A common beginner mistake is making one glove much larger than the other, so compare sizes as you color.
Keep practicing this drawing for beginners, and try drawing the gloves at different angles next time.
Get the FREE Printable Drawing Guide
FREE Download Printable Boxing Gloves Drawing Tutorial
Frequently Asked Questions
How can I make the boxing gloves look more 3D?
Add a darker shade along one side and under the cuff, then blend lightly.
What if my gloves look uneven?
Measure with your pencil and match the oval sizes before you darken the lines.
Can I change the style and still follow this easy drawing tutorial?
Yes, keep the same basic shapes, then add your own logos, patterns, or expressions.