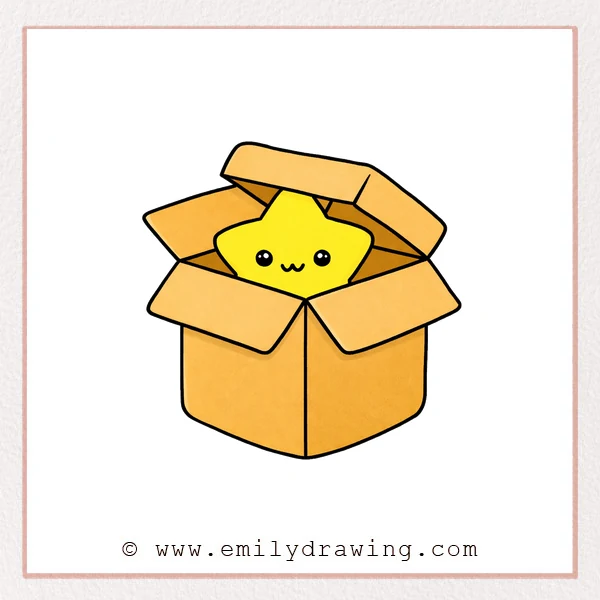
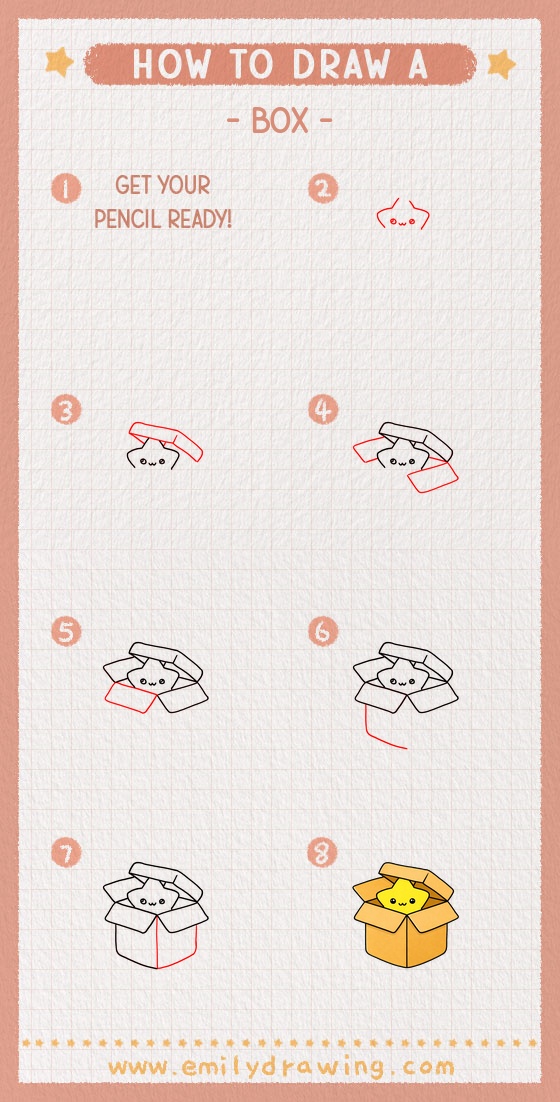
This easy drawing tutorial shows how to draw a cute box step by step. We will turn simple rounded shapes into an open box with a friendly face. Take your time and enjoy this drawing for beginners.
What You Will Need
- Pencil
- Eraser
- Black pen or marker
- Paper
- Optional: colored pencils or markers
Here are my RECOMMENDED Art Supplies!
- Crayola Coloring Set (140 Pieces – Mega Value!)
- 24 Colored Crayon Set
- A4 Printer Paper
- Crayola Coloring Pencils
- HP Home Printer with Instant Ink!
Time needed:
21 minutes.
Step-by-Step Drawing Guide
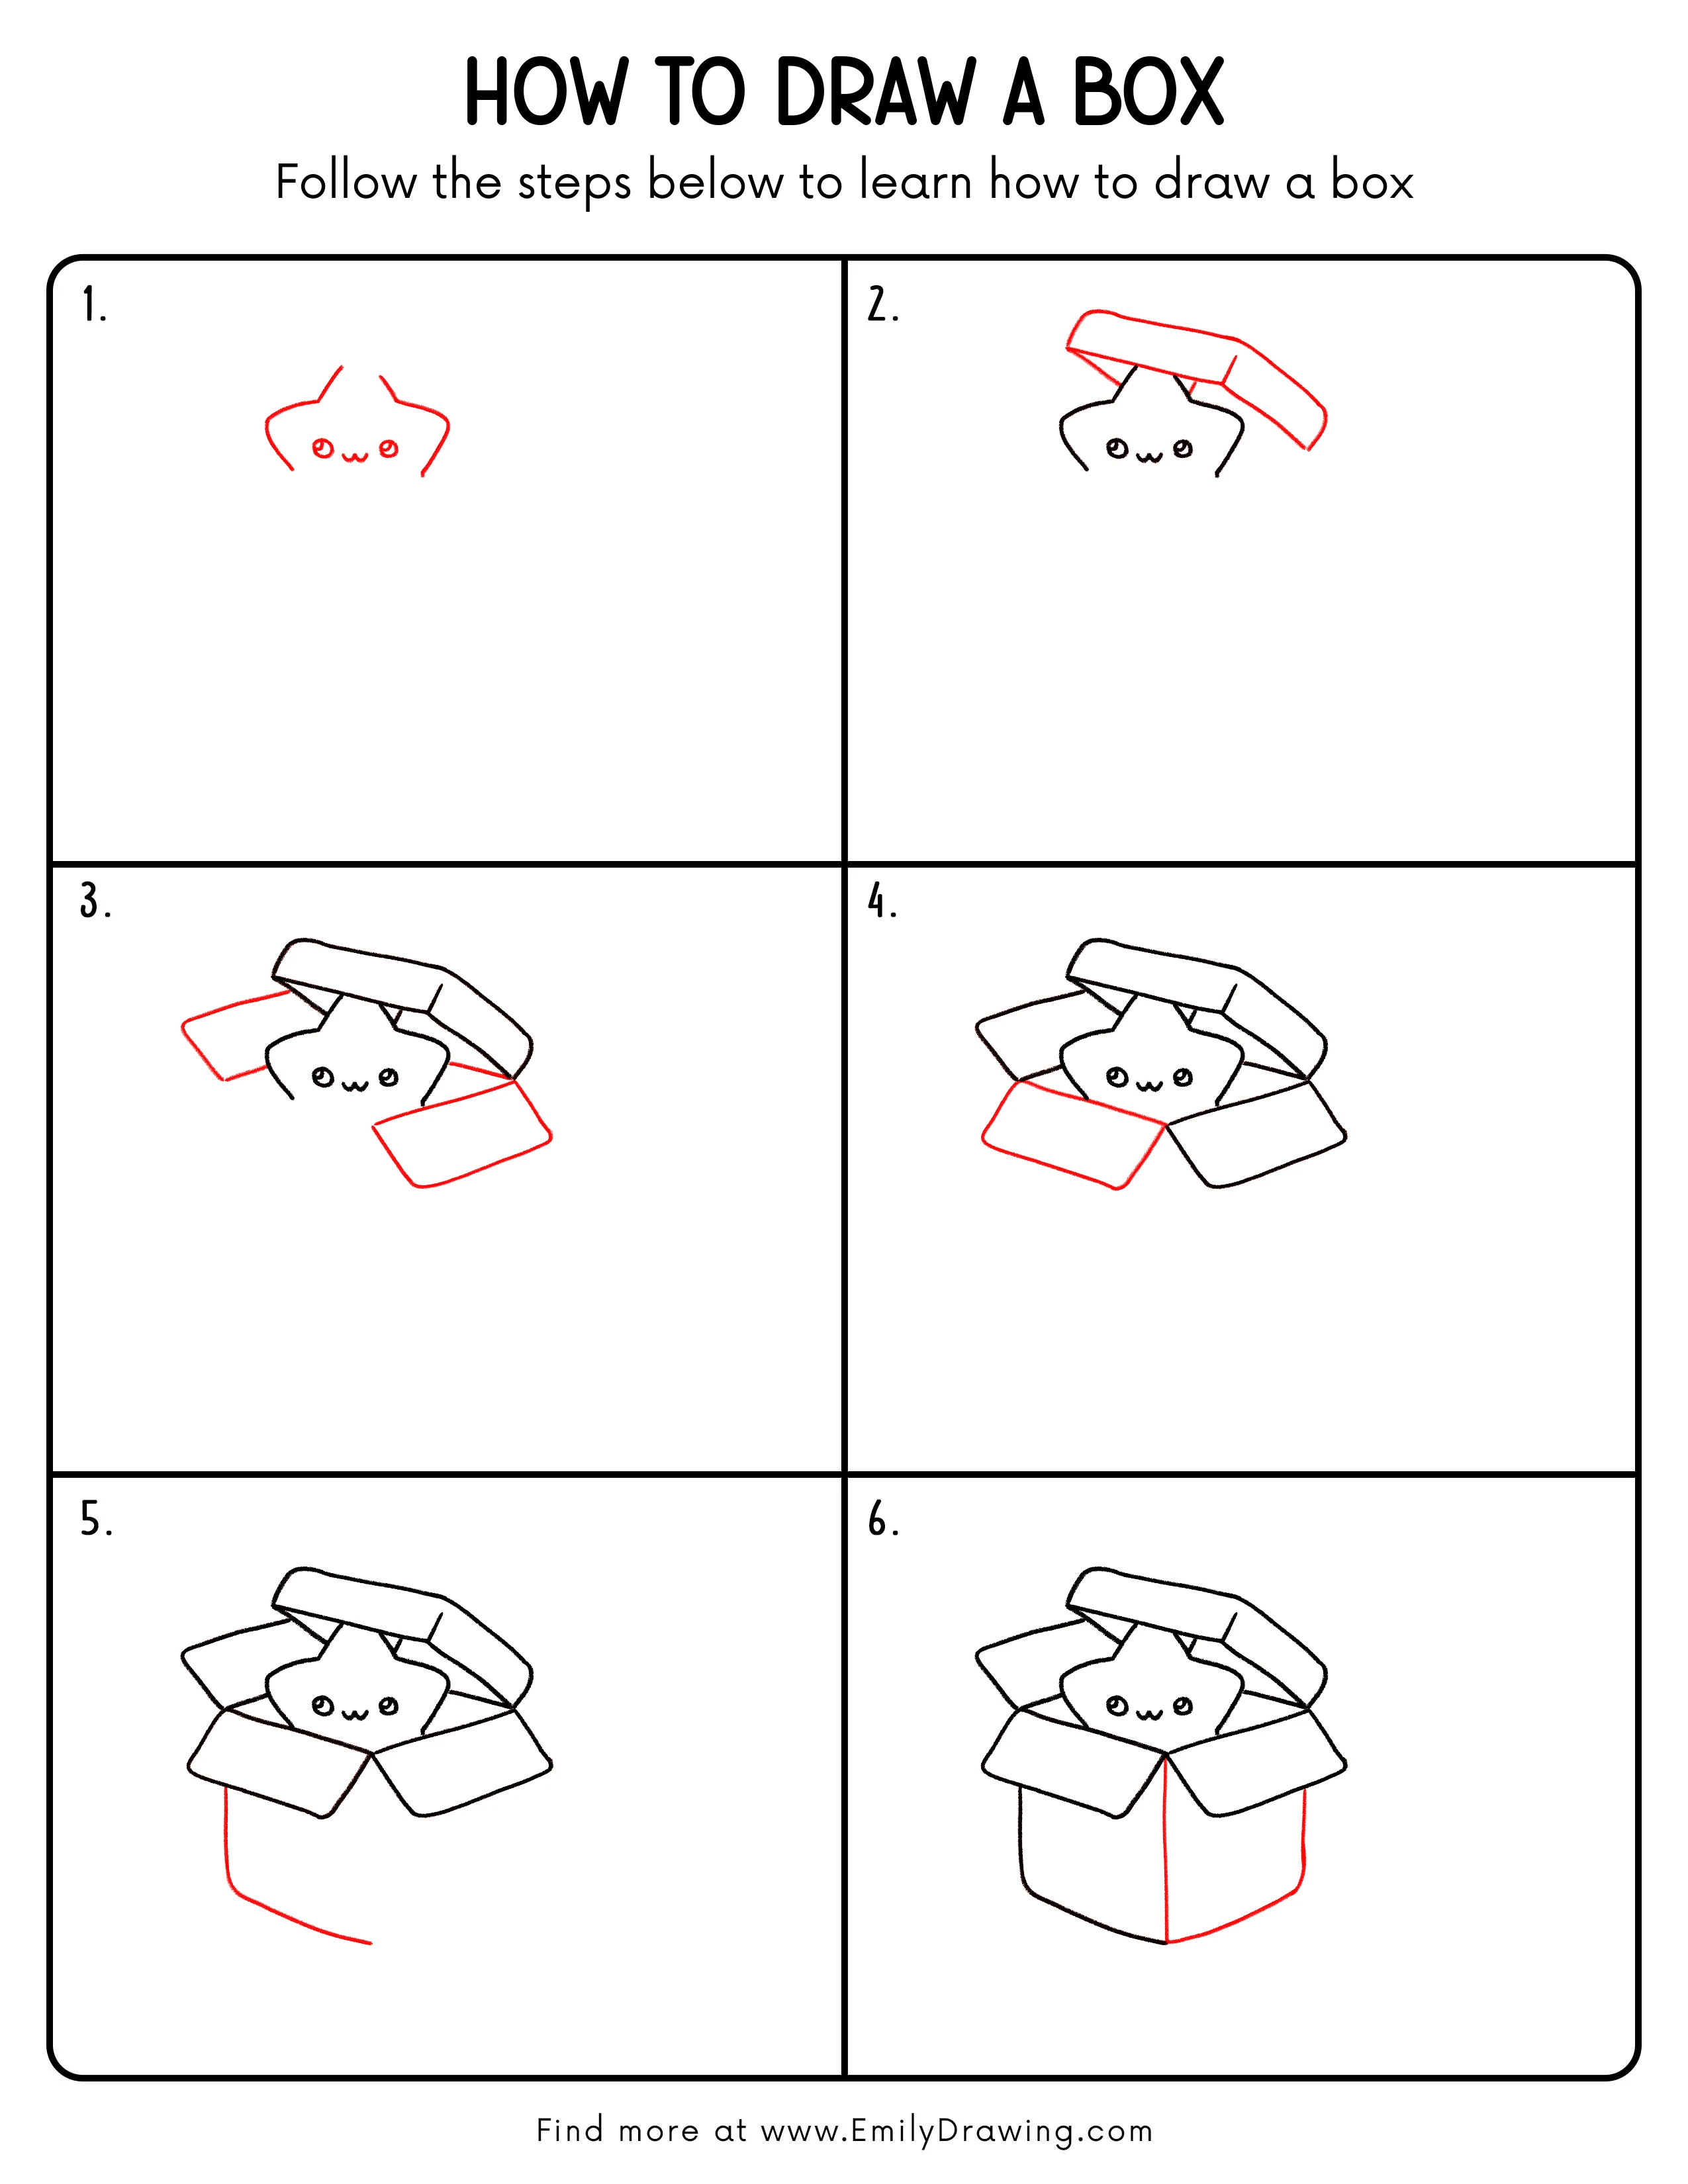
Step 1: Sketch the Box Top and a Cute Face
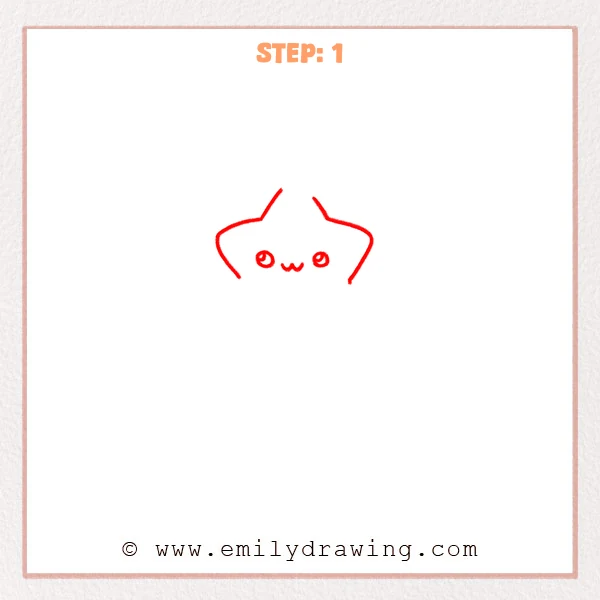
Start with a rounded arc for the top edge, then add two curved lines dropping down on each side. Keep the shape open at the bottom for now, like the upper rim of a box. Add two small round eyes and a tiny “w” mouth in the center.
Pro Tip: Keep the side curves balanced so the box looks stable and neat.
Step 2: Add the Open Box Lid
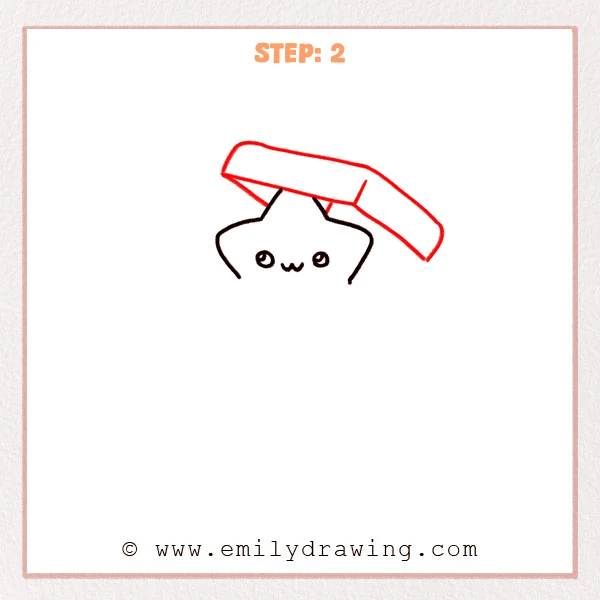
Sketch a long, tilted rectangle above the face to form the lid. Add a second line under it to show thickness, then connect it to the box with short angled lines. This makes the lid look attached and lifted.
Pro Tip: Keep the lid thickness even so the 3D look stays clear.
Step 3: Add the Left and Right Open Flaps
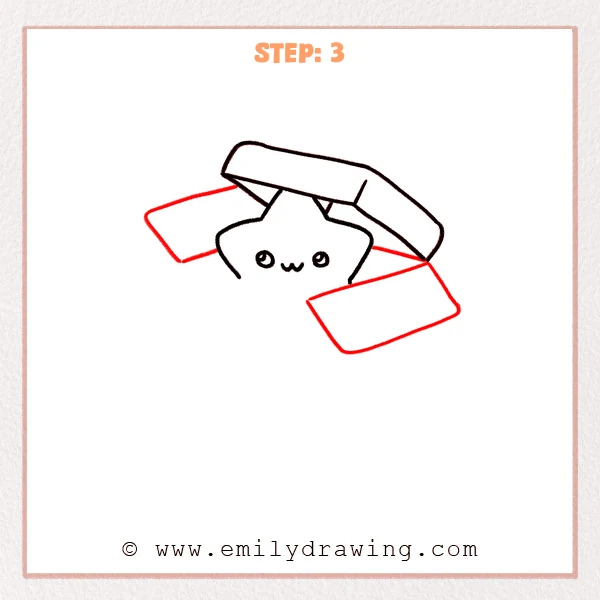
Add a rounded rectangle flap extending out on the left side. Then draw a larger rounded rectangle flap on the lower right, and connect it back with a slanted fold line. Let the angles differ so the opening feels wide.
Pro Tip: Give the two flaps different angles to create more depth.
Step 4: Draw the Two Front Flaps
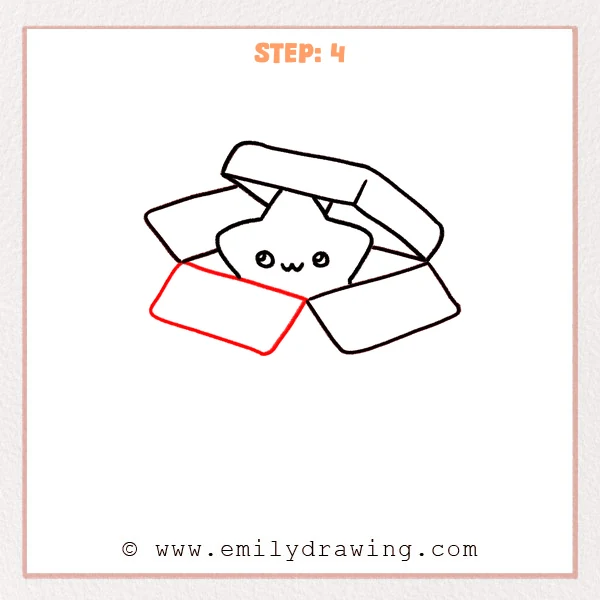
Add two rounded rectangle flaps folding forward at the bottom of the opening. Leave a small “V” gap between them to show they are separate. This small gap helps the box look more realistic.
Pro Tip: Keep the bottom edges of both flaps aligned for a neat, steady box.
Step 5: Draw the Box Side and Bottom Edge
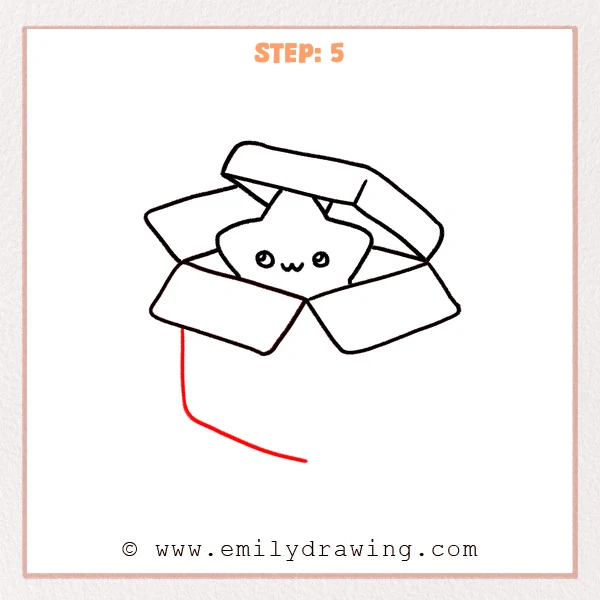
From under the left front flap, extend a long vertical line down for the left wall of the box. Then sketch a gently curved long line across the bottom to begin the base. Keep the curve soft so it still feels like cardboard.
Pro Tip: Keep the bottom curve subtle so it feels like stiff cardboard.
Step 6: Complete the Right Side and the Center Edge
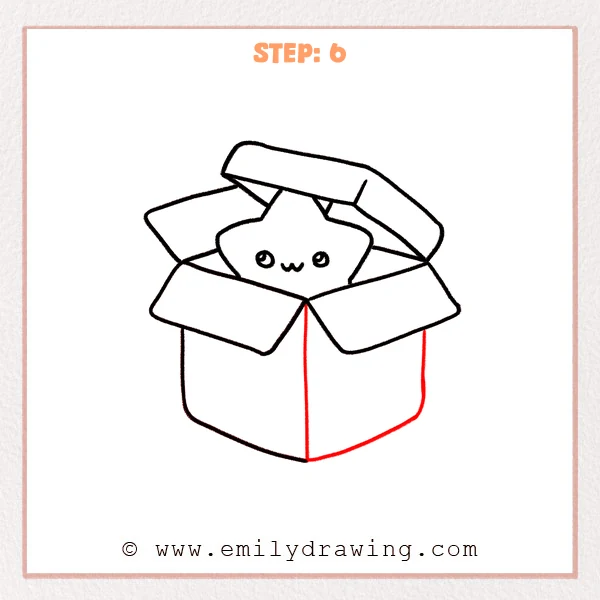
Add the right outer wall line so the box body becomes a complete 3D shape. Draw a straight vertical line down from the center of the opening to the bottom point to show the front edge fold. This line gives the box a clear corner and structure.
Pro Tip: Keep the center vertical line straight to make the 3D form clear.
Step 7: Color in your drawing!
Fun Facts
- Cardboard boxes are made from layered paper that creates a strong, light material.
- Folding flaps help boxes close securely without needing glue.
- Artists often use simple box shapes to practice drawing objects in 3D.
Pin it now, Draw later!
You have now learned how to draw a cute box step by step, with an open lid and folding flaps. To add color, try a light base color on the box and a slightly darker shade under each flap. A common beginner mistake is making the fold lines tilt in different directions, so keep your edges consistent with the box’s angle. Practice this easy drawing tutorial again with different box sizes, and try adding stickers or patterns to make your box character unique.
Get the FREE Printable Drawing Guide
FREE Download Printable Box Drawing Tutorial
Frequently Asked Questions
How can I make my box look more 3D?
Add a little shading under the lid and flaps, and keep your corner lines straight.
What if my flaps look uneven?
That is normal at first. Lightly sketch the flap shapes, then adjust the angles before outlining.
Can I change the face on the box?
Yes. Try different eye shapes or a small smile, and keep the features centered on the front.