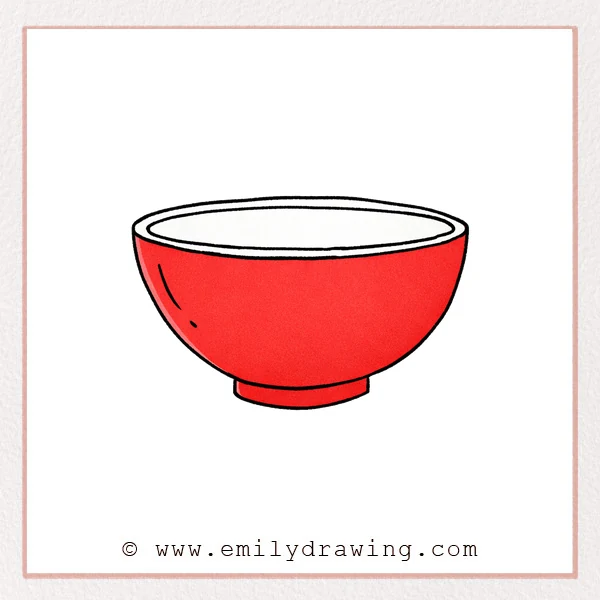
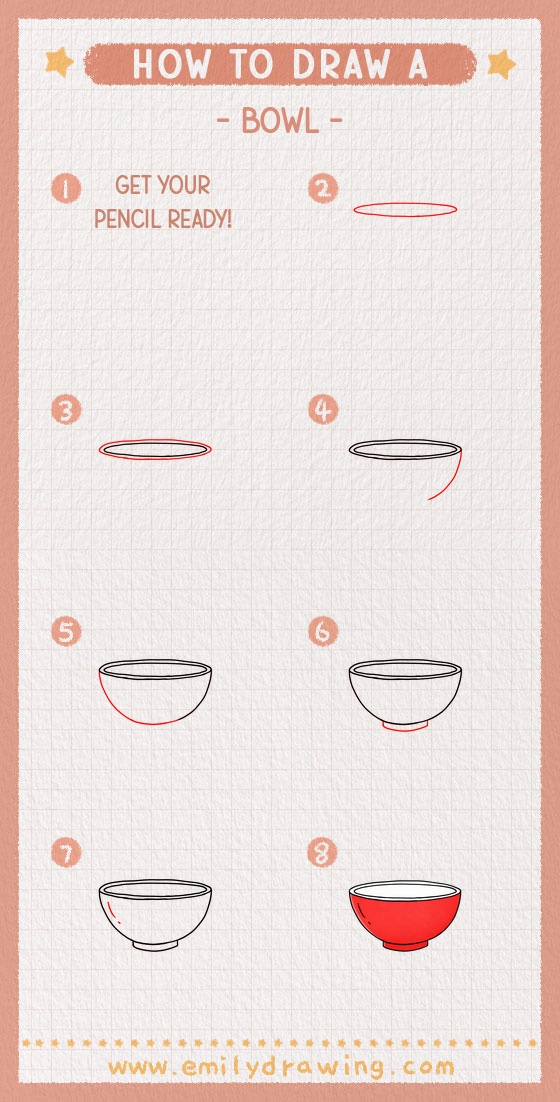
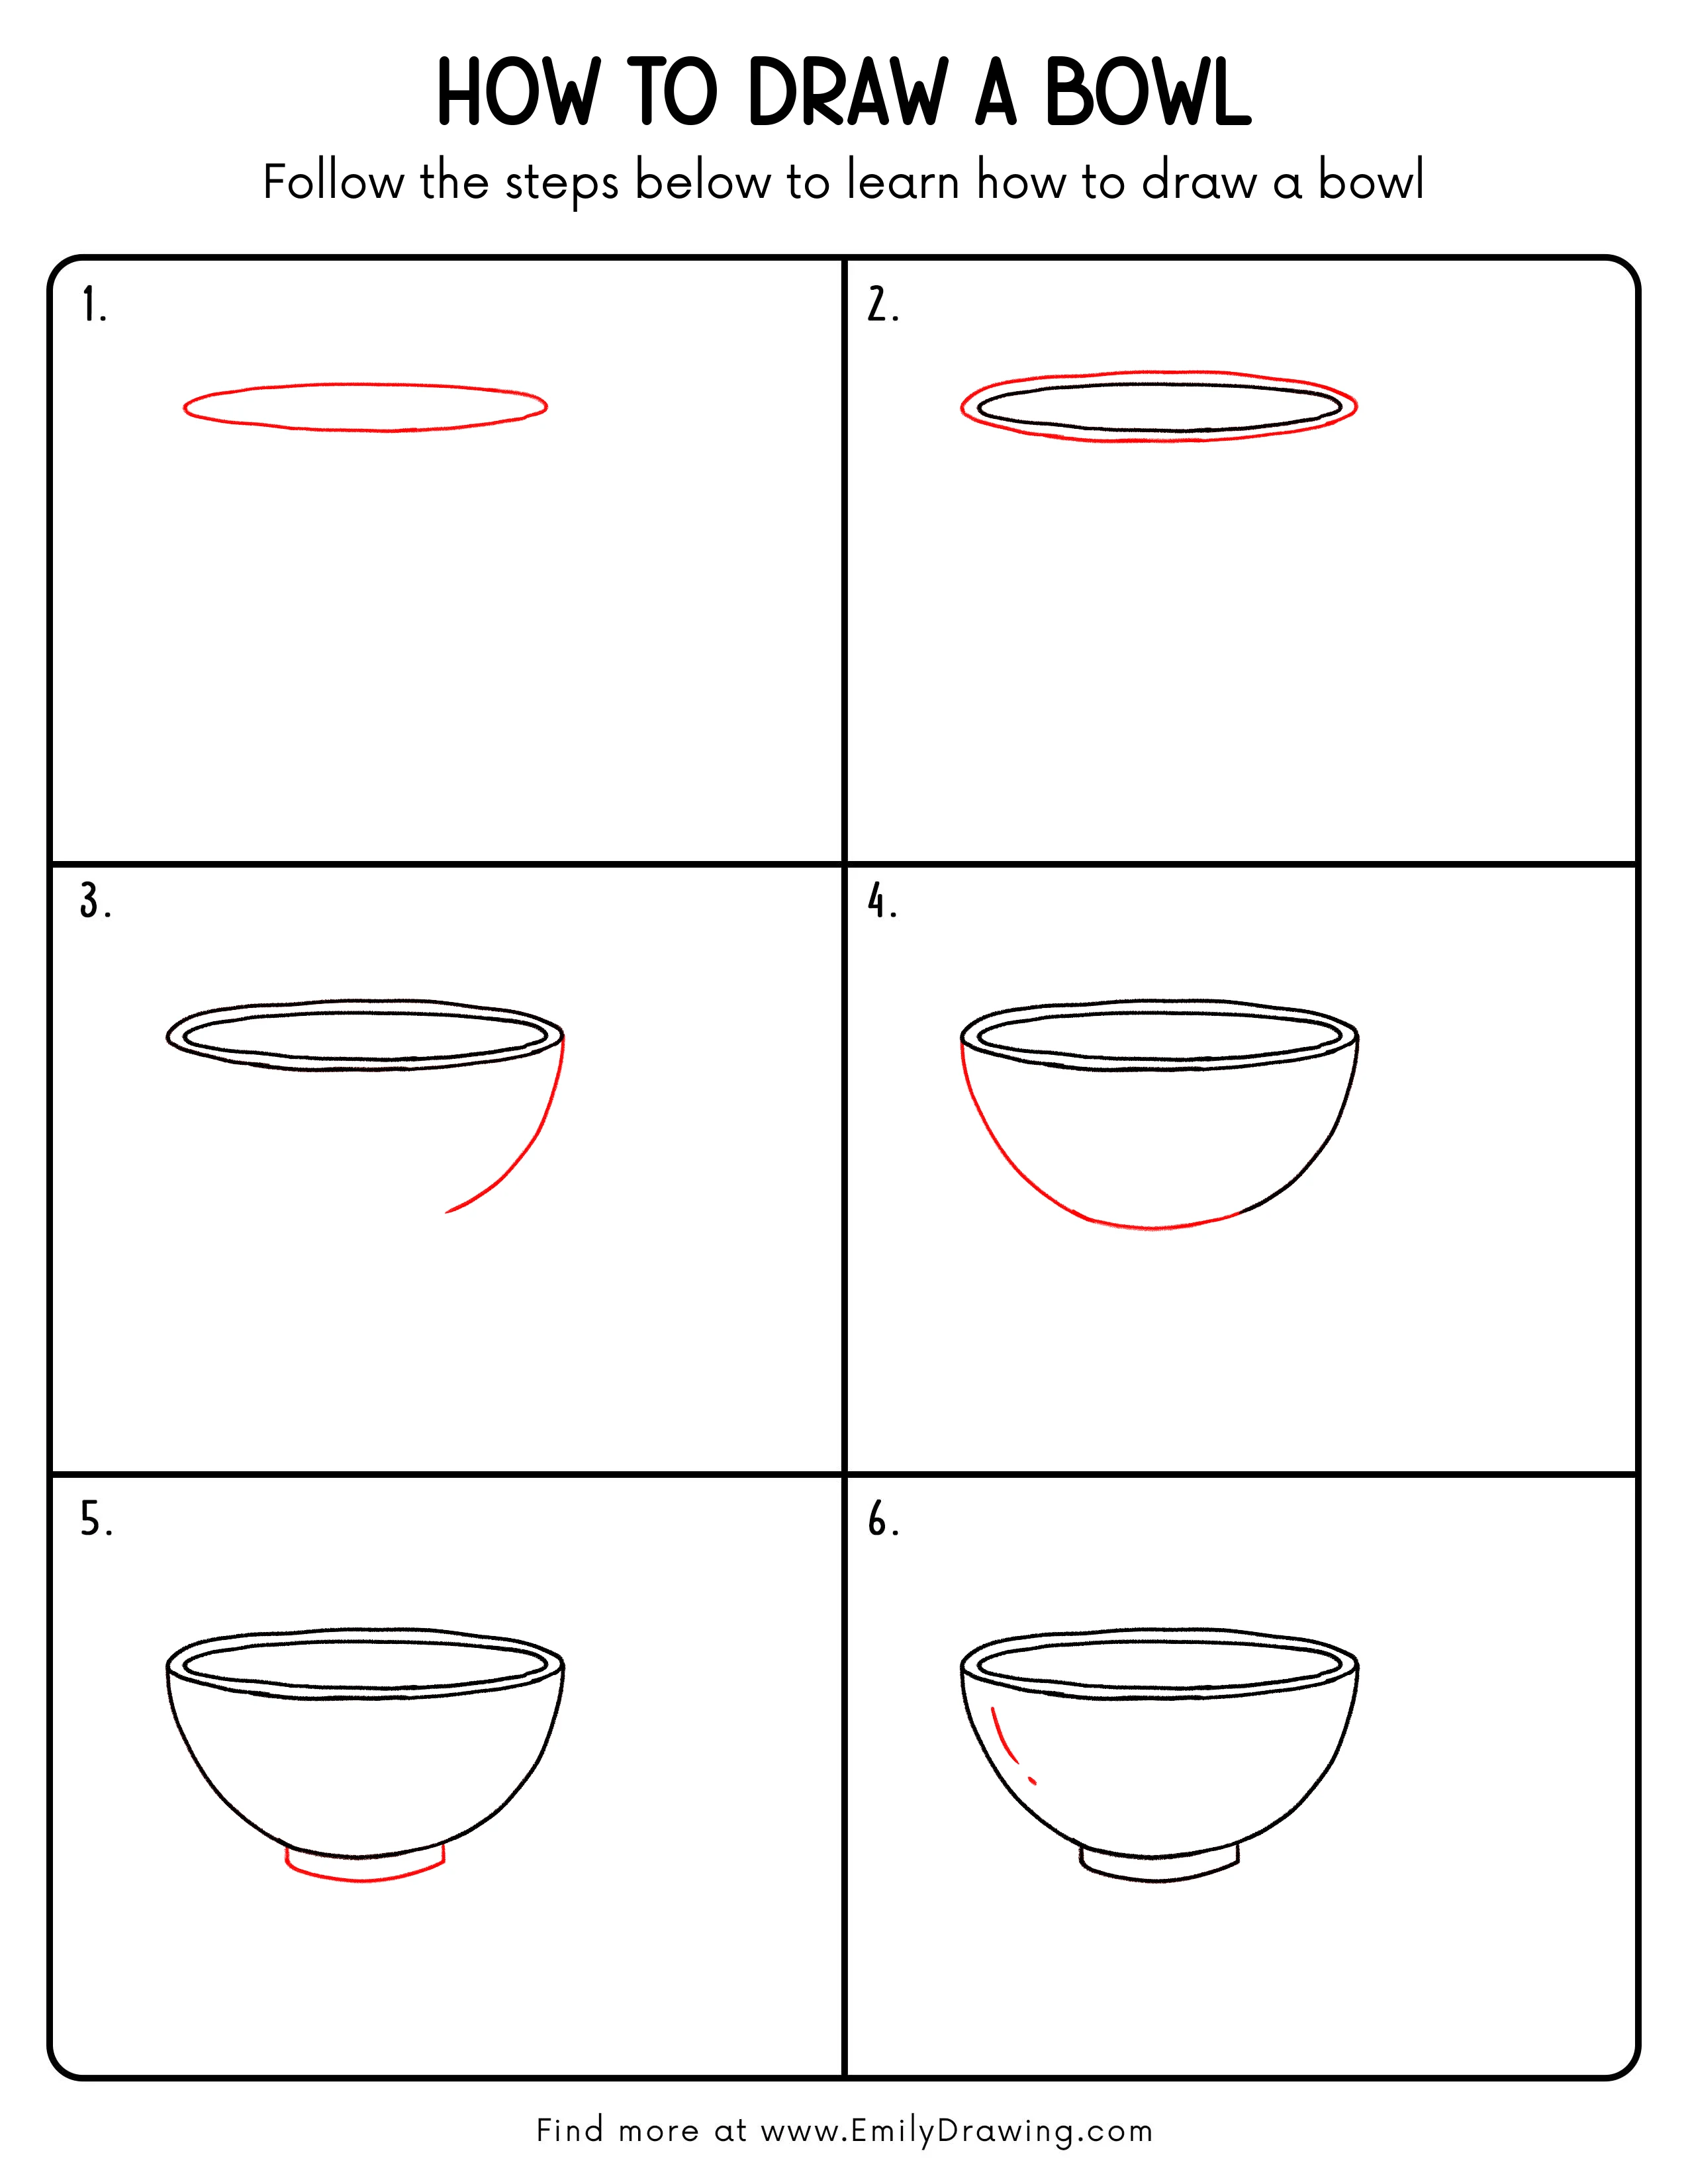
This easy drawing tutorial shows how to draw a bowl step by step using simple ovals and smooth curves. It is a calm drawing for beginners that helps you practice symmetry and clean lines.
What You Will Need
- Pencil
- Eraser
- Drawing paper
- Black pen or fineliner (optional)
- Colored pencils or markers (optional)
Here are my RECOMMENDED Art Supplies!
- Crayola Coloring Set (140 Pieces – Mega Value!)
- 24 Colored Crayon Set
- A4 Printer Paper
- Crayola Coloring Pencils
- HP Home Printer with Instant Ink!
Time needed:
10 minutes.
Step-by-Step Drawing Guide
Step 1: Draw the Bowl’s Opening Oval
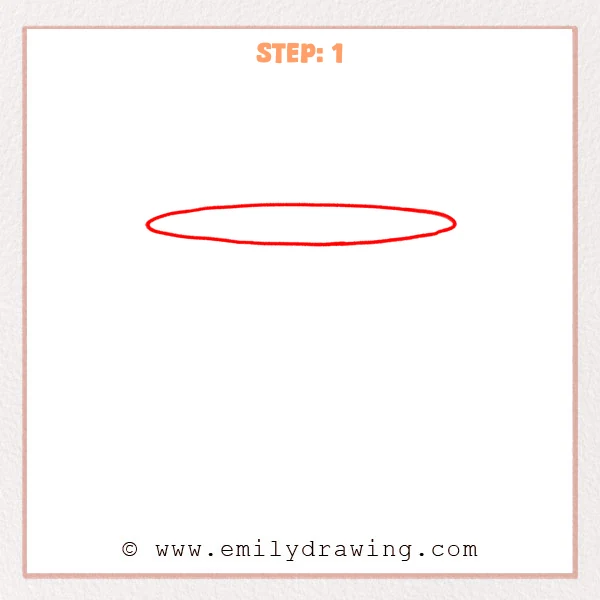
Start with a wide, flat oval. Keep it long from left to right and narrower top to bottom.
Pro Tip: Sketch the oval lightly first, then darken once it feels even.
Step 2: Add Rim Thickness
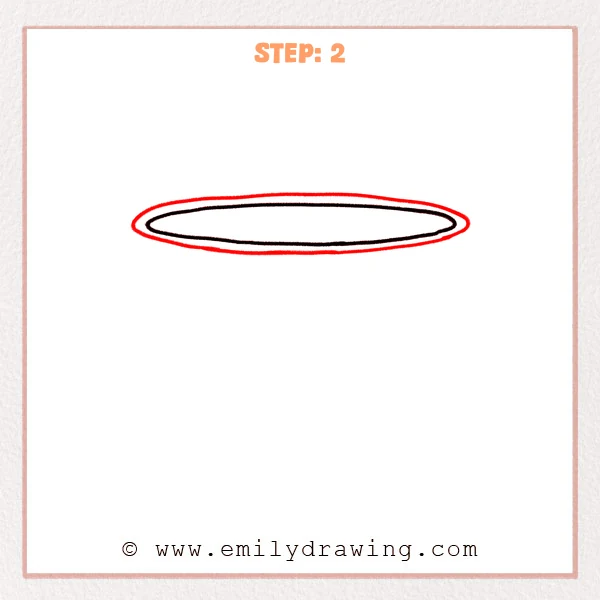
Draw a smaller oval inside the first one, leaving an even gap all around. This creates a thick rim.
Pro Tip: Leave a clear gap so the rim reads as a solid edge.
Step 3: Sketch the Bowl’s Outer Curves
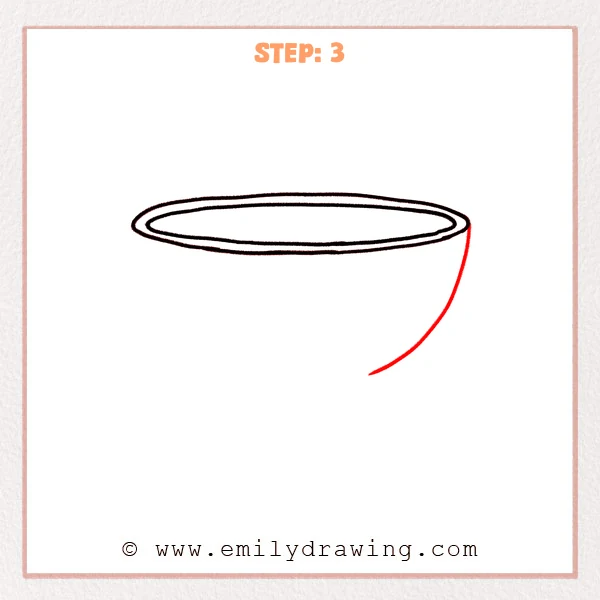
Pull two big curved lines down from the rim sides, keeping them balanced. Let them curve inward toward the bottom, leaving the base open for now.
Pro Tip: Match the curve bulge on both sides so the bowl doesn’t tilt.
Step 4: Close the Bottom Curve

Connect the two sides with a smooth bottom curve. Keep it slightly flatter than a full circle so the bowl feels stable.
Pro Tip: Avoid a pointy base; a rounded curve feels more like a real bowl.
Step 5: Draw the Bowl Foot Ring

Add a small base under the bowl with a short front curve, then a second curve behind it for thickness. Center it under the bowl so it looks supported.
Pro Tip: Keep the base ring less than half the bowl’s narrowest bottom width.
Step 6: Add Shine Highlights
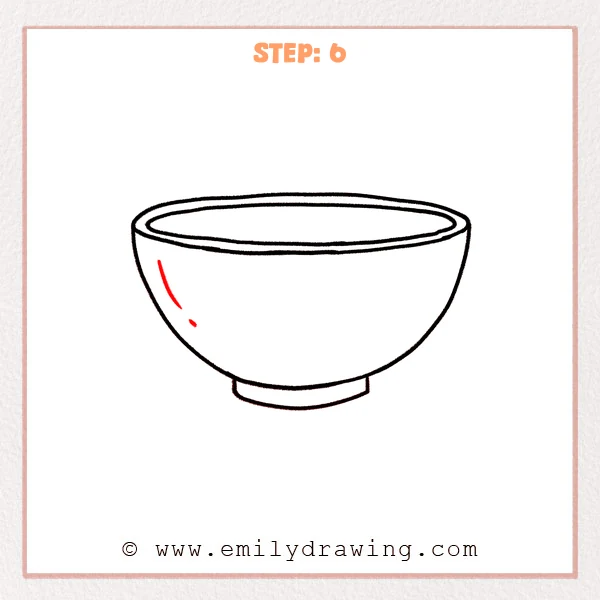
Draw two short curved highlight lines on the left side. Add a tiny dot below to suggest a glossy reflection.
Pro Tip: Keep highlight lines thin and light so they read as shine.
Step 7: Color in your drawing!
Fun Facts
- Many bowls look round, but they are drawn with ovals because of perspective.
- A thicker rim can make a bowl look heavier and more realistic.
- A small foot ring helps bowls sit steady on a table.
Pin it now, Draw later!
You have learned how to draw a bowl step by step by starting with an oval rim, building smooth sides, and finishing with a simple base. For coloring, try a light cream or pale blue, then shade softly under the rim and along the lower curve. Add a darker shadow under the foot ring to help the bowl feel grounded.
One common beginner mistake is making the rim uneven on both sides. Take your time and adjust the inner oval until the spacing looks consistent.
Practice this easy drawing tutorial again with different bowl shapes, like a taller bowl or a wider rim. Keep drawing for beginners to build steady control and confidence.
Get the FREE Printable Drawing Guide
FREE Download Printable Bowl Drawing Tutorial
Frequently Asked Questions
How do I make my oval look more even?
Draw it lightly first, then correct the sides before darkening the line.
Why does my bowl look flat?
Add a clear inner oval for the rim and shade slightly under the top edge.
How can I make the bowl look shiny?
Keep the highlight lines small and leave the area around them unshaded.