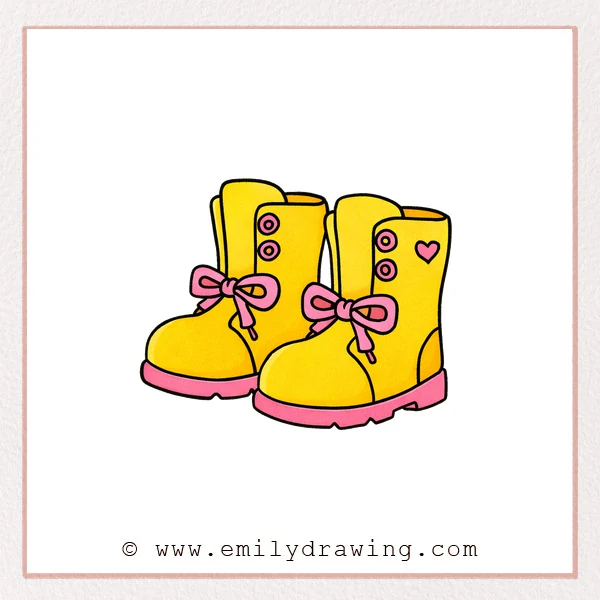
This easy drawing tutorial shows how to draw boots step by step with simple, rounded shapes. You will build one boot first, then add the second boot behind it for a clear 3D look. This is a calm drawing for beginners that helps you practice matching details.
What You Will Need
- Pencil
- Eraser
- Drawing paper
- Black pen or fineliner (optional)
- Colored pencils or markers (optional)
Here are my RECOMMENDED Art Supplies!
- Crayola Coloring Set (140 Pieces – Mega Value!)
- 24 Colored Crayon Set
- A4 Printer Paper
- Crayola Coloring Pencils
- HP Home Printer with Instant Ink!
Time needed:
14 minutes.
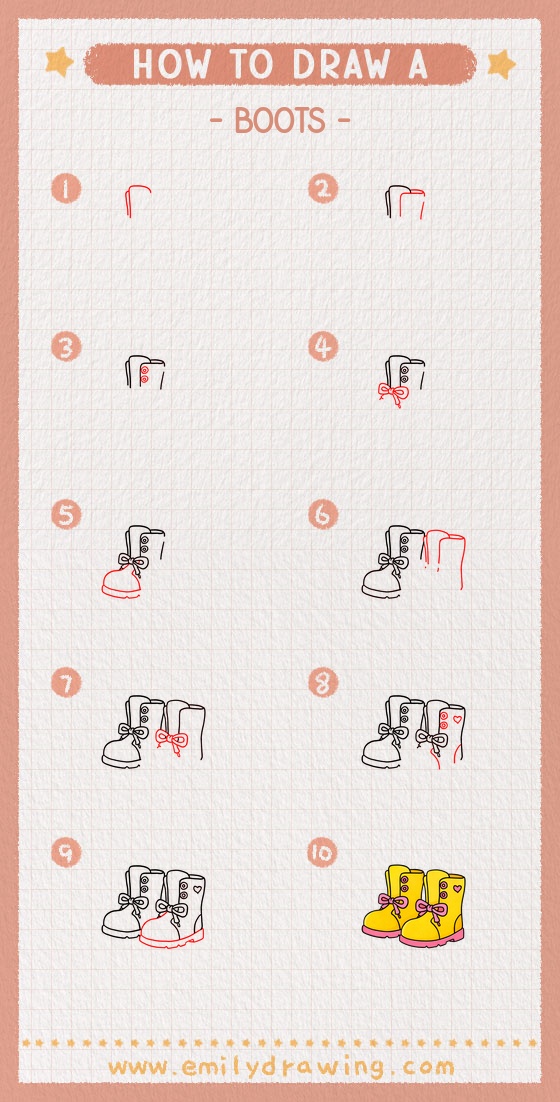
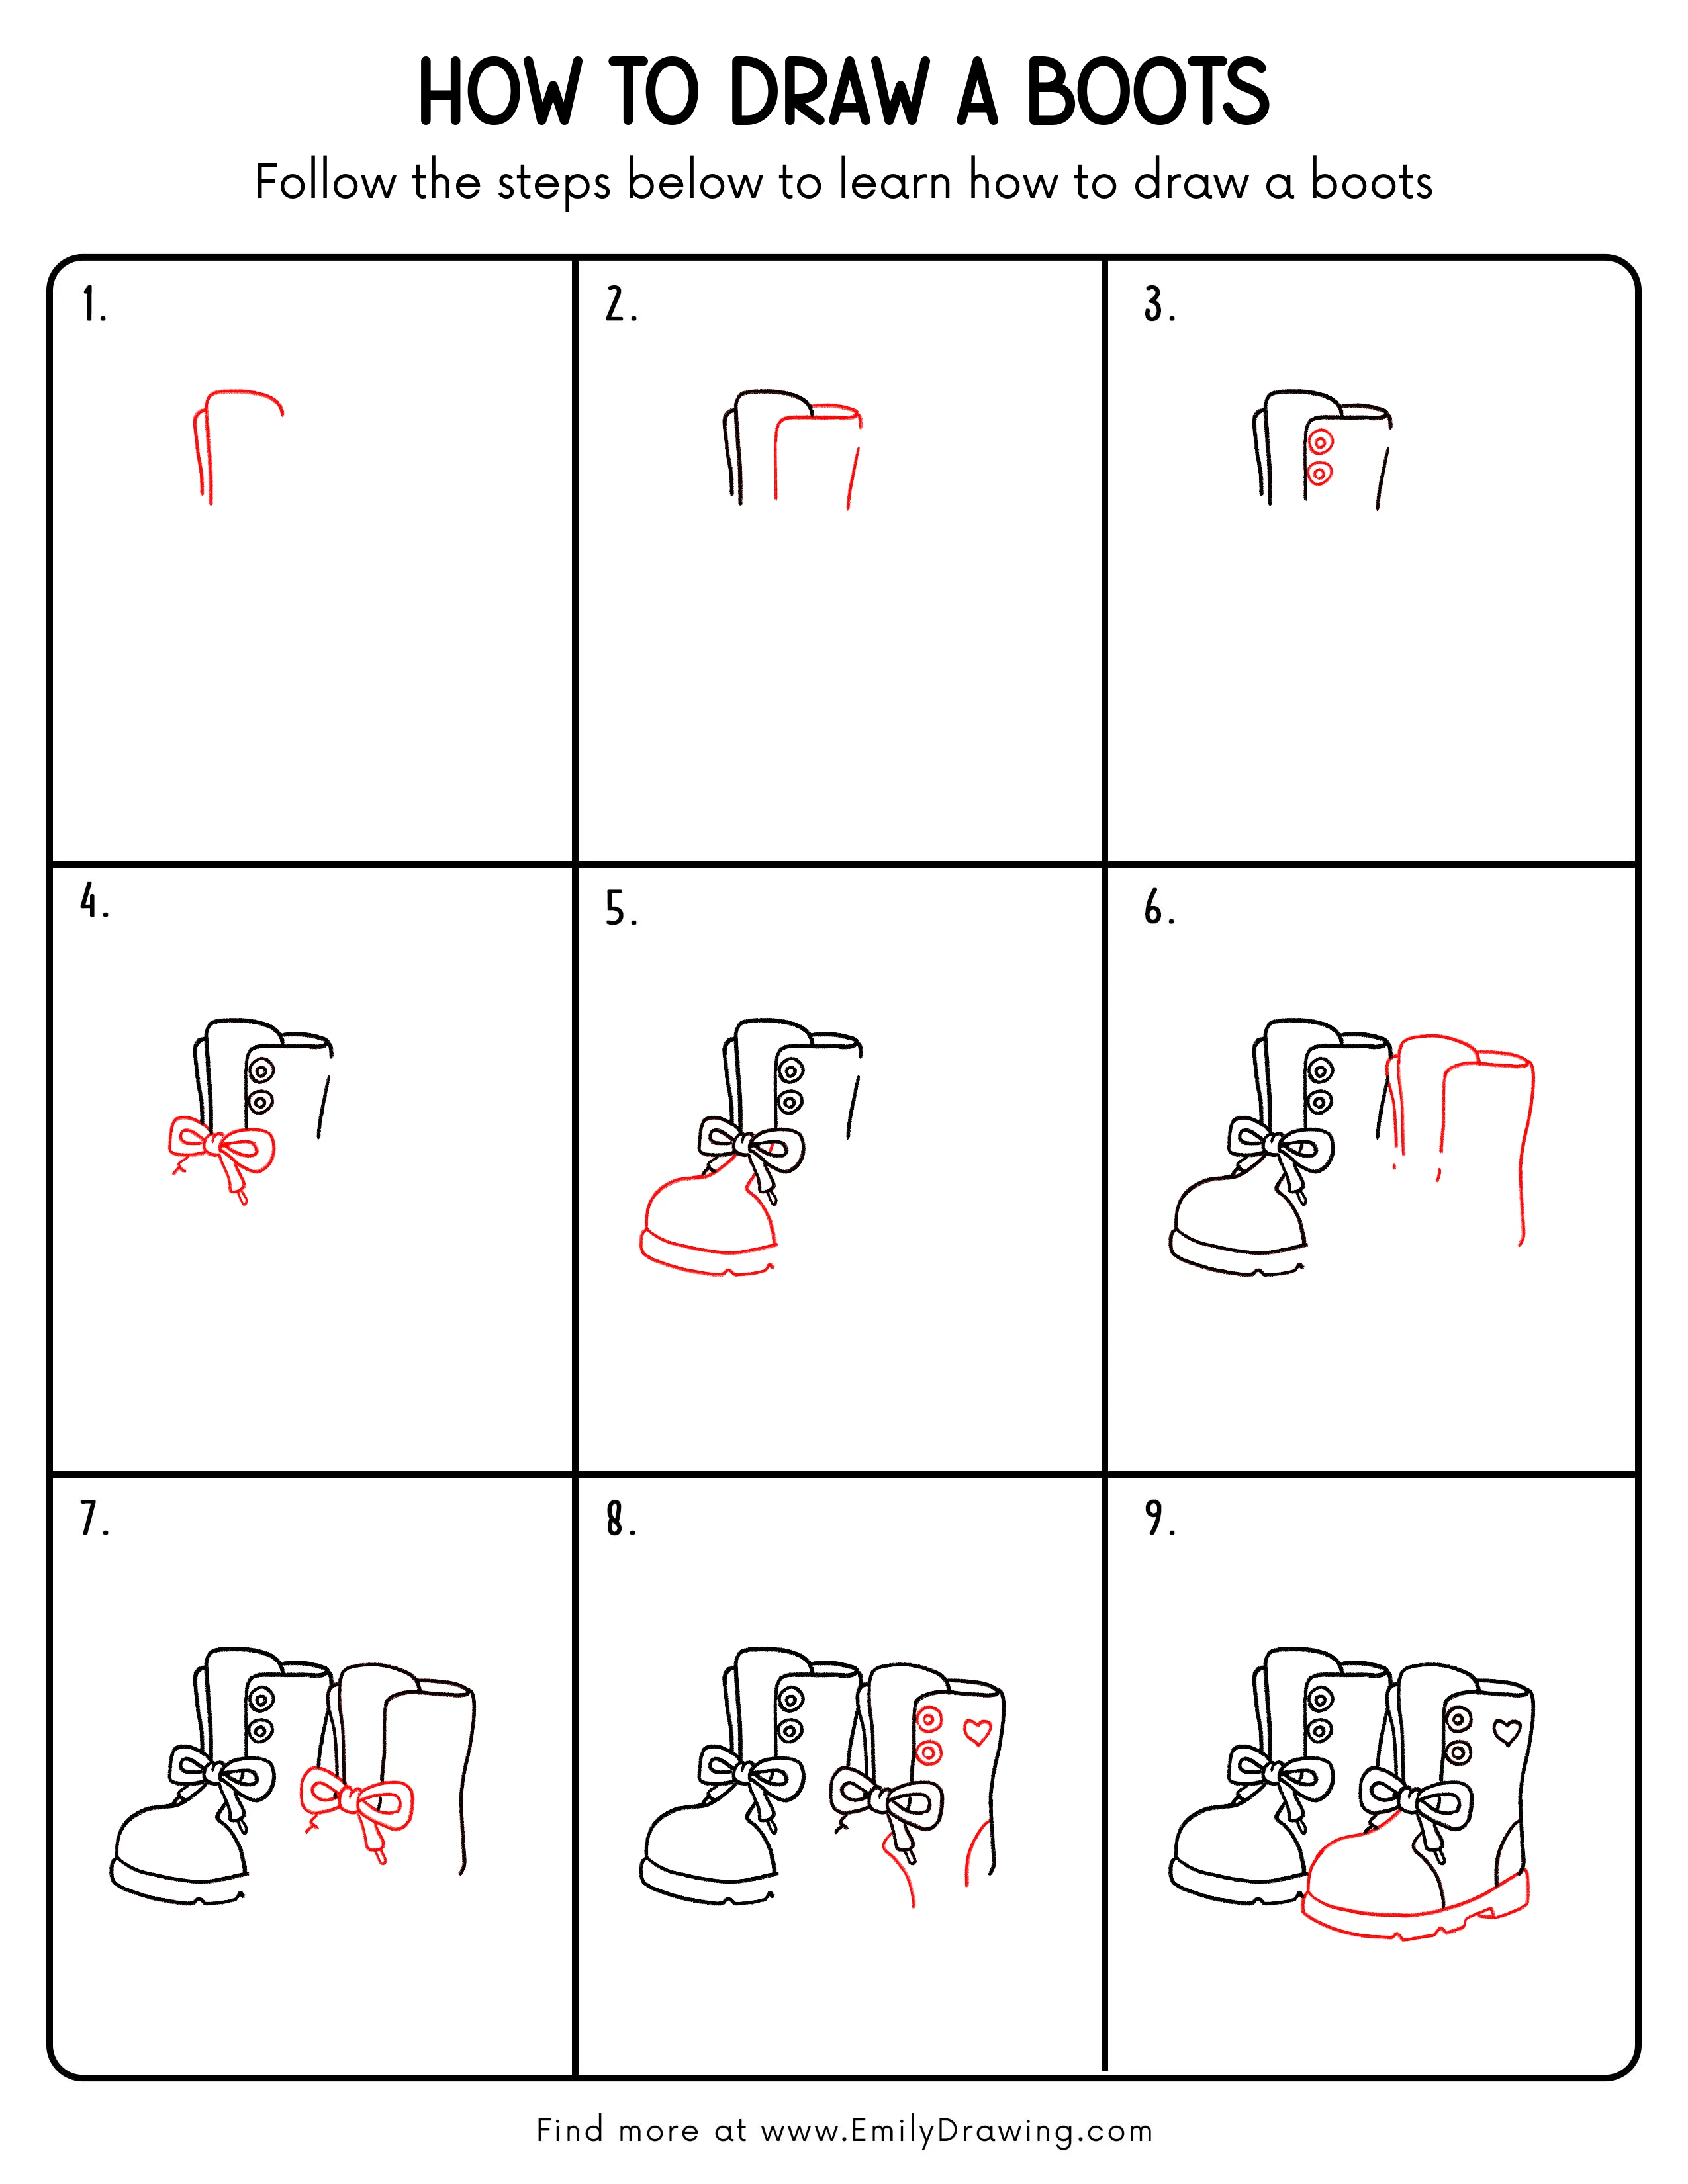
Step-by-Step Drawing Guide
Step 1: Draw the Top of the First Boot
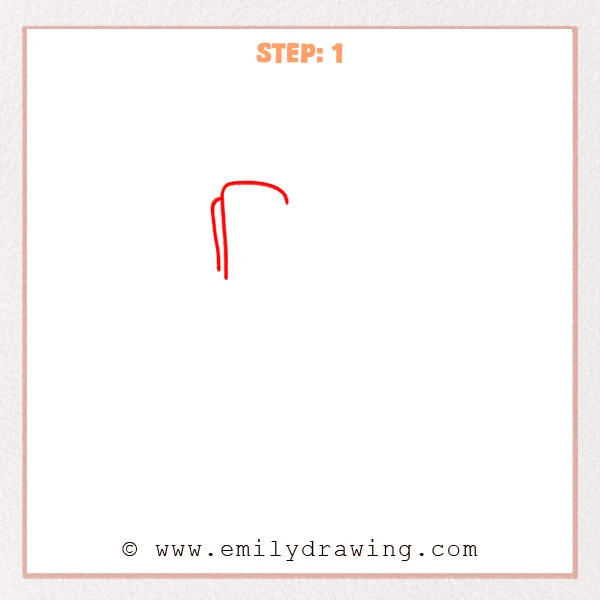
Start with a curved top edge like a soft “U” shape. Add two short vertical lines on the left to show the boot shaft’s side thickness.
Pro Tip: Keep the top curve rounded, not pointy.
Step 2: Draw the Shaft of the First Boot
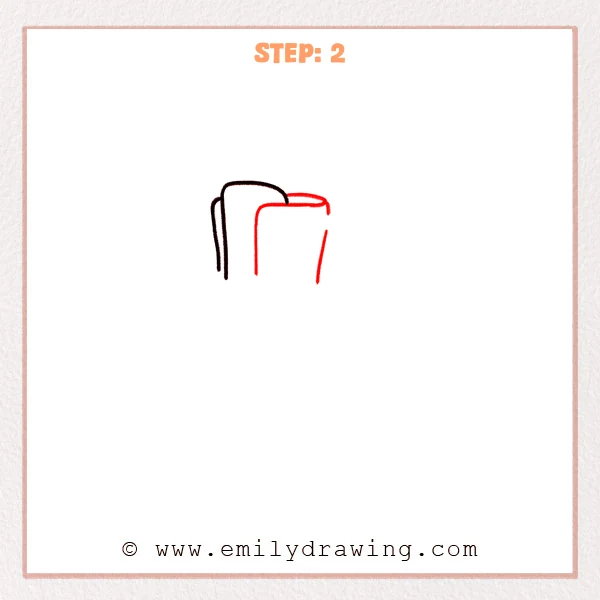
Extend the lines downward from the top opening to form the tall shaft, letting the right side taper slightly inward. Add a short inner line to show the inside edge thickness.
Pro Tip: Sketch the sides lightly first, then darken once the height feels right.
Step 3: Draw the Eyelets
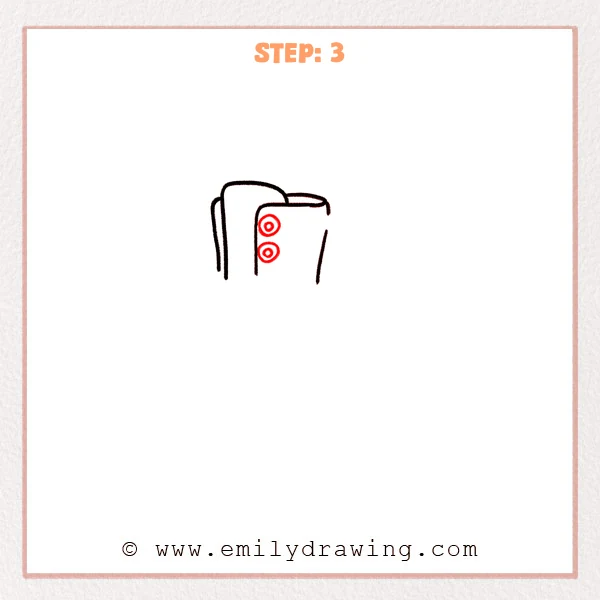
Add two small circles on the front boot shaft, stacked vertically like eyelets. Place a tiny inner circle in each to make them clearer.
Pro Tip: Keep the spacing between eyelets even for neatness.
Step 4: Tie a Bow on the First Boot

Draw a bow lace under the shaft: a small center knot, then two oval loops. Add two ribbon ends hanging down with slightly pointed tips.
Pro Tip: Make both loops similar in width so the bow feels tied.
Step 5: Draw the Toe and Sole of the First Boot
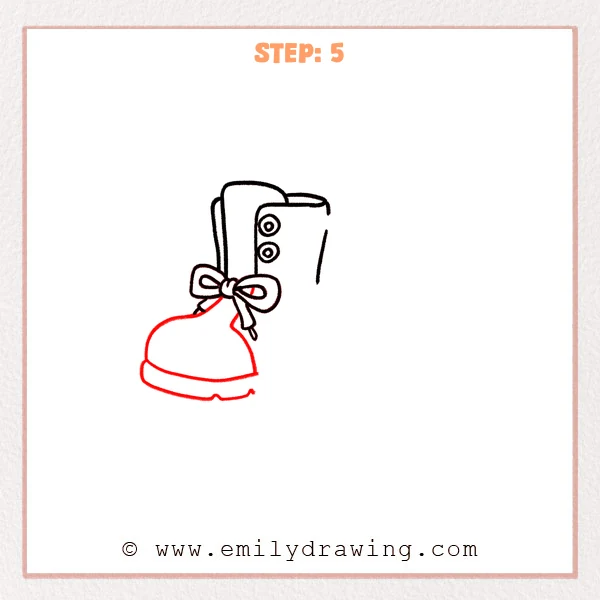
Sketch a rounded toe below the bow and connect it to a thick sole. Use two parallel curves for the sole thickness and add a small notch for tread.
Pro Tip: Keep the toe round and wide so it reads as a boot.
Step 6: Build the Back Boot Shaft Shape
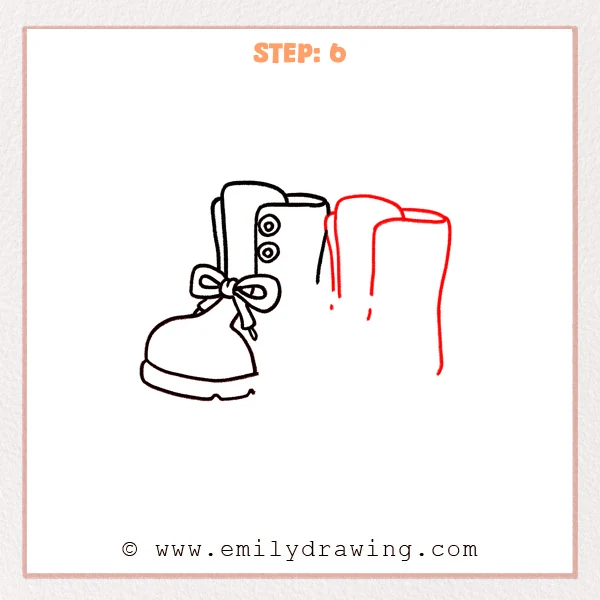
Complete the second boot shaft behind, narrowing slightly as it goes down. Use long curved lines to show the shaft’s rounded side.
Pro Tip: Use slightly lighter lines on the back boot to keep depth clear.
Step 7: Add a Bow Lace to the Second Boot
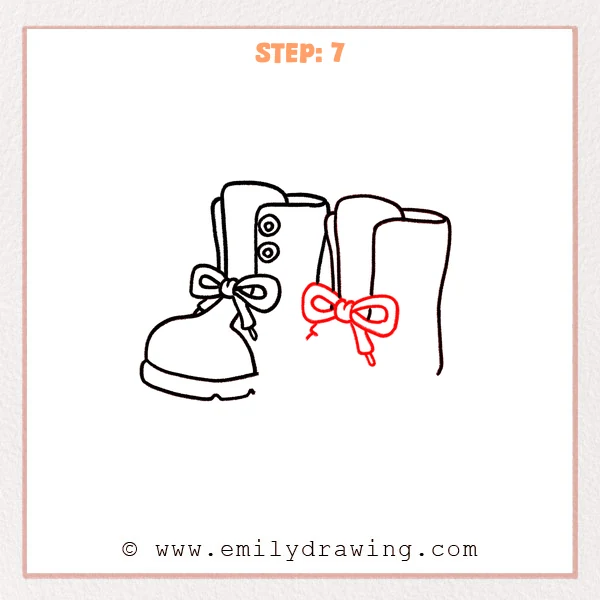
Draw a second bow on the back boot, placed around the same height as the first. Add two lace ends so it matches the cute style.
Pro Tip: Make the second bow slightly smaller to show it is behind.
Step 8: Add Decorations and Side Details
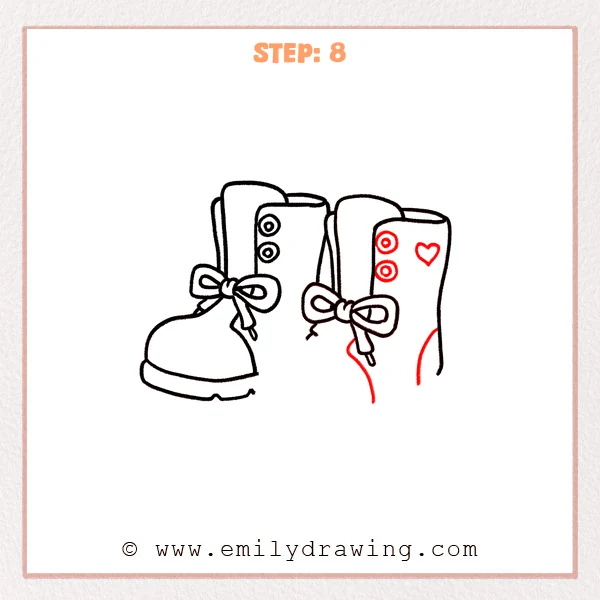
Add two eyelets on the second boot shaft, then draw a small heart on the side. Sketch a curved heel edge to show the back shape.
Pro Tip: Keep the heart small so the boot still looks simple.
Step 9: Finish the Second Boot Toe and Thick Sole

Complete the second boot’s rounded toe and draw the thick sole outline. Add a few small notches along the bottom for tread so both boots feel grounded.
Pro Tip: Keep both soles a similar thickness for a matched pair.
Step 10: Color in your drawing!
Fun Facts
- Many boots have a thicker sole to protect your feet from rough ground.
- Eyelets help laces stay in place and tighten evenly.
- Drawing one boot first makes it easier to match the second boot.
Pin it now, Draw later!
You have learned how to draw boots step by step by building the first boot, then layering a second boot behind it. For coloring, try a warm brown or a bright rain-boot color, then shade lightly under the bows and along the lower sides. Add a darker shade under the soles to make the boots feel planted.
One common beginner mistake is making the back boot larger than the front boot. Keep the back boot slightly smaller and lighter so the depth feels correct.
Try this easy drawing tutorial again with different decorations, like a stripe or a tiny star. Keep practicing and explore another drawing for beginners to build steady line control.
Get the FREE Printable Drawing Guide
FREE Download Printable Boots Drawing Tutorial
Frequently Asked Questions
How do I make both boots match?
Copy the height of the first shaft and place the second opening at the same level.
What if my bows look uneven?
Draw the center knot first, then mirror the loop shape on both sides.
How can I make the boots look more 3D?
Shade the inner side of the shafts and add a small shadow under each sole.