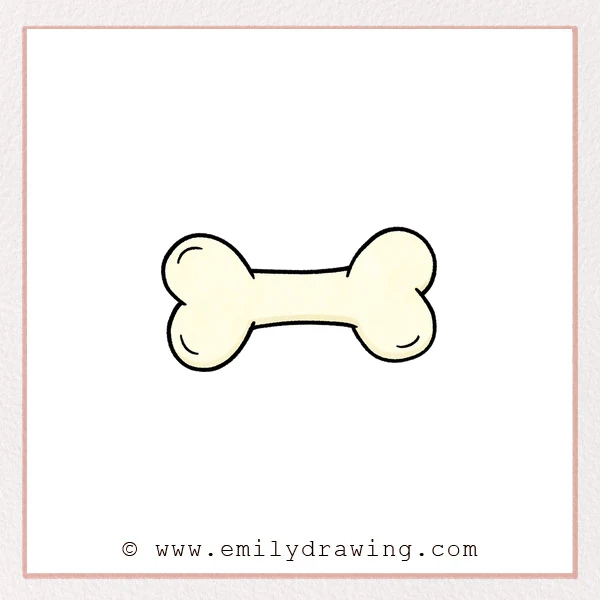
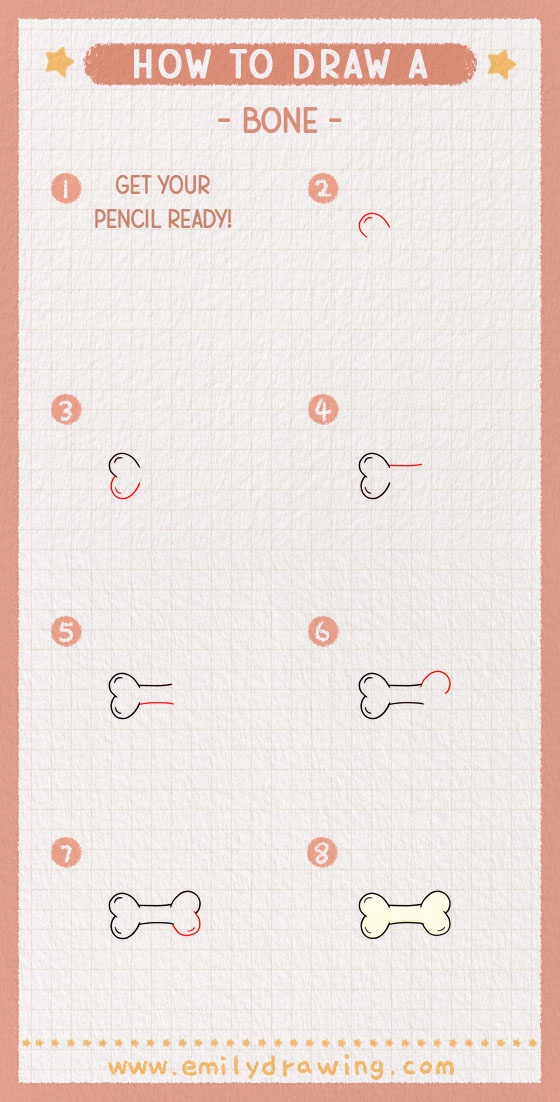
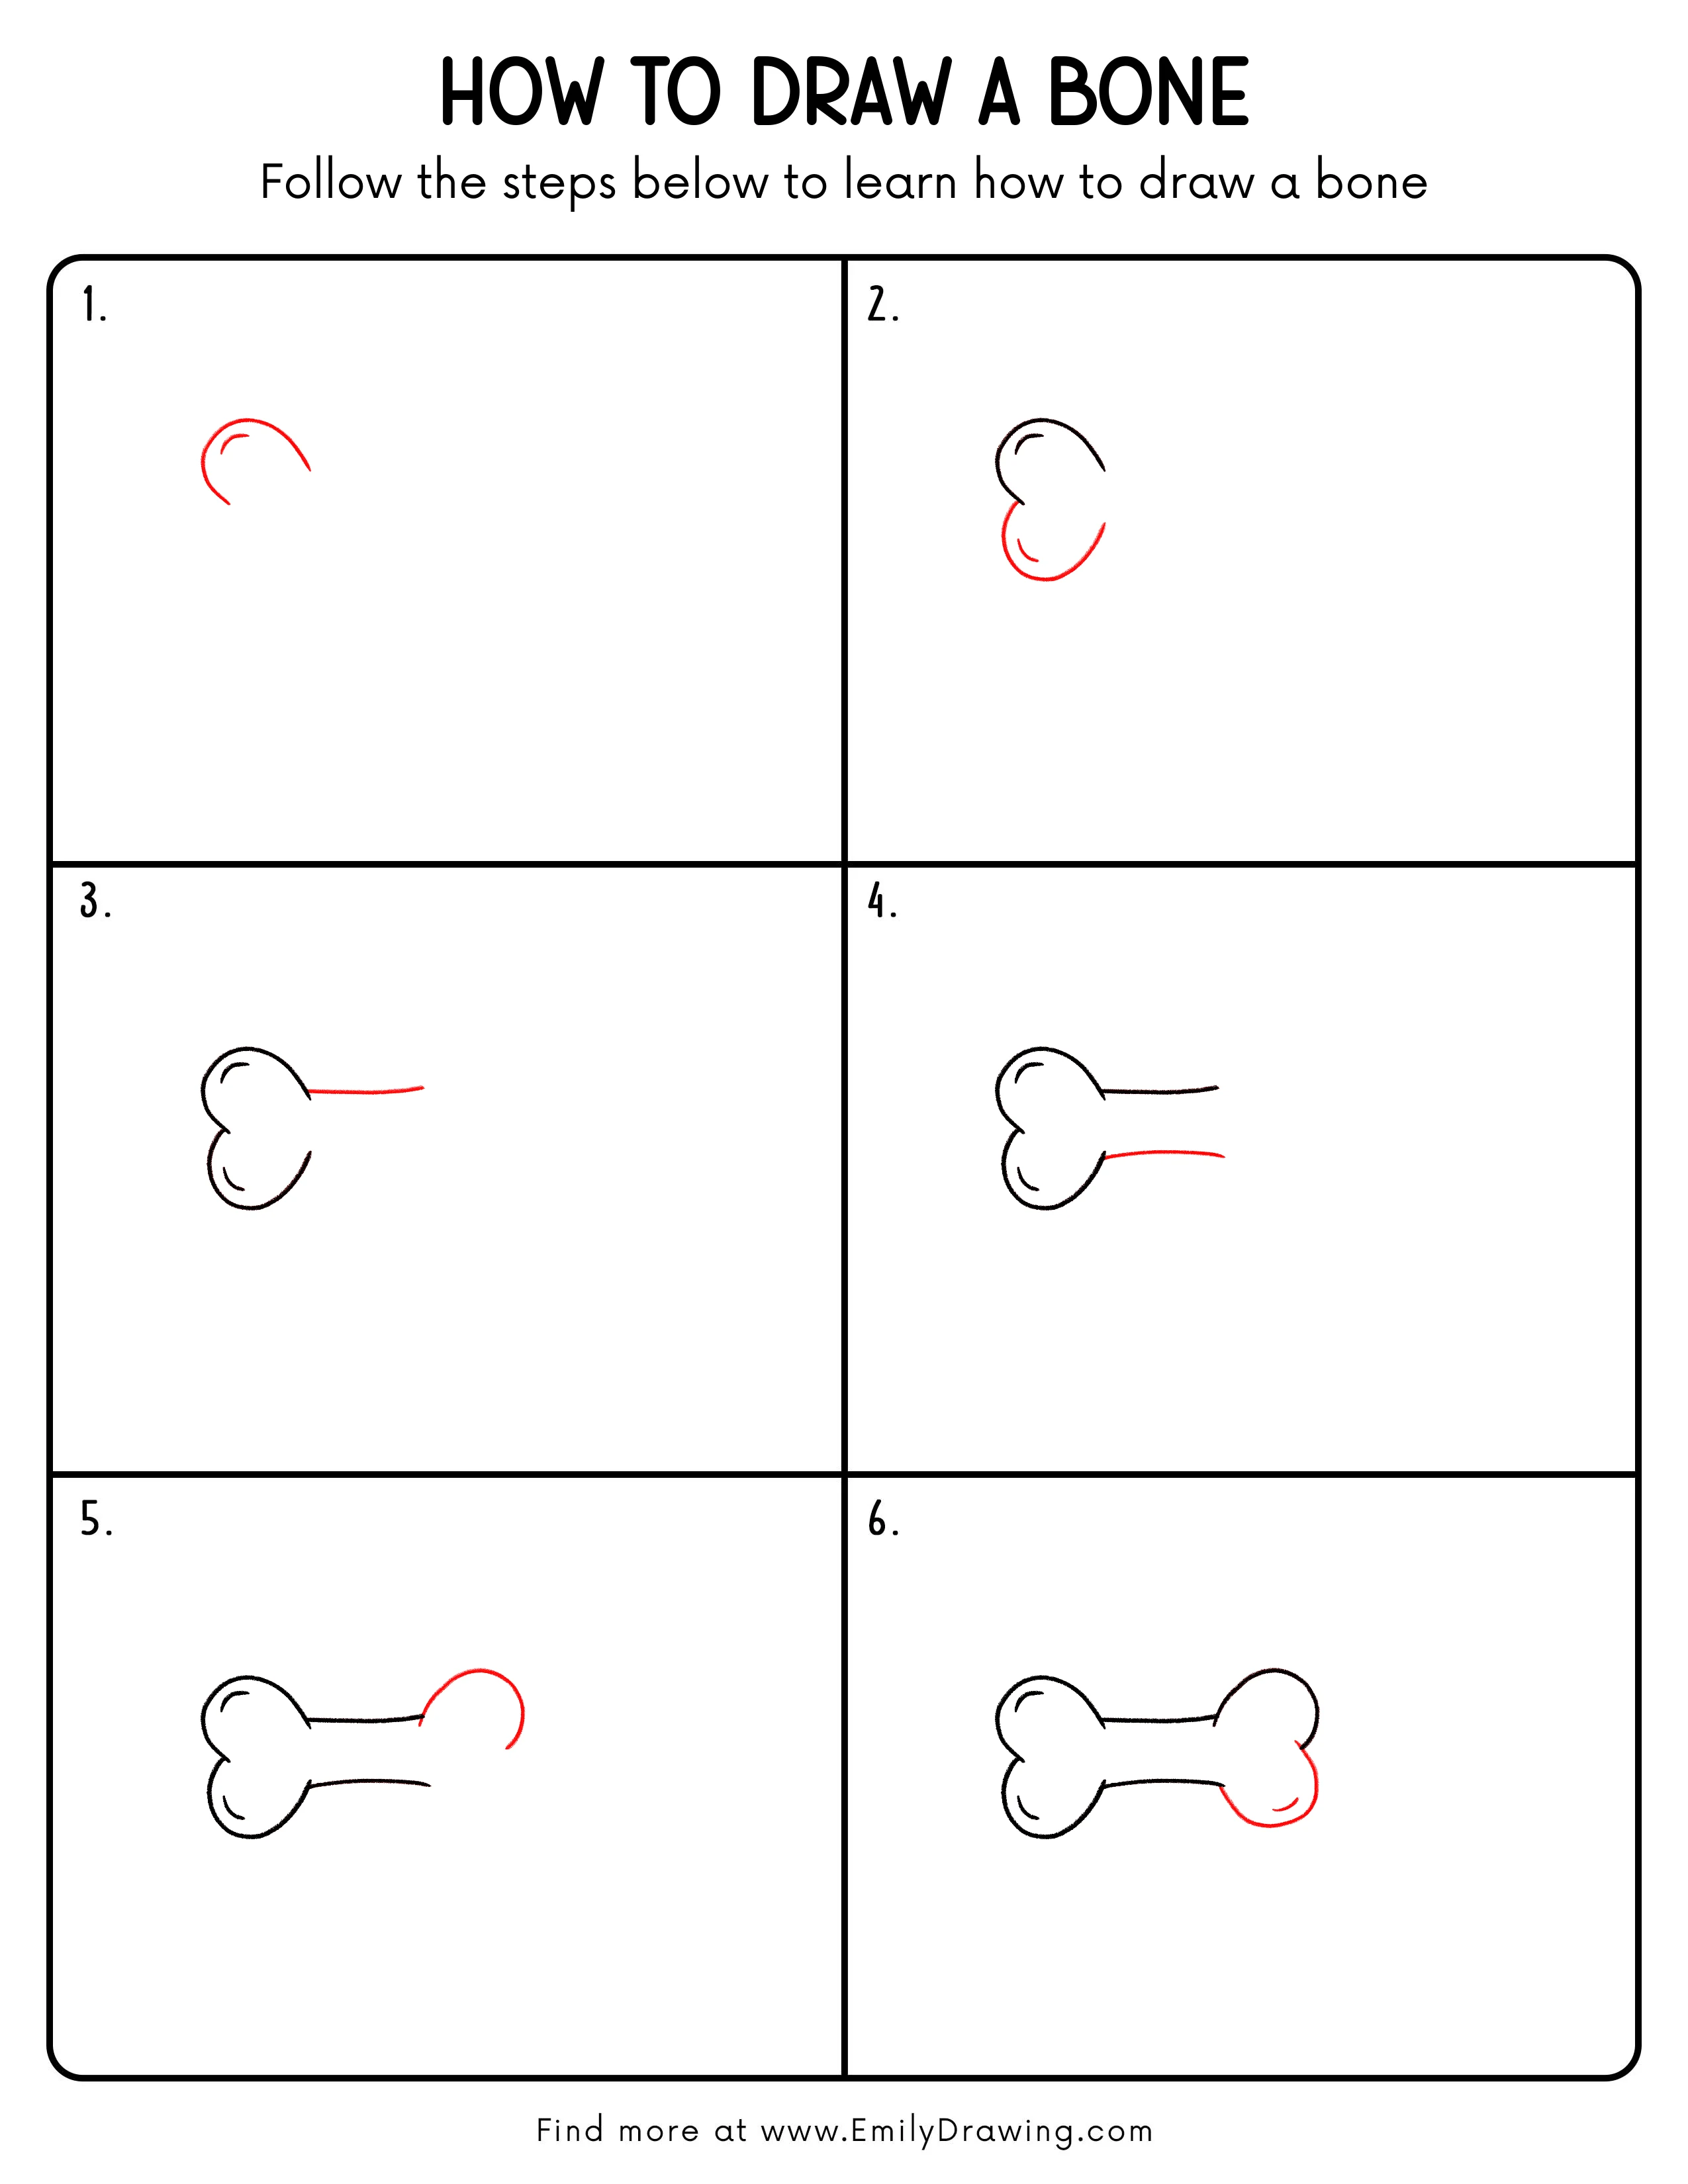
This easy drawing tutorial shows how to draw a bone step by step using smooth, simple curves. If you want a clean drawing for beginners, this is a calm place to practice rounded ends and even spacing. Follow each small change, and you will have a friendly cartoon bone.
What You Will Need
- Pencil
- Eraser
- Drawing paper
- Black pen or fineliner (optional)
- Colored pencils or markers (optional)
Here are my RECOMMENDED Art Supplies!
- Crayola Coloring Set (140 Pieces – Mega Value!)
- 24 Colored Crayon Set
- A4 Printer Paper
- Crayola Coloring Pencils
- HP Home Printer with Instant Ink!
Time needed:
16 minutes.
Step-by-Step Drawing Guide
Step 1: Start the Left Rounded End
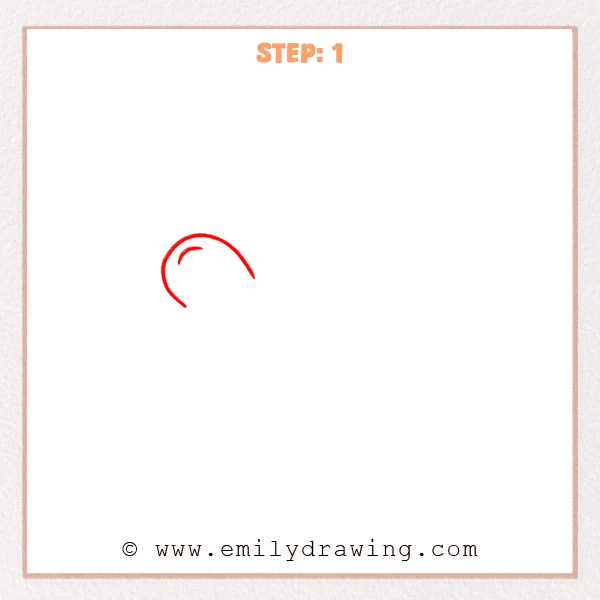
Draw a large curved arc on the left to begin one end of the bone. Add a short inner arc to suggest a highlight.
Pro Tip: Keep the outer curve smooth and round for a soft look.
Step 2: Complete the Left Bone Knob
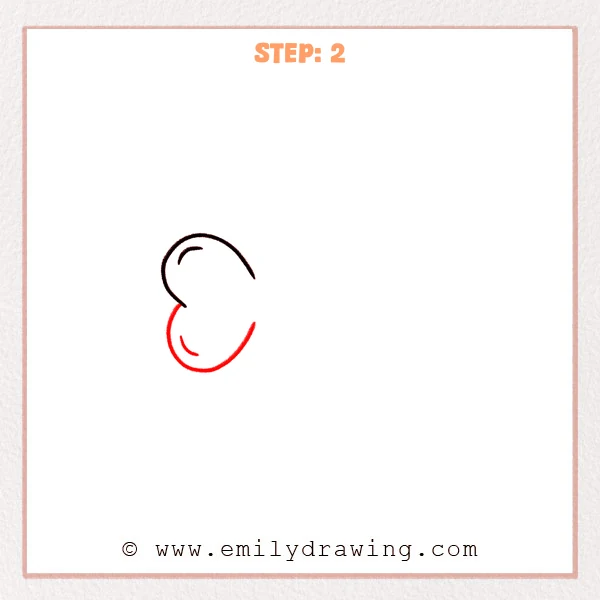
Add the lower curve to finish the plump left knob shape. Place a small curved mark near the bottom for extra dimension.
Pro Tip: Balance the top and bottom curves so the knob stays round.
Step 3: Draw the Top Bar of the Bone
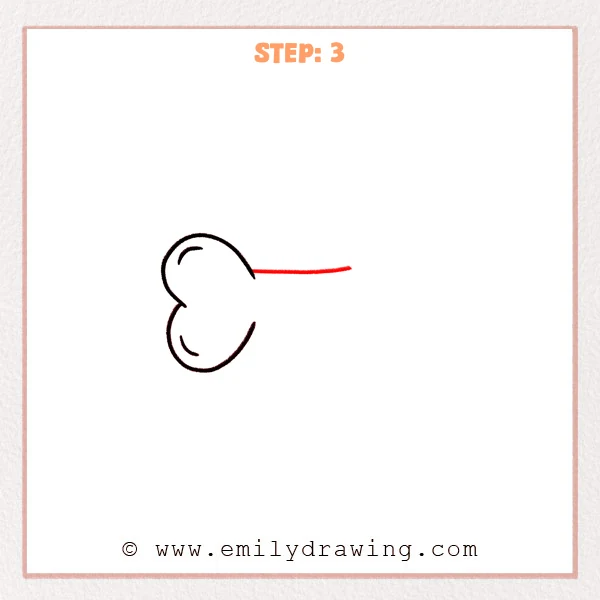
Draw a long, mostly straight line extending right from the left knob to form the top edge. A slight curve is fine and can look natural.
Pro Tip: Keep the line close to level so the bone looks stable.
Step 4: Add the Bottom Curve
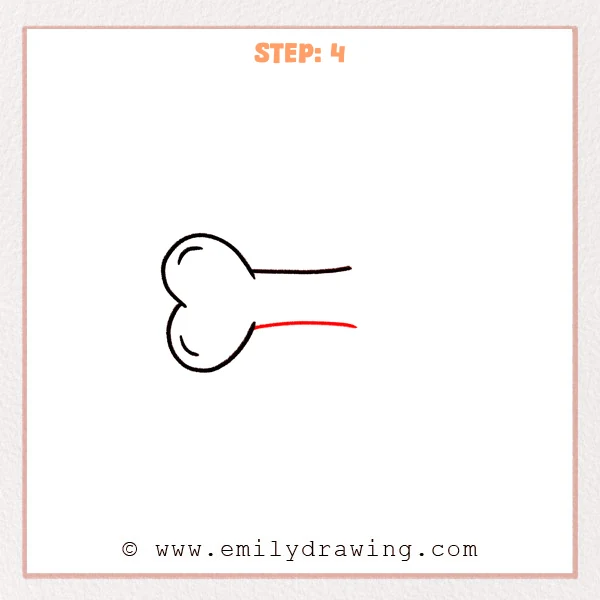
Draw a long curved line underneath to create the bone’s thickness. Let the middle bulge slightly so the shaft looks full.
Pro Tip: Keep the spacing between top and bottom edges consistent.
Step 5: Draw the Right Rounded End
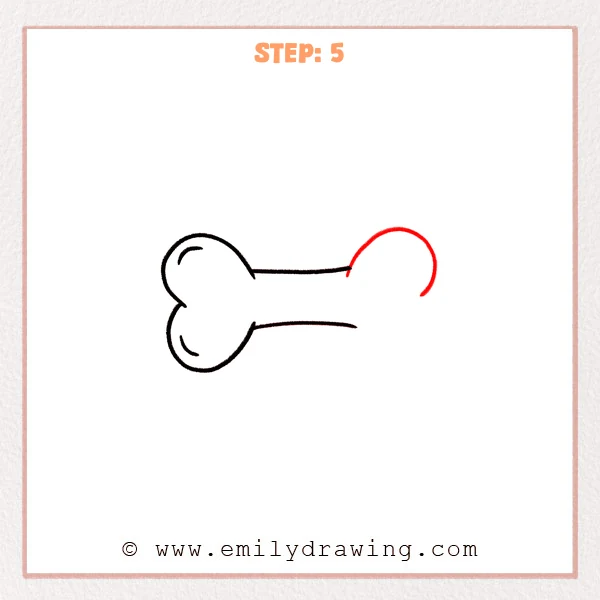
On the right, draw a second plump knob using large curved arcs. Finish the outer shape first, then compare it to the left side.
Pro Tip: A tiny size difference is okay, but keep them close.
Step 6: Complete the Right Rounded End
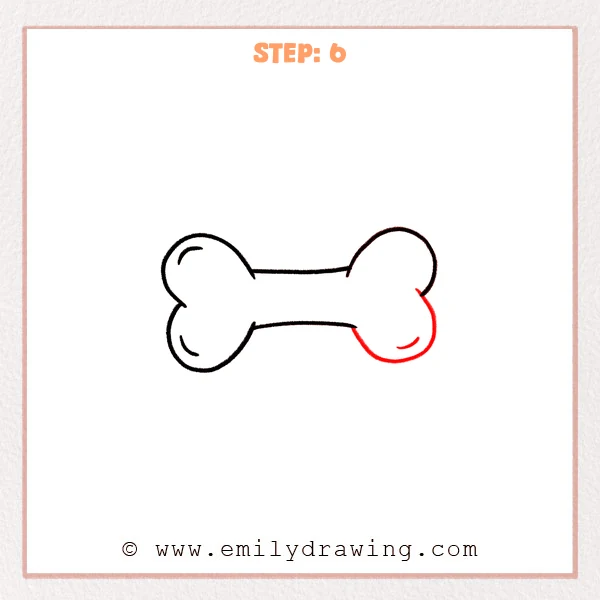
Close any small gaps on the right knob so it connects smoothly to the shaft. Add one or two short inner curves to suggest a rounded highlight on the end.
Pro Tip: Keep the right outline flowing so it stays soft and rounded.
Step 7: Color in your drawing!
Fun Facts
- Cartoon bones often use rounded ends to look friendly and simple.
- Small highlight marks can make flat shapes feel more 3D.
- Keeping both ends similar helps the bone look balanced.
Pin it now, Draw later!
You have finished your step by step drawing of a bone, starting with one rounded end and building across to the other side. For coloring, try light gray or beige, then add a slightly darker shade along the bottom edge to show form. Keep the highlight areas white so the bone looks smooth.
One common beginner mistake is making the two ends very different sizes. Compare left and right often, and adjust with small erases before you darken the outline.
Practice this easy drawing tutorial again by making a shorter bone, a longer bone, or thicker ends. Try another drawing for beginners lesson next and keep building steady line control.
Get the FREE Printable Drawing Guide
FREE Download Printable Bone Drawing Tutorial
Frequently Asked Questions
How do I make the bone ends match?
Draw the left end first, then copy its width and curve on the right.
What if my bone looks too thin?
Increase the space between the top and bottom lines in the middle section.
How can I add more depth?
Shade lightly under the top edge and along the lower curve, then blend gently.