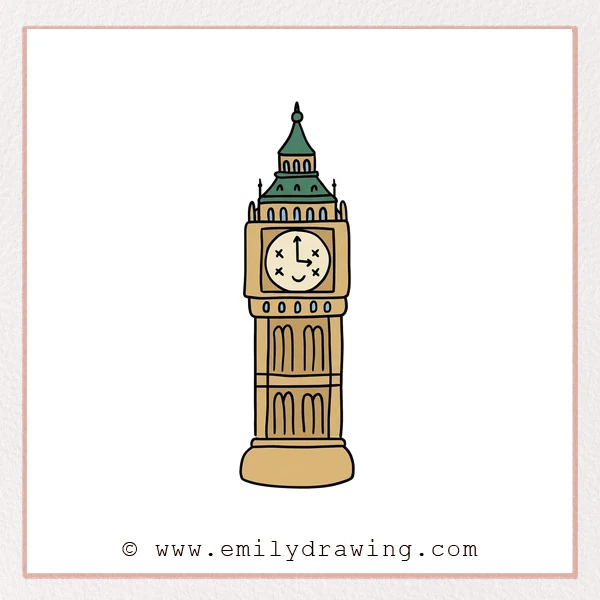
This easy drawing tutorial shows how to draw Big Ben step by step using simple shapes. You will build the tower from the spire down to the base with calm, steady lines. It is a friendly drawing for beginners that focuses on clean structure and small details.
What You Will Need
- Pencil
- Eraser
- Drawing paper
- Black pen or fineliner (optional)
- Colored pencils or markers (optional)
Here are my RECOMMENDED Art Supplies!
- Crayola Coloring Set (140 Pieces – Mega Value!)
- 24 Colored Crayon Set
- A4 Printer Paper
- Crayola Coloring Pencils
- HP Home Printer with Instant Ink!
Time needed:
21 minutes.
Step-by-Step Drawing Guide
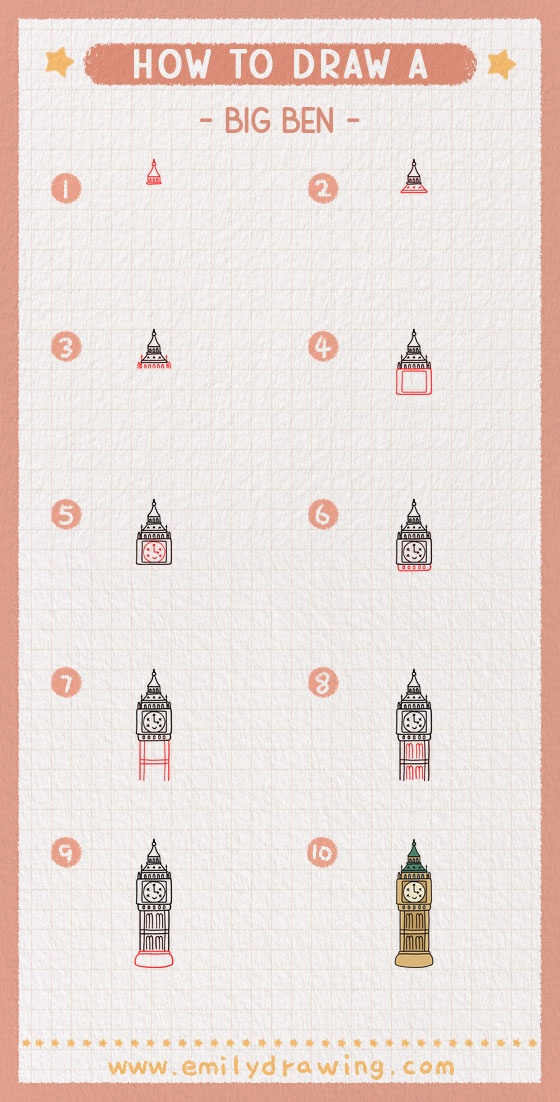
Step 1: Draw the Small Spire
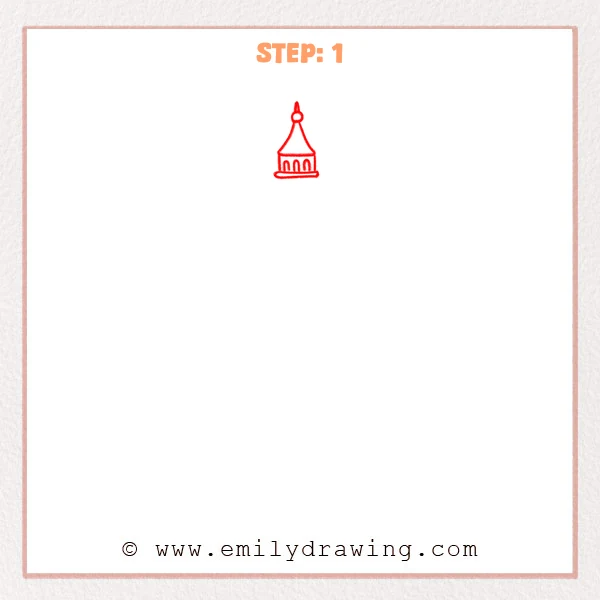
Start with a tall pointed roof and add a small circle at the tip. Under it, sketch a small tower section using simple straight sides.
Pro Tip: Keep the spire centered so the whole tower feels balanced.
Step 2: Add the Upper Roof Layer
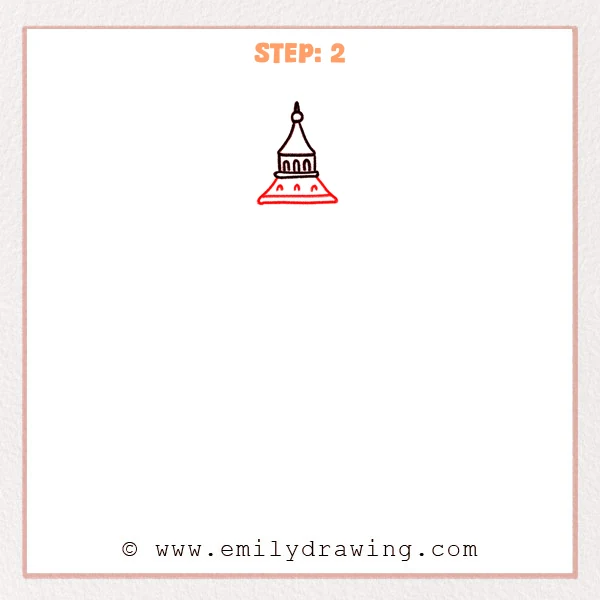
Draw a wider trapezoid roof under the small tower, with a broader bottom edge. Add an inner line along the rim to show the roof’s thickness.
Pro Tip: Match both side angles so the roof does not tilt.
Step 3: Add Roof Details and Small Ornaments
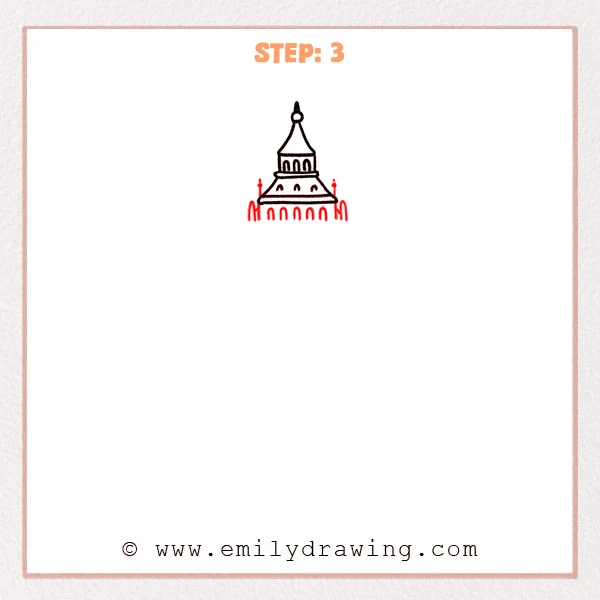
Add a row of small arch windows on the upper tower using repeated “U” shapes. Place tiny side spires and short accents on the roof edges for character.
Pro Tip: Leave even spacing between arches for a tidy look.
Step 4: Draw the Main Tower Block
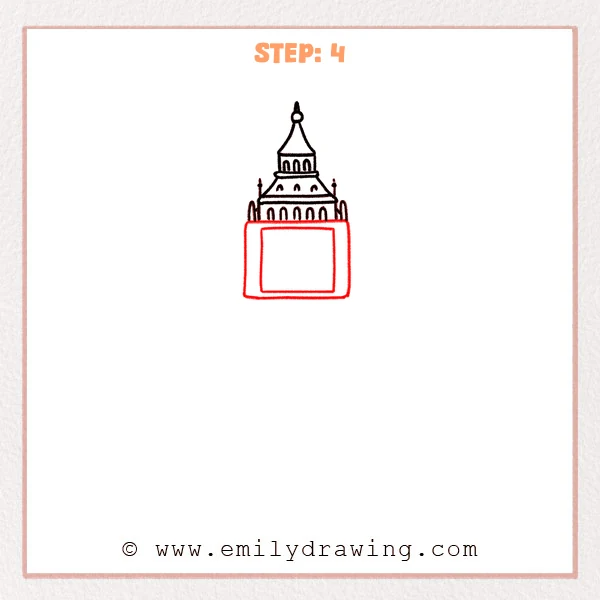
Draw a large rectangle under the roof to form the tower front. Inside it, add a smaller rectangle to create the inner frame for the clock area.
Pro Tip: Sketch lightly first to keep the corners square and clean.
Step 5: Draw the Clock Face and Hands
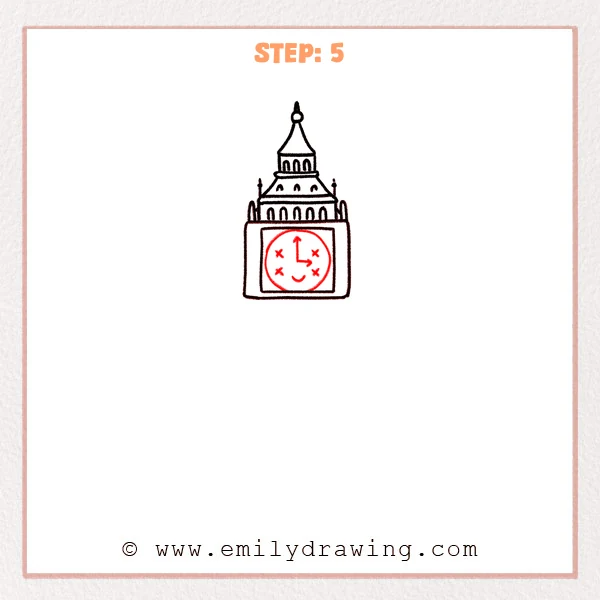
Inside the inner frame, draw a large circle for the clock face, close to the edges but not touching. Add two hands with simple lines and a small arrow tip.
Pro Tip: Use a light cross guideline to place the circle evenly.
Step 6: Connect the Main Body and Upper Tower
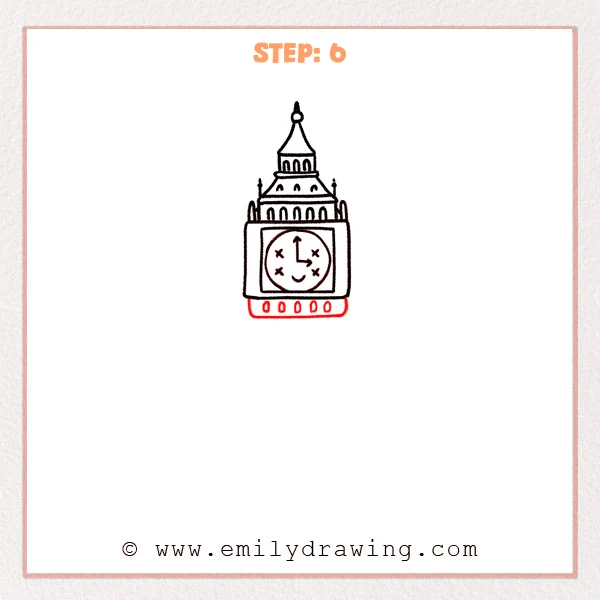
Add a slim horizontal ledge line above the clock block to connect the main body to the upper tower. Place a row of small arches or short vertical marks on the ledge so the roof section sits naturally on top.
Pro Tip: Extend the ledge equally on both sides to keep it centered.
Step 7: Extend the Tall Tower Columns
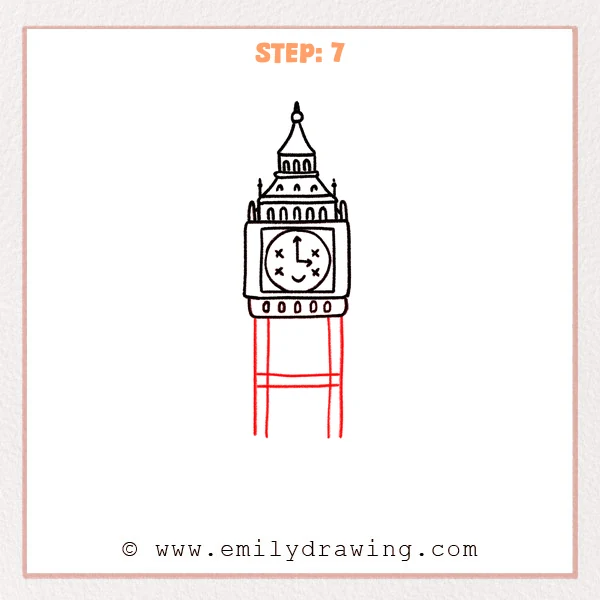
Draw long vertical lines downward from the main block to extend the tower body. Add two horizontal bands to suggest floor divisions.
Pro Tip: Keep the vertical lines parallel so the tower stands straight.
Step 8: Add Tall Arch Window Patterns
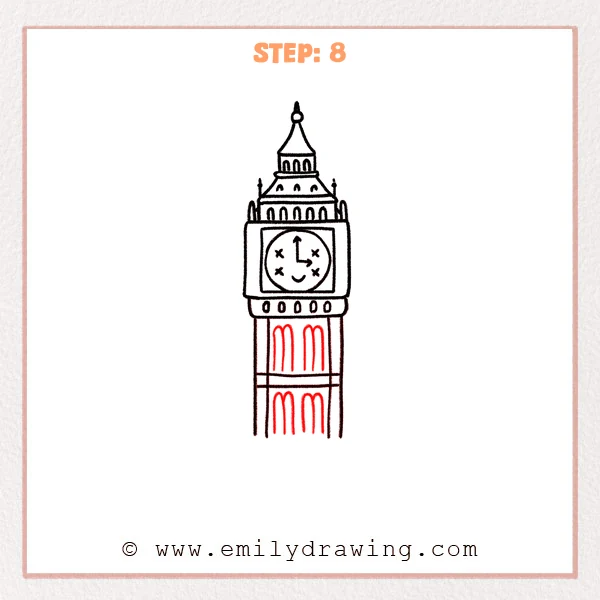
Fill the tower sections with rows of tall arch windows using narrow “U” shapes. Align the arches in each section to keep the architecture orderly.
Pro Tip: Start with a center arch, then add matching arches on both sides.
Step 9: Draw the Base and Finalize Lines
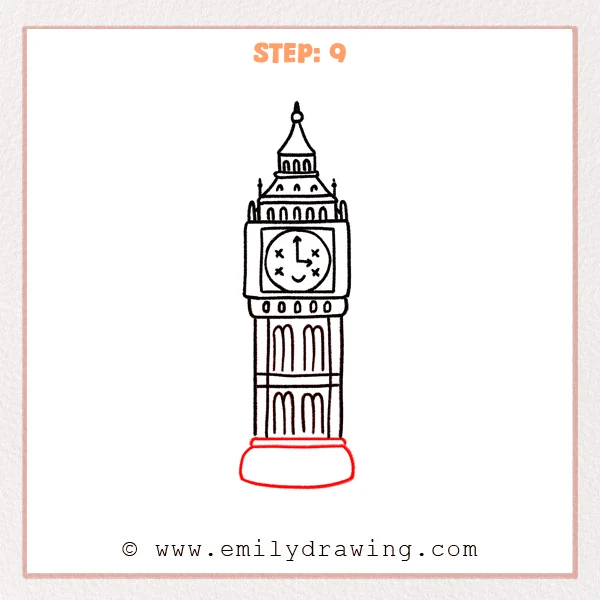
Add a rounded base at the bottom using a wide curved shape to show a sturdy platform. Clean up the outline and erase extra sketch lines for a crisp finish.
Pro Tip: Make the base slightly wider than the tower for stability.
Step 10: Color in your drawing!
Fun Facts
- Big Ben is often used to refer to the famous clock, though the tower is a landmark too.
- Tall towers look more realistic when the sides stay parallel.
- Repeating window arches is a simple way to suggest grand architecture.
Pin it now, Draw later!
You have drawn Big Ben by building the spire, roof layers, clock face, and tall tower body. For coloring, try warm gray or light tan for the stone, then use a darker gray to shade under roof ledges and inside the window arches. Add gentle shading on one side of the tower to show a light direction, and keep the opposite edge lighter for contrast.
One common beginner mistake is letting the tower sides drift inward or outward as you go down. Check the left and right edges often and keep them parallel.
Practice this step by step drawing again with a different clock hand position or extra window rows. When you feel ready, try another easy drawing tutorial and keep growing your drawing for beginners skills.
Get the FREE Printable Drawing Guide

FREE Download Printable Big Ben Drawing Tutorial
Frequently Asked Questions
How can I make my Big Ben look straighter?
Draw a light center line first, then keep both sides parallel to it.
What if my clock circle does not fit in the frame?
Erase lightly and redraw the circle a little smaller, leaving a clear border.
How do I add depth without making it messy?
Shade only under ledges and inside a few window arches, then stop.