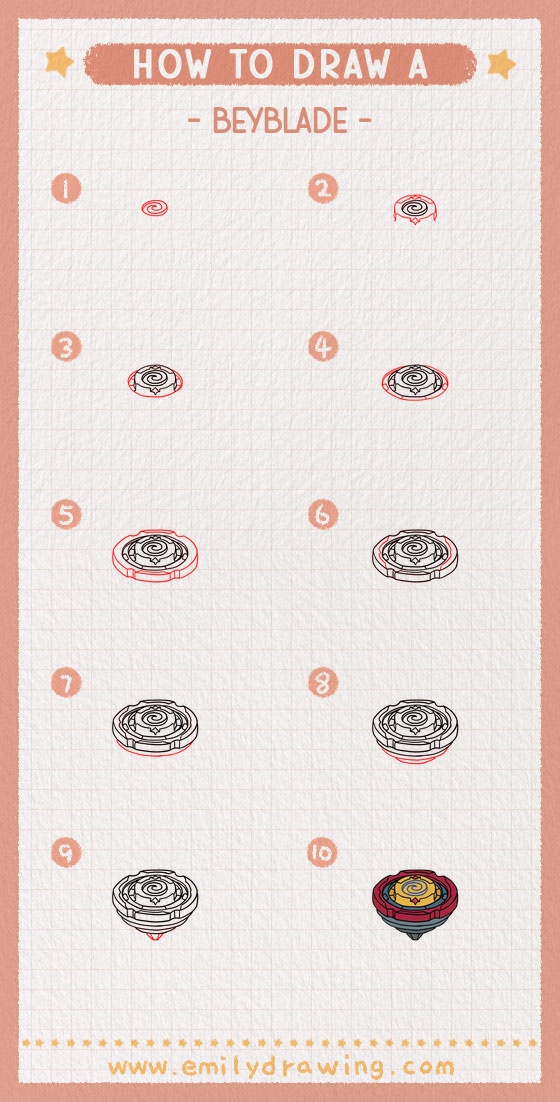
This easy drawing tutorial shows how to draw a Beyblade step by step with clean, simple shapes. You will build the design from the center spiral to the outer armor and the bottom tip. Take your time with the ovals, and your drawing for beginners will look solid and balanced.

What You Will Need
- Drawing paper
- Pencil
- Eraser
- Black pen or fineliner (optional)
- Colored pencils or markers (optional)
Here are my RECOMMENDED Art Supplies!
- Crayola Coloring Set (140 Pieces – Mega Value!)
- 24 Colored Crayon Set
- A4 Printer Paper
- Crayola Coloring Pencils
- HP Home Printer with Instant Ink!
Time needed:
22 minutes.
Step-by-Step Drawing Guide
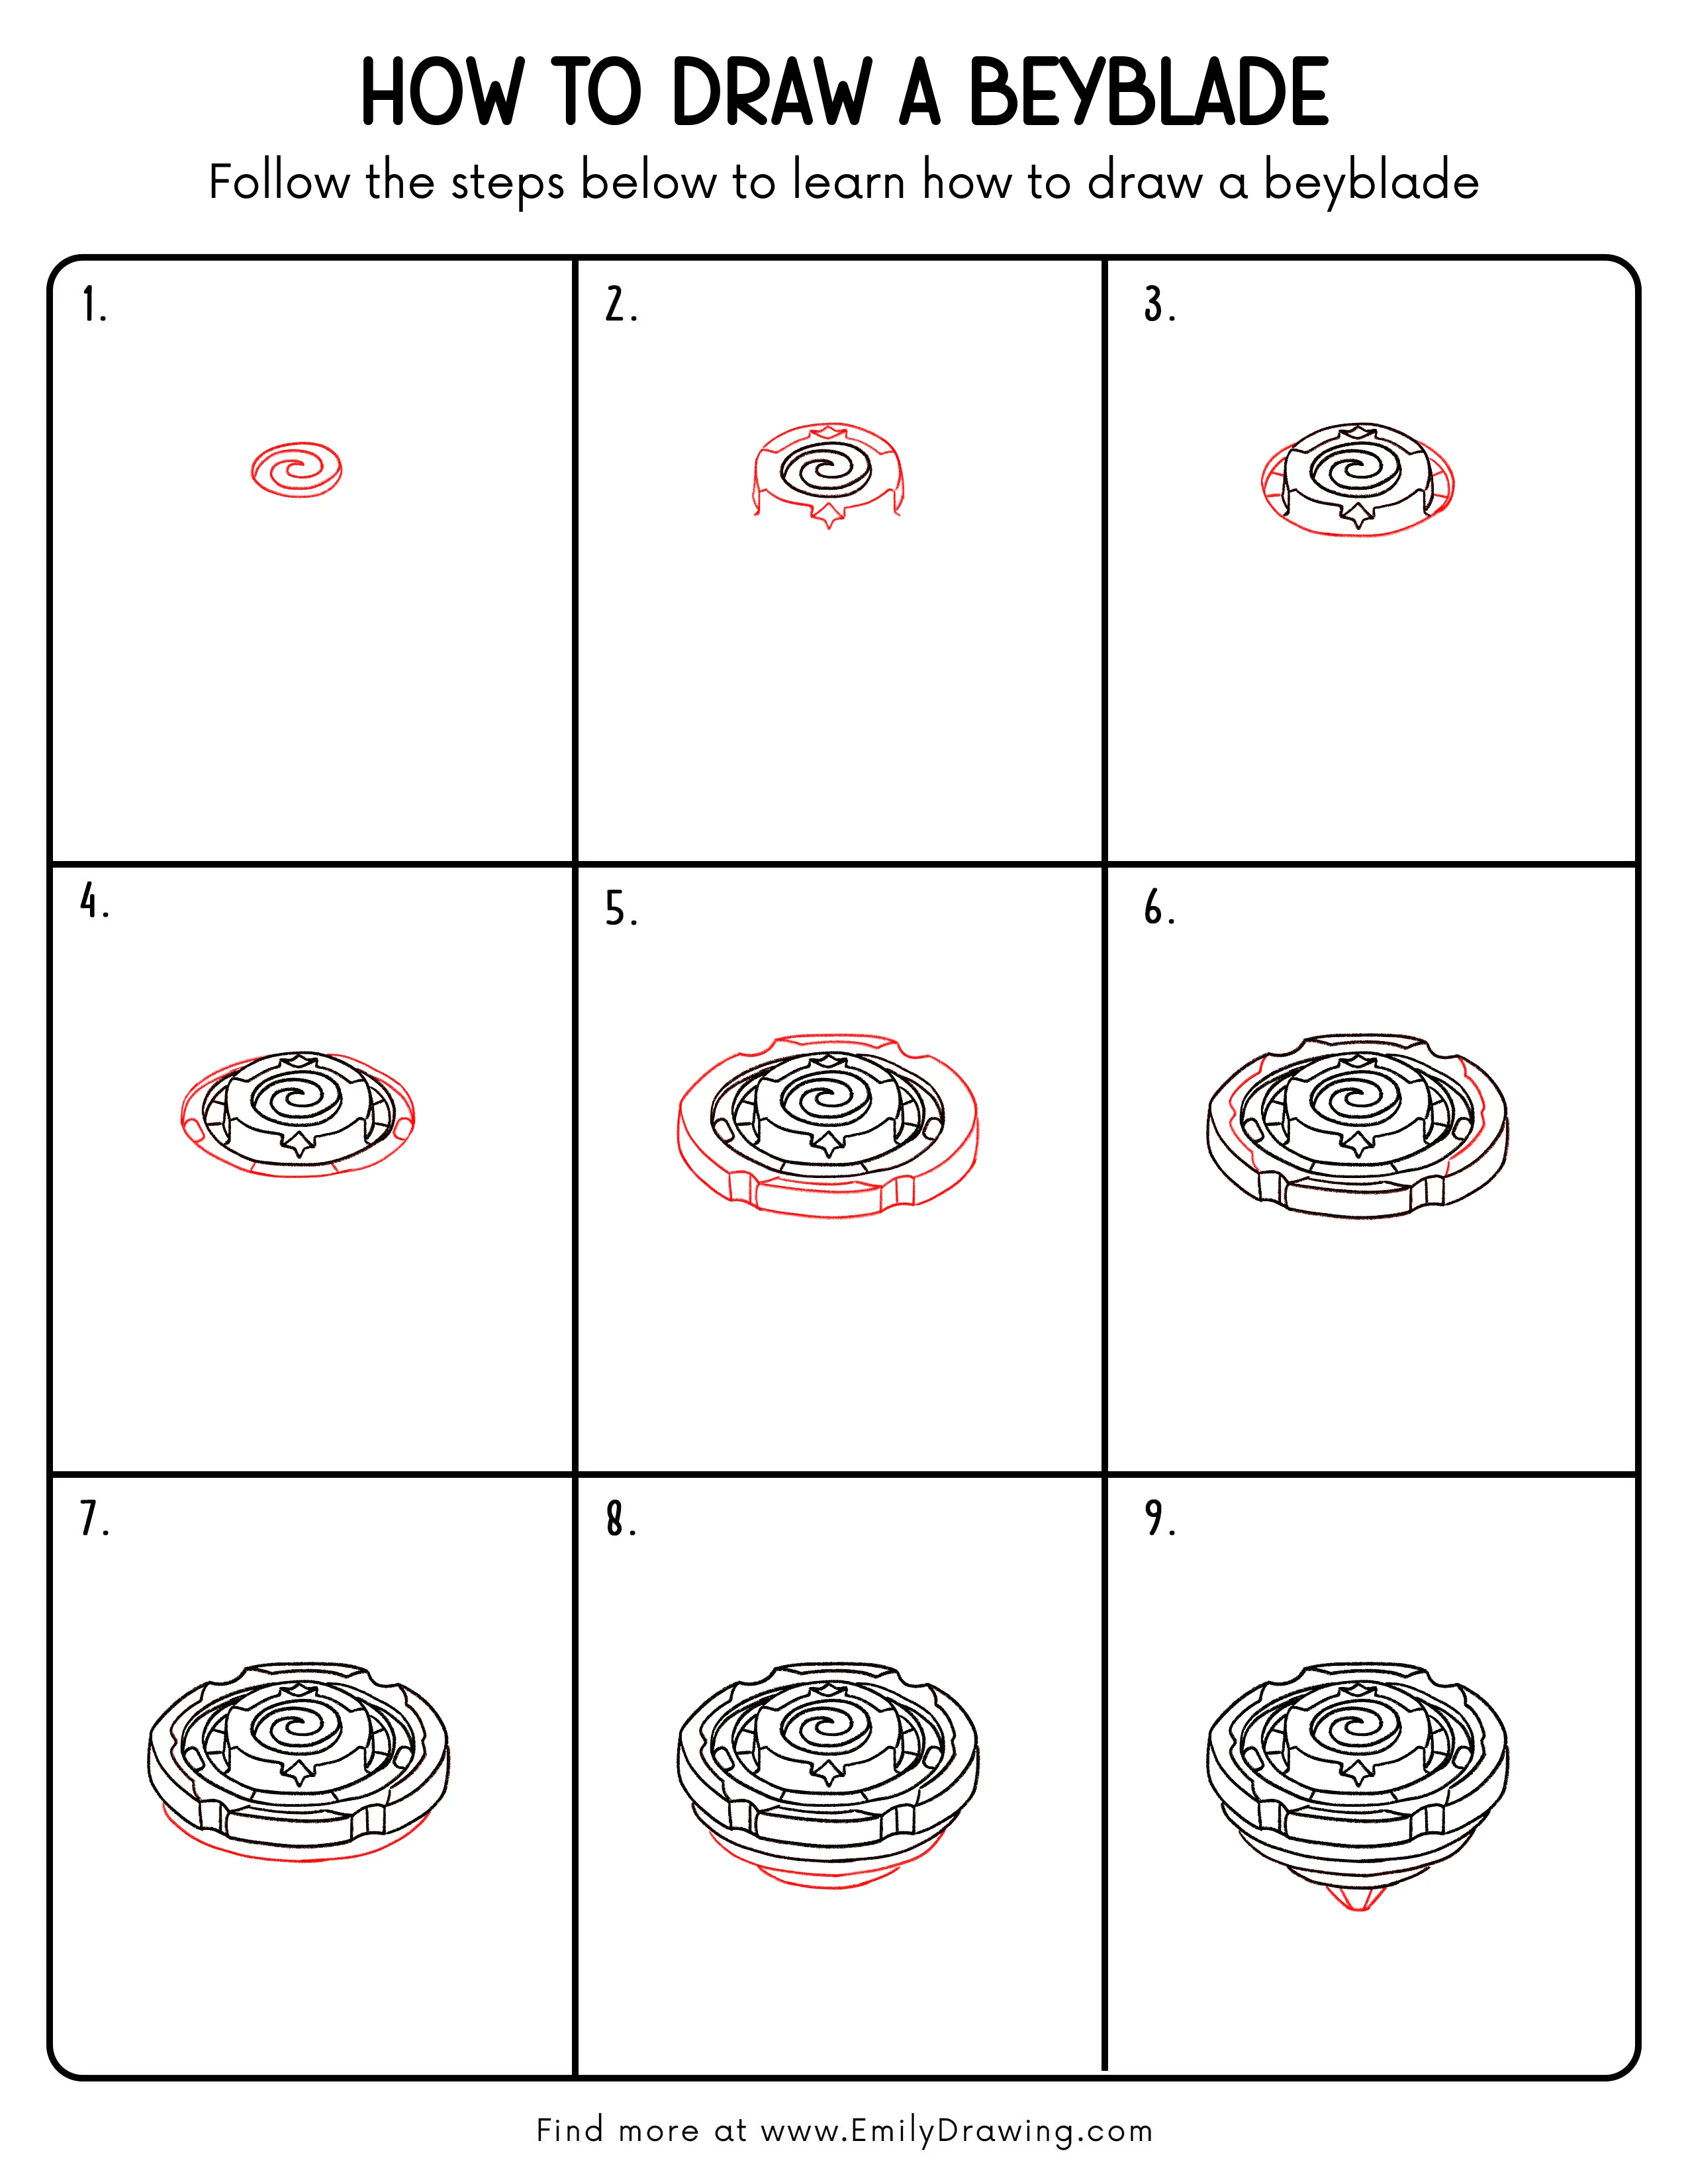
Step 1: Draw the Center Spiral
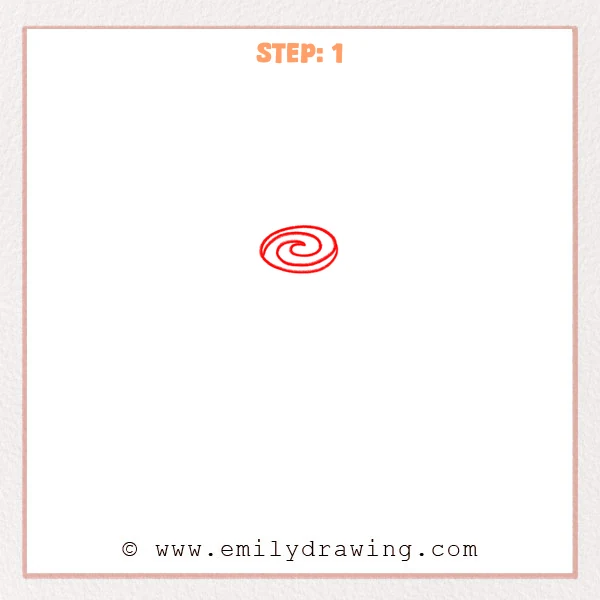
Start with a small oval near the upper middle for the Beyblade’s center. Inside it, draw a clockwise spiral that narrows toward the middle.
Pro Tip: Let the spiral gaps shrink as they go inward for motion.
Step 2: Build the Center Disc Height
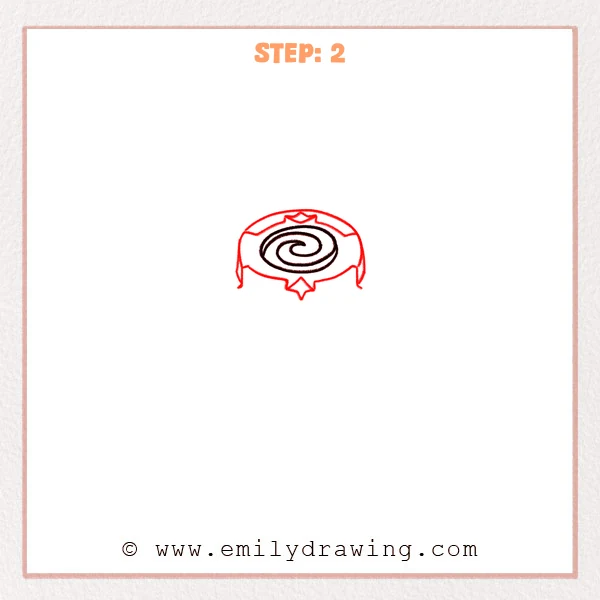
Draw a larger oval around the spiral to form the top disc edge. Drop a few short curved side lines to make the disc look thick.
Pro Tip: Keep the ovals centered so the thickness stays even.
Step 3: Outline the Mid-Ring Shape
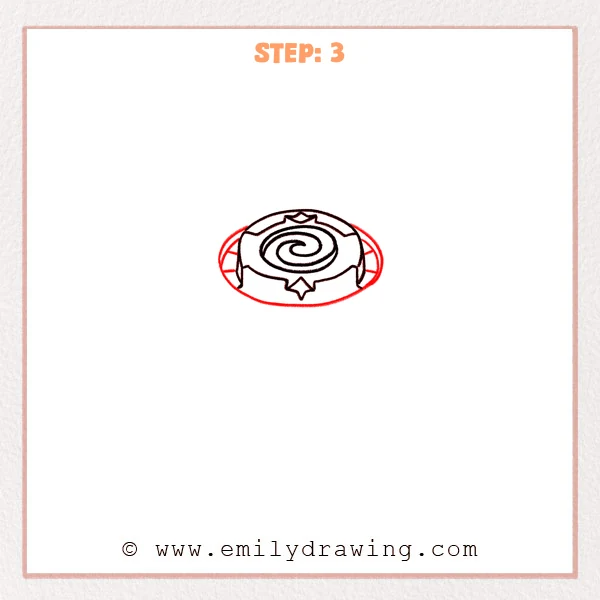
Add a wider, flatter oval around the disc for the mid ring. Stretch the left and right ends slightly to show perspective.
Pro Tip: A flatter oval reads as a more tilted viewing angle.
Step 4: Add Inner Ring Segments and a Marker
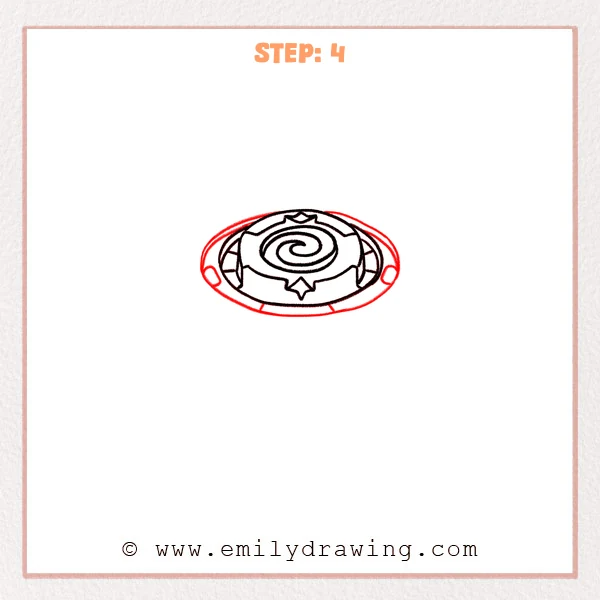
Draw an inner edge line to turn the oval into a ring. Add a few small block segments around it, and place a small star marker at the front.
Pro Tip: Keep the segments similar in size for a clean ring.
Step 5: Draw the Outer Armor Bumps
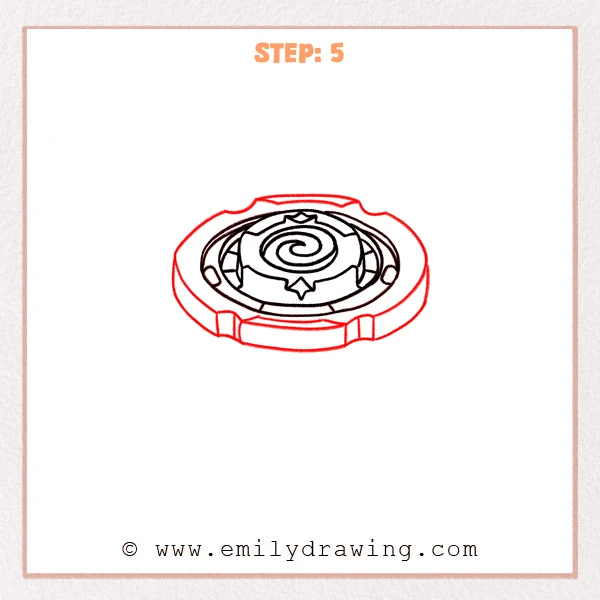
Add a thicker outer ring and sketch raised armor blocks at key points around it. Use straight edges with rounded corners to keep them strong but smooth.
Pro Tip: Place front, back, left, and right first, then fill the rest.
Step 6: Detail the Outer Armor
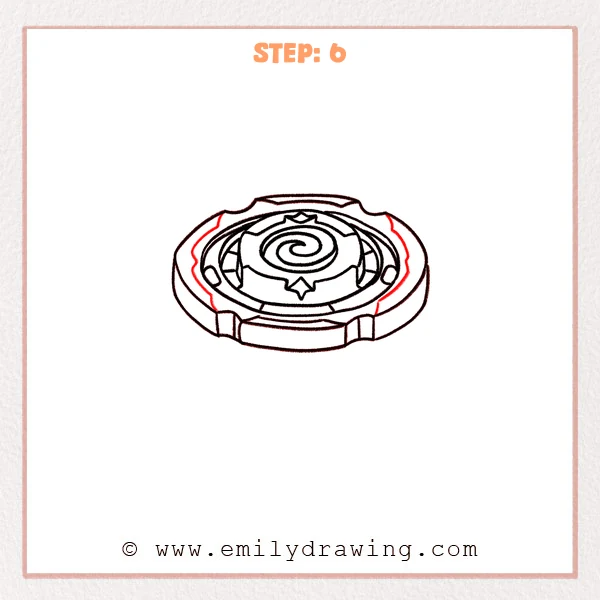
Add inner edge lines on each armor block to show layered surfaces. Then place a few small ovals or inset slots as accents to make the ring feel mechanical.
Pro Tip: Mirror details left and right, and keep the count modest.
Step 7: Add Outer Ring Thickness and Sides

Draw a parallel arc under the outer ring to show the rim’s thickness. Add short vertical edges under several armor blocks to make them pop forward.
Pro Tip: Make the front thickness stronger and the back slightly lighter.
Step 8: Draw the Bowl-Like Underside
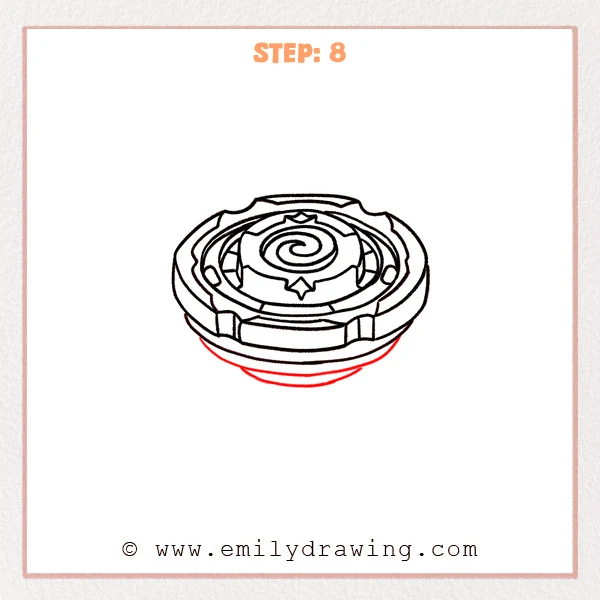
Add a smaller oval beneath the rim and connect it with curved sides to form a bowl shape. Keep this lower edge tucked inward so it feels recessed.
Pro Tip: Match the left and right curves so the form stays round.
Step 9: Add the Tip and Base Details
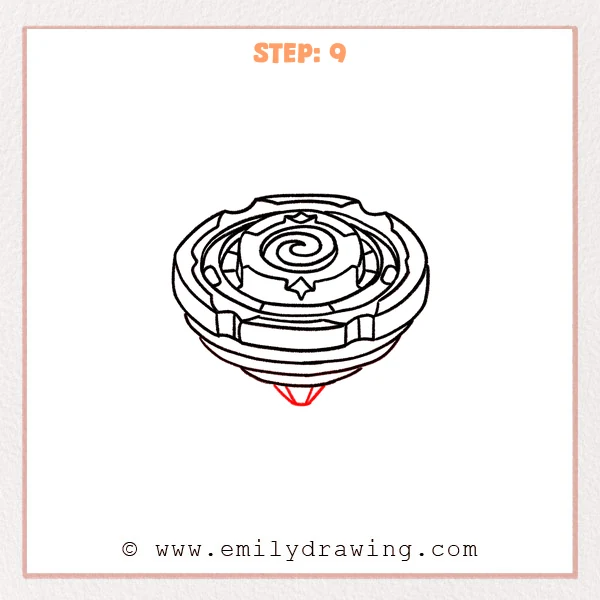
Draw a small tip at the bottom using a diamond or inverted triangle shape. Add a short curved base ring above it to show how the tip attaches.
Pro Tip: Center the tip on the vertical axis so it looks stable.
Step 10: Color in your drawing!
Fun Facts
- Beyblades are designed with layers that lock together and spin smoothly.
- A spiral symbol often helps a design feel fast and energetic.
- Strong ovals and clean symmetry make spinning tops look realistic.
Pin it now, Draw later!
You have now learned how to draw a Beyblade step by step, starting from the center spiral and building outward. For shading, darken the underside bowl and the inner edges under the armor blocks. Leave a few small white highlights on the top ring to make it look shiny.
One common beginner mistake is making the ovals uneven, which can tilt the whole top. Lightly sketch your ovals first, then trace them more neatly once they look balanced.
Keep practicing this easy drawing tutorial by changing the armor shapes or adding new symbols in the center. Try another drawing for beginners lesson next and keep building your line confidence.
Get the FREE Printable Drawing Guide
FREE Download Printable Beyblade Drawing Tutorial
Frequently Asked Questions
How do I keep the Beyblade looking symmetrical?
Draw a light center line and match left and right shapes across it.
Why does my Beyblade look flat?
Add more thickness lines under the rim and shade the underside bowl gently.
How can I make the spiral look smoother?
Draw it lightly first in one flowing motion, then trace it with a cleaner line.