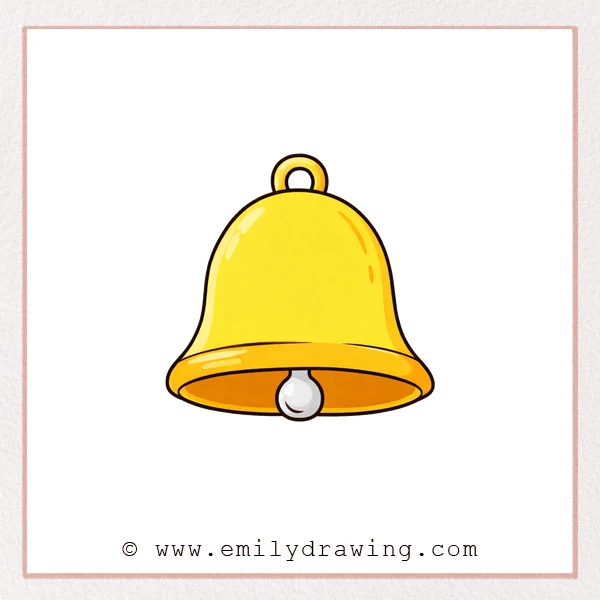
This easy drawing tutorial shows how to draw a bell step by step.
We will build it with smooth curves and simple shapes.
It is a calm drawing for beginners and a nice warm-up sketch.
What You Will Need
- Pencil
- Eraser
- Black pen or marker (optional)
- Paper
- Colored pencils or crayons (optional)
Here are my RECOMMENDED Art Supplies!
- Crayola Coloring Set (140 Pieces – Mega Value!)
- 24 Colored Crayon Set
- A4 Printer Paper
- Crayola Coloring Pencils
- HP Home Printer with Instant Ink!
Time needed:
18 minutes.
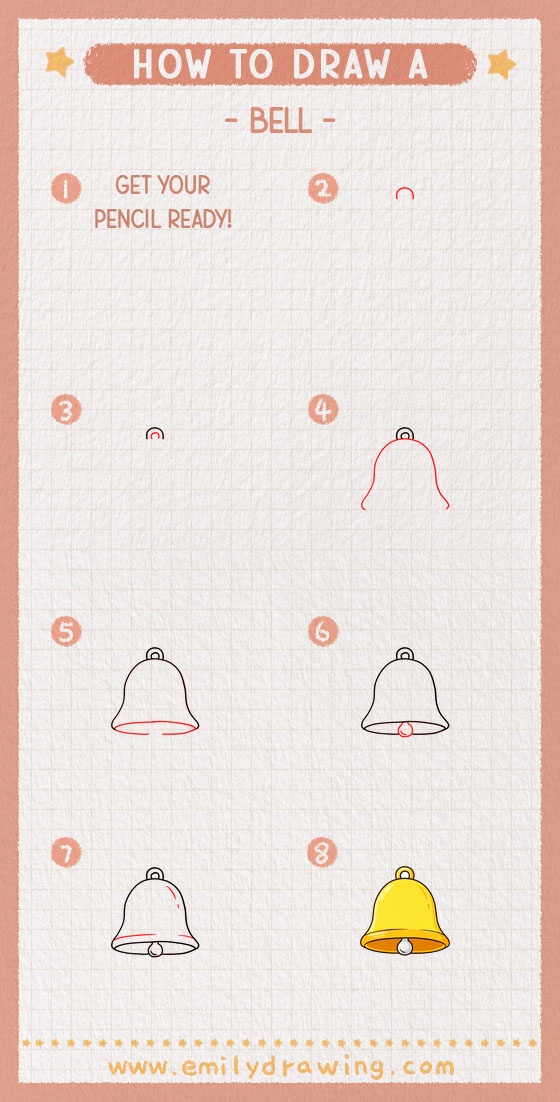
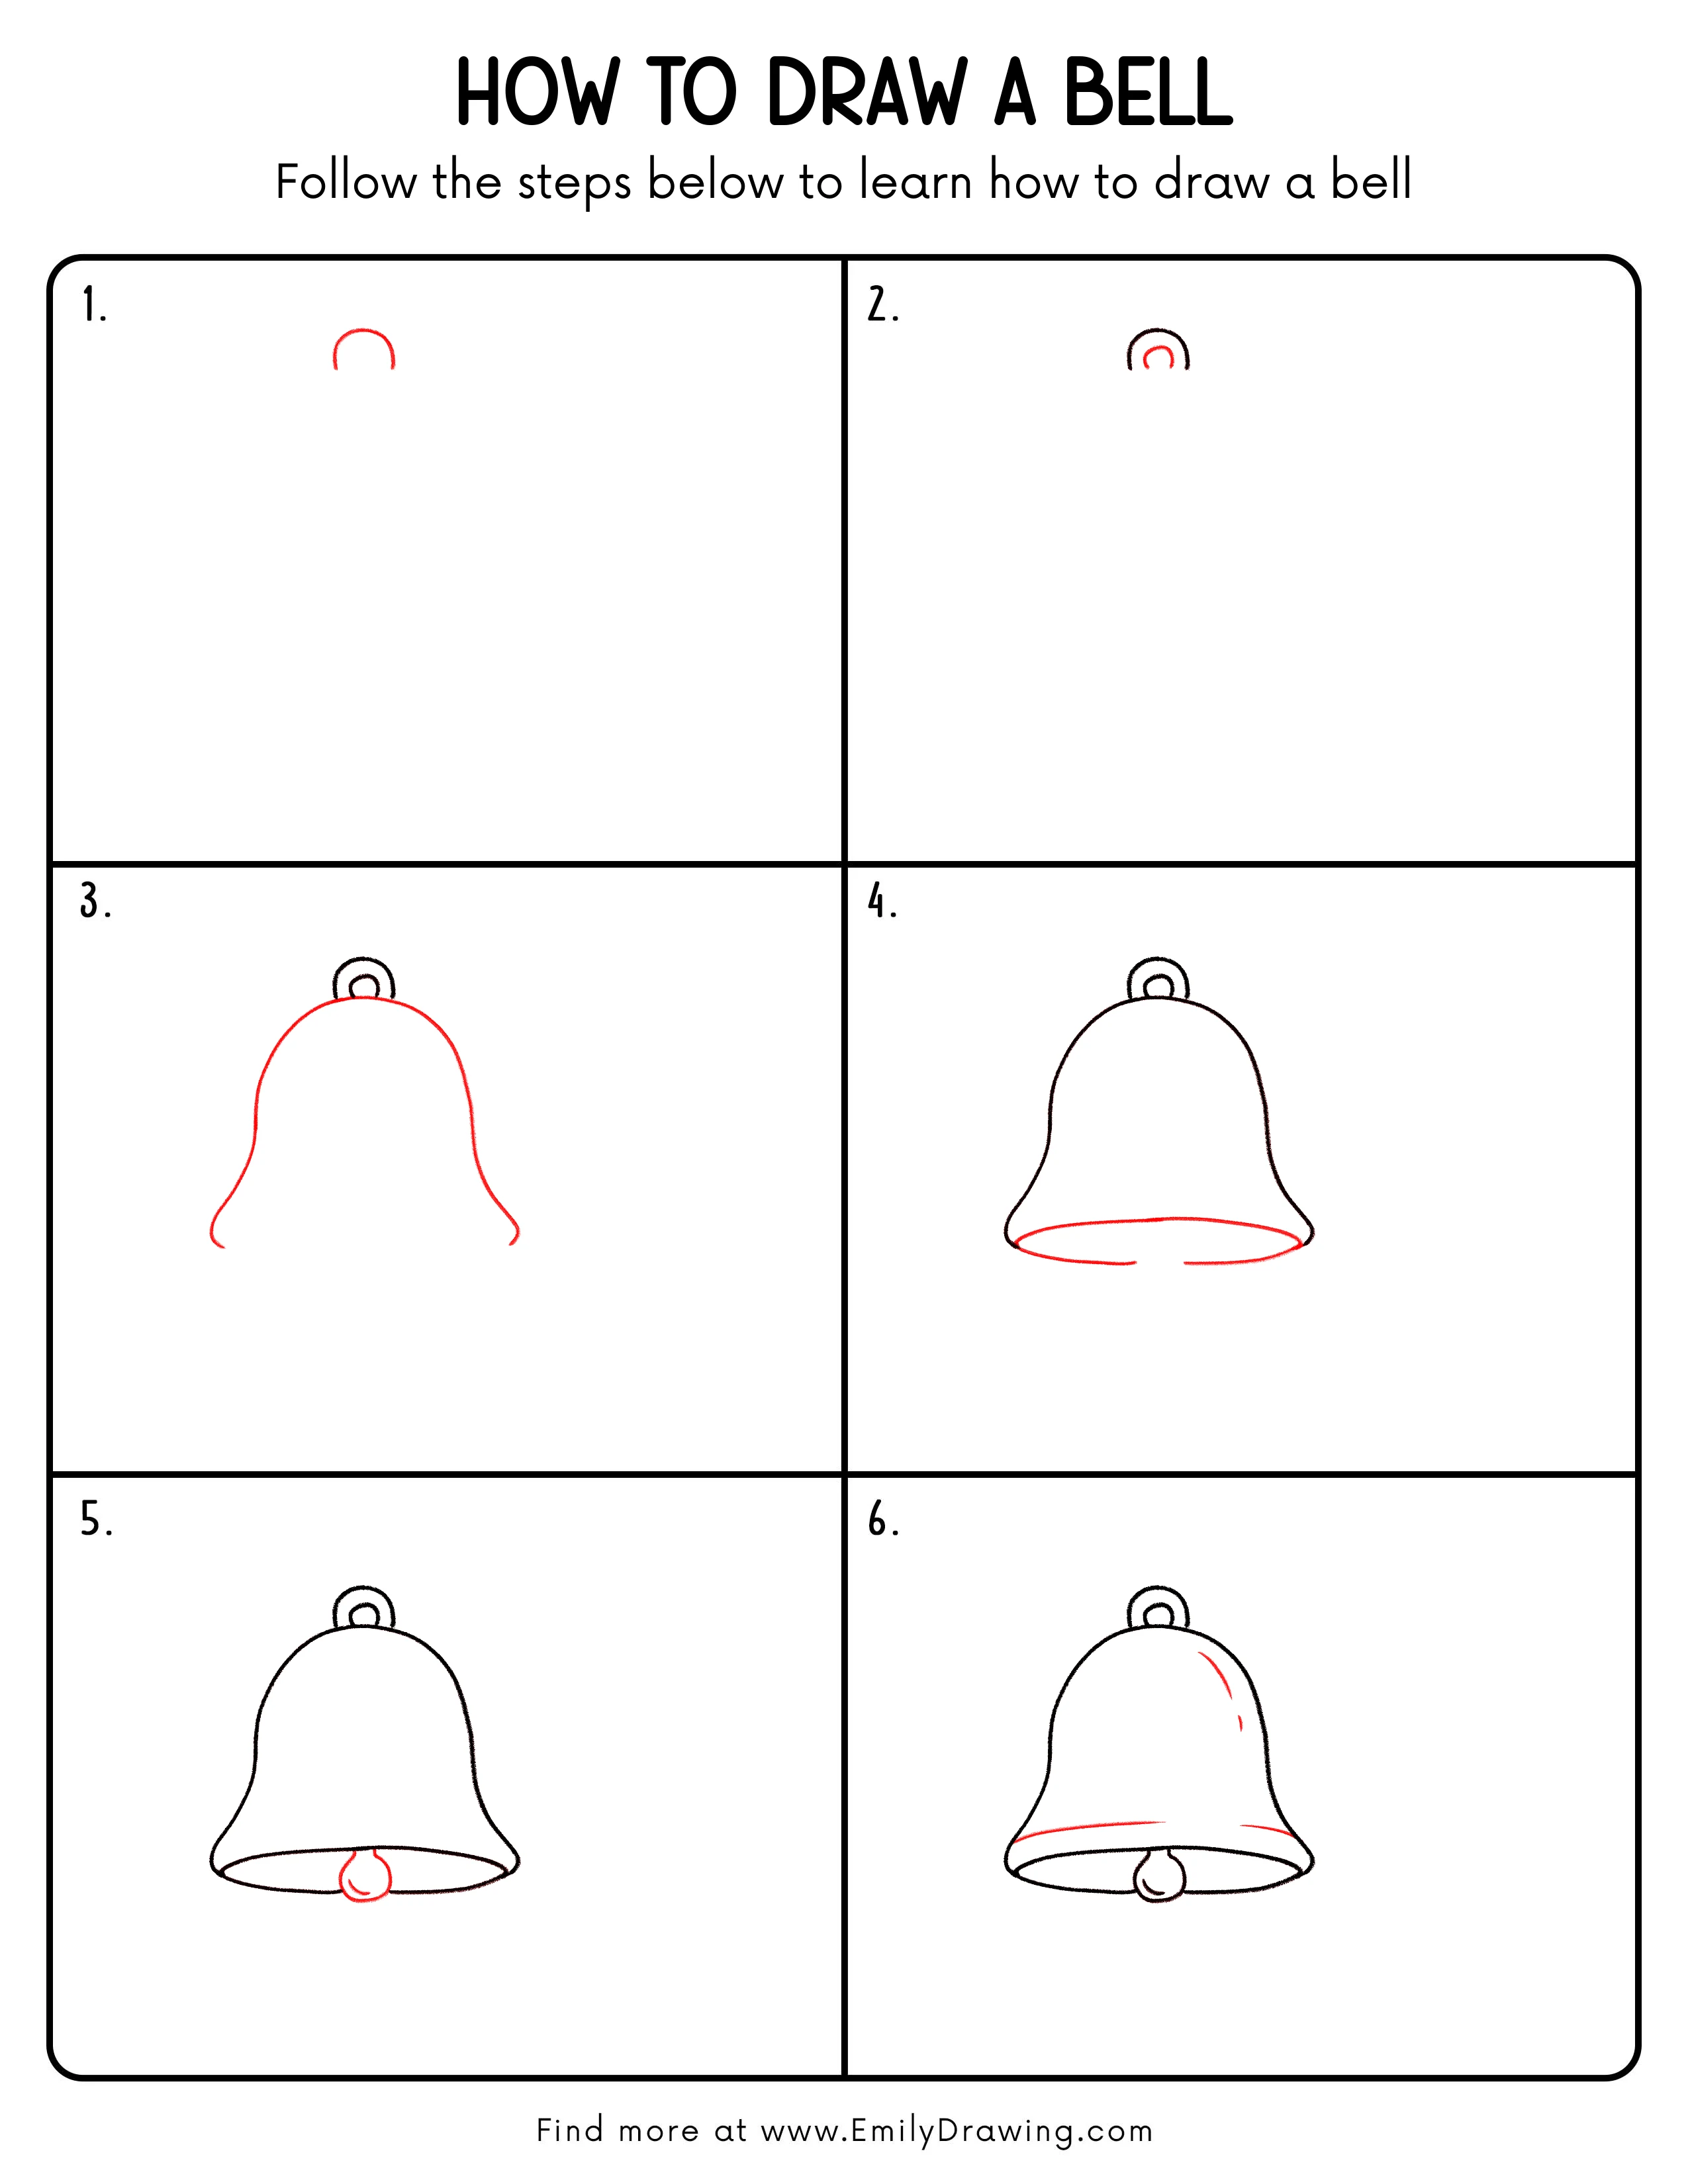
Step-by-Step Drawing Guide
Step 1: Draw the Outer Top Loop
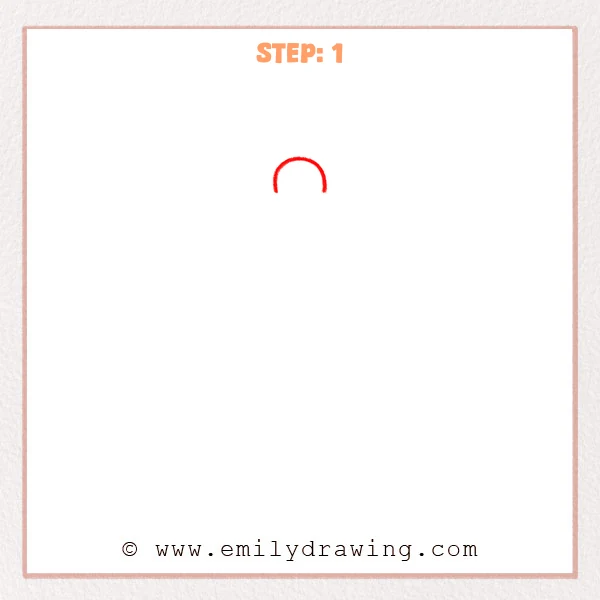
Start near the top of the page with an upside-down U shape.
Keep the curve small, and round the ends softly.
Pro Tip: A smaller loop looks cleaner and is easier to center.
Step 2: Add the Inner Loop
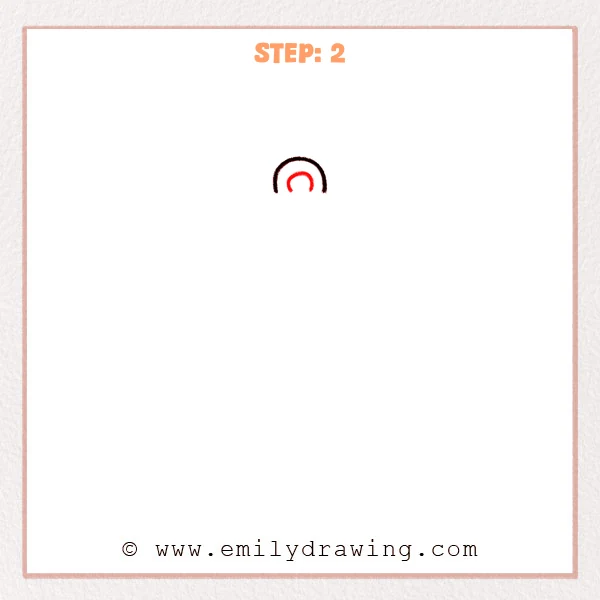
Inside the first loop, draw a smaller upside-down U shape.
Try to keep the space between the two curves even.
Pro Tip: Even spacing helps the loop look sturdy and neat.
Step 3: Draw the Bell Body Outline
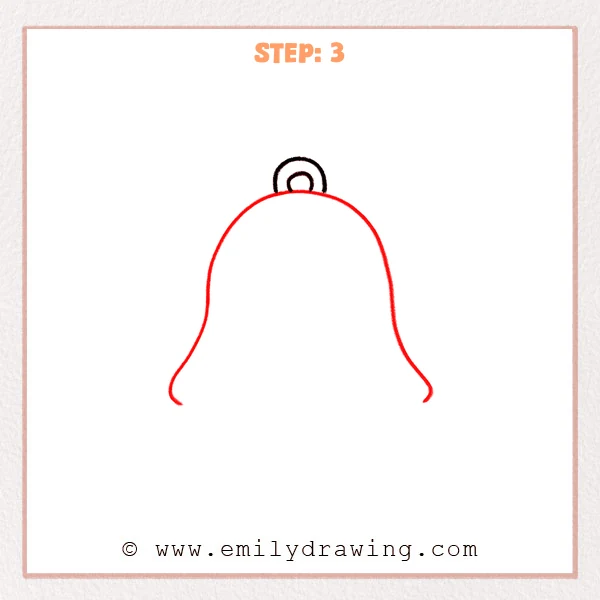
From below the loop, draw two long curves down the left and right sides.
Let the sides widen gently near the bottom, like a soft skirt.
Pro Tip: Make both side curves similar so the bell feels balanced.
Step 4: Add the Bottom Oval Opening
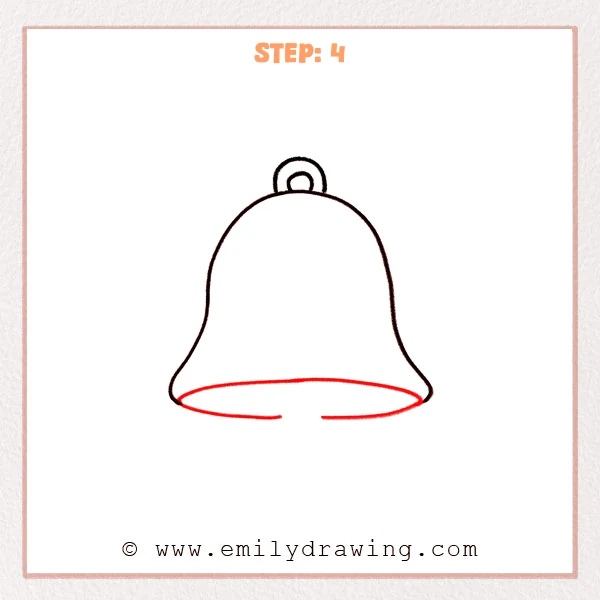
Draw a long curved line across the bottom to form a flattened oval opening.
Connect both ends into the bell’s lower sides with smooth joins.
Pro Tip: Curve the oval slightly upward to make the opening feel 3D.
Step 5: Draw the Clapper
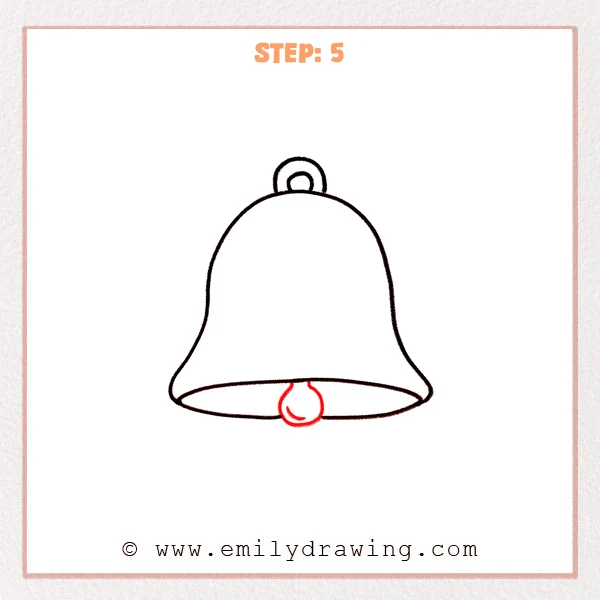
In the center of the opening, draw a small circle for the clapper.
Add a short connector above the circle so it looks suspended inside.
Pro Tip: Center the clapper so the spaces on both sides feel even.
Step 6: Add Highlight Lines
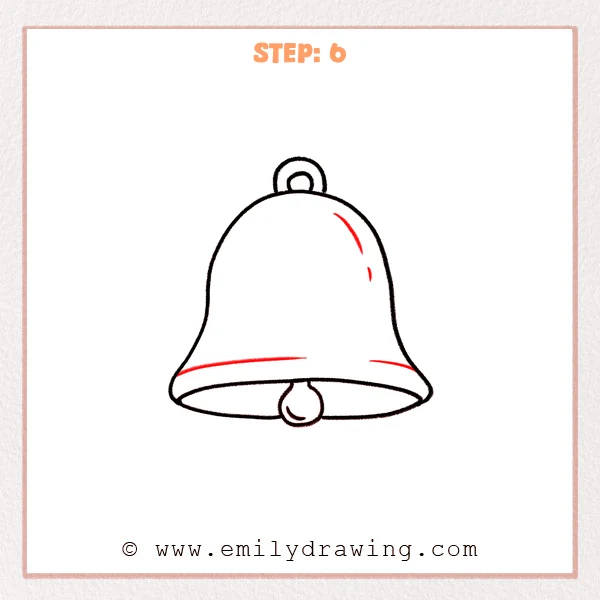
Add two or three short curved highlight lines on one side of the bell.
Follow the bell’s curve so the surface looks smooth and shiny.
Pro Tip: Use only a few highlights so the metal shine stays clean.
Step 7: Color in your drawing!
Fun Facts
- Many bells are made of bronze, which rings clearly when struck.
- The moving piece inside a bell is called a clapper.
- Bells have been used for music, signals, and celebrations for centuries.
Pin it now, Draw later!
You learned how to draw a bell by starting with the top loop.
Then you shaped the body, added the opening, and drew the clapper.
For color, try gold or warm yellow with a little orange shading.
Shade the lower rim and the inside opening to add depth.
A common beginner mistake is making the bottom oval too flat.
Keep it gently curved so the bell looks rounded.
If you liked this step by step drawing, try drawing a star or ribbon next.
Practice this easy drawing tutorial again to make your lines smoother.
Get the FREE Printable Drawing Guide
FREE Download Printable Bell Drawing Tutorial
Frequently Asked Questions
How do I make the bell look more three-dimensional?
Add darker shading under the rim and near the bottom edge.
Keep the highlight lines light and on one side only.
What if my bell outline looks uneven?
Lightly erase and adjust one side at a time.
Use the top loop as a center guide for both sides.
How can I draw a bell with decorations?
Add a small bow on the top loop or a stripe near the rim.
Keep decorations simple so the bell shape stays clear.