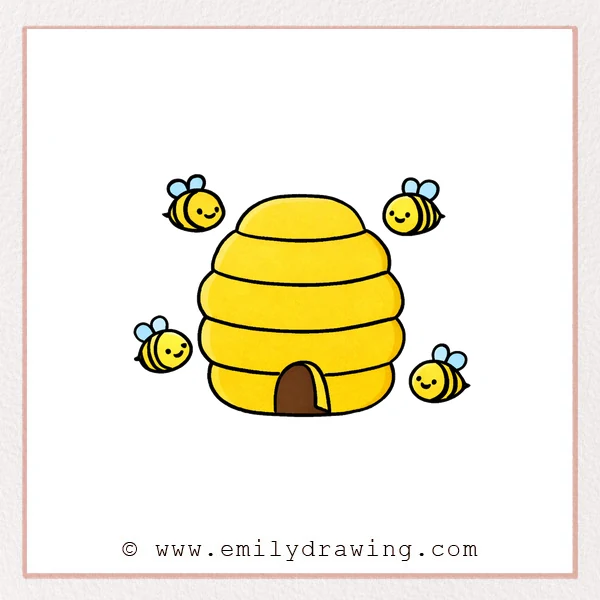
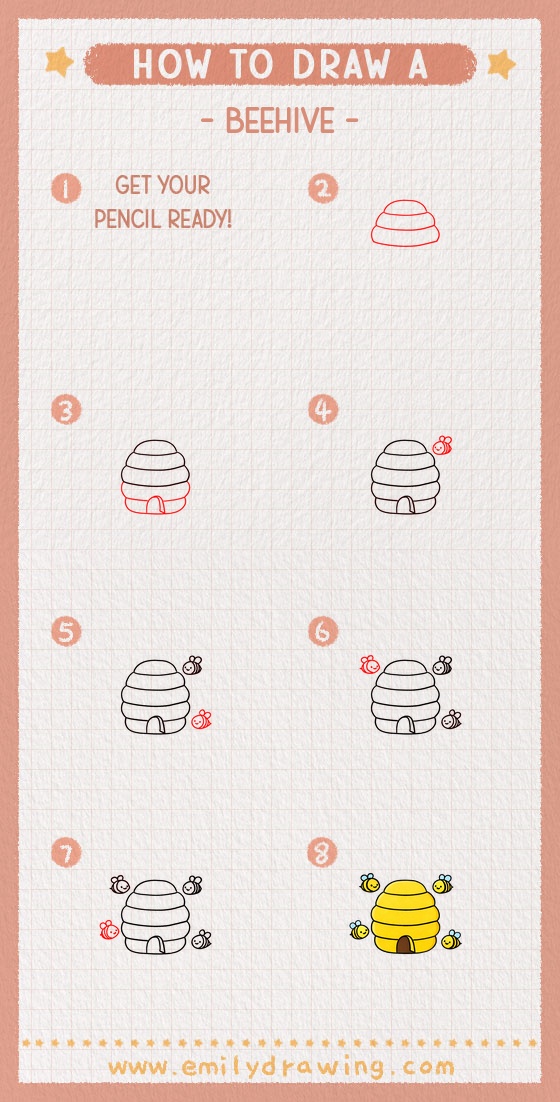
This easy drawing tutorial shows how to draw a beehive step by step.
It uses simple shapes, so drawing for beginners feels calm and doable.
By the end, you will have a cute beehive with smiling bees.
What You Will Need
- Pencil
- Eraser
- Black pen or marker (optional)
- Paper
- Colored pencils or crayons (optional)
Here are my RECOMMENDED Art Supplies!
- Crayola Coloring Set (140 Pieces – Mega Value!)
- 24 Colored Crayon Set
- A4 Printer Paper
- Crayola Coloring Pencils
- HP Home Printer with Instant Ink!
Time needed:
28 minutes.
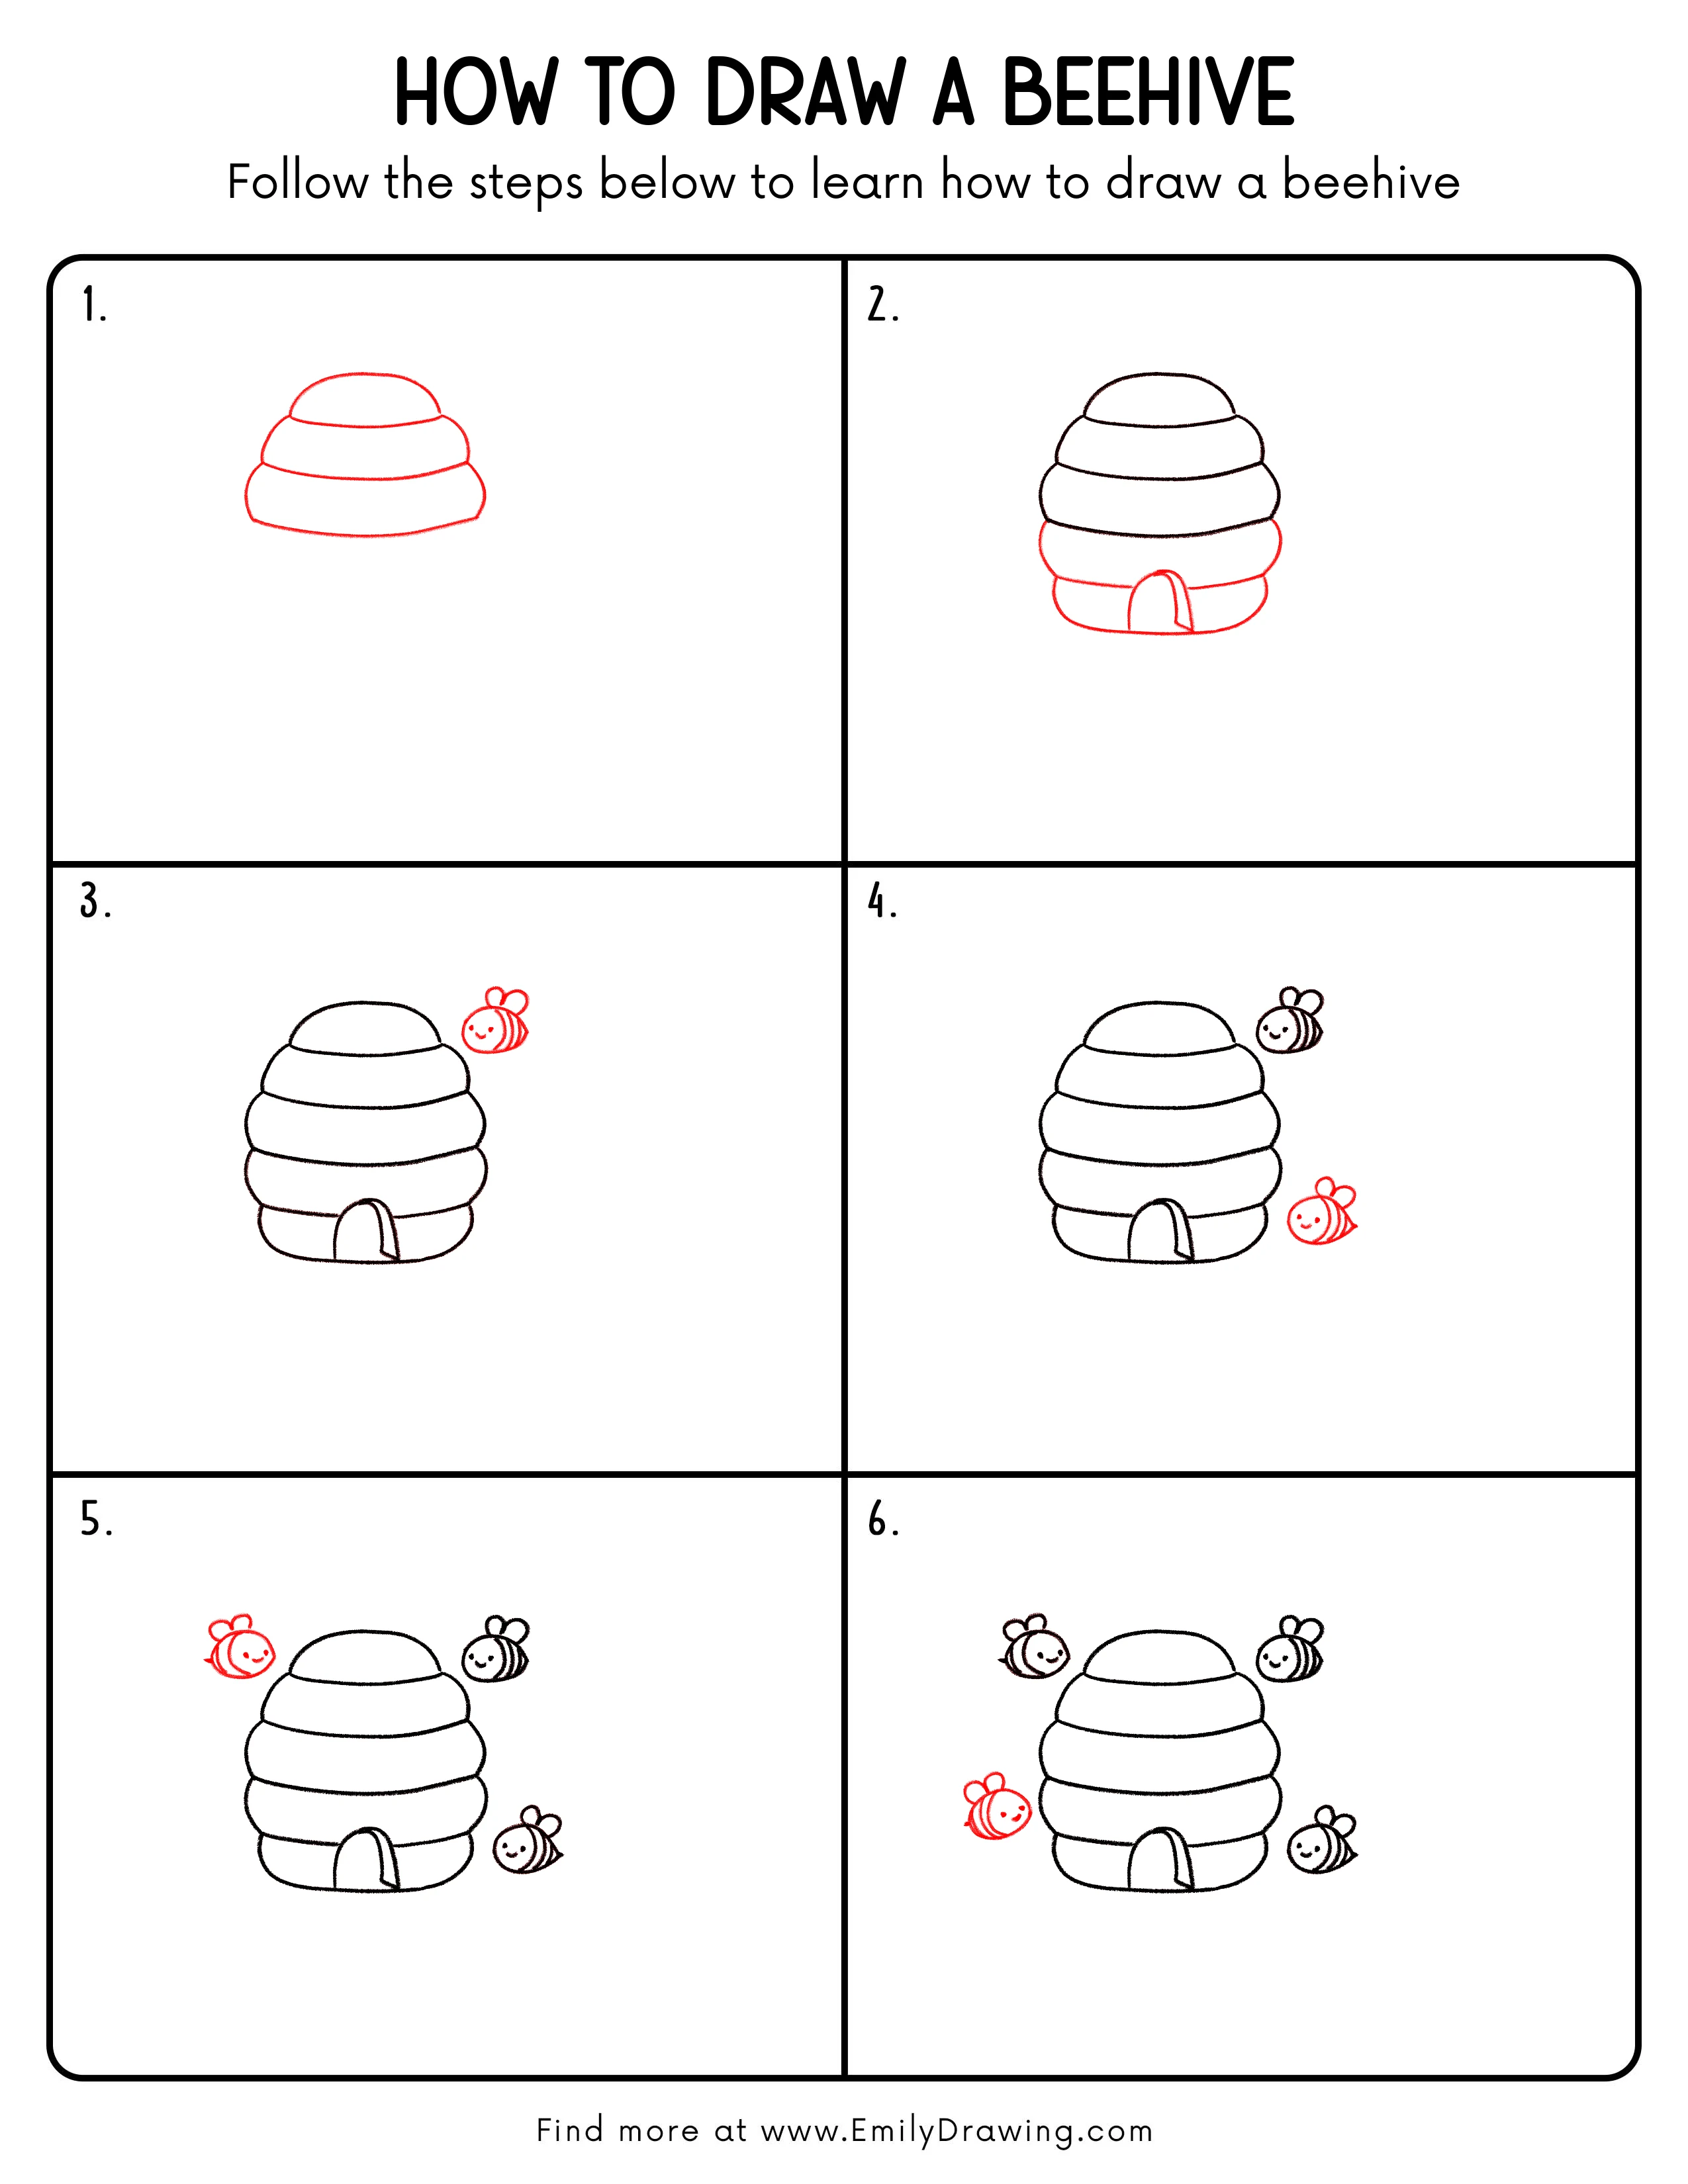
Step-by-Step Drawing Guide
Step 1: Draw the Upper Half of the Beehive
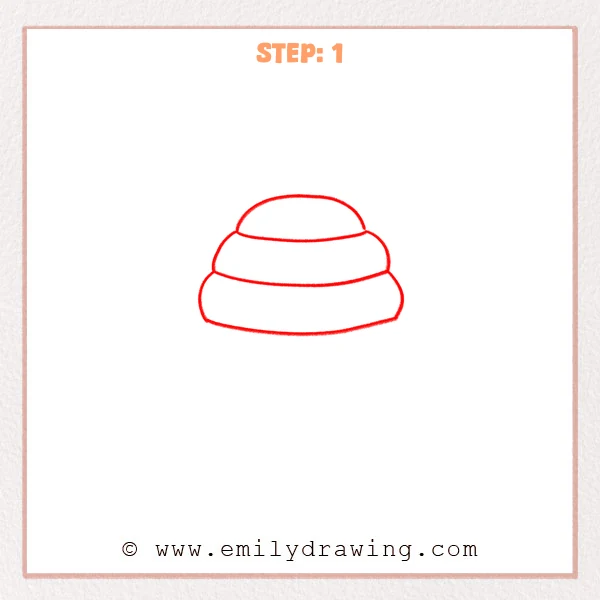
Start with a wide half-oval dome in the page center.
Add one curved band underneath to form the top beehive layer.
Pro Tip: Keep the dome evenly wide on both sides for a tidy hive.
Step 2: Add the Lower Half and the Base
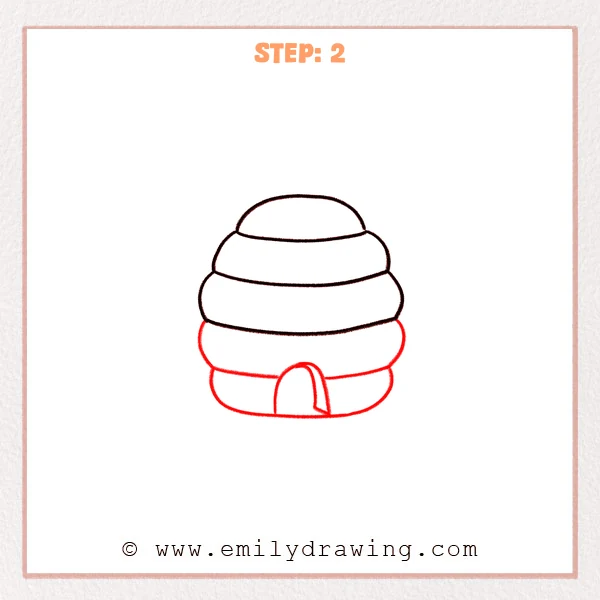
Draw two wider curved bands under the first layer for volume.
Add a short curved band at the bottom as a stable beehive base.
Pro Tip: Make each lower layer slightly wider than the one above.
Step 3: Refine the Entrance and Add One Bee
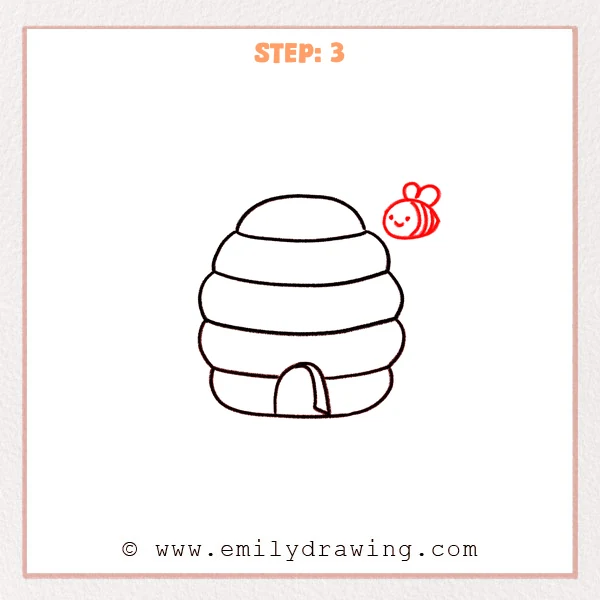
Draw a rounded arch doorway in the lower center of the beehive.
Add an inner line to show the doorway depth, then sketch one bee nearby.
Pro Tip: Center the entrance so the beehive looks balanced and steady.
Step 4: Add a Second Bee to Balance the Picture
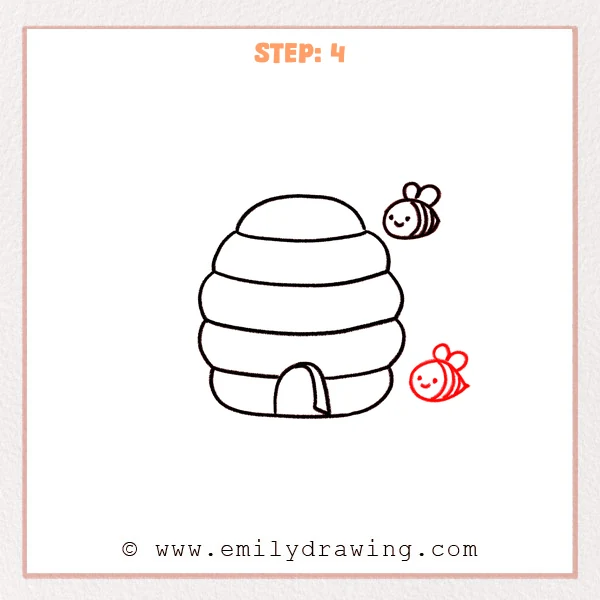
Place a second bee on the other side of the beehive.
Add wings to both bees using two small petal shapes behind the head.
Pro Tip: Leave a small gap around each bee so shapes stay clear.
Step 5: Add Two More Bees Flying Around the Hive
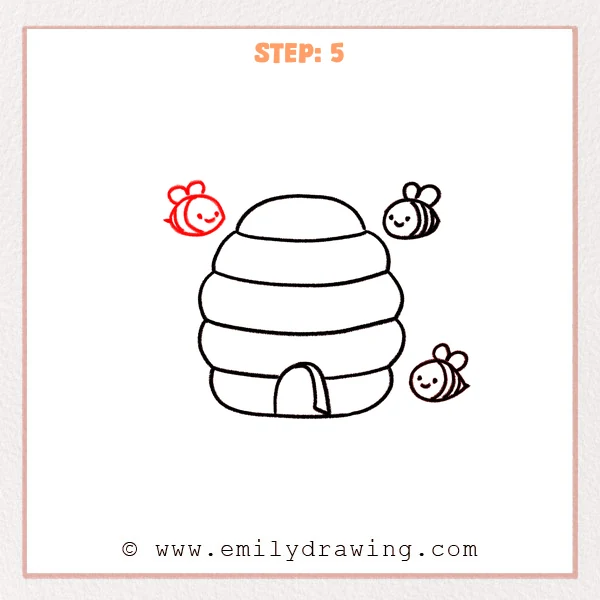
Add one bee near the upper area and one near the lower area.
Keep each bee consistent: round head, oval body, and small wings.
Pro Tip: Sketch lightly first, then darken lines after placement feels right.
Step 6: Add Stripes, Tails, and Smiling Faces to Finish
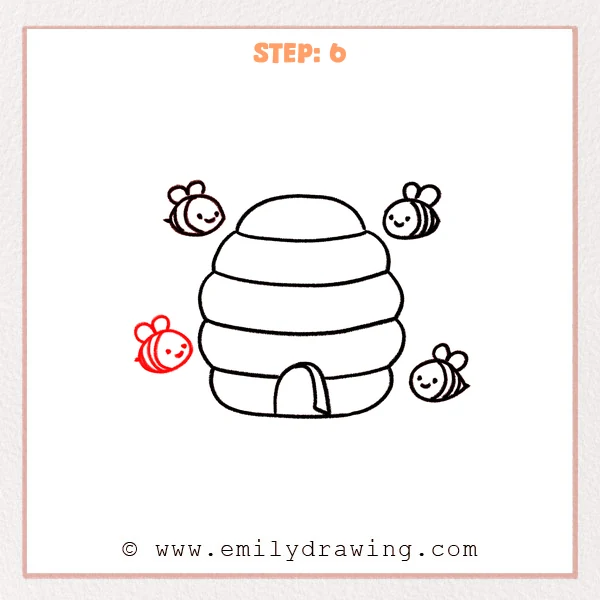
Draw two or three curved stripes across each bee body.
Add a tiny pointed tail, then dot eyes and a curved smile on each bee.
Pro Tip: Curve the stripes to match the body so each bee looks rounded.
Step 7: Color in your drawing!
Fun Facts
- Real beehives can be built in trees, walls, or safe boxes.
- Bees use wax to build neat cells for honey and baby bees.
- Worker bees often fan their wings to help cool the hive.
Pin it now, Draw later!
You drew a beehive by stacking smooth, rounded layers.
You added a doorway, then placed four bees to create movement.
For color, try warm yellows and honey browns on the beehive.
Shade under each layer with a softer brown for gentle depth.
A common beginner mistake is making layers too flat and straight.
Keep your lines curved, and let each band look softly rounded.
If you enjoyed this step by step drawing, try drawing a flower next.
Practice often, and your lines will feel steadier every time.
Get the FREE Printable Drawing Guide
FREE Download Printable Beehive Drawing Tutorial
Frequently Asked Questions
How do I keep the beehive layers even?
Start each band with a light guide curve.
Match the curve on both sides before darkening lines.
What if my beehive looks lopsided?
Erase lightly and adjust one side at a time.
Check the center line of the doorway as a simple guide.
How can I make the bees look cuter?
Make the head slightly larger than the body.
Keep the eyes small and place them evenly.