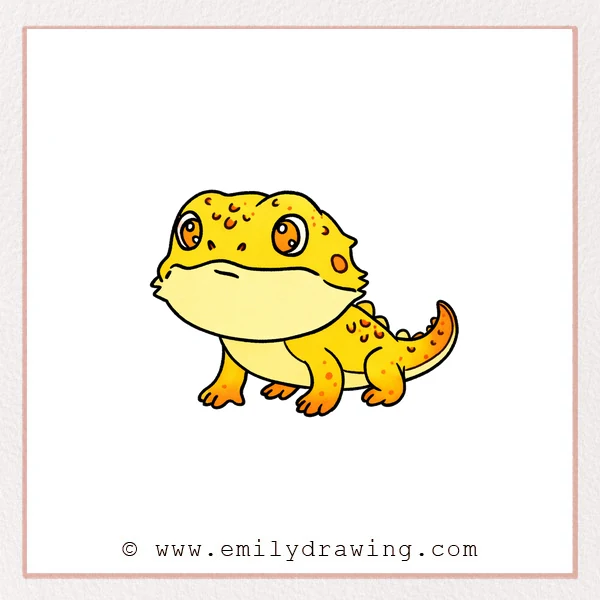
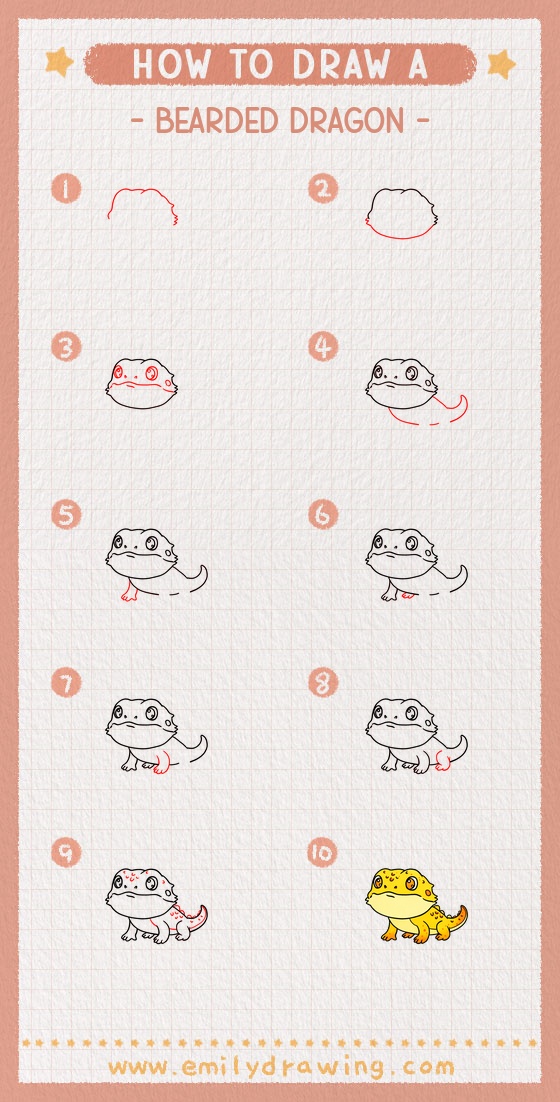
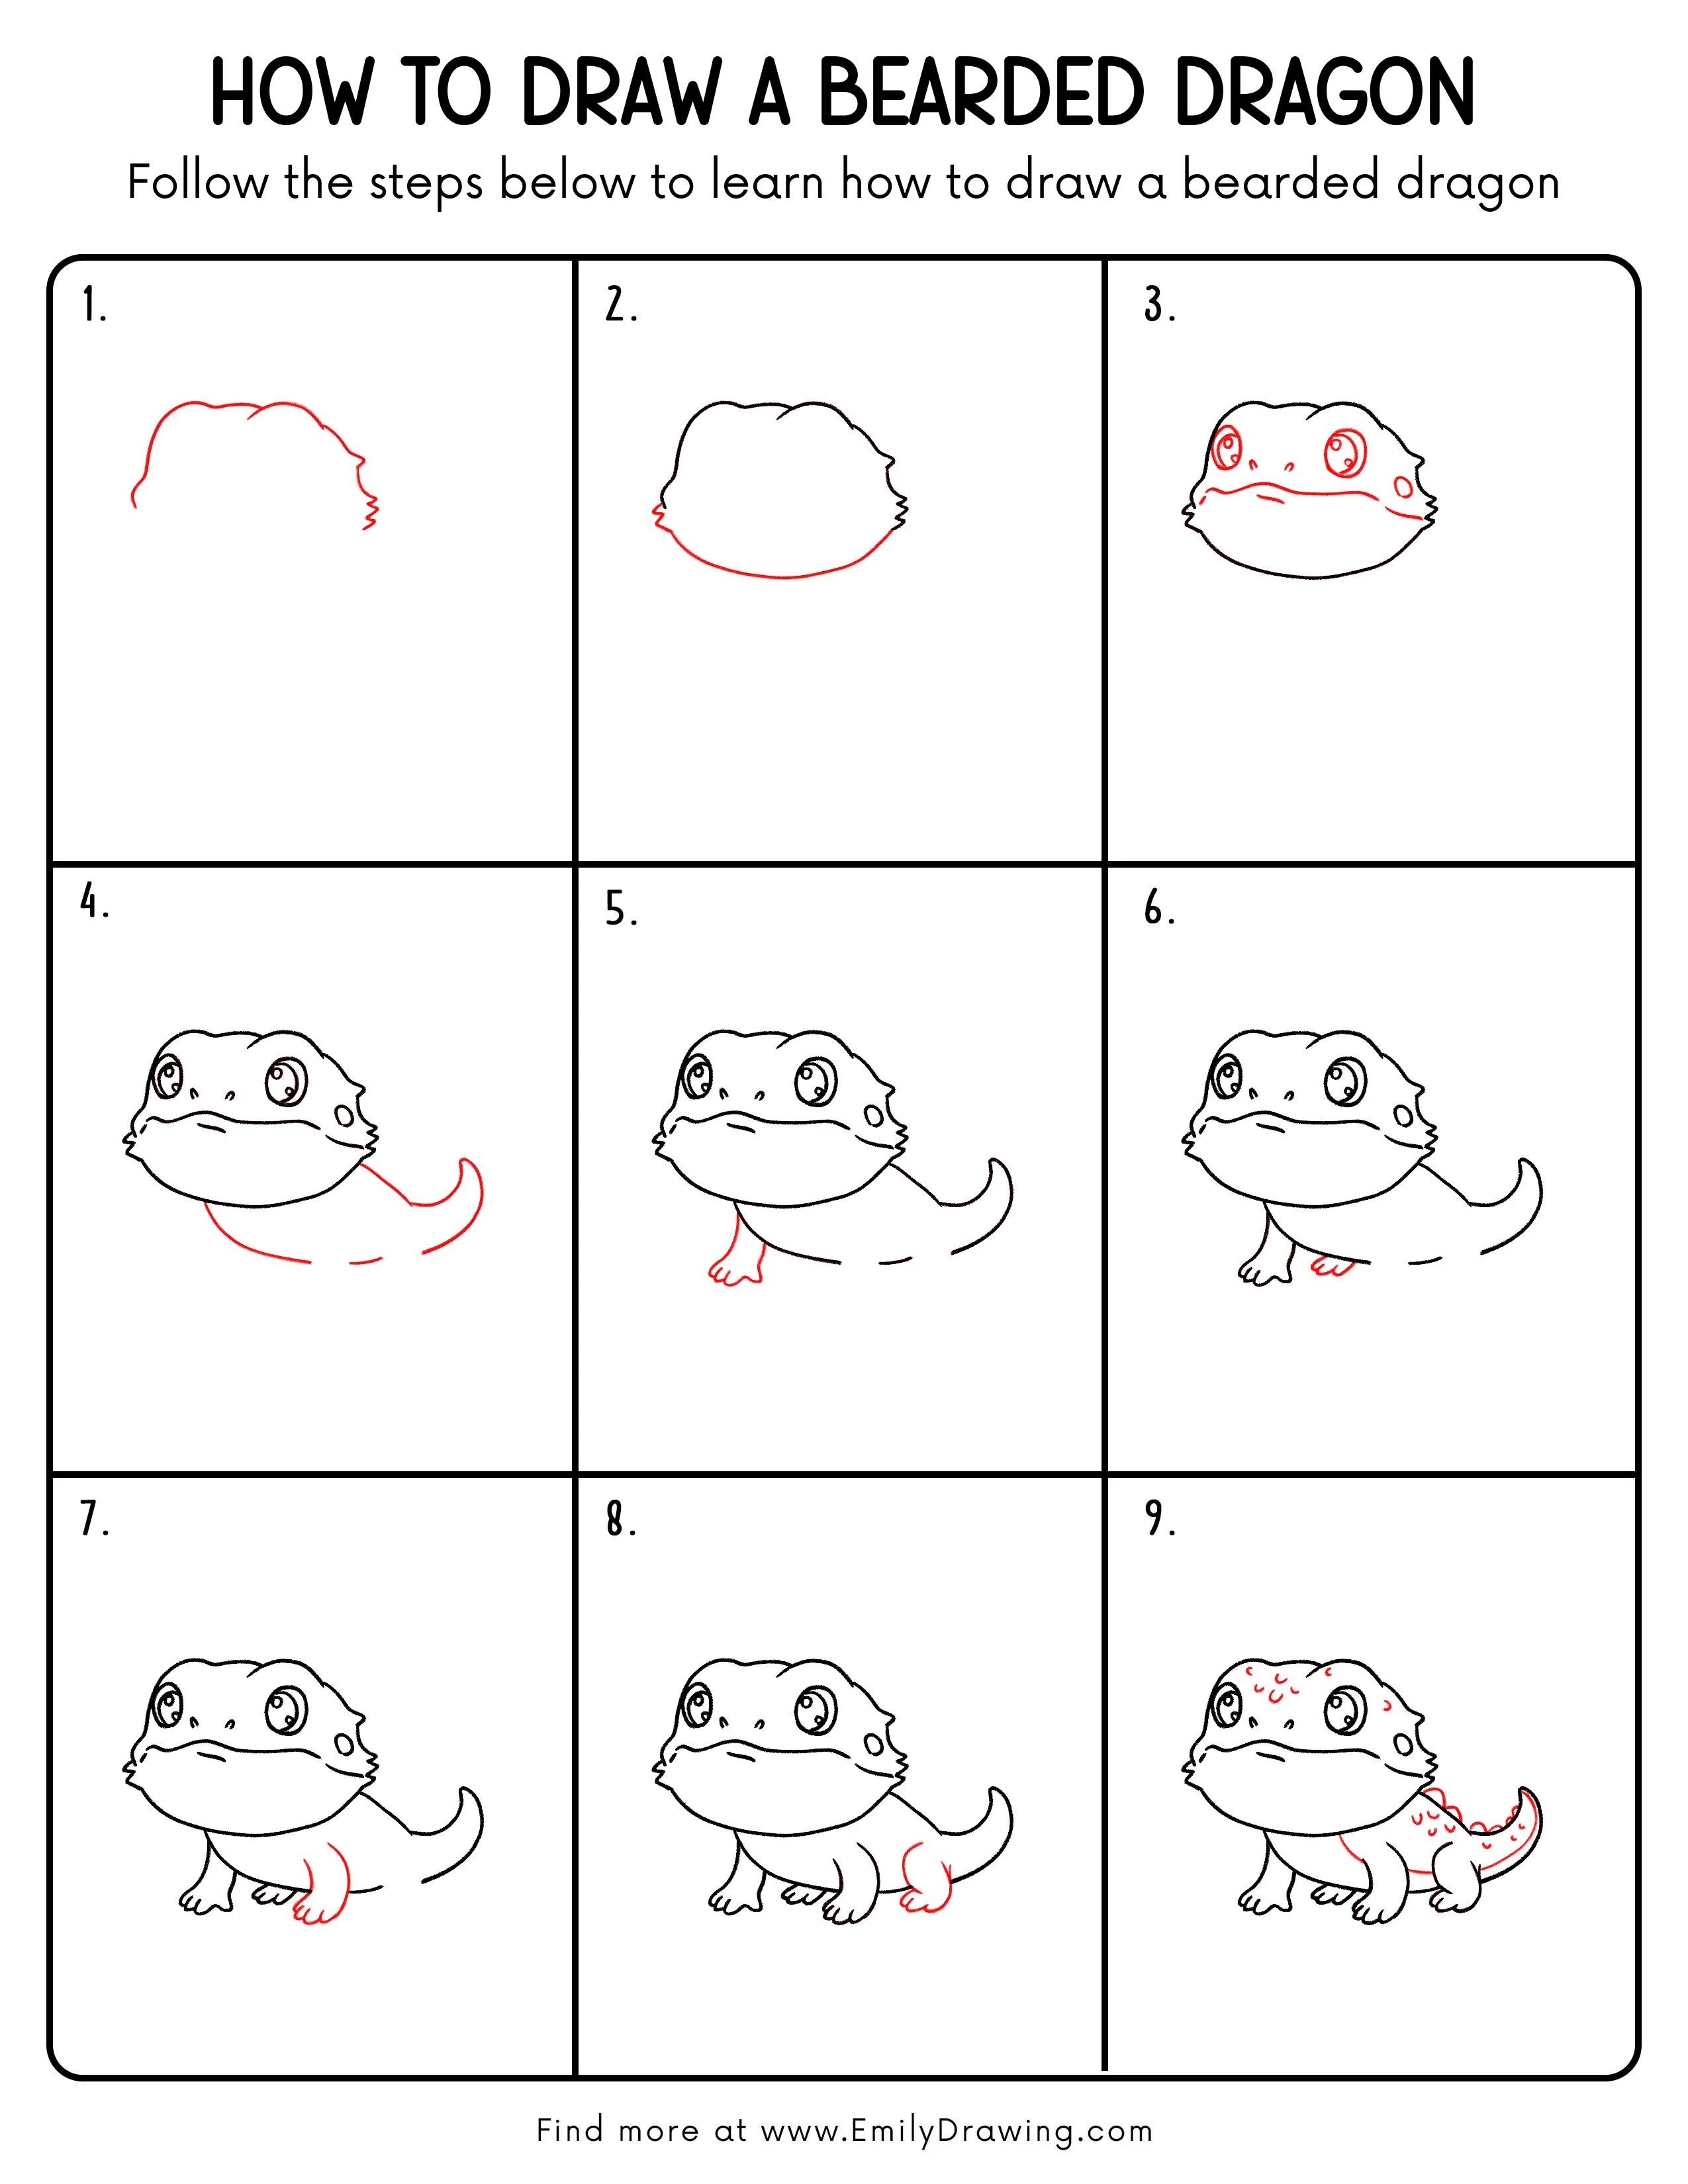
This easy drawing tutorial shows how to draw a bearded dragon step by step. You will build the head first, then add a long body, legs, and a tail. Take your time and keep your curves smooth for a friendly drawing for beginners.
What You Will Need
- Pencil
- Eraser
- Black pen or marker (optional)
- Paper
- Colored pencils, markers, or crayons
Here are my RECOMMENDED Art Supplies!
- Crayola Coloring Set (140 Pieces – Mega Value!)
- 24 Colored Crayon Set
- A4 Printer Paper
- Crayola Coloring Pencils
- HP Home Printer with Instant Ink!
Time needed:
25 minutes.
Step-by-Step Drawing Guide
Step 1: Outline the Bearded Dragon’s Head Top
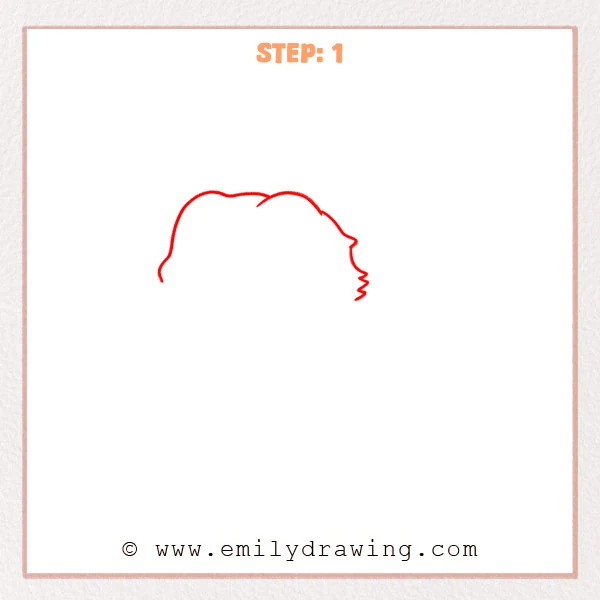
Start with a long wavy curve for the top of the head, then add a small point on the right. Leave the left side open so you can close the head next.
Pro Tip: Use broad bumps so the outline stays clean.
Step 2: Add Cheeks and the Big Chin Curve
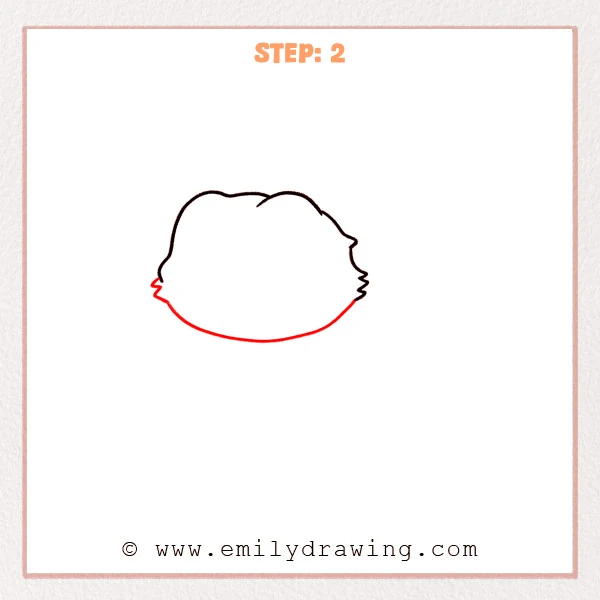
Add small spiky cheeks on the sides, then draw a wide curved chin to close the head. Keep the chin slightly puffy for a sturdy look.
Pro Tip: Draw the chin in one smooth stroke if you can.
Step 3: Add Big Eyes, Nostrils, Mouth Line, and a Cheek Spot
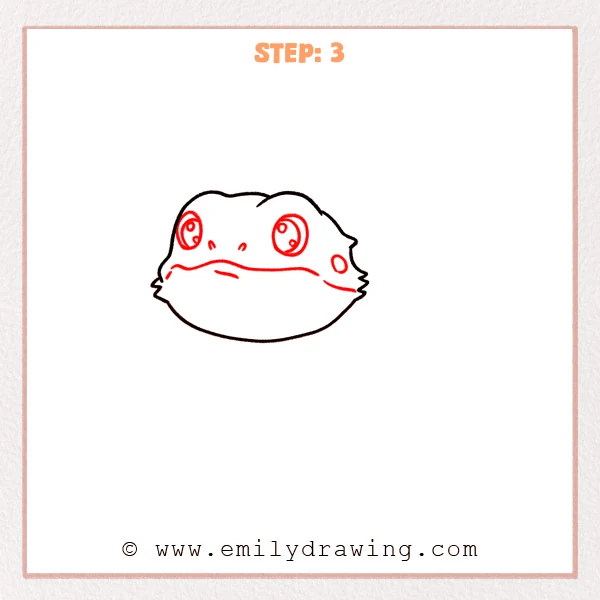
Draw two large eyes with pupils and tiny highlights. Add two small nostrils, then a gently wavy mouth line, and finish with one round cheek spot.
Pro Tip: Keep both eyes at the same height for a calm expression.
Step 4: Add the Body and Tail Main Outline
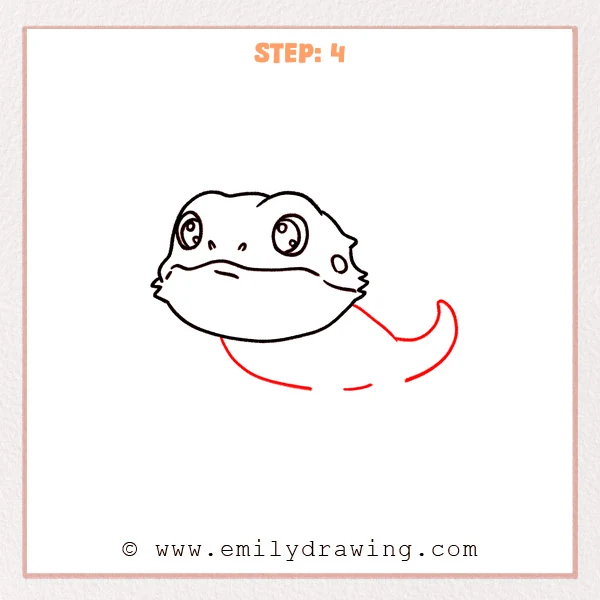
Draw a long back curve from behind the chin and taper it into the tail. Add a lower belly curve and let the tail tip curl slightly upward.
Pro Tip: Taper the tail gradually, not suddenly.
Step 5: Draw the First Front Leg and Toes
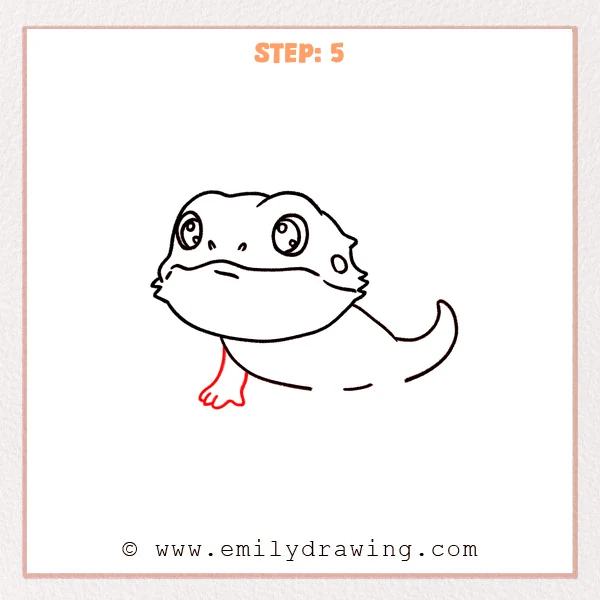
Add a short front leg under the chest with a rounded shoulder connection. Shape the foot like a small fan and add three to four rounded toes.
Pro Tip: Keep toes short and rounded for a simple look.
Step 6: Draw the First Back Leg and Toes on the Same Side

Add a back leg on the same visible side of the body, using a rounded knee bend. Draw the foot and separate the toes with a few small curves.
Pro Tip: Leave a little hip space before the tail begins.
Step 7: Add the Second Front Leg and Adjust the Belly
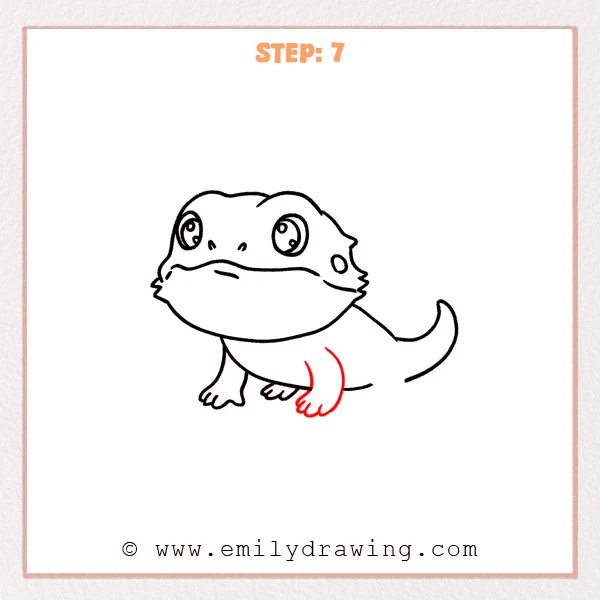
Draw a smaller front leg behind the first to show depth. Add a short belly line to connect the shapes neatly around the legs.
Pro Tip: Make the farther leg slightly smaller for depth.
Step 8: Add the Second Back Leg and an Inner Tail Line
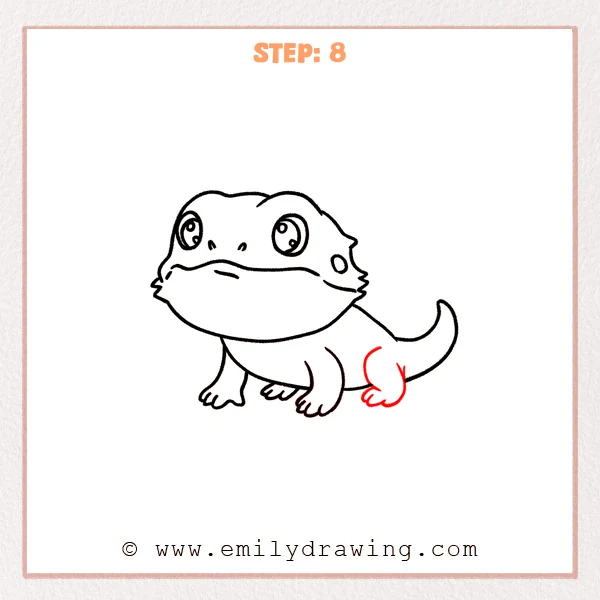
Add the other back leg slightly smaller to complete the stance. Draw a short inner line along the tail to suggest thickness and form.
Pro Tip: Keep the inner tail line short so it stays clean.
Step 9: Add Spines and Skin Texture Details

Draw a row of small spikes along the back and tail using tiny pointed bumps. Add a few small crescent marks on the head and back for skin texture.
Pro Tip: Do not overfill with texture; blank space keeps it clear.
Step 10: Color in your drawing!
Fun Facts
- Bearded dragons can “puff” their throat area to look larger.
- Their spiky scales help protect them in dry environments.
- A long tail helps with balance when they move.
Pin it now, Draw later!
You have learned how to draw a bearded dragon step by step by starting with a spiky head, then adding a long body, legs, and a tapering tail. For coloring, try sandy tan, warm brown, or soft orange, then add a darker shade under the belly and behind the legs. Leave a small light area on the head and back to suggest a gentle highlight.
One common beginner mistake is making the tail the same width all the way. If that happens, erase lightly and taper it more gradually toward the tip.
Keep practicing this step by step drawing, and try changing the spikes or adding a simple background rock. If you enjoy drawing for beginners, follow another easy drawing tutorial and build a whole set of reptiles.
Get the FREE Printable Drawing Guide
FREE Download Printable Bearded Dragon Drawing Tutorial
Frequently Asked Questions
How do I make the bearded dragon look more realistic?
Add a few extra small spikes and keep the texture marks subtle.
What if my legs look too big?
Shorten the feet and move the knees closer to the body.
How can I shade it quickly?
Shade under the chin, along the belly, and under the tail with one darker tone.