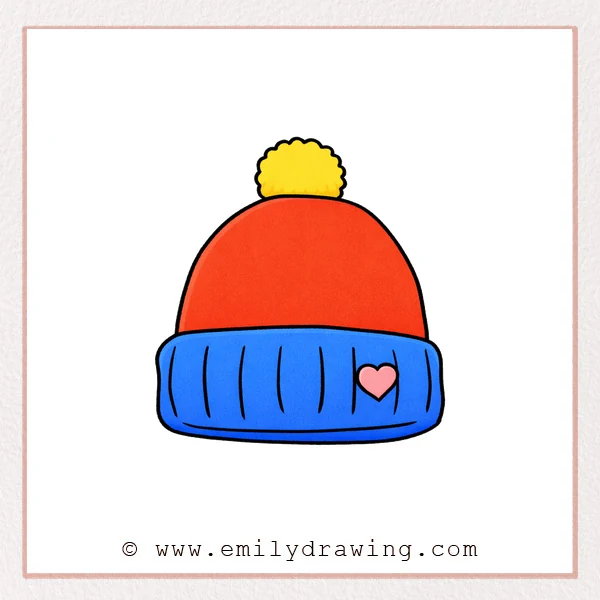
This guide shows how to draw a beanie in a simple, friendly way. You will follow a clear step by step drawing process using smooth curves and easy texture lines. It is an easy drawing tutorial and a calm project for drawing for beginners.
What You Will Need
- Pencil
- Eraser
- Black pen or marker (optional)
- Paper
- Colored pencils, markers, or crayons
Here are my RECOMMENDED Art Supplies!
- Crayola Coloring Set (140 Pieces – Mega Value!)
- 24 Colored Crayon Set
- A4 Printer Paper
- Crayola Coloring Pencils
- HP Home Printer with Instant Ink!
Time needed:
15 minutes.
Step-by-Step Drawing Guide
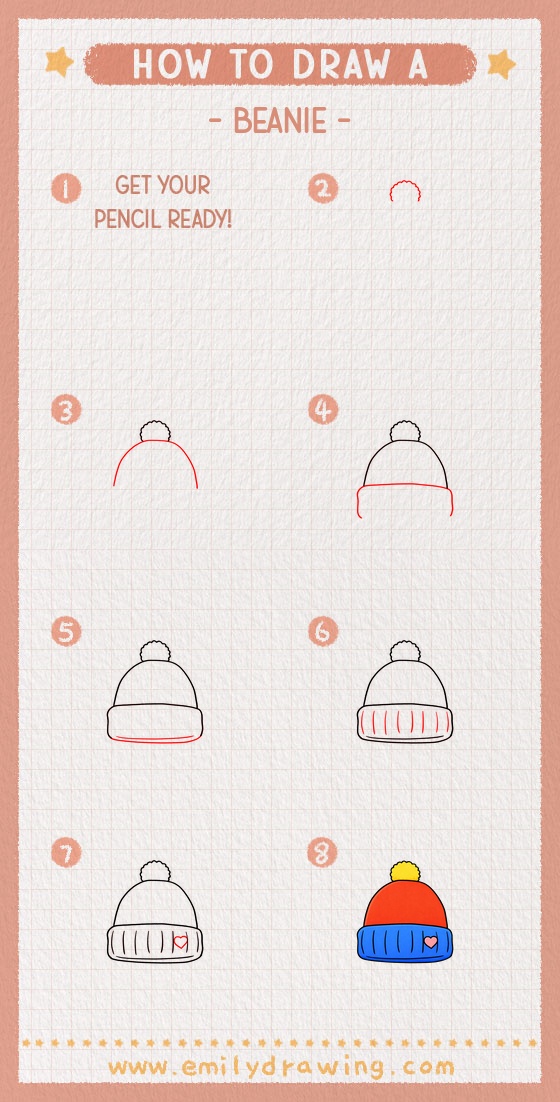
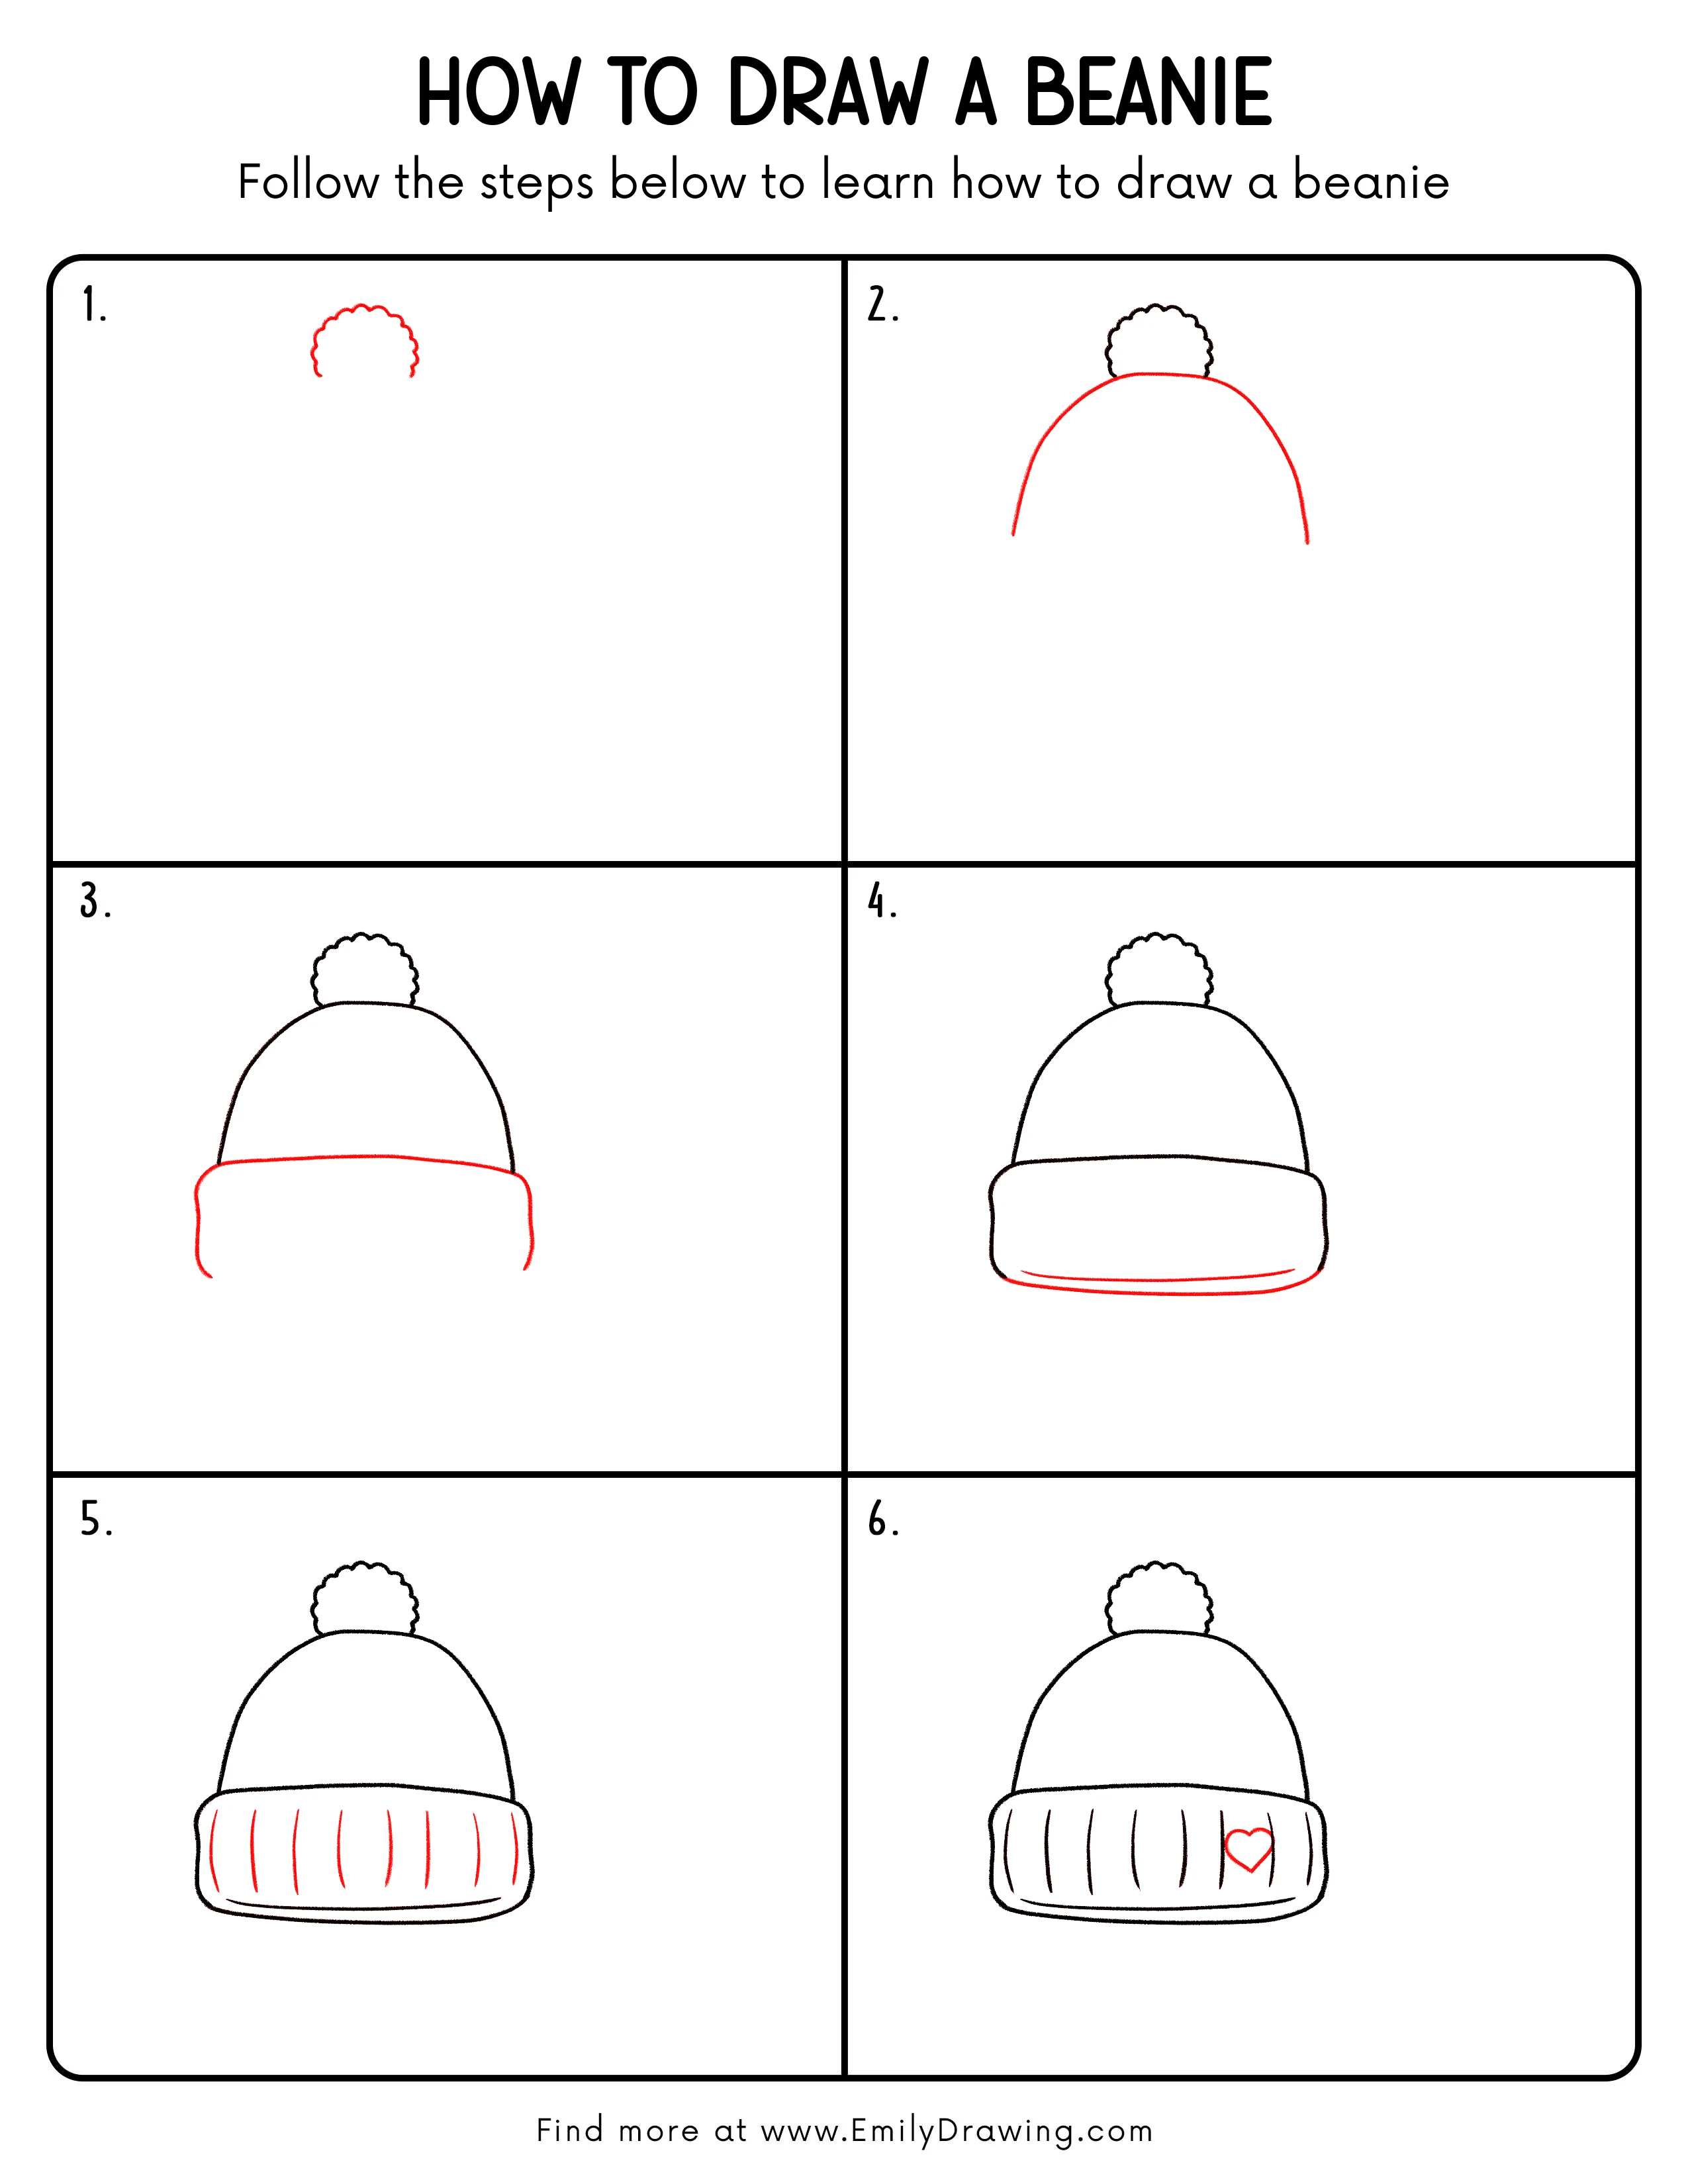
Step 1: Sketch the Fluffy Pom-Pom Edge
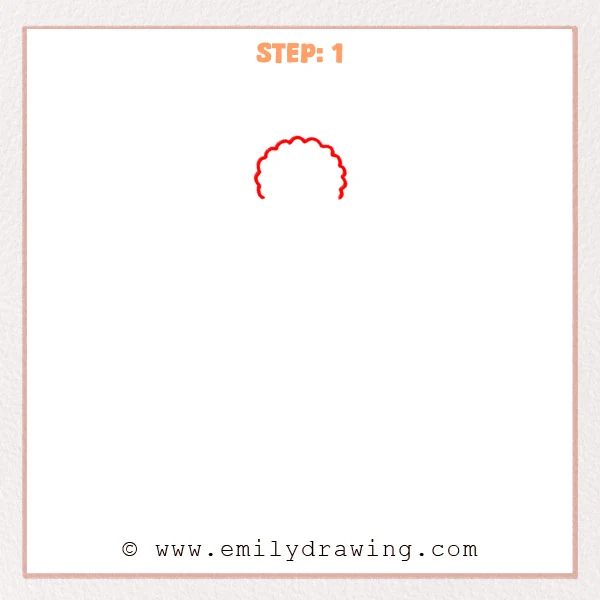
Start near the top of the page with a small cloud-like wavy curve. Keep the bumps small and leave the sides open for now.
Pro Tip: Make the bumps similar in size so the pom-pom looks soft.
Step 2: Draw the Beanie’s Rounded Top
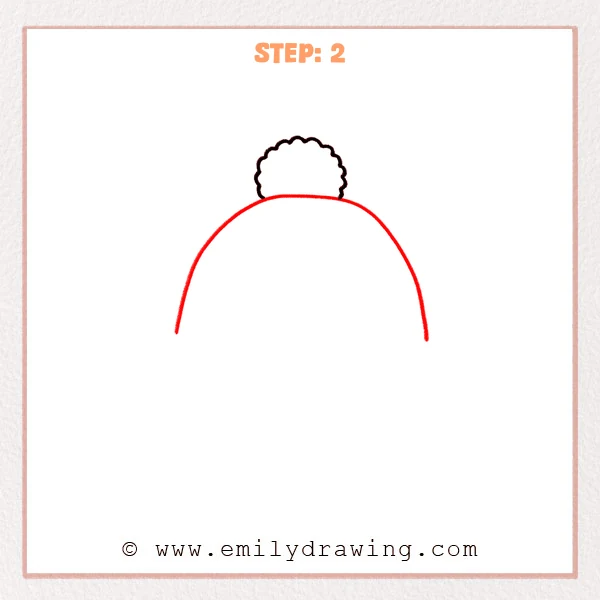
Under the pom-pom, add a wide arc like an upside-down bowl. Let the ends drop slightly, but do not close the bottom yet.
Pro Tip: Keep the arc balanced on both sides to avoid a leaning hat.
Step 3: Add the Thick Folded Cuff
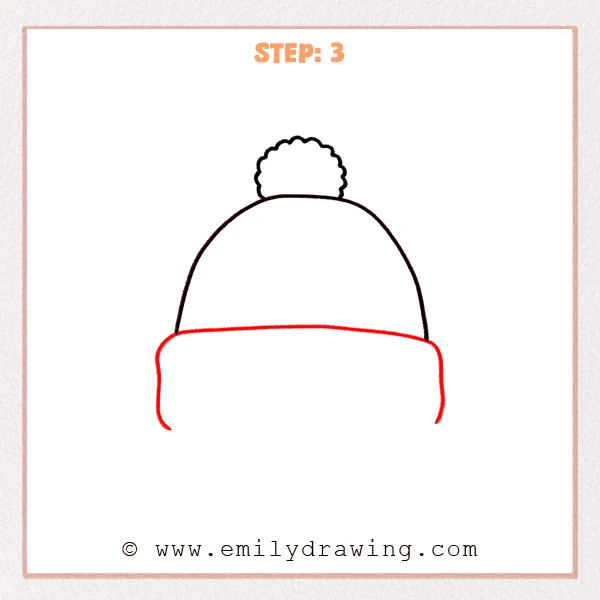
Draw a wide rounded band under the dome, like a soft rectangle with curved corners. Connect it gently to the hat top so it looks folded.
Pro Tip: Make the cuff a little wider than the dome for a cozy fit.
Step 4: Add the Inner Bottom Curve of the Cuff
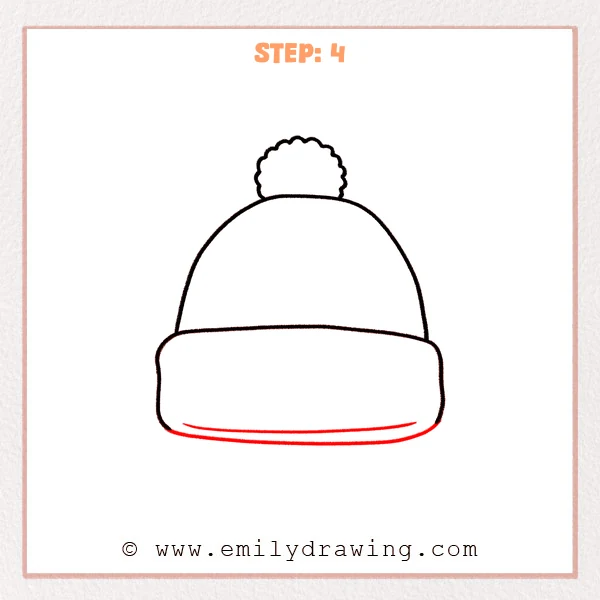
Inside the bottom edge of the cuff, draw a thin curved line that follows the outer shape. This small line makes the cuff look thicker and more layered.
Pro Tip: Leave a small gap from the outer edge so the line does not touch it.
Step 5: Draw Vertical Knit Ribs on the Cuff
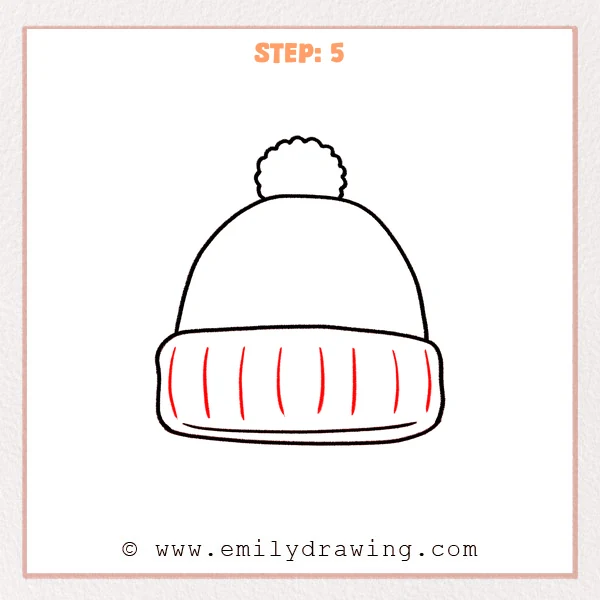
Add several short vertical curved lines across the cuff. Space them evenly, and let each line bend slightly like soft knitted fabric.
Pro Tip: Use light pressure so the rib lines stay gentle and not heavy.
Step 6: Add a Heart Detail and Refine the Lines
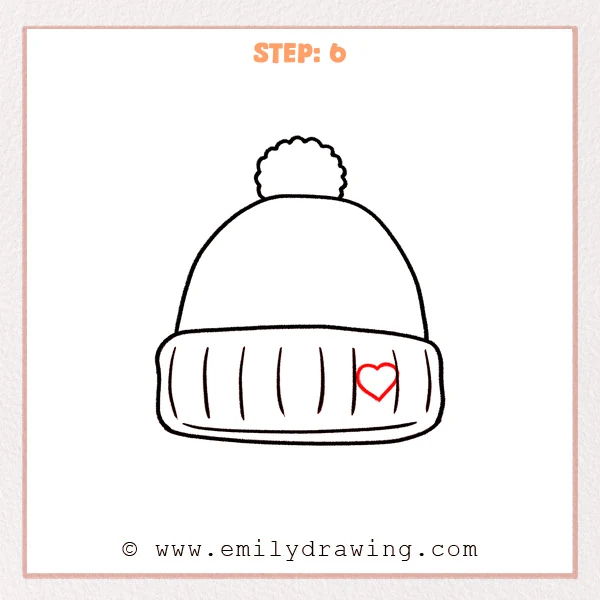
Place a small heart on the right side of the cuff and keep it centered within the band. Then clean up extra sketch marks and slightly thicken the main outline.
Pro Tip: Draw the heart with two small top curves before joining them to a neat point.
Step 7: Color in your drawing!
Fun Facts
- Many beanies use ribbed knitting because it stretches and fits snugly.
- A pom-pom can help a hat feel playful and adds a clear top point.
- Folded cuffs are common because they add warmth around the forehead.
Pin it now, Draw later!
You just learned how to draw a beanie by building a pom-pom, a rounded dome, and a folded cuff. For color, try a warm red, teal, or soft gray, then shade the lower side of the dome with a slightly darker tone. Add a tiny highlight strip on the dome to suggest smooth yarn catching light.
One common beginner mistake is making the cuff too thin, which can make the beanie look flat. If that happens, widen the band and redraw the inner bottom curve.
Keep practicing this step by step drawing and try changing the cuff pattern or adding a different patch. When you are ready, follow another easy drawing tutorial to grow your drawing for beginners skills.
Get the FREE Printable Drawing Guide
FREE Download Printable Beanie Drawing Tutorial
Frequently Asked Questions
How do I make the beanie look more fluffy?
Add more small bumps to the pom-pom and keep them rounded.
What if my beanie dome looks uneven?
Lightly erase and redraw the top arc, checking both sides for balance.
How can I add more texture to the hat top?
Use a few gentle curved lines that follow the dome shape, spaced far apart.