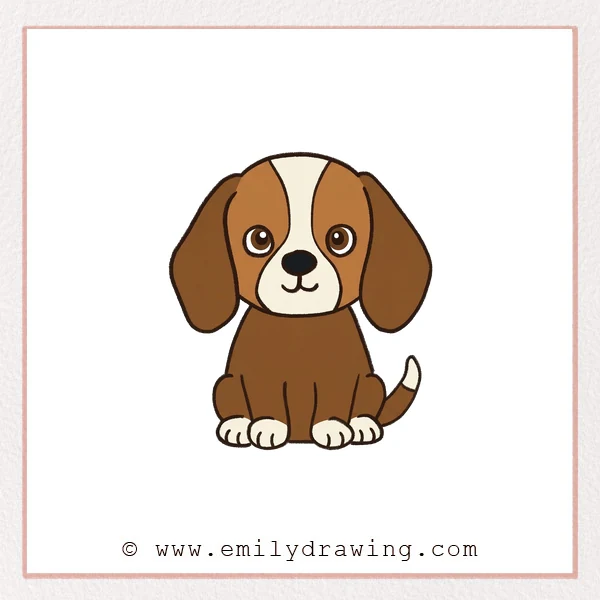
This easy drawing tutorial shows how to draw a beagle step by step. You will build a cute sitting beagle using smooth curves and simple shapes. It is a calm drawing for beginners that works well with pencil or marker.
What You Will Need
- Pencil
- Eraser
- Black pen or marker (optional)
- Paper
- Colored pencils, markers, or crayons
Here are my RECOMMENDED Art Supplies!
- Crayola Coloring Set (140 Pieces – Mega Value!)
- 24 Colored Crayon Set
- A4 Printer Paper
- Crayola Coloring Pencils
- HP Home Printer with Instant Ink!
Time needed:
14 minutes.
Step-by-Step Drawing Guide
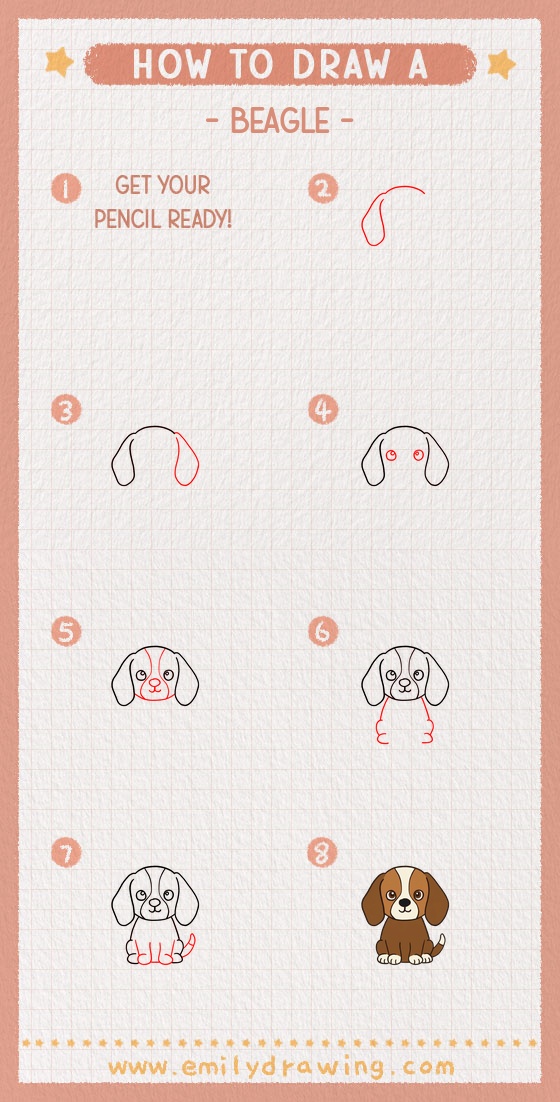
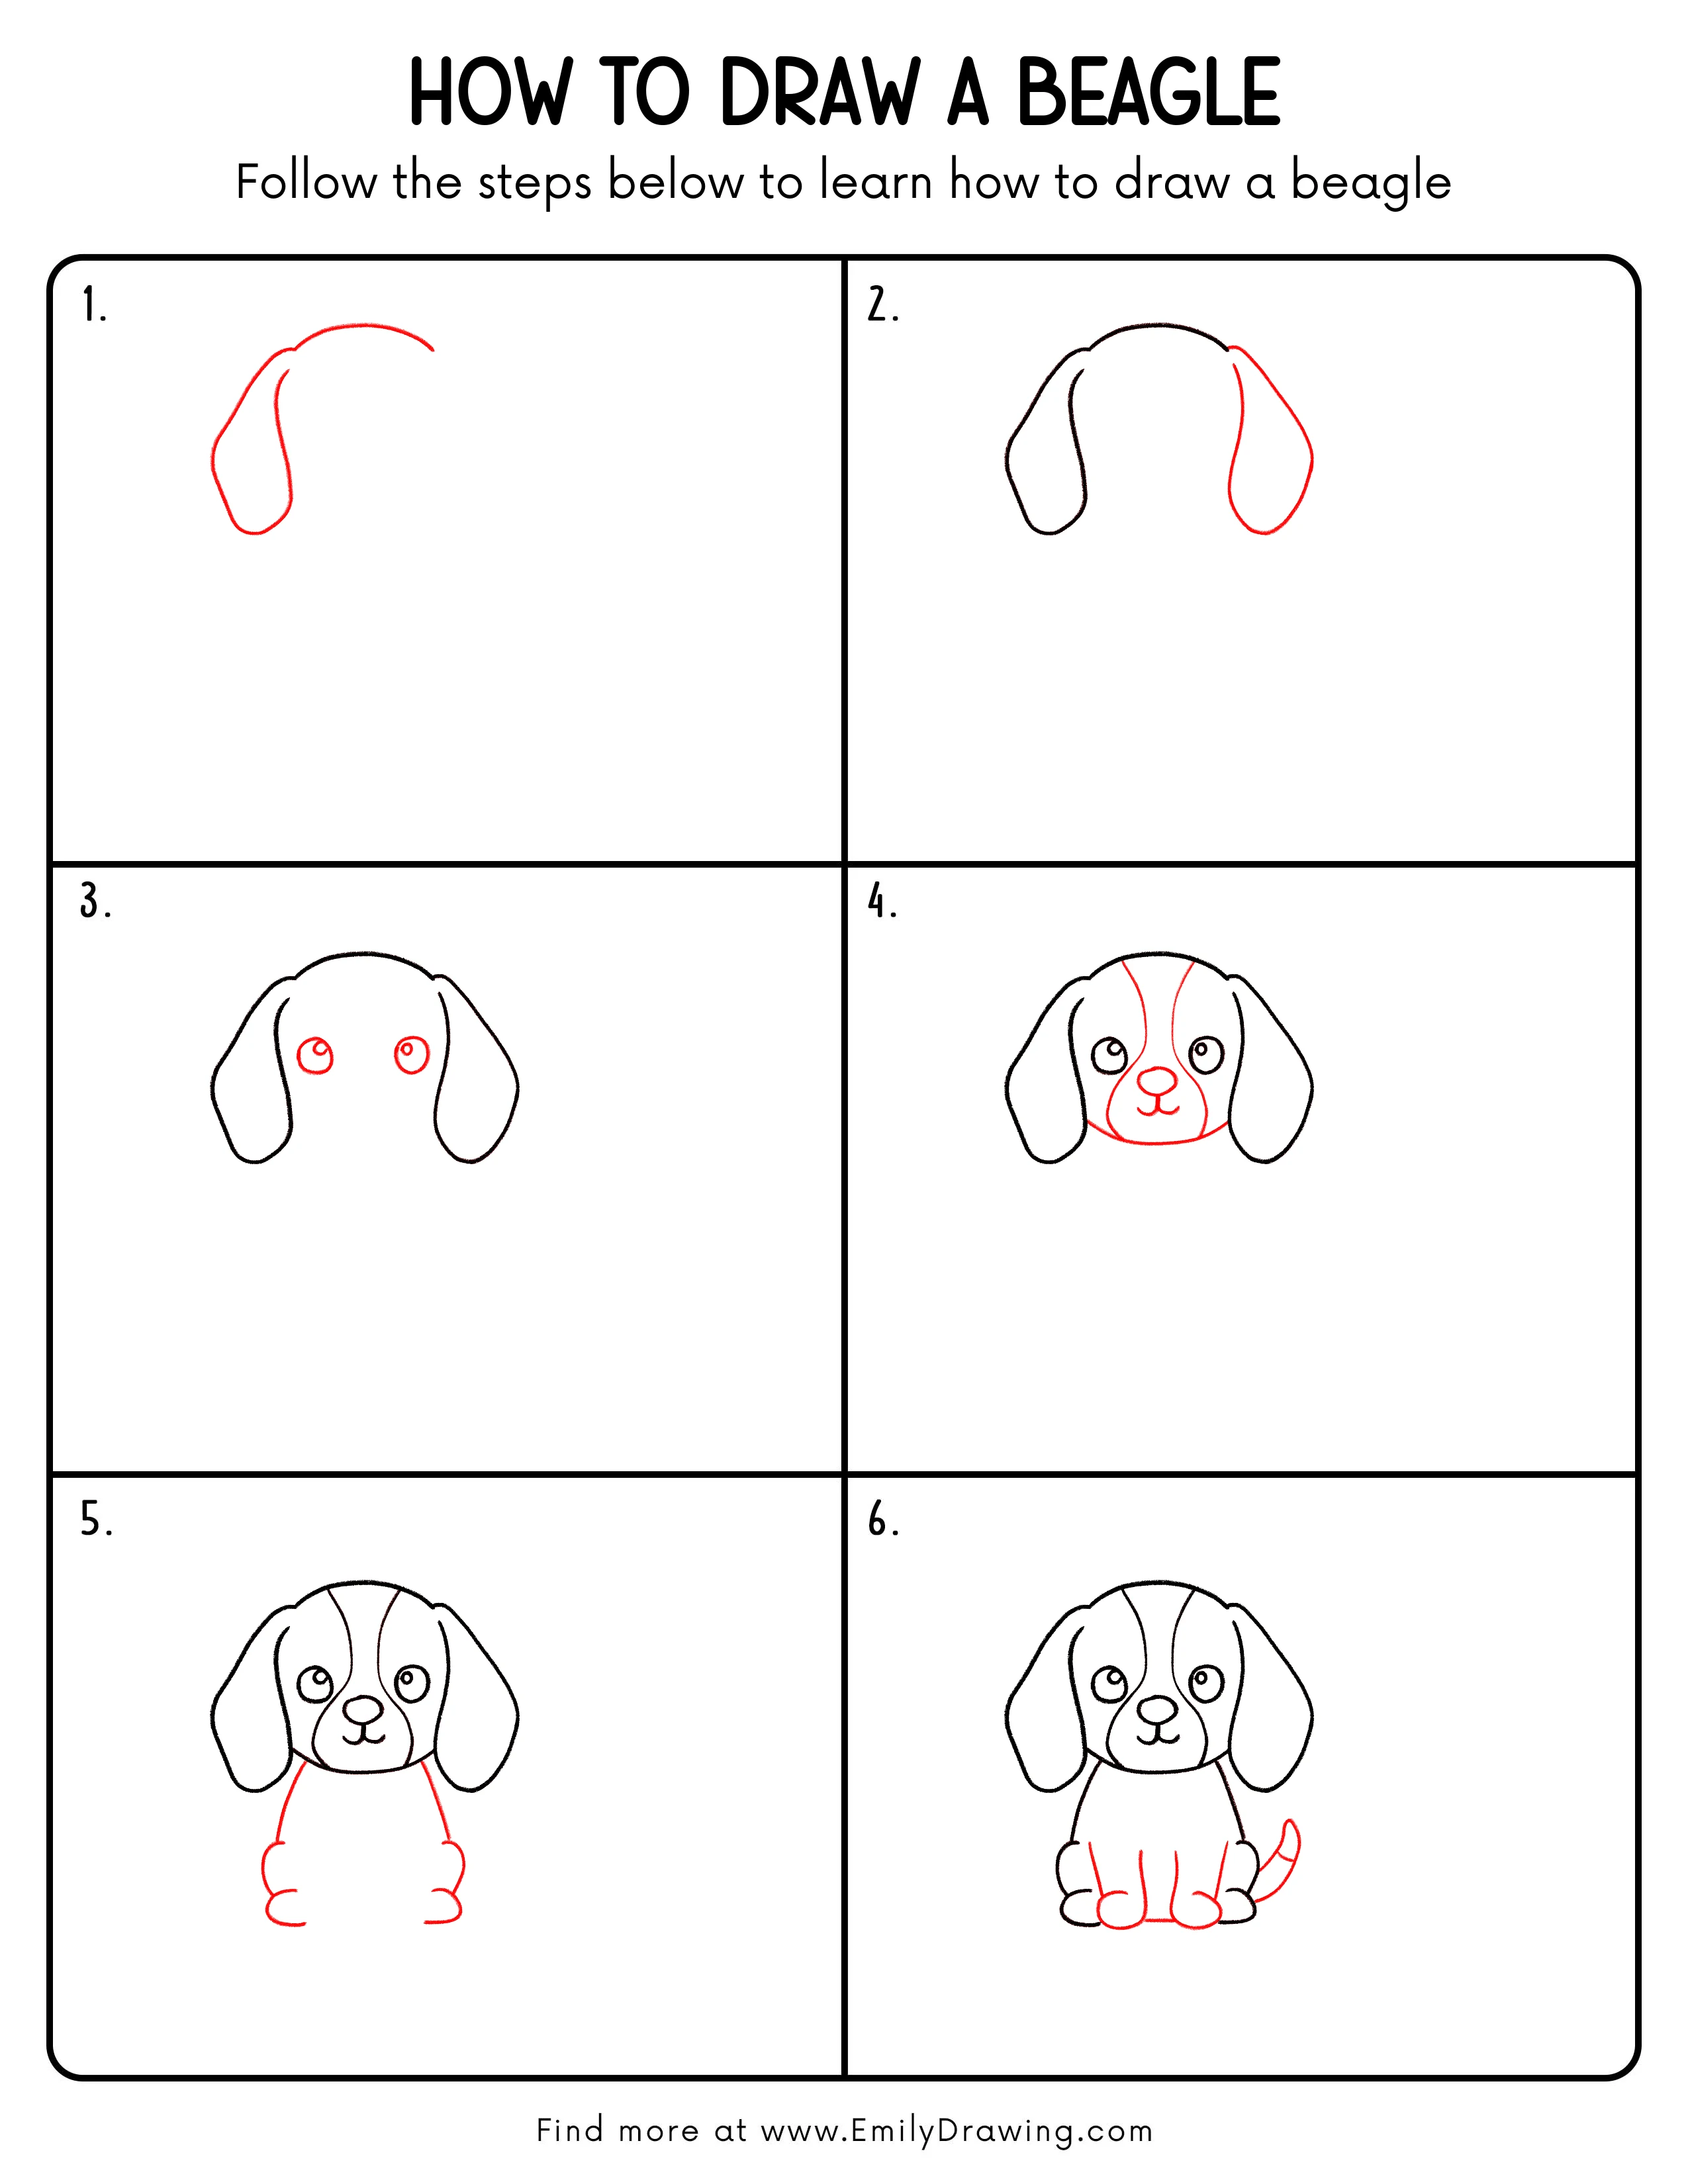
Step 1: Draw the Beagle’s Left Ear and Head Top
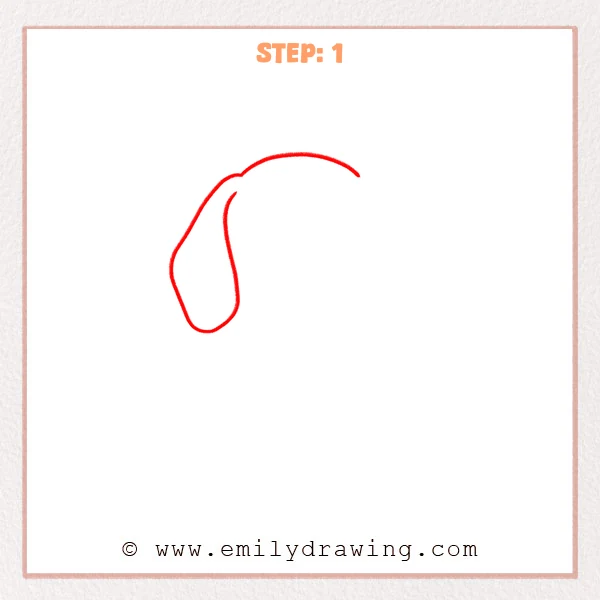
Start with a rounded arc for the top of the head, leaving it open. Add one floppy left ear with a long soft curve and a rounded bottom.
Pro Tip: Keep the ear tip rounded, not pointy.
Step 2: Add the Right Ear and Cheek Outline
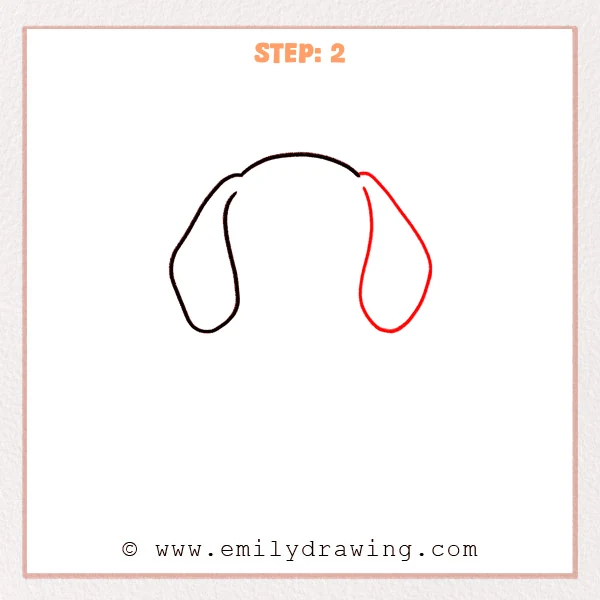
Draw a matching floppy right ear on the other side. Use two gentle inward curves to shape the sides of the beagle’s face.
Pro Tip: Keep both ears similar in height for balance.
Step 3: Add the Two Eyes

Place two round eyes in the upper-middle of the face with a small gap between them. Add a tiny highlight circle in each eye for a lively look.
Pro Tip: Line the eyes up at the same height.
Step 4: Draw the Nose, Mouth, and Face Markings
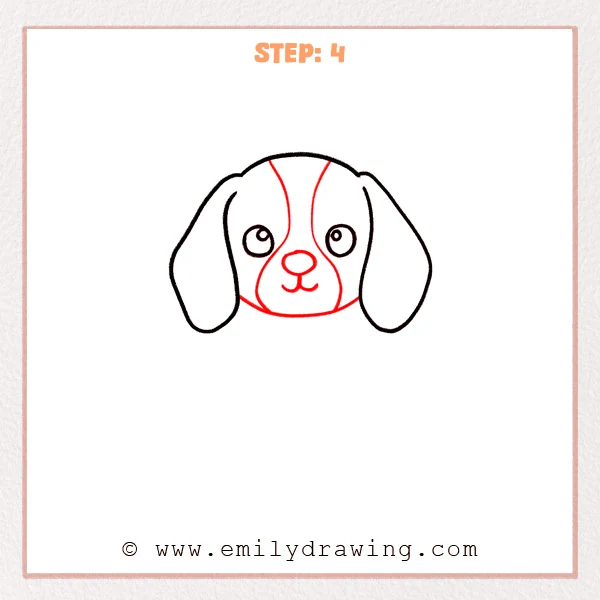
Draw a small oval nose under the eyes. Add a simple smiling mouth with short curves, then sketch a center marking line from forehead toward the nose.
Pro Tip: Keep the mouth lines short and soft for a gentle smile.
Step 5: Add the Body and Two Back Paws
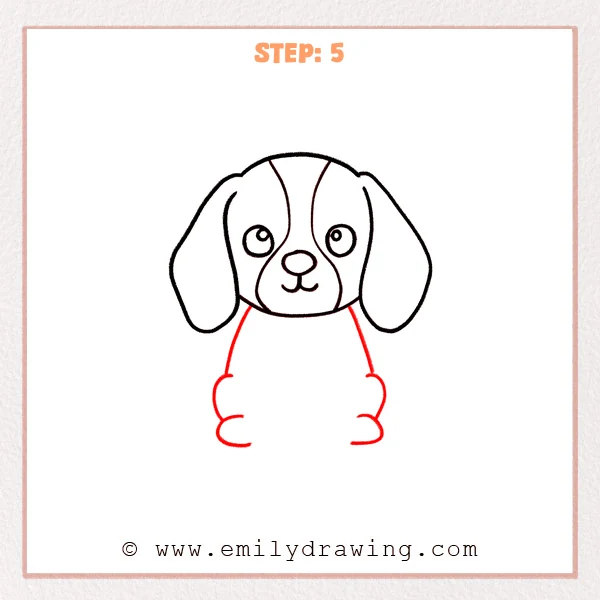
Extend two lines down from the head to form a rounded body shape. Then add one rounded back paw bump on each side at the bottom to show a sitting pose.
Pro Tip: Place the back paws toward the sides, leaving space for front paws.
Step 6: Finish the Front Paws and Tail, Then Refine
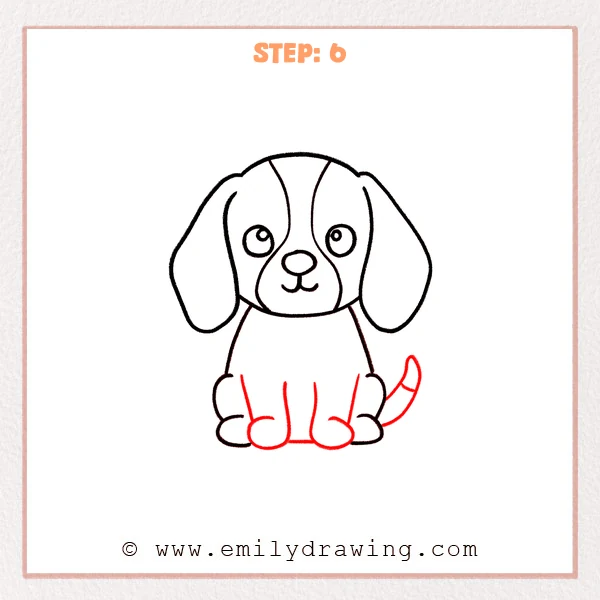
Draw two rounded front paws in the middle front area, using small curves to hint at toes. Add a curved tail on the right with a short tip band, then slightly thicken the main outline.
Pro Tip: Keep the front paws short and rounded for a cute look.
Step 7: Color in your drawing!
Fun Facts
- Beagles have long ears that help carry scents toward their noses.
- Their strong sense of smell makes them famous tracking dogs.
- Many beagles have a white-tipped tail that is easy to spot.
Pin it now, Draw later!
You just learned how to draw a beagle step by step using ears, a rounded head, and a simple sitting body. For coloring, try tan and white for the face, with a darker brown or black patch on the back. Add gentle shading under the ears and beneath the paws to help the beagle sit on the ground.
One common beginner mistake is placing the eyes too high or too far apart. If that happens, lightly erase and bring them closer to the center line.
Keep practicing this step by step drawing, and try drawing your beagle in a few different sizes. If you enjoy drawing for beginners, try another easy drawing tutorial and build a small set of pet drawings.
Get the FREE Printable Drawing Guide
FREE Download Printable Beagle Drawing Tutorial
Frequently Asked Questions
How can I make my beagle look cuter?
Make the eyes slightly larger and keep the mouth small and curved.
What if my ears look uneven?
Adjust the bottom curves so both ear tips end at a similar height.
How do I add simple fur texture?
Use a few tiny, short strokes along the cheeks and ear edges.