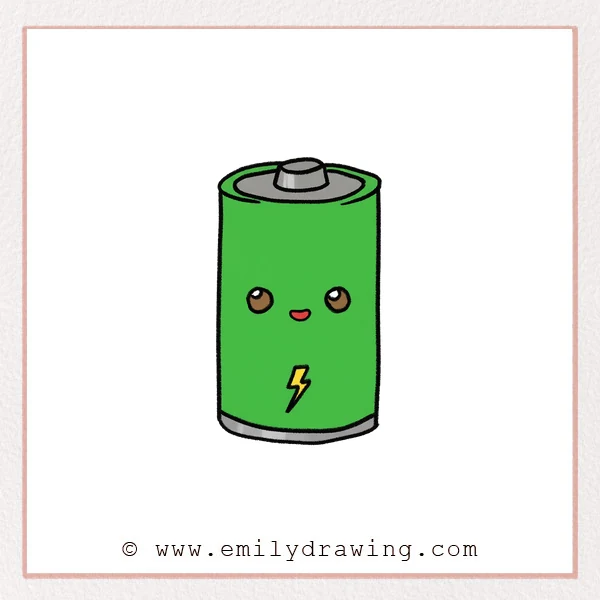
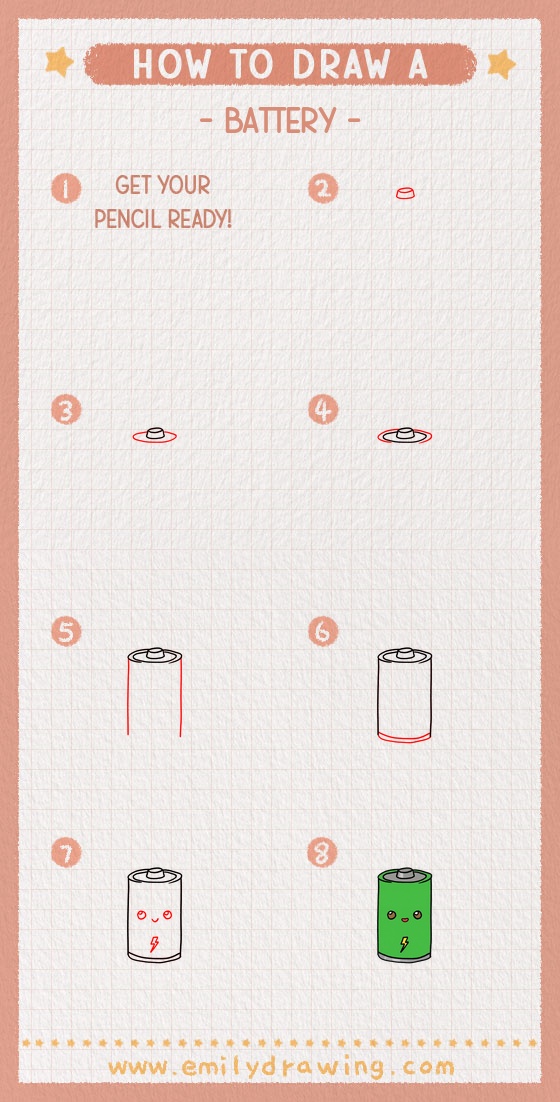
This easy drawing tutorial shows how to draw a battery step by step using simple ovals and straight lines. You will start with the top cap, build the cylinder body, and finish with a cute face and lightning symbol. Take your time with symmetry, and this drawing for beginners will look clean and tidy.
What You Will Need
- Pencil
- Eraser
- Black marker or fineliner
- Plain drawing paper
- Colored pencils or crayons (optional)
Here are my RECOMMENDED Art Supplies!
- Crayola Coloring Set (140 Pieces – Mega Value!)
- 24 Colored Crayon Set
- A4 Printer Paper
- Crayola Coloring Pencils
- HP Home Printer with Instant Ink!
Time needed:
24 minutes.
Step-by-Step Drawing Guide
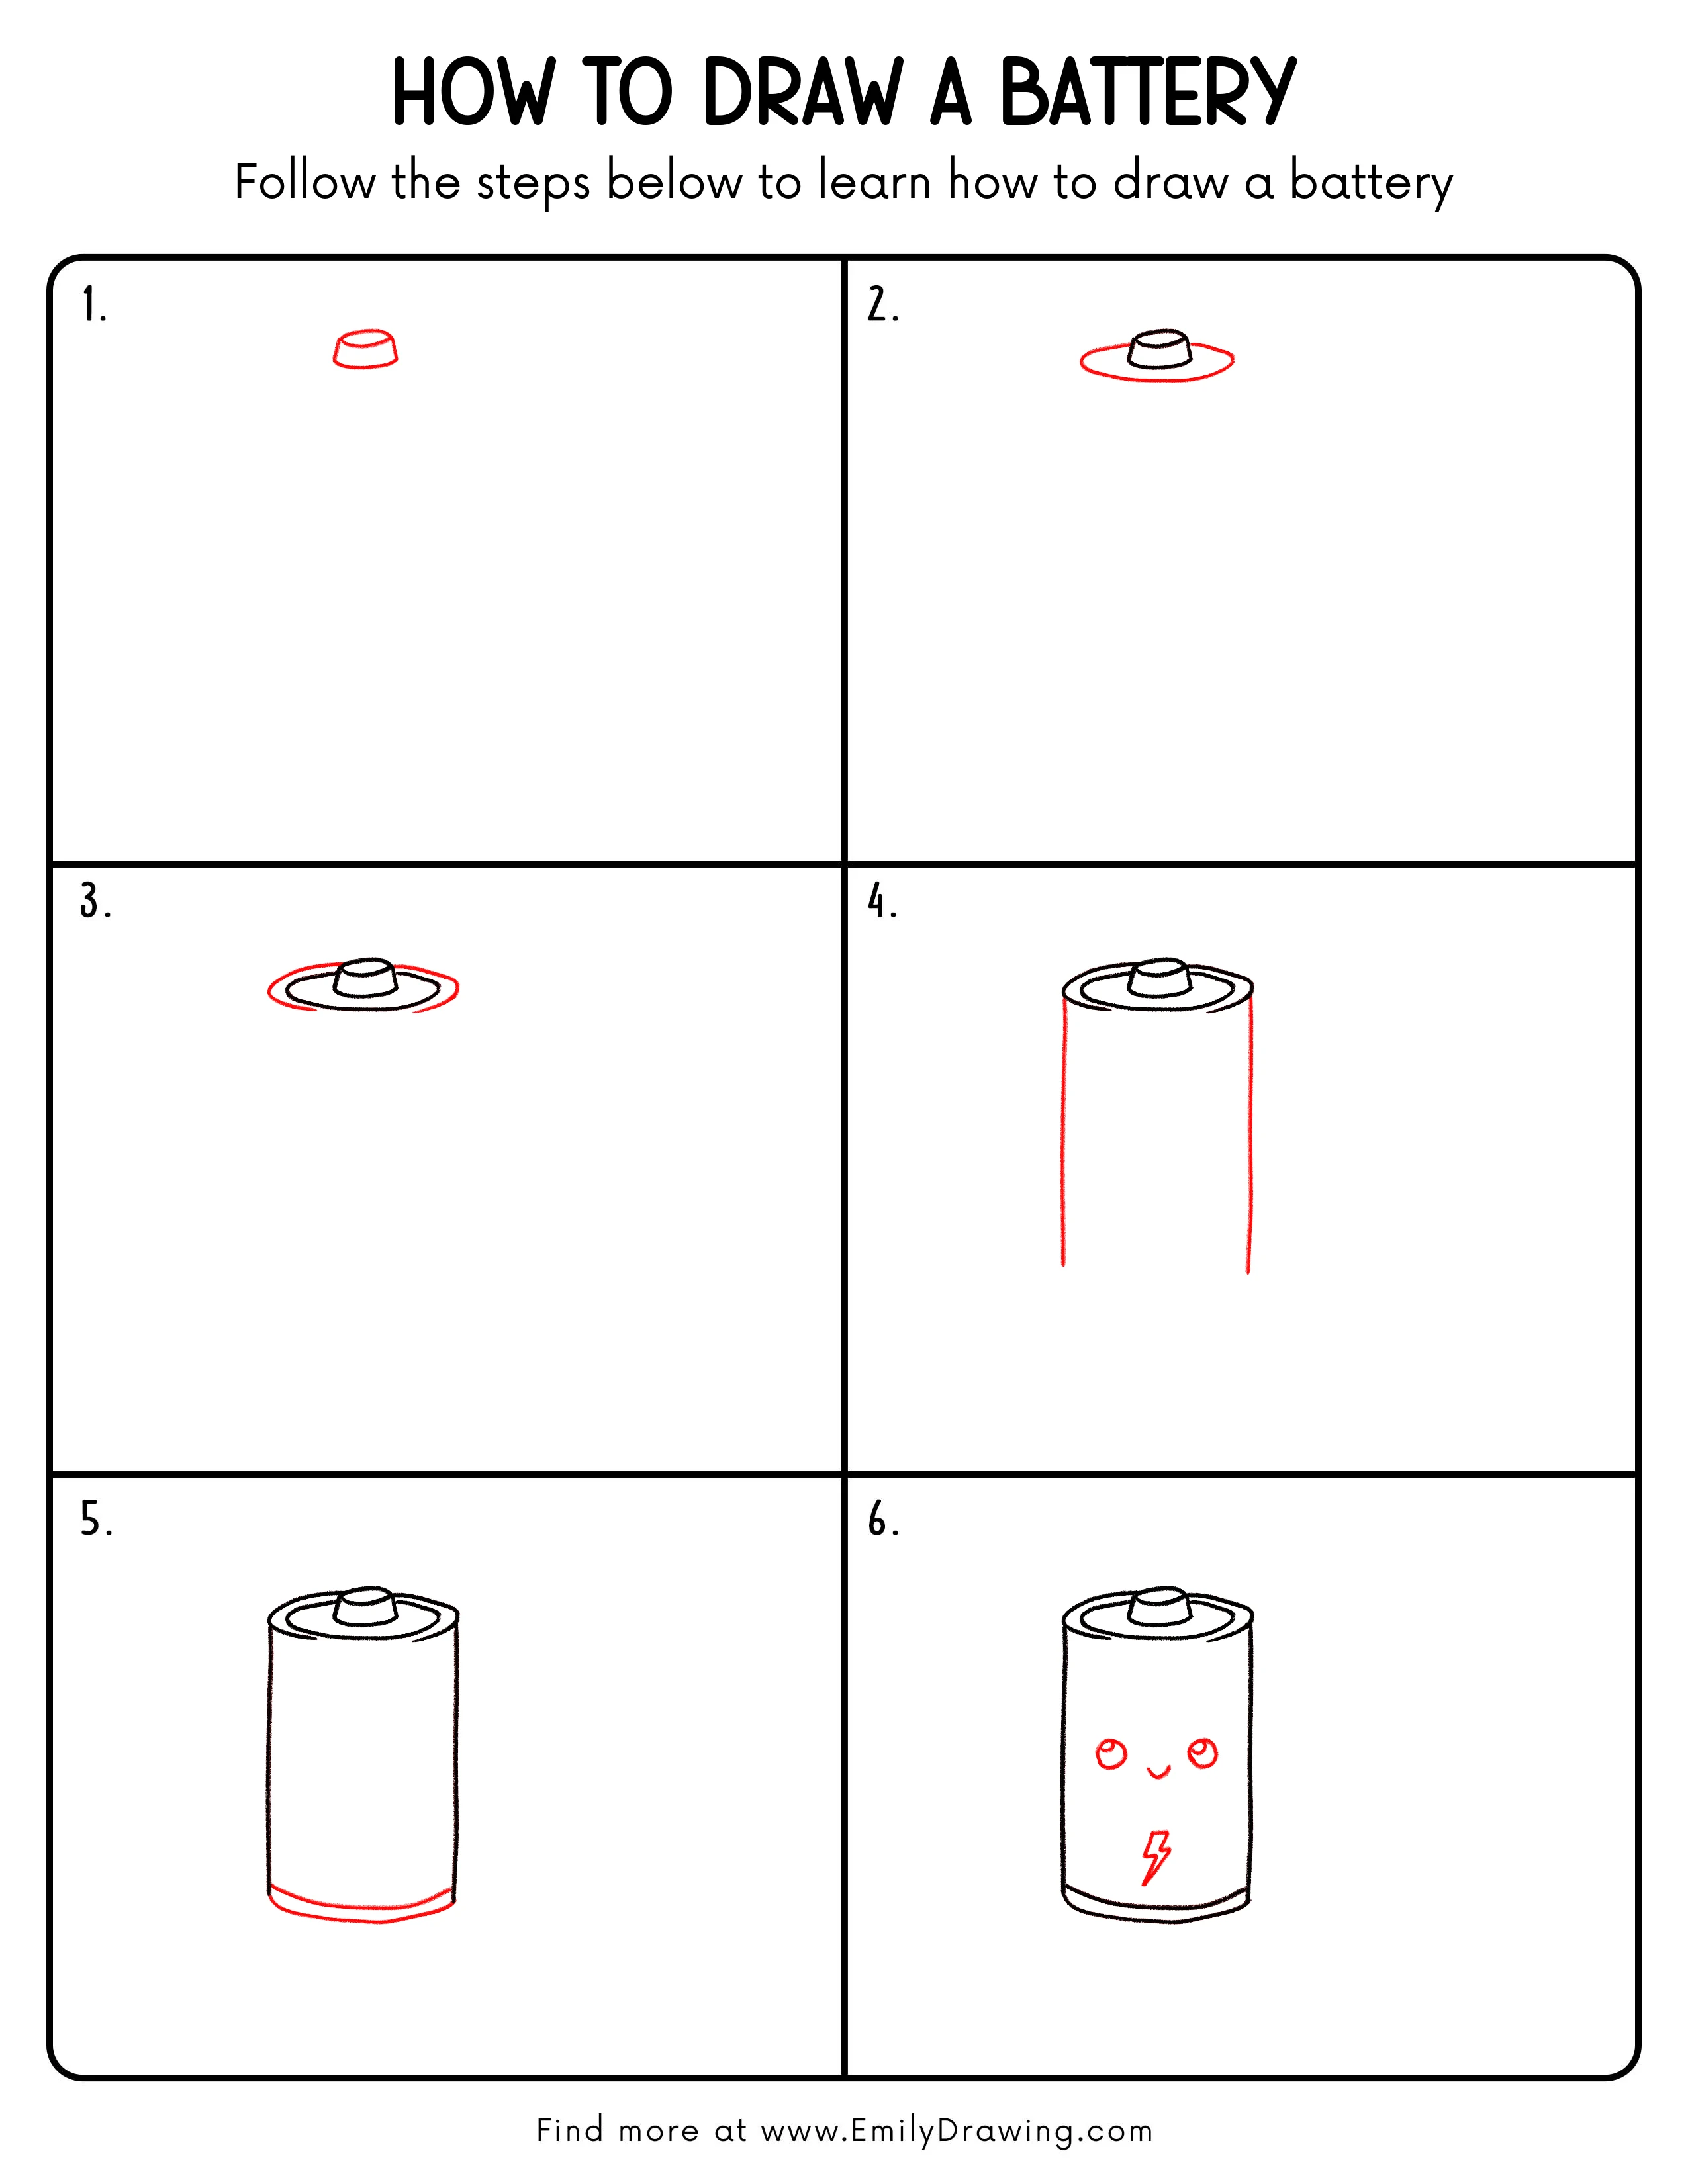
Step 1: Draw the Small Top Cap

Start with a small rounded trapezoid near the top of the page. Use a short curved line on top so it feels slightly 3D.
Pro Tip: Keep the top curve shallow so the cap stays short and sturdy.
[Alt Text: Step 1: A small rounded cap shape is drawn to start the battery’s top.]
Step 2: Add the Top Outer Oval
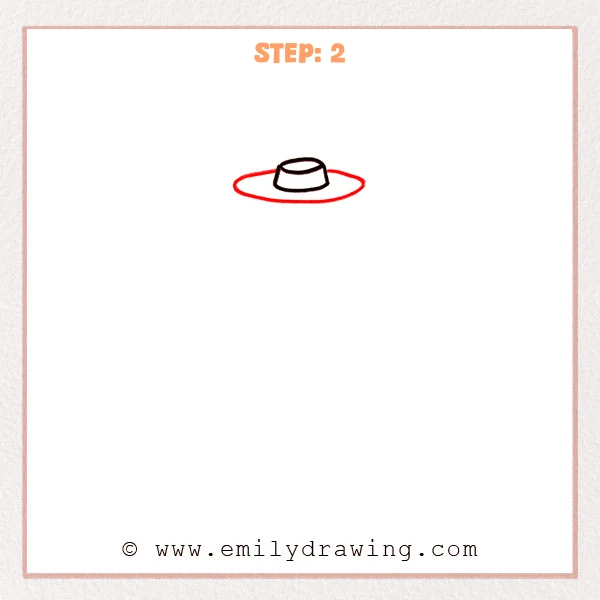
Draw a wide, flat oval under the small cap, like a ring supporting it. Keep the oval balanced left and right.
Pro Tip: Lightly imagine a center line, then widen the oval evenly on both sides.
[Alt Text: Step 2: A wide oval ring is added beneath the battery cap to form the top rim.]
Step 3: Add the Inner Rim Oval
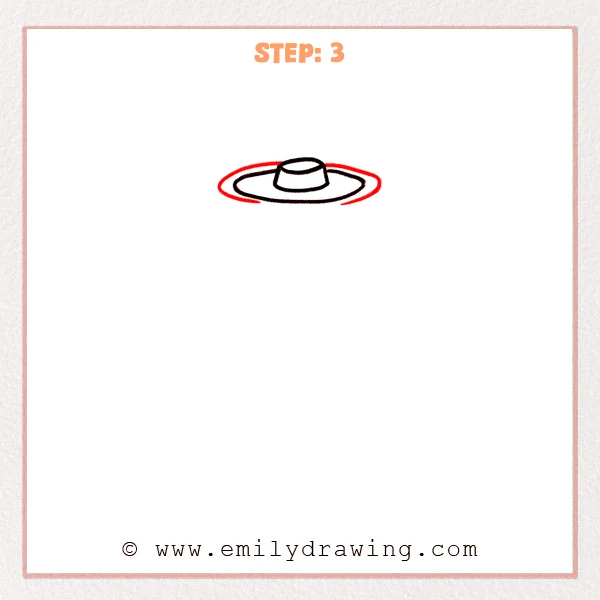
Draw a smaller oval inside the first one to create a double rim. Keep the spacing even so the top looks like metal.
Pro Tip: Don’t hug the edge—leave a clear rim thickness all around.
[Alt Text: Step 3: A second inner oval is added to create a double rim on the battery top.]
Step 4: Draw the Battery Cylinder Body
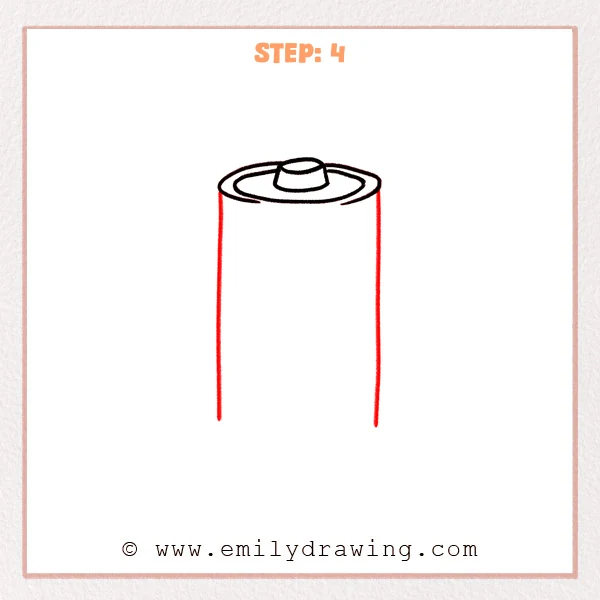
Pull two long vertical lines down from the top edges to form the cylinder sides. Keep them parallel so the battery stands straight.
Pro Tip: Check both sides’ height as you extend them downward.
[Alt Text: Step 4: Long vertical sides are drawn to form the battery’s tall cylindrical body.]
Step 5: Add the Bottom Base Rim
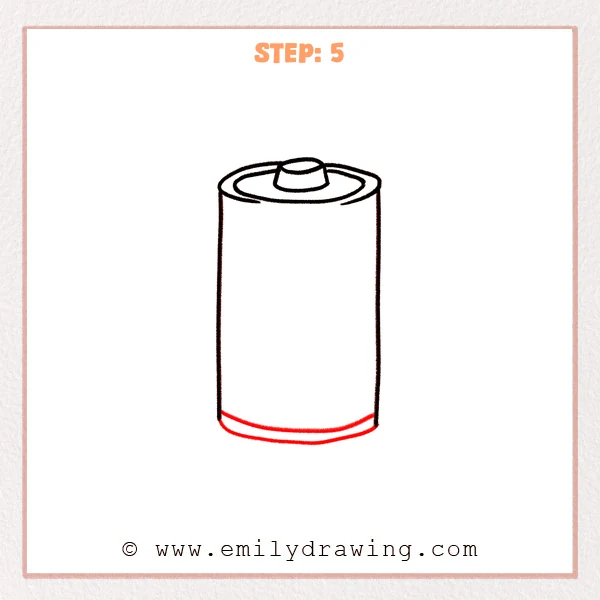
Draw a curved bottom edge to round off the base. Add a second curved line above it to show the bottom rim thickness.
Pro Tip: Keep both bottom curves similar so the rim thickness looks even.
[Alt Text: Step 5: A rounded base and a second curve are added to form the battery’s bottom rim.]
Step 6: Add the Face and Lightning Symbol
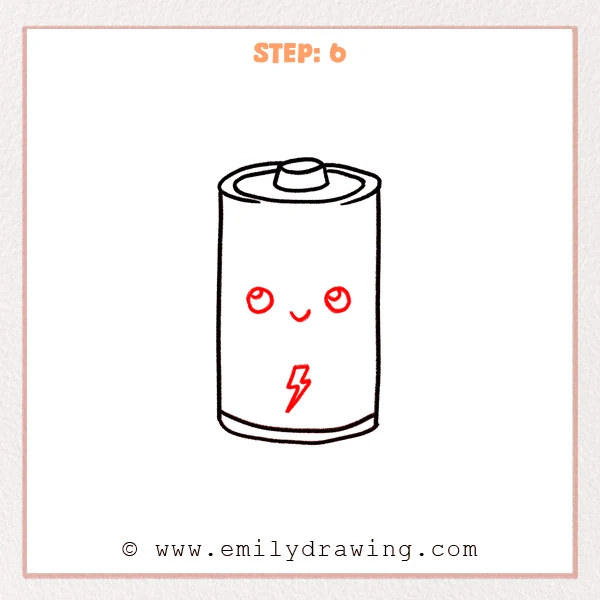
Draw two round eyes with small highlights, then add a tiny smiling mouth. Finish with a simple lightning bolt symbol on the lower body for an energetic look.
Pro Tip: Keep the eyes the same size, and use sharp angles for a crisp bolt.
[Alt Text: Step 6: Cute eyes, a small smile, and a lightning bolt icon complete the battery drawing.]
Step 7: Color in your drawing!
Fun Facts
- A battery is often drawn as a cylinder because many common batteries are round.
- A double rim at the top helps your drawing look more three-dimensional.
- A lightning bolt is a common symbol for energy and power.
Pin it now, Draw later!
You now know how to draw a battery step by step, from the top cap to the full cylinder and cute face. Trace your final outline with a marker, then erase leftover pencil lines once the ink is fully dry.
For coloring, try a light gray body with a darker gray rim, and add a bright yellow lightning bolt. Shade one side of the cylinder lightly, and leave a thin highlight stripe on the other side to make it look shiny.
One common beginner mistake is making the side lines tilt inward, which makes the battery look crooked. Keep practicing this easy drawing tutorial, and try drawing different battery sizes to build your drawing for beginners skills.
Get the FREE Printable Drawing Guide
FREE Download Printable Battery Drawing Tutorial
Frequently Asked Questions
How do I keep the top oval from looking lopsided?
Mark a light center point first, then draw the oval evenly to both sides.
What if my battery looks too flat?
Add the inner rim oval and keep the bottom curve slightly rounded.
How can I make the cylinder look more 3D?
Shade one side gently and leave a clean highlight strip on the other side.