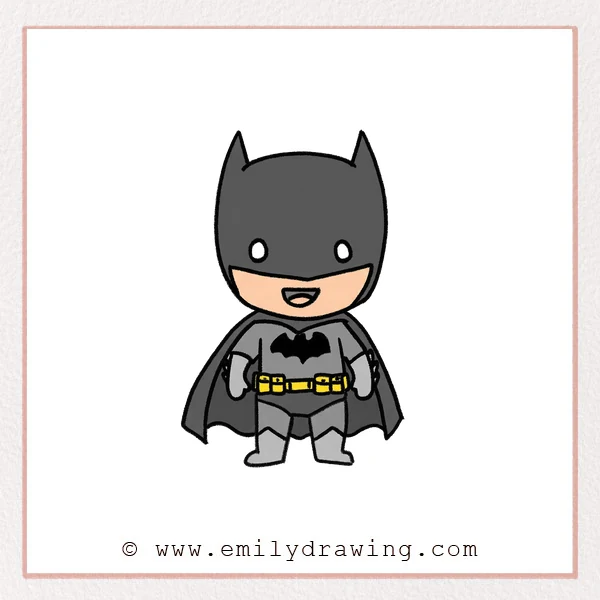
This easy drawing tutorial shows how to draw Batman step by step in a cute, simple style. You will build the cowl first, then add the cape, belt, and boots. Take your time with symmetry, and this drawing for beginners will look clean and confident.
What You Will Need
- Pencil
- Eraser
- Black marker or fineliner
- Plain drawing paper
- Colored pencils or crayons (optional)
Here are my RECOMMENDED Art Supplies!
- Crayola Coloring Set (140 Pieces – Mega Value!)
- 24 Colored Crayon Set
- A4 Printer Paper
- Crayola Coloring Pencils
- HP Home Printer with Instant Ink!
Time needed:
20 minutes.
Step-by-Step Drawing Guide
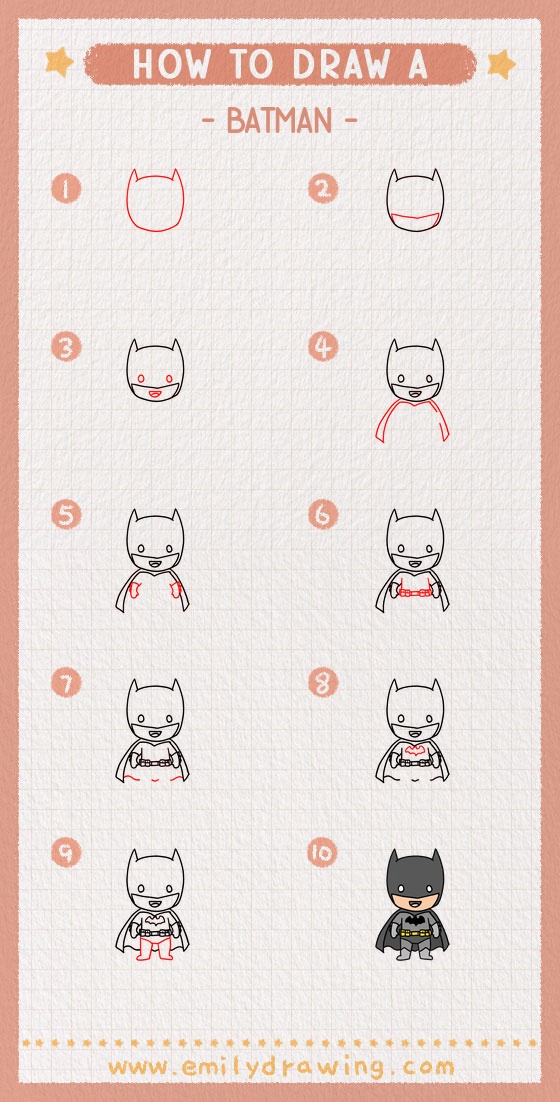
Step 1: Draw the Batman Cowl Outline
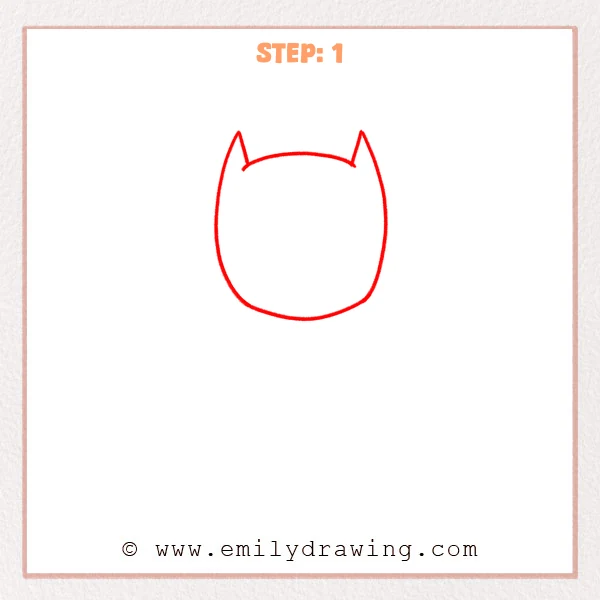
Start with a rounded head shape that curves into a soft chin. Add two pointed bat ears on top, keeping them similar in height.
Pro Tip: Place both ear tips first, then connect them back to the head.
[Alt Text: Step 1: Batman’s cowl outline is drawn with a rounded head and two pointed ears.]
Step 2: Add the Lower Mask Area
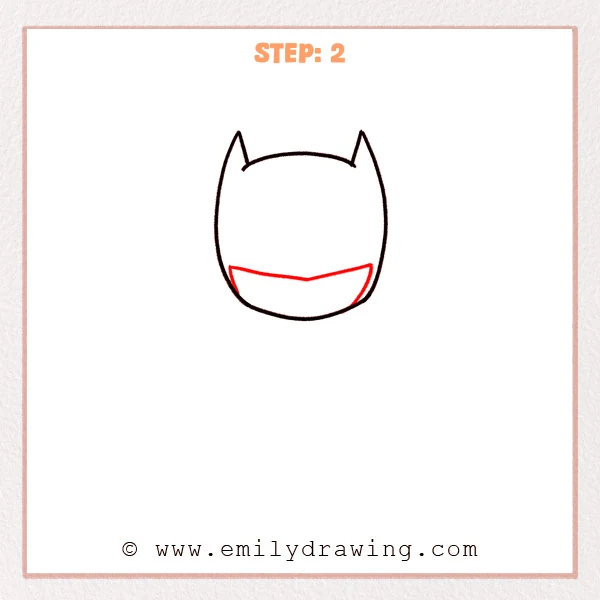
Draw a wide curved boundary across the lower face to separate the mask from the mouth area. Let it dip slightly in the center and hug the cheeks.
Pro Tip: Keep the boundary low enough to leave room for the mouth.
[Alt Text: Step 2: A curved mask boundary is added to define Batman’s lower face area.]
Step 3: Draw the Eyes and Open Mouth
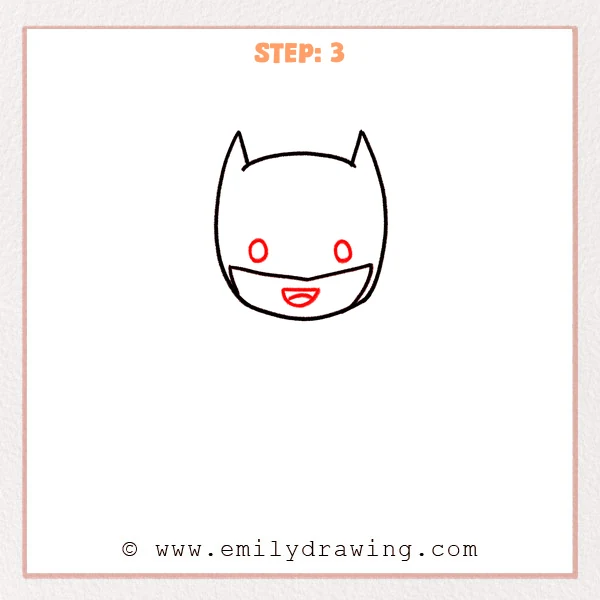
Add two small round eyes inside the mask, aligned left and right. Draw an open smiling mouth and add a small inner curve for tongue or depth.
Pro Tip: Keep the eyes small and simple for a cute look.
[Alt Text: Step 3: Batman’s eyes and an open smiling mouth are added to the face.]
Step 4: Draw the Cape and Upper Body Outline
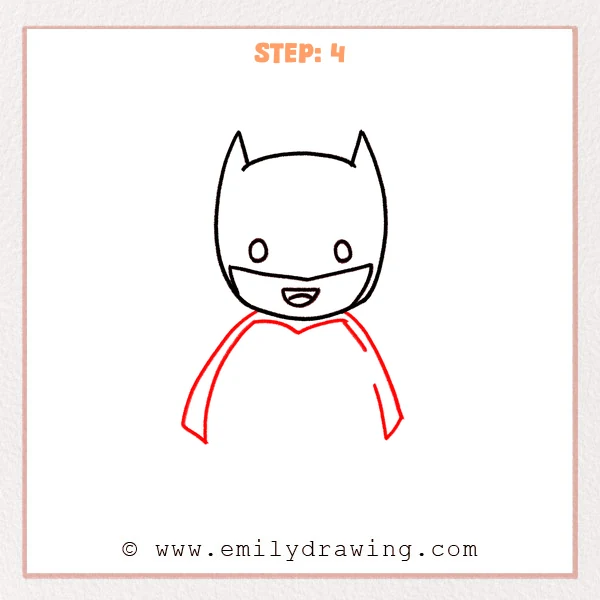
Pull two long curved lines down from the head to shape the cape sides. Add a neckline curve so the upper body sits inside the cape.
Pro Tip: Keep both cape sides close in length for balance.
[Alt Text: Step 4: Batman’s cape and upper body neckline are outlined beneath the head.]
Step 5: Add Arms and Gloves
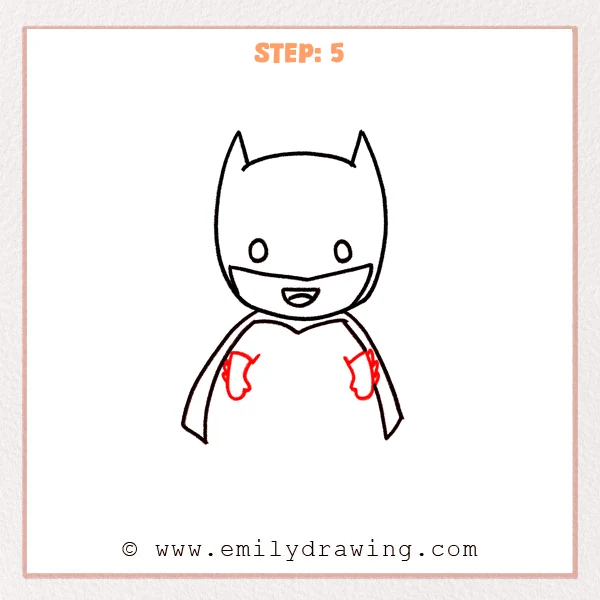
Sketch the arms inside the cape and finish each with a rounded glove shape. Add short inner lines to suggest the cape’s inner edge.
Pro Tip: Line up both gloves at the same height for a tidy pose.
[Alt Text: Step 5: Batman’s arms and rounded gloves are added inside the cape.]
Step 6: Draw the Utility Belt
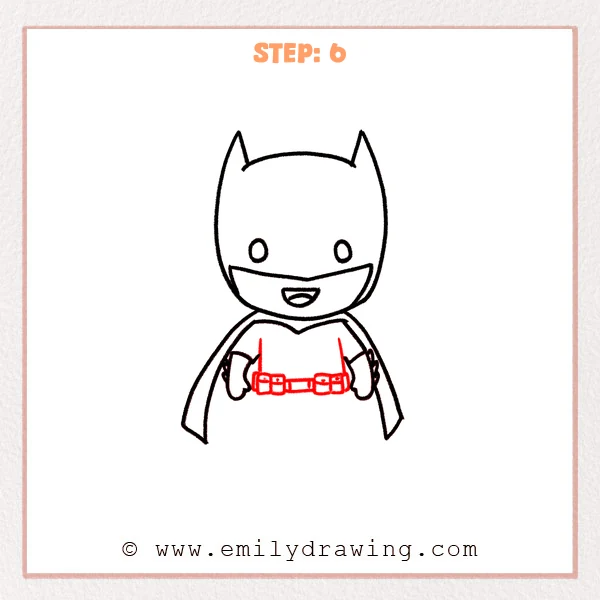
Draw a horizontal belt across the waist and divide it into small rectangular pouches. Add a simple buckle shape in the center for detail.
Pro Tip: Keep the pouch sizes consistent for a clean look.
[Alt Text: Step 6: A utility belt with pouches and a center buckle is added to Batman’s waist.]
Step 7: Add the Cape Hem Waves

Add gentle wavy lines along the lower edge to form the cape hem. Keep the waves soft so the fabric looks like it hangs naturally.
Pro Tip: Smaller waves help the cape feel heavier and thicker.
[Alt Text: Step 7: Wavy cape hem lines are added beneath Batman’s body.]
Step 8: Draw the Bat Symbol
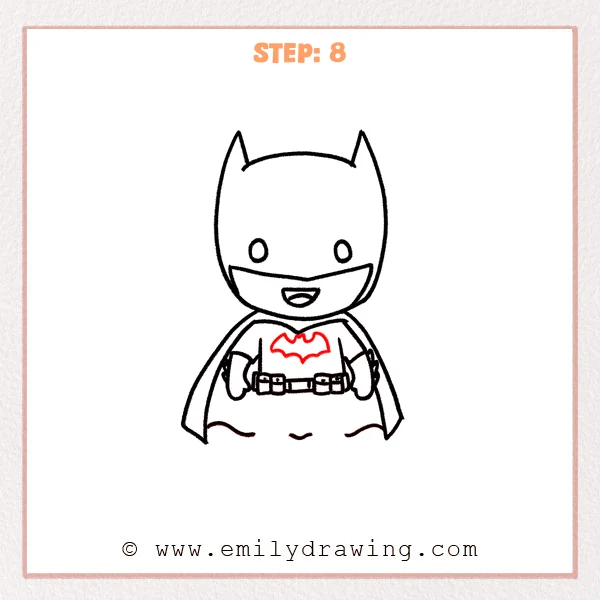
Draw a simplified bat symbol in the center of the chest with wings spread evenly. Use small points for wing tips while keeping the shape rounded overall.
Pro Tip: Draw the small center body first, then add wings to both sides.
[Alt Text: Step 8: A simple bat emblem is added to Batman’s chest.]
Step 9: Add Legs and Boots to Finish
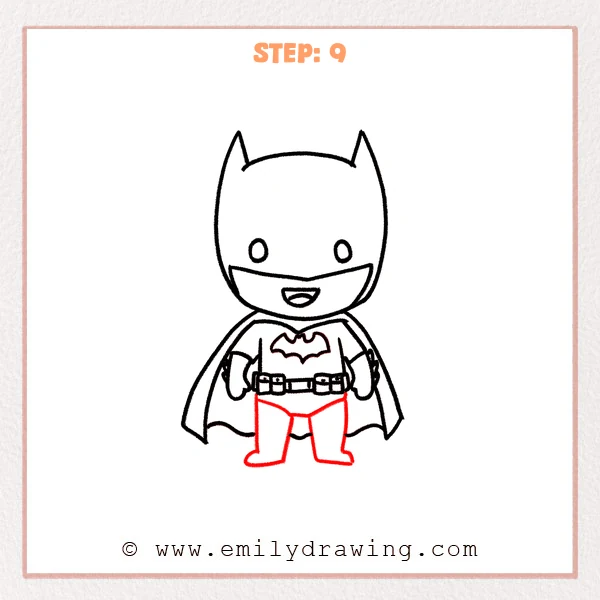
Draw two short legs below the belt like rounded pillars. Add simple boot shapes with flat soles so Batman stands firmly.
Pro Tip: Keep both boot soles on the same horizontal line.
[Alt Text: Step 9: Batman’s legs and boots are added to complete the full chibi Batman drawing.]
Step 10: Color in your drawing!
Fun Facts
- Batman’s pointed ears help make his silhouette easy to recognize.
- A cape is great practice for drawing smooth, flowing lines.
- Simple symbols, like the bat emblem, make characters instantly clear.
Pin it now, Draw later!
You now know how to draw Batman step by step, from the cowl to the cape, belt, and boots. Trace your final outline with a marker, then erase leftover pencil lines once the ink is fully dry.
For coloring, try dark gray or black for the cowl and cape, with a lighter gray suit. Add gentle shading under the cape and along one side of the legs, and leave a small highlight on the belt to suggest shine.
One common beginner mistake is making the ears uneven, which can tilt the whole face. Keep practicing this easy drawing tutorial, and try drawing Batman with different cape shapes to build confidence.
Get the FREE Printable Drawing Guide
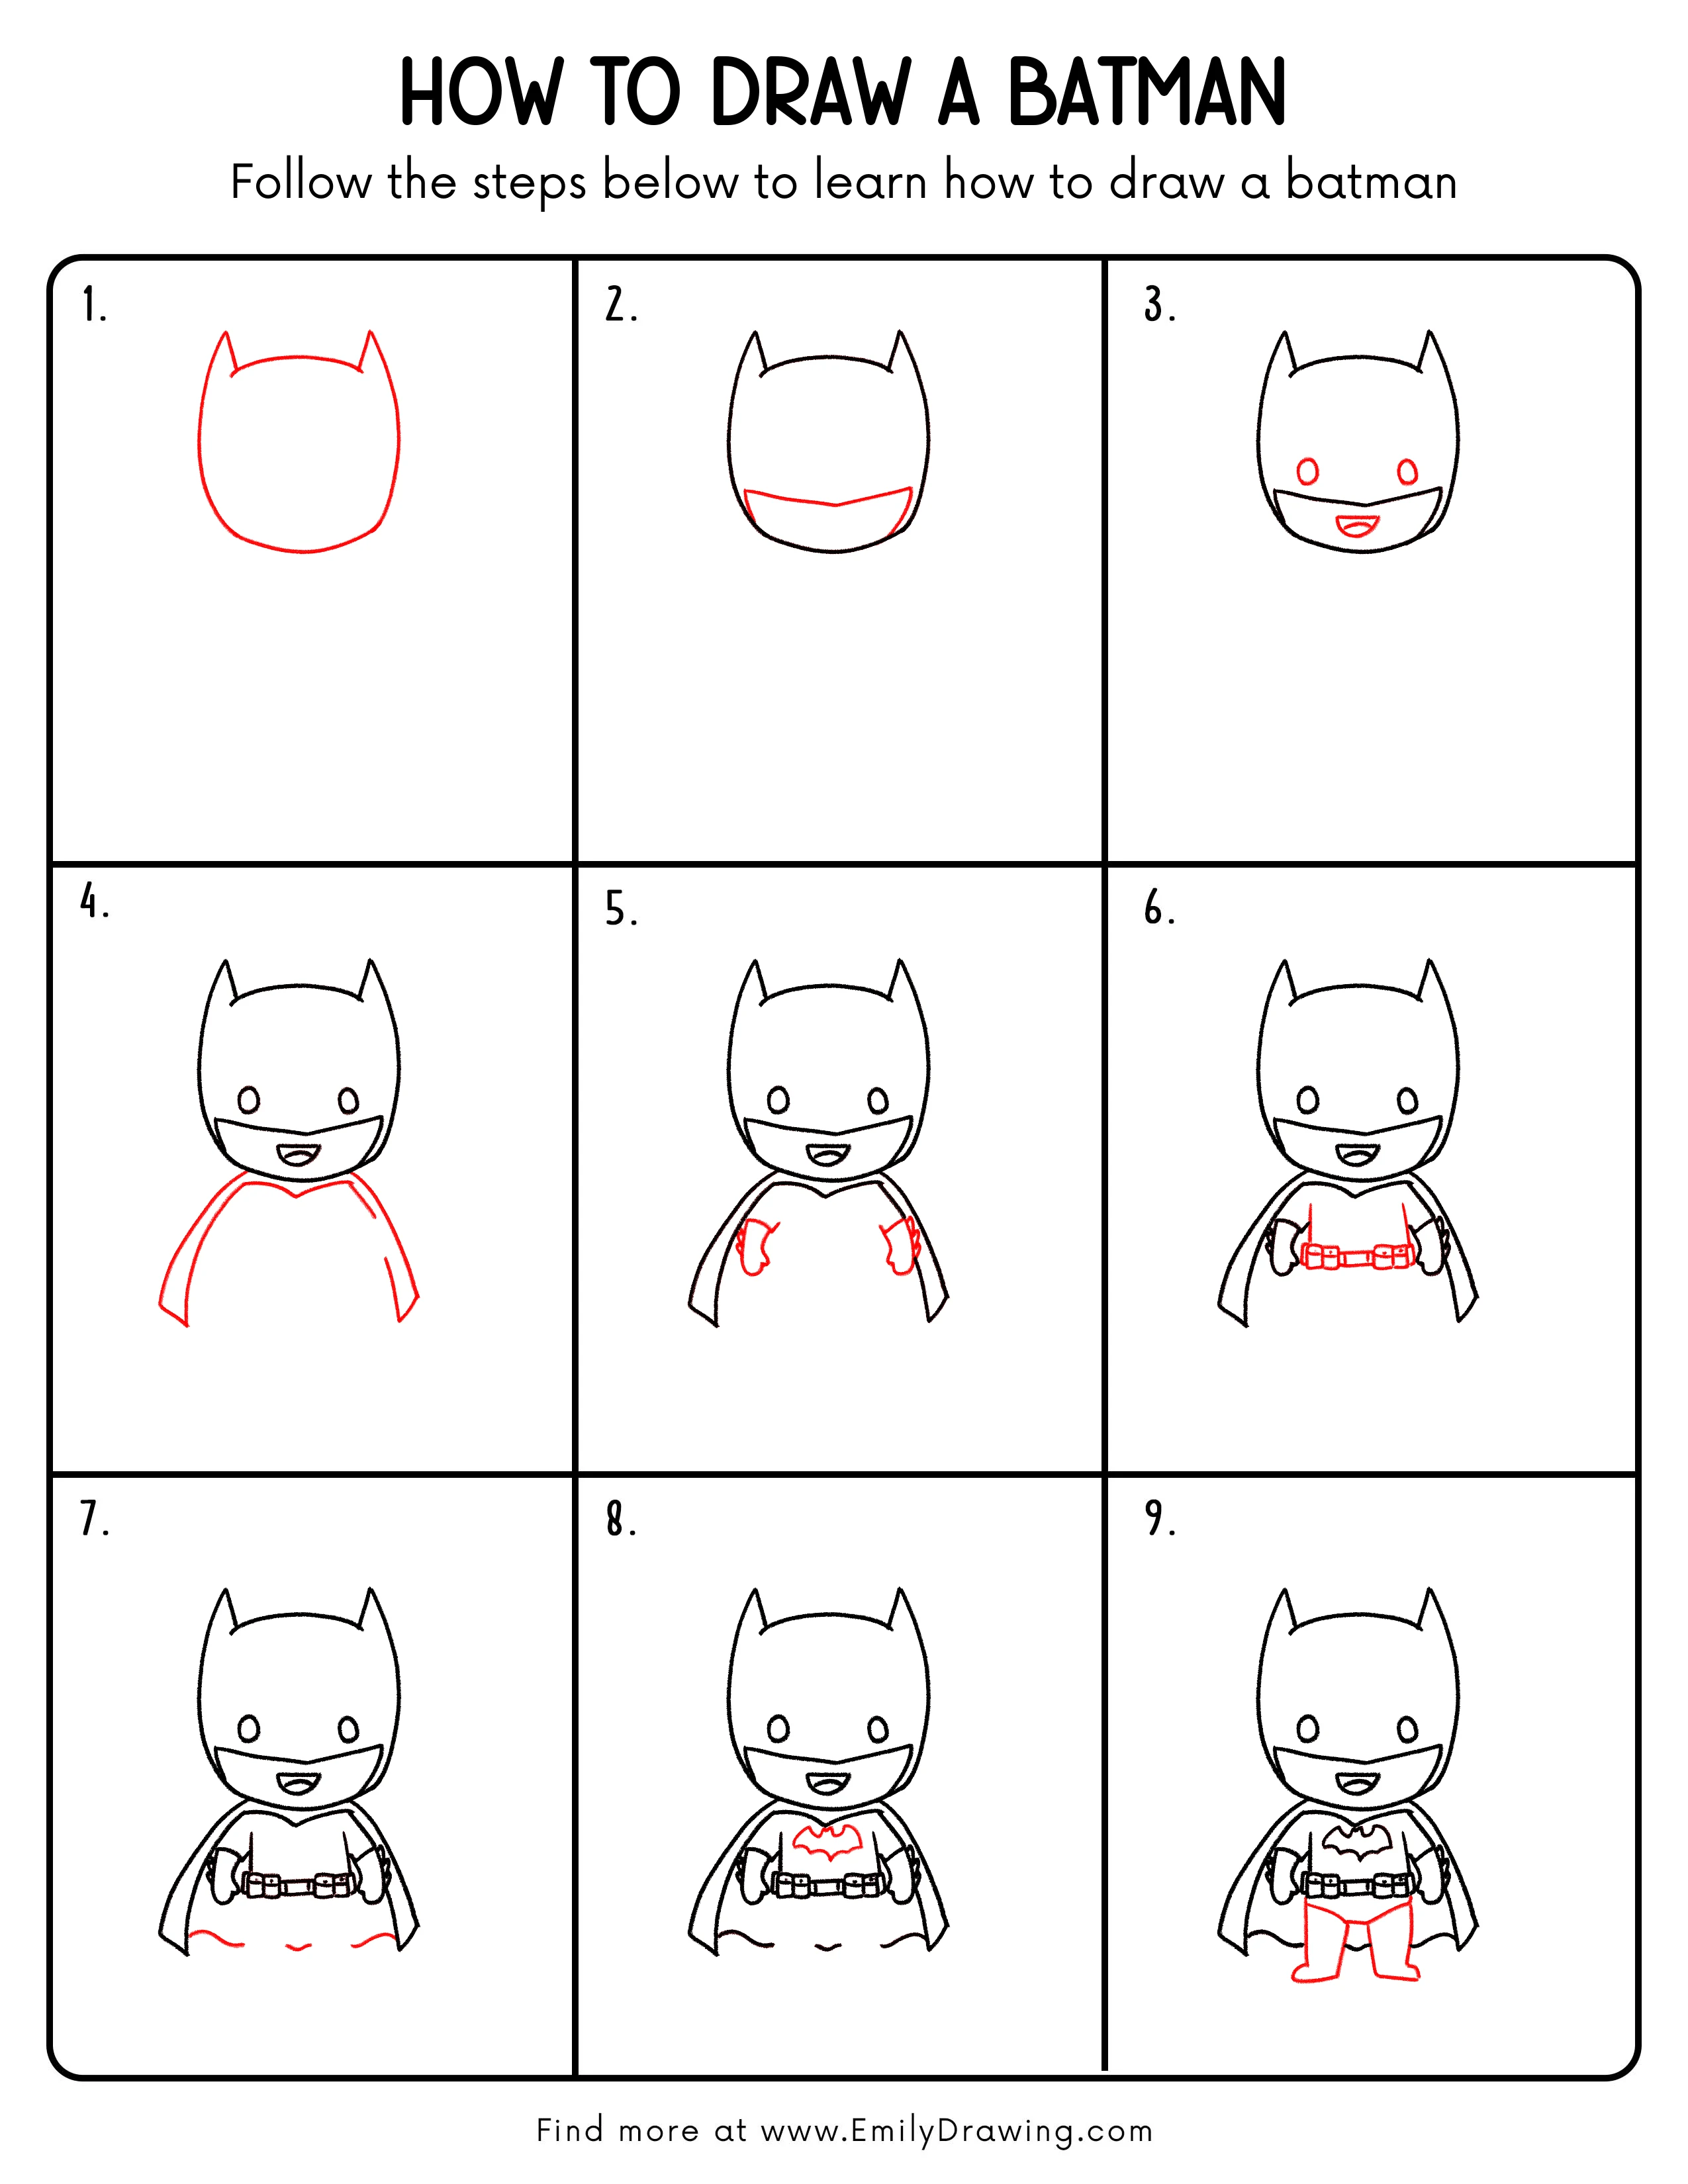
FREE Download Printable Batman Drawing Tutorial
Frequently Asked Questions
How do I keep the ears the same size?
Mark two small points at the same height first, then draw both ears to those points.
What if my cape looks stiff?
Use longer, smoother curves and add soft waves at the bottom edge.
How can I center the bat symbol on the chest?
Find the middle of the neckline first, then build the symbol outward on both sides.