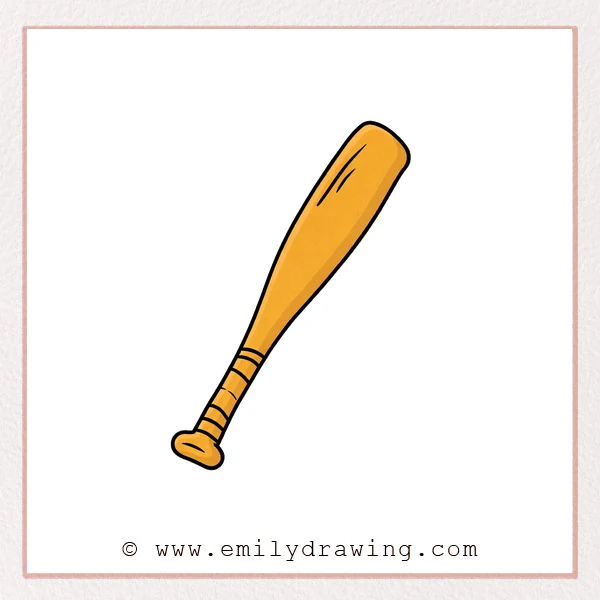
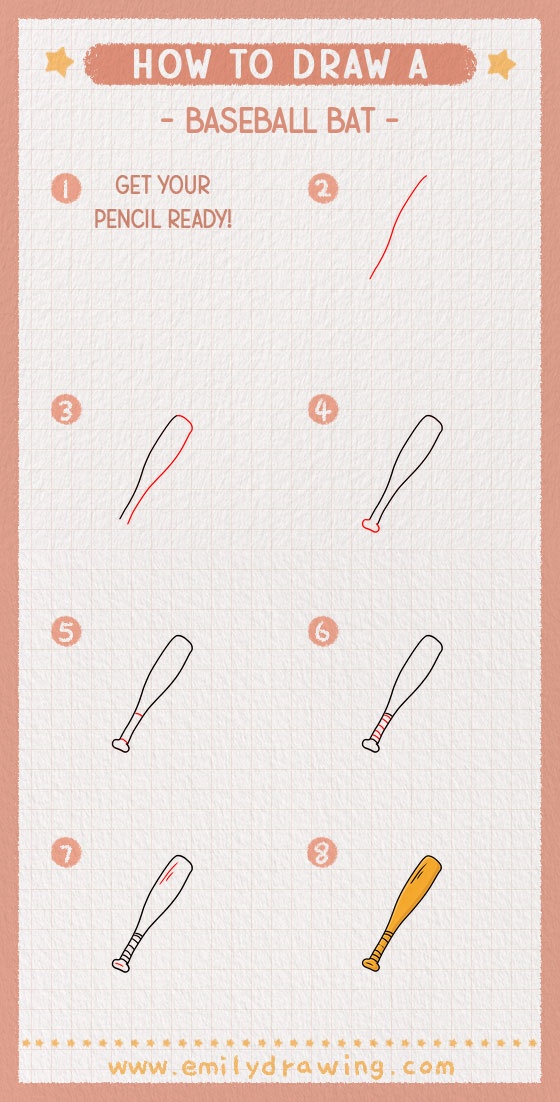
This easy drawing tutorial shows how to draw a baseball bat step by step with smooth, simple curves. You will build the bat from one guiding line, then shape the handle, grip wrap, and shiny highlights. Take your time, and your drawing for beginners will look clean and confident.
What You Will Need
- Pencil
- Eraser
- Black marker or fineliner
- Plain drawing paper
- Colored pencils or crayons (optional)
Here are my RECOMMENDED Art Supplies!
- Crayola Coloring Set (140 Pieces – Mega Value!)
- 24 Colored Crayon Set
- A4 Printer Paper
- Crayola Coloring Pencils
- HP Home Printer with Instant Ink!
Time needed:
15 minutes.
Step-by-Step Drawing Guide
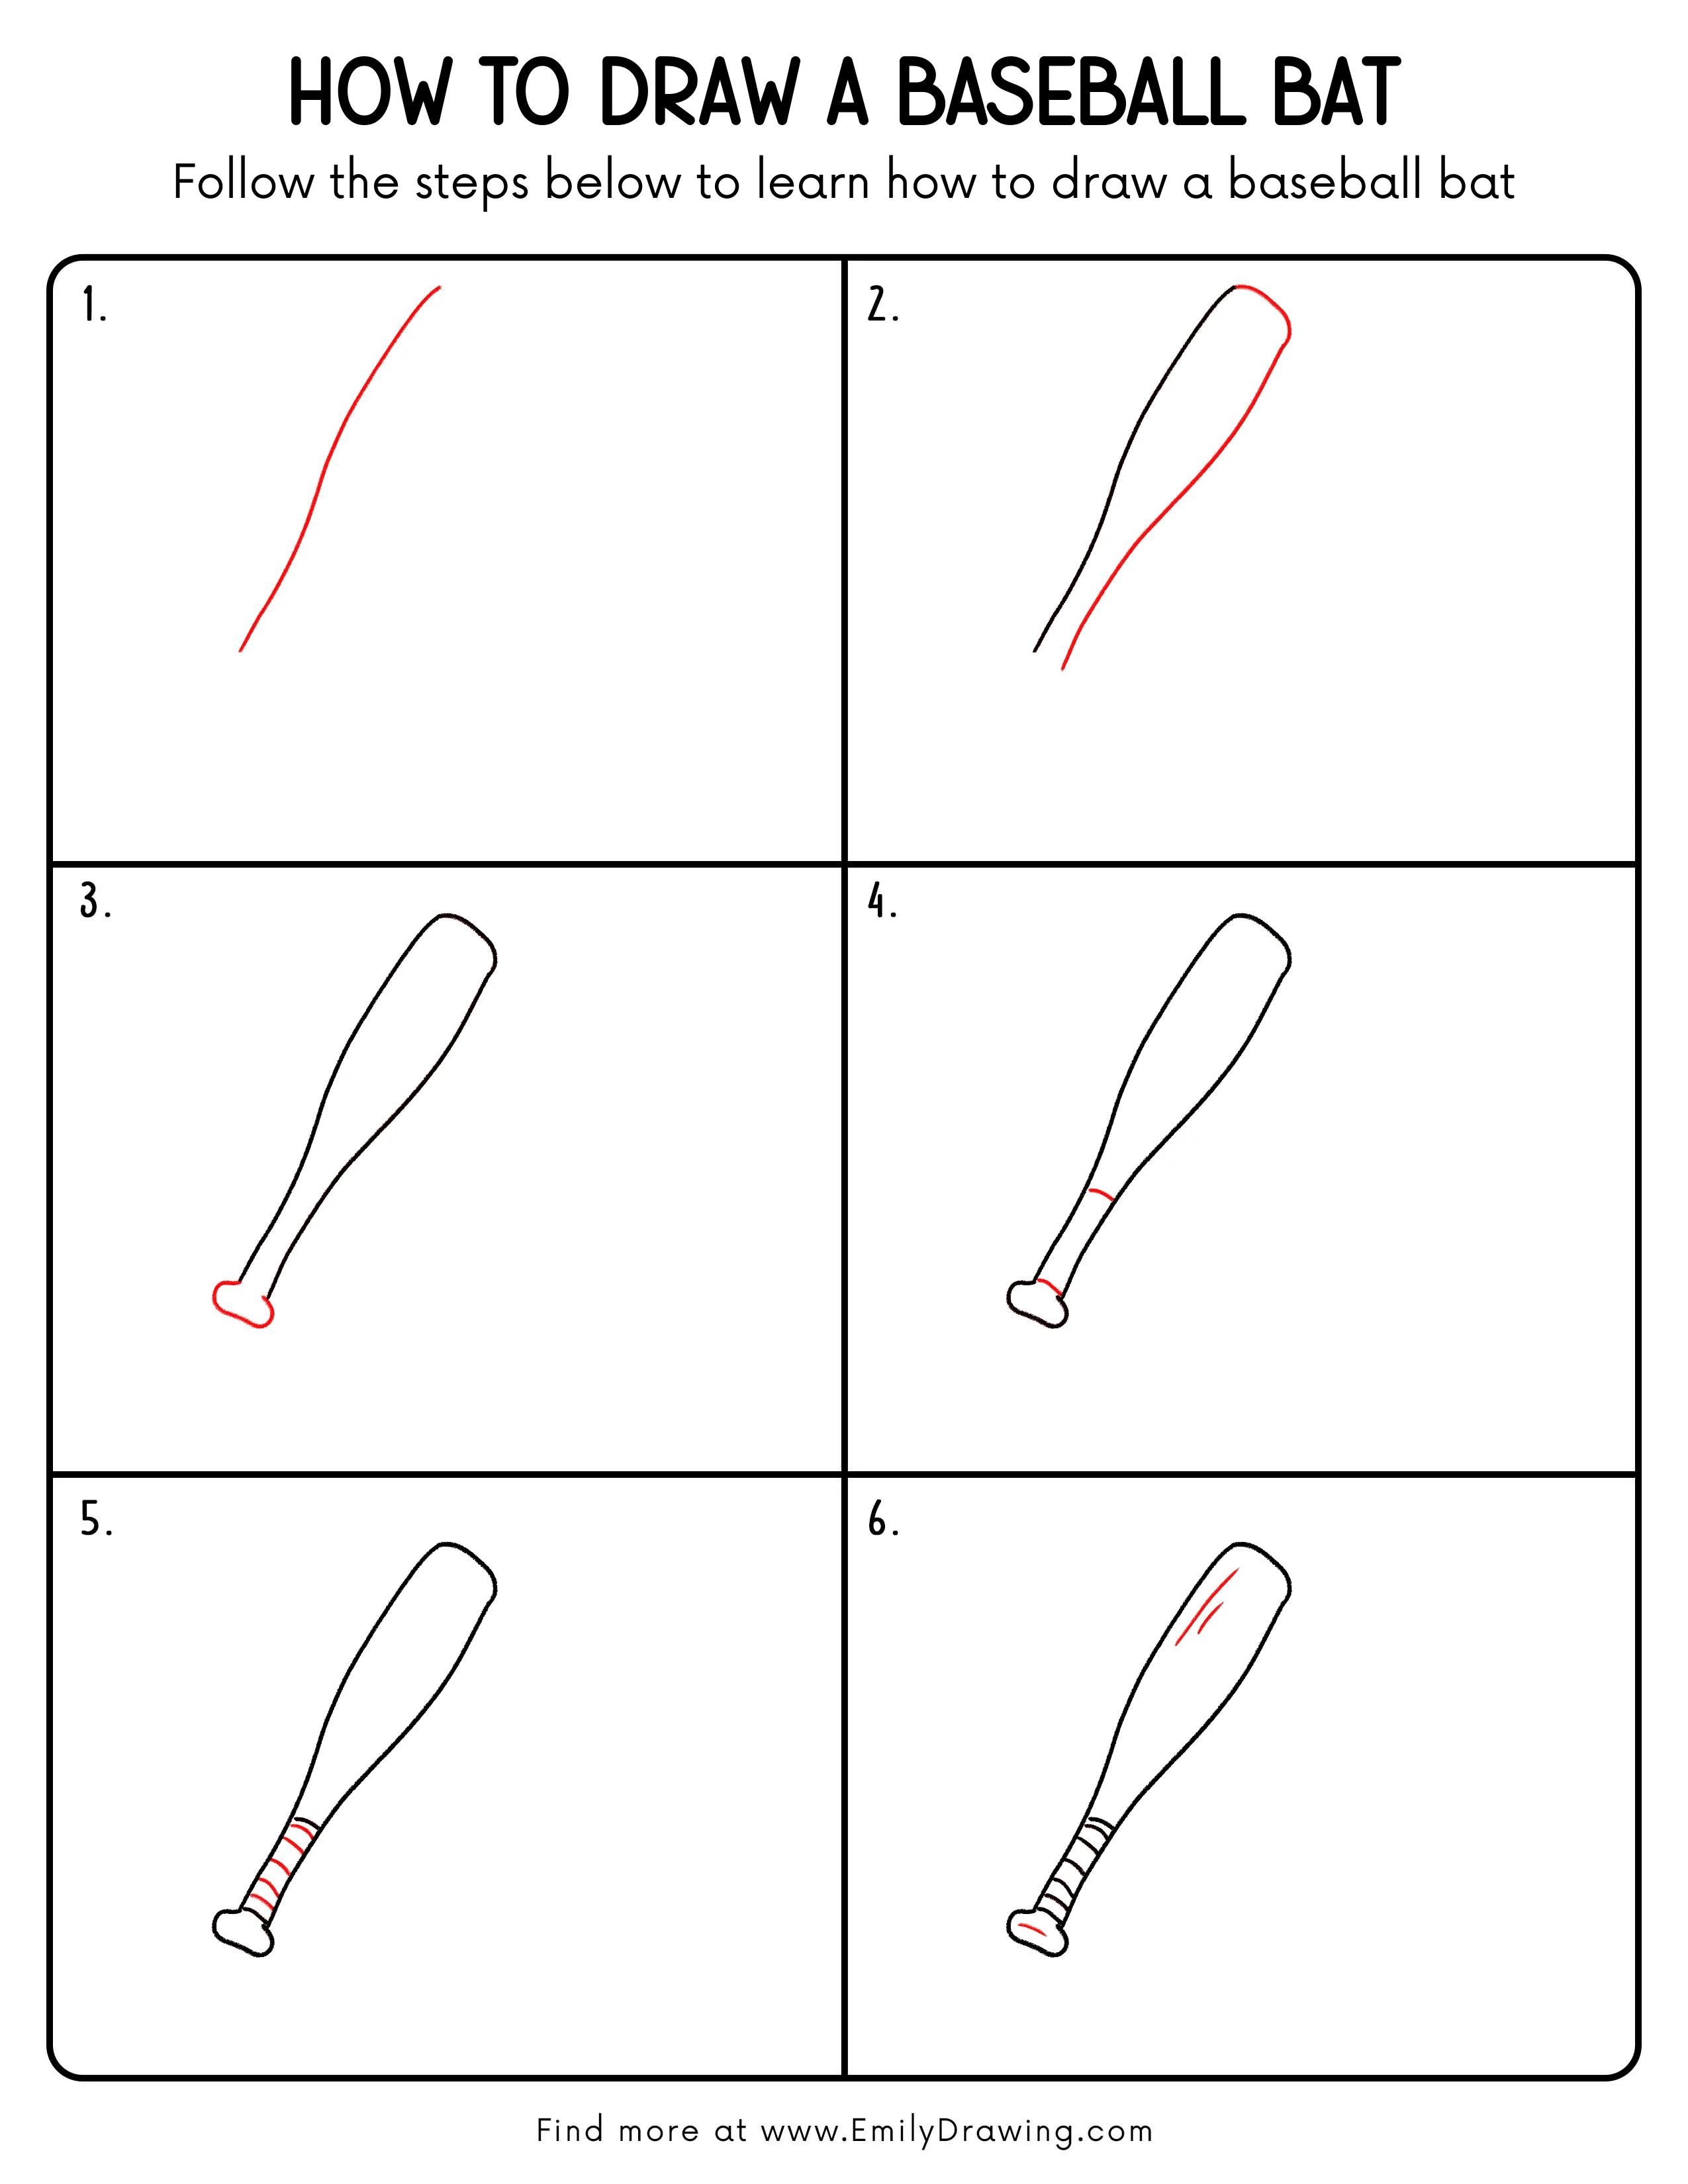
Step 1: Draw the Main Curve
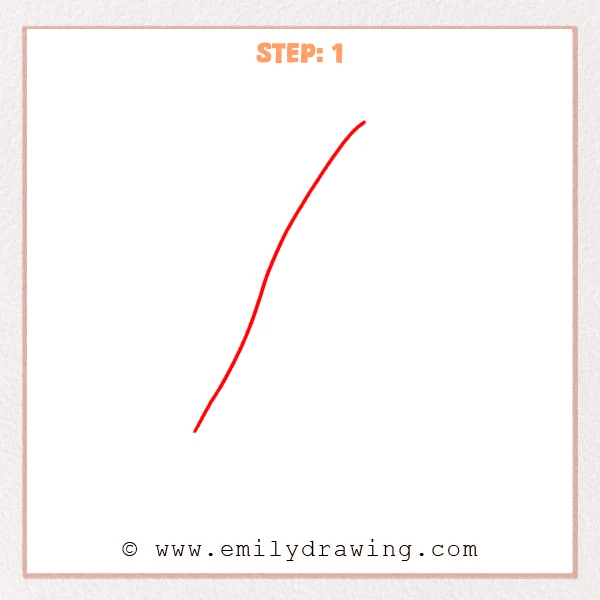
Start with one long, gentle curved line, slightly tilted. Let it begin thinner near the bottom and rise toward a rounder top area.
Pro Tip: Keep the line smooth and unbroken so the bat feels solid.
[Alt Text: Step 1: A single long curved line sets the main direction of the baseball bat.]
Step 2: Add the Second Side Line
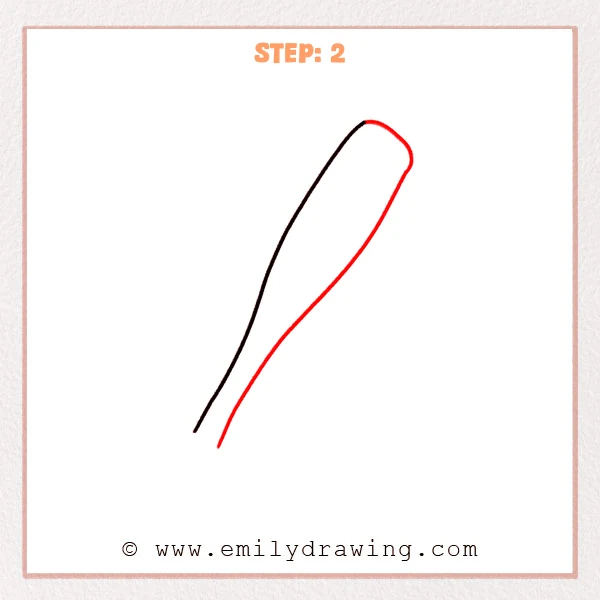
Draw a second line beside the first, matching the same curve. Let the gap between them widen upward to show the bat’s thickness.
Pro Tip: Change the width gradually so the bat doesn’t look lumpy.
[Alt Text: Step 2: A second curved line creates the bat’s thickness and overall body shape.]
Step 3: Draw the Handle and Rounded Knob

Gently connect the two lower lines to close the handle end. Add a flattened oval knob that is a little wider than the grip.
Pro Tip: Keep the knob small and rounded for a more realistic proportion.
[Alt Text: Step 3: The baseball bat’s lower handle is closed and a rounded knob is added.]
Step 4: Draw the Grip Boundary Line
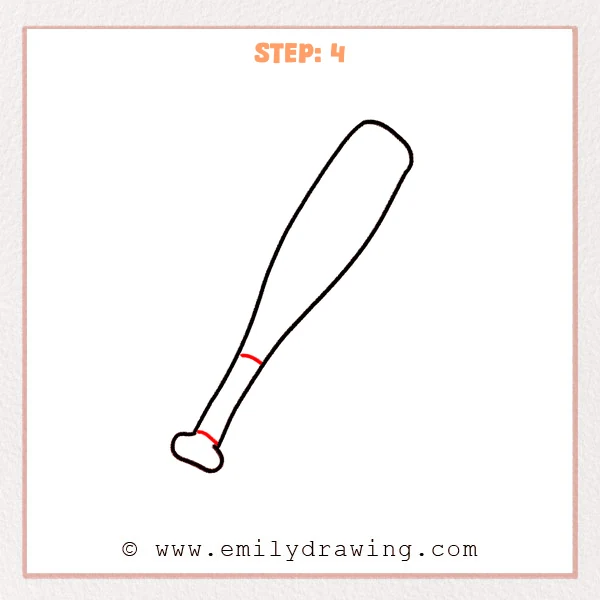
Draw a curved boundary line near the bottom to separate the grip from the barrel. Let it wrap around the bat like a ring.
Pro Tip: Curve the line gently so it follows the bat’s contour.
[Alt Text: Step 4: A curved ring line marks where the grip section begins on the baseball bat.]
Step 5: Add the Grip Wrap Bands
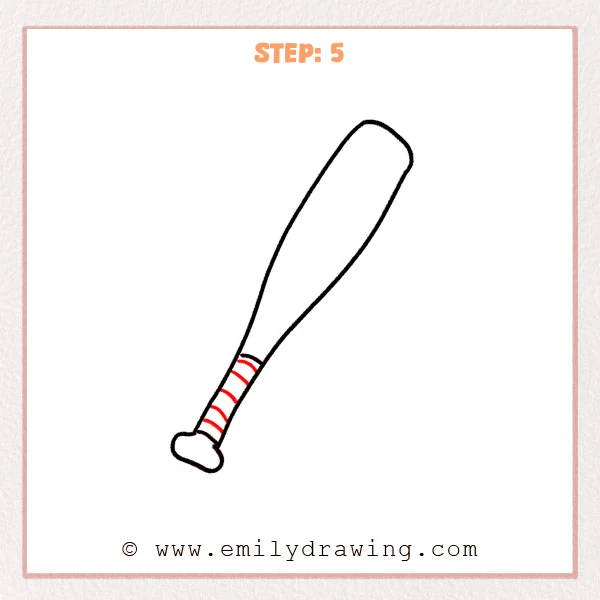
Inside the grip area, draw several short curved bands with even spacing. Let each band curve slightly to match the bat’s direction.
Pro Tip: Fewer bands look better if they stay even and consistent.
[Alt Text: Step 5: Even curved wrap bands are added along the baseball bat’s grip.]
Step 6: Add Barrel Highlight Details
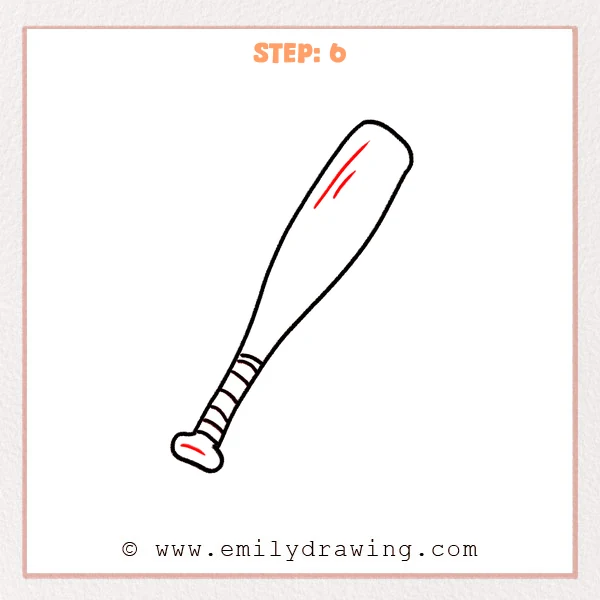
Draw two slim curved highlight lines along the upper barrel, following the bat’s curve. Place them closer to one edge to suggest reflected light.
Pro Tip: Keep highlight lines thin and light so the outline stays strongest.
[Alt Text: Step 6: Simple highlight lines are added to the baseball bat’s barrel to show shine.]
Step 7: Color in your drawing!
Fun Facts
- Baseball bats can be made from wood or metal, and both can show shiny highlights.
- A bat gets wider toward the barrel, which helps it hit the ball farther.
- Smooth curves and steady spacing make sports drawings look clean and clear.
Pin it now, Draw later!
You now know how to draw a baseball bat step by step, from the first guiding curve to the grip wrap and highlights. Trace your final outline with a marker, then erase any leftover pencil once the ink is dry.
For coloring, try light brown or tan for a wooden bat, and add slightly darker shading along one side. If you want a metal bat, use light gray with a brighter highlight stripe and a darker edge shadow.
One common beginner mistake is making the bat suddenly widen in the middle, so let the thickness change slowly. Keep practicing this easy drawing tutorial, and try drawing the bat at different angles to build your drawing for beginners skills.
Get the FREE Printable Drawing Guide
FREE Download Printable Baseball Bat Drawing Tutorial
Frequently Asked Questions
How do I keep the bat looking smooth and not wobbly?
Draw lightly first, then redraw the best curve with a steadier line.
What if my bat looks too thick near the handle?
Bring the two side lines closer together at the bottom before you add the knob.
How can I make the grip wrap look even?
Use a similar gap between each band and follow the same curve direction.