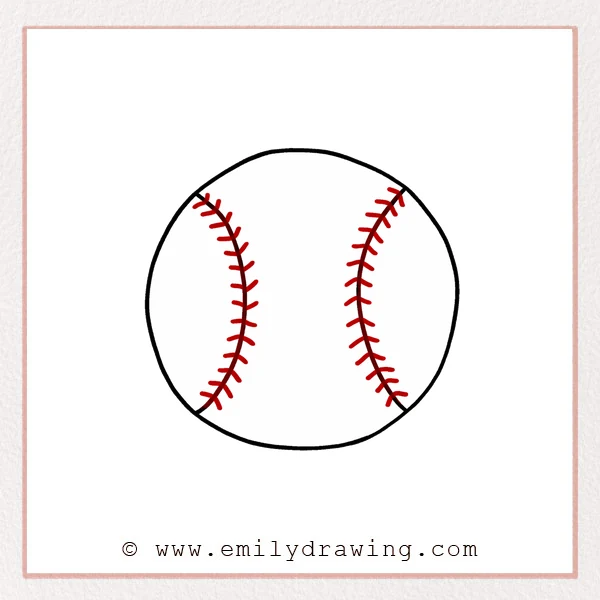
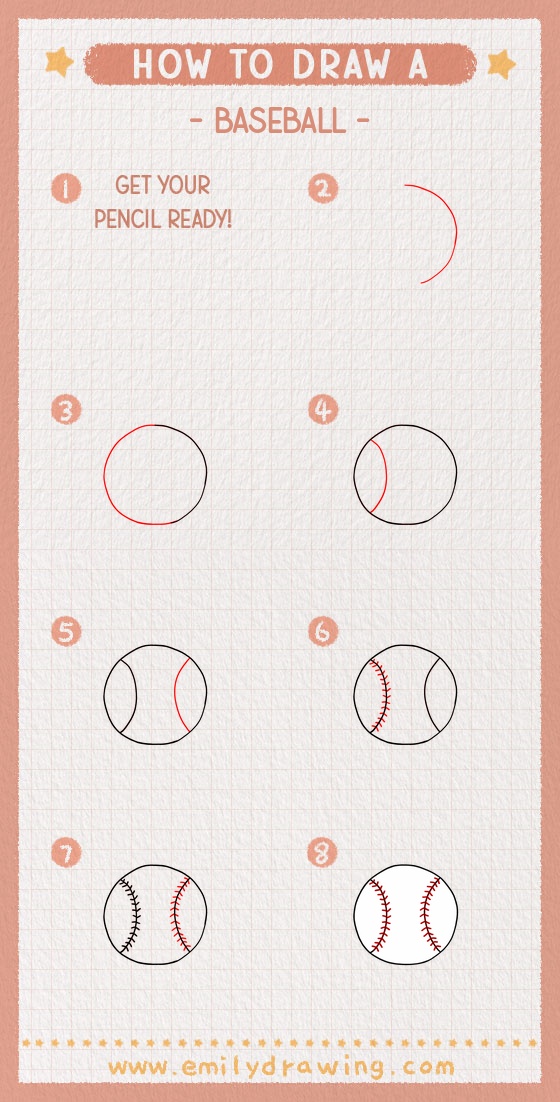
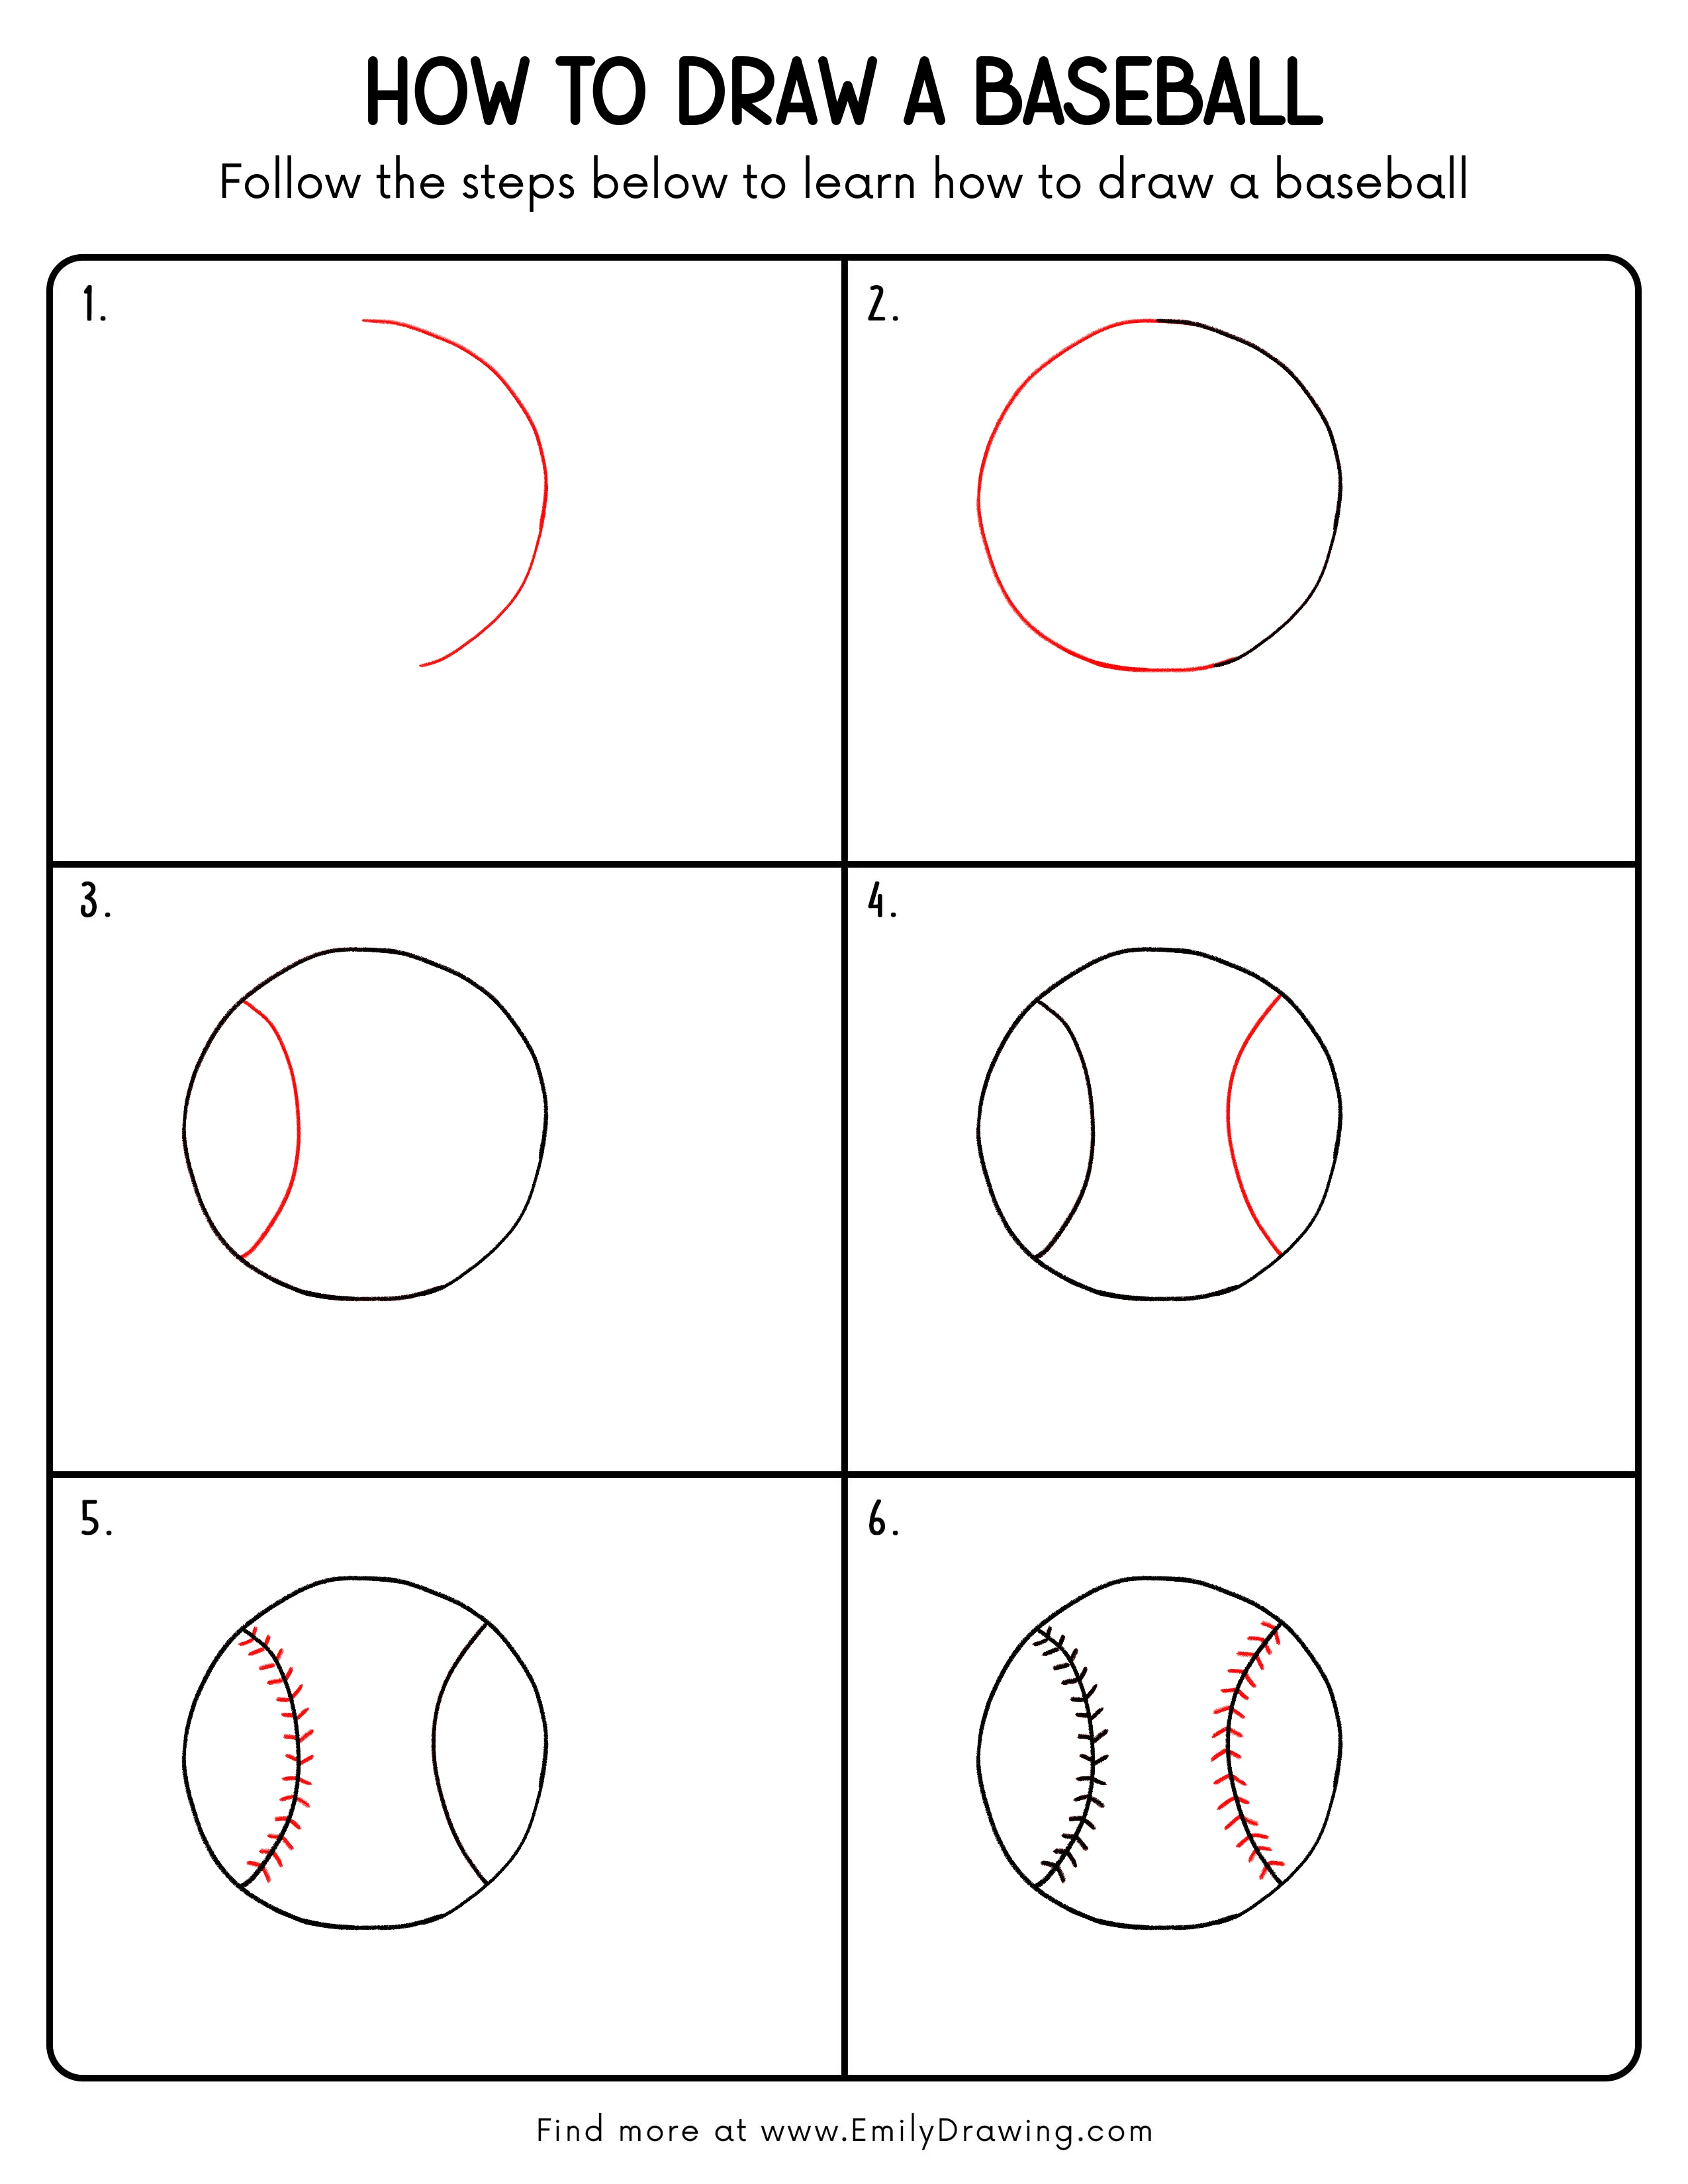
This easy drawing tutorial shows how to draw a baseball step by step using simple curves. You will start with a clean circle, then add the curved seam panels, and finish with stitches. Take your time with spacing, and your drawing for beginners will look neat and sporty.
What You Will Need
- Pencil
- Eraser
- Black marker or fineliner
- Plain drawing paper
- Colored pencils or crayons (optional)
Here are my RECOMMENDED Art Supplies!
- Crayola Coloring Set (140 Pieces – Mega Value!)
- 24 Colored Crayon Set
- A4 Printer Paper
- Crayola Coloring Pencils
- HP Home Printer with Instant Ink!
Time needed:
25 minutes.
Step-by-Step Drawing Guide
Step 1: Draw the First Outer Curve

Start with one large curved line, like a wide parenthesis. Keep it smooth, and leave small open ends at the top and bottom.
Pro Tip: Try to draw the curve in one steady stroke for a cleaner line.
[Alt Text: Step 1: A single smooth curved line begins the baseball outline.]
Step 2: Close the Shape Into a Circle

Add the other side to close the shape into a rounded circle. Let the bottom be slightly flatter so the baseball feels stable.
Pro Tip: Sketch lightly first, then darken once the circle feels right.
[Alt Text: Step 2: The baseball is a complete round circle with a slightly flatter bottom.]
Step 3: Add the Left Curved Seam Band
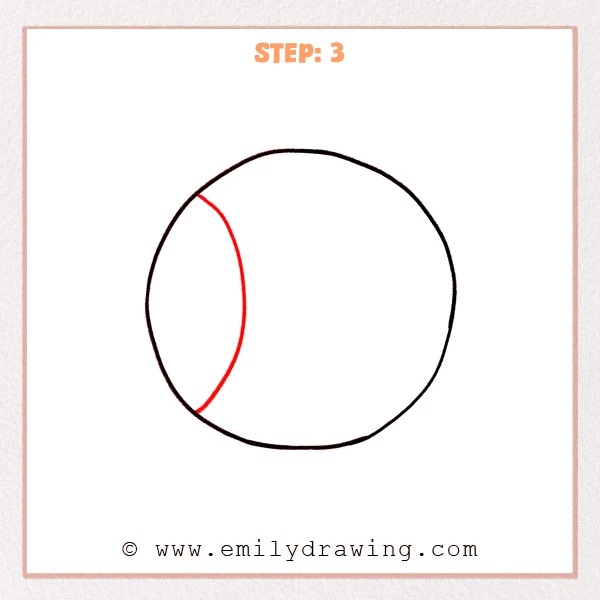
Draw a long curved line on the left side, like a narrow oval panel on the baseball. Keep both ends close to the edge without touching the outer outline.
Pro Tip: Match the curve to the outer circle so it feels three-dimensional.
[Alt Text: Step 3: A curved seam band is added on the left side of the baseball.]
Step 4: Add the Right Curved Seam Band
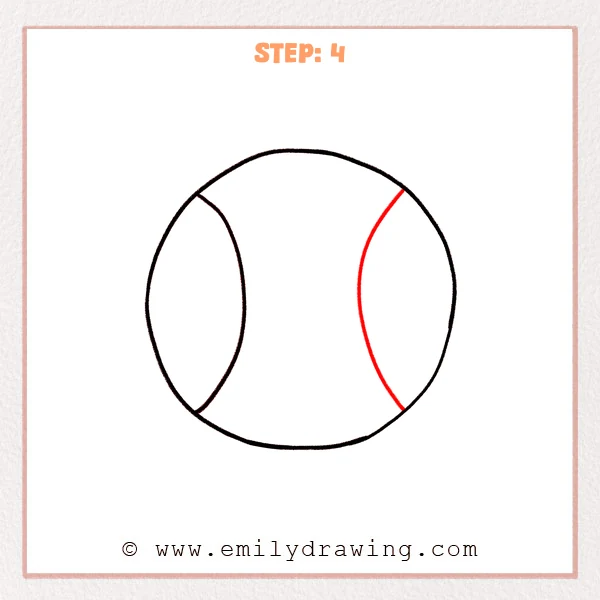
Draw a matching curved seam band on the right side of the baseball. Leave a wider blank area in the center to show the front of the ball.
Pro Tip: Mark the highest points first to make both sides feel balanced.
[Alt Text: Step 4: A second curved seam band appears on the right side of the baseball.]
Step 5: Add Stitches on the Left Seam
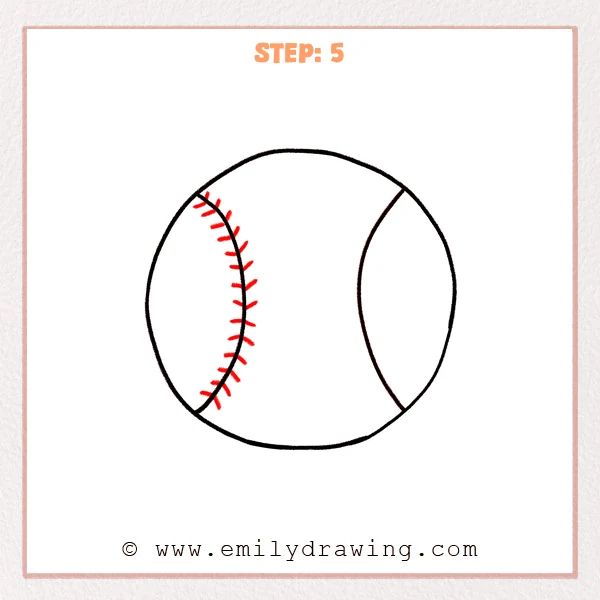
Along the left seam band, draw short angled stitches like tiny branching marks. Space them evenly and follow the curve downward.
Pro Tip: Keep stitches short and consistent so they stay neat.
[Alt Text: Step 5: Short, evenly spaced stitches are added along the left seam of the baseball.]
Step 6: Add Stitches on the Right Seam
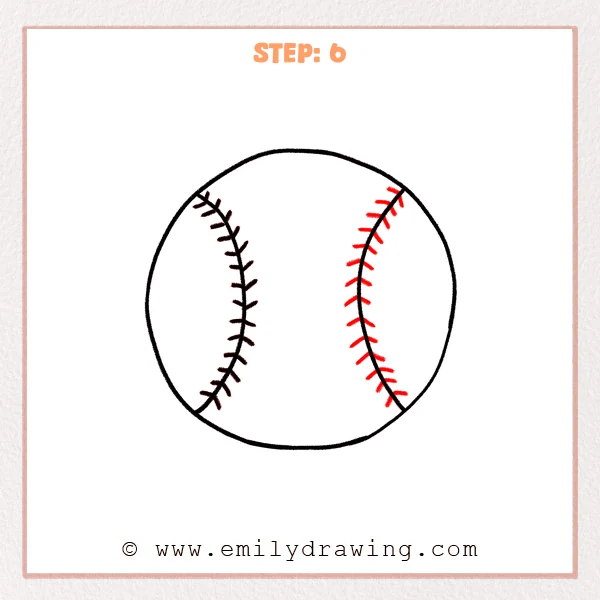
Repeat the stitch marks on the right seam band, keeping the spacing similar to the left side. Clean up any wobbly lines so the baseball drawing looks crisp.
Pro Tip: Aim for a similar stitch count on both sides for a polished look.
[Alt Text: Step 6: Matching stitches complete the right seam, finishing the baseball drawing.]
Step 7: Color in your drawing!
Fun Facts
- A baseball has two curved seams that wrap around the ball in an “S” style path.
- The red stitches help hold the leather cover to the ball’s inner layers.
- Simple curves and even spacing make the baseball look round and realistic.
Pin it now, Draw later!
You now know how to draw a baseball step by step, from the circle to the seam bands and stitches. Trace your final lines with a marker, then erase leftover pencil once the ink is dry.
For color, keep the ball white or light cream, then color the stitches red. Add gentle shading on one side of the baseball with light gray, and leave a small bright highlight to show shine.
One common beginner mistake is placing the seam bands too close to the center, which makes the ball look flat. Practice this easy drawing tutorial again, and try drawing the baseball at different angles for even stronger results.
Get the FREE Printable Drawing Guide
FREE Download Printable Baseball Drawing Tutorial
Frequently Asked Questions
How can I draw a cleaner circle for the baseball?
Start with light sketch lines and slowly smooth them into one outline before you darken.
Why do my seams look uneven on both sides?
Make sure the highest points of each seam band sit at the same height.
How do I keep the stitches from looking messy?
Draw shorter stitch marks and keep the spacing steady along the curve.