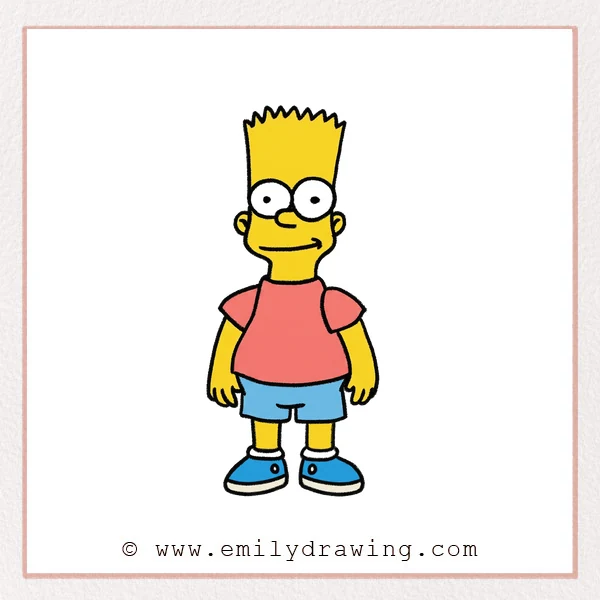
Learning how to draw Bart Simpson gets easier when you use simple shapes. This step by step drawing guide is a calm, easy drawing tutorial for beginners. Start with light pencil lines, then refine them as you go.
What You Will Need
- Pencil
- Eraser
- Black marker or fineliner
- Plain drawing paper
- Colored pencils or crayons (optional)
Here are my RECOMMENDED Art Supplies!
- Crayola Coloring Set (140 Pieces – Mega Value!)
- 24 Colored Crayon Set
- A4 Printer Paper
- Crayola Coloring Pencils
- HP Home Printer with Instant Ink!
Time needed:
20 minutes.
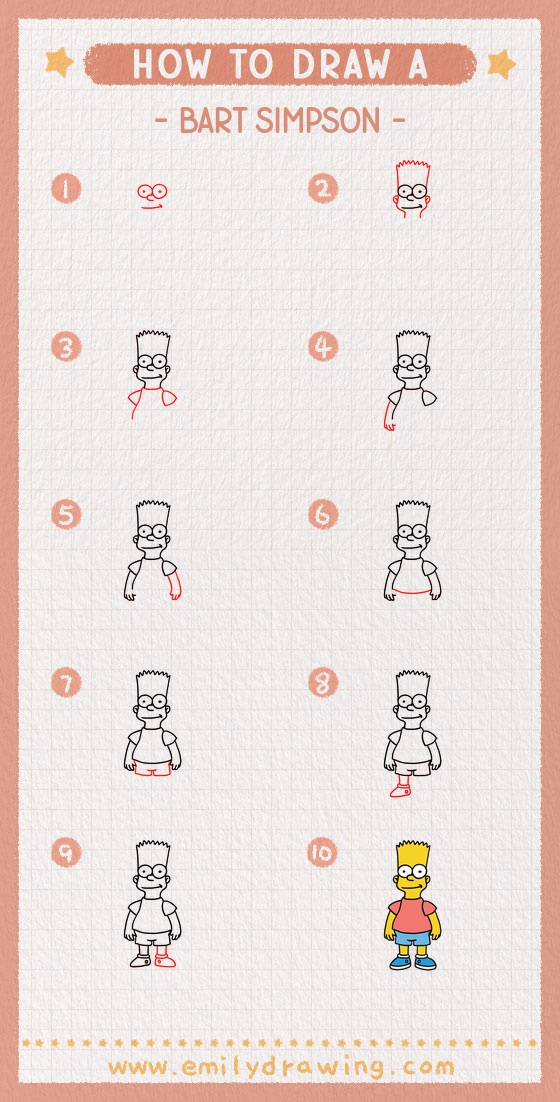
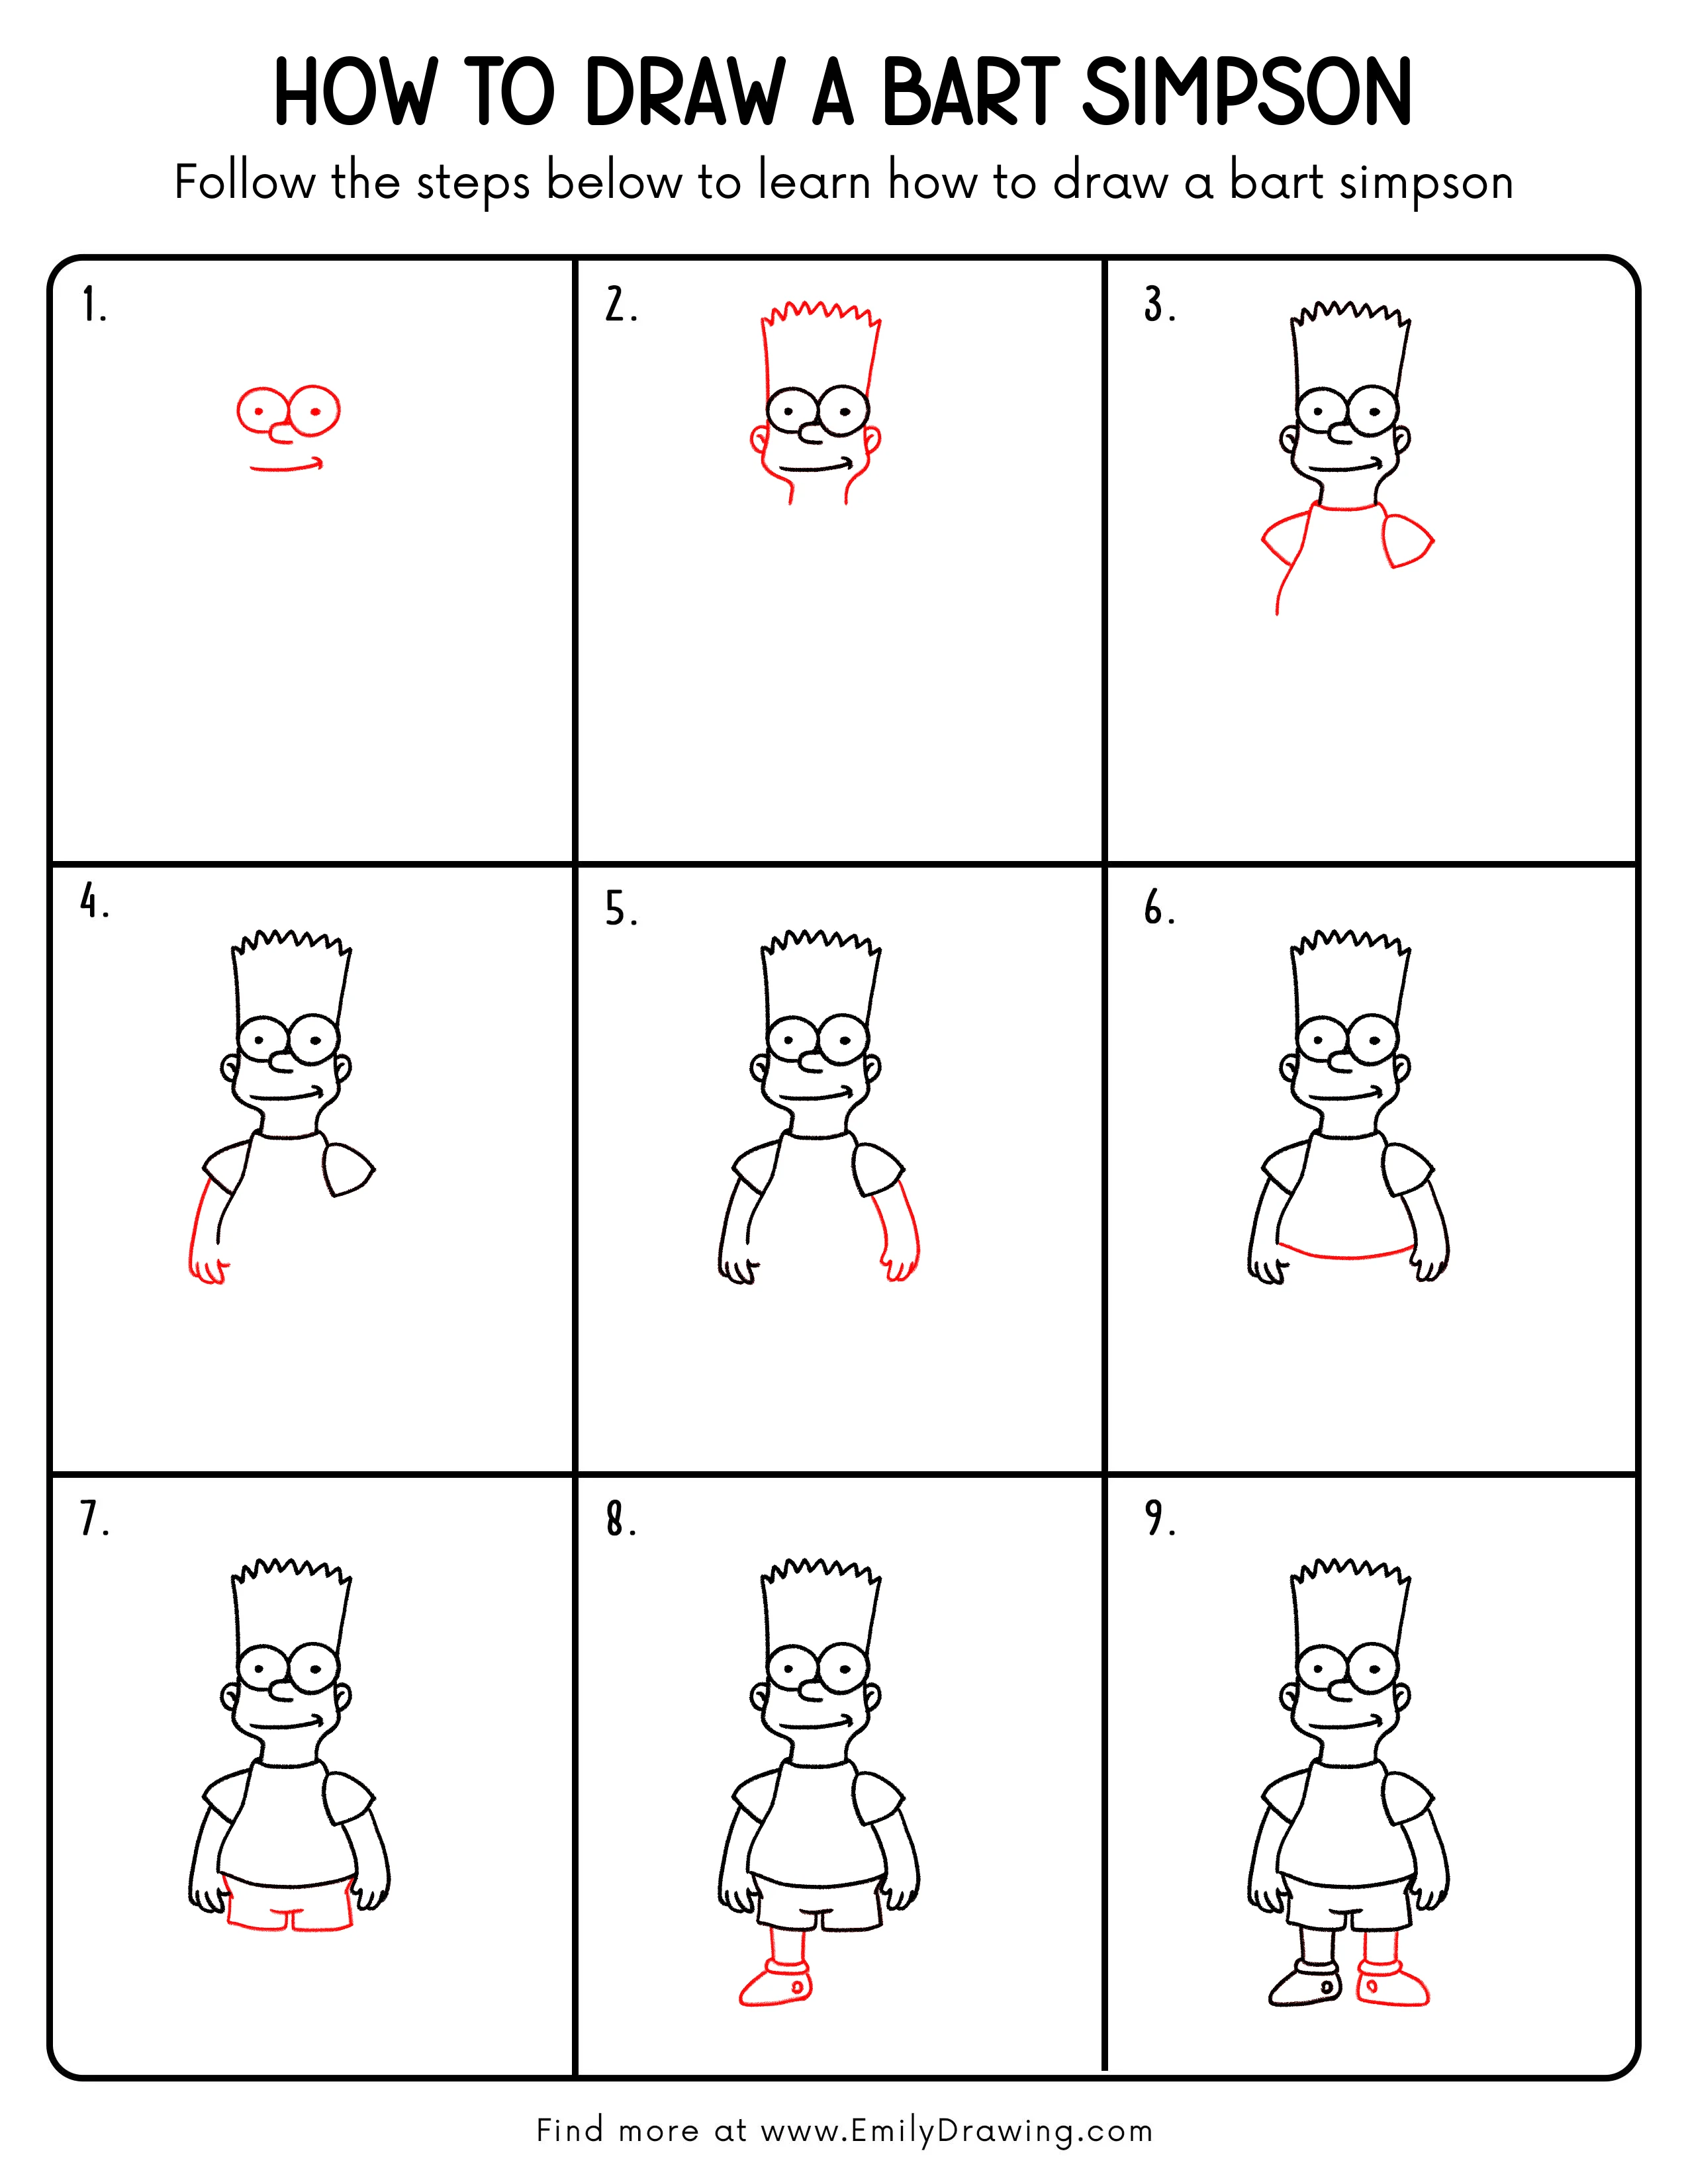
Step-by-Step Drawing Guide
Step 1: Place the Face Features
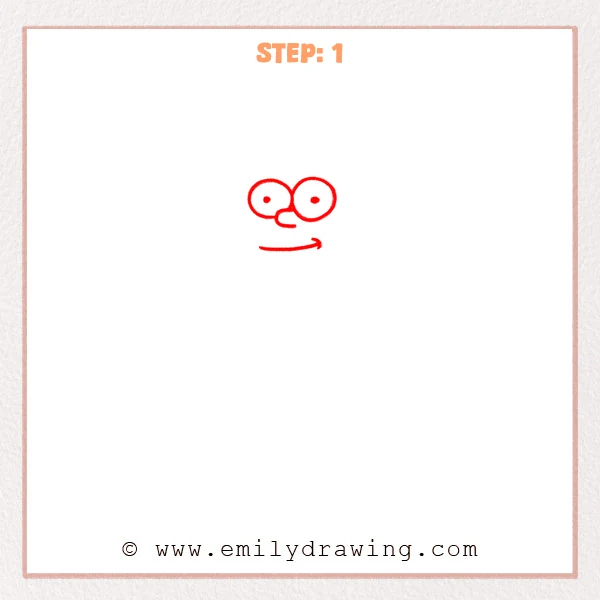
Start with two big circles side by side for the eyes, near the top of your page. Add a small rounded nose between them, then sketch a gently curved smile underneath.
Pro Tip: Keep both eyes the same size with only a tiny gap.
[Alt Text: Step 1: Bart Simpson’s eyes, nose, and smile sketched as simple shapes.]
Step 2: Add the Head and Spiky Hair
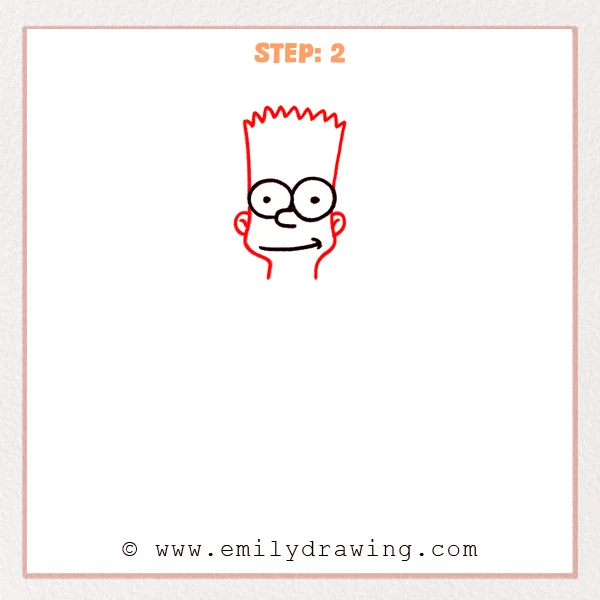
Draw a tall head shape above the eyes, with straight sides and a rounded jaw. Use a zigzag line across the top edge to create Bart’s spiky hair, then add ears on both sides and two neck lines below.
Pro Tip: Make the hair spikes similar in size for an even rhythm.
[Alt Text: Step 2: Bart Simpson’s full head outline with spiky hair, ears, and neck added.]
Step 3: Sketch the Shirt Shoulders
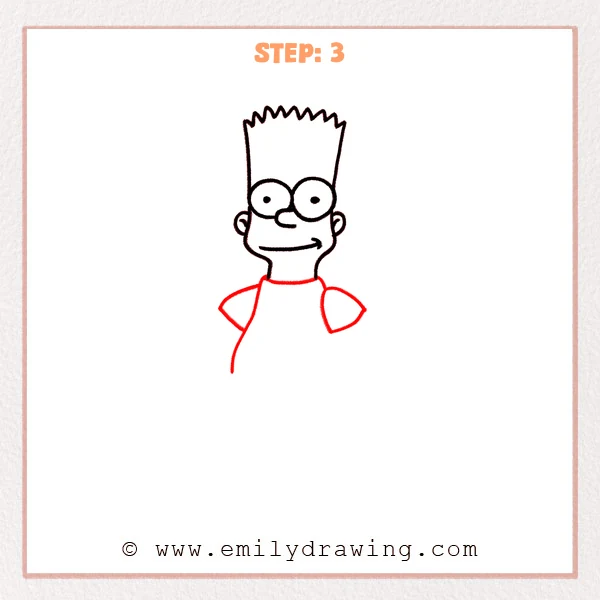
Draw a curved collar under the neck, like a soft half-oval. Add short sleeves on both sides so the top looks like a loose T-shirt.
Pro Tip: Align the sleeve heights so the pose feels balanced.
[Alt Text: Step 3: Bart Simpson’s neck and T-shirt collar with both short sleeves placed.]
Step 4: Draw the Left Arm
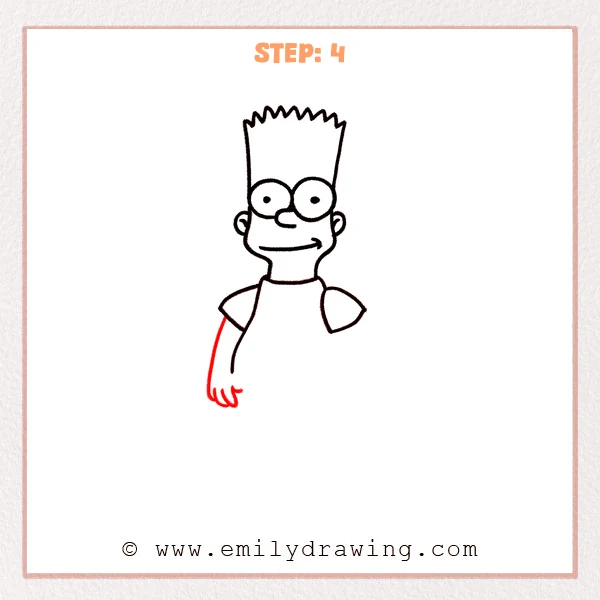
From the left sleeve, sketch a thin arm dropping down like a simple tube. Leave space at the end and hint the hand area with a small curved shape.
Pro Tip: Keep the arm slim, closer to a narrow tube shape.
[Alt Text: Step 4: Bart Simpson’s left arm added under the left sleeve with a simple hand area.]
Step 5: Draw the Right Arm
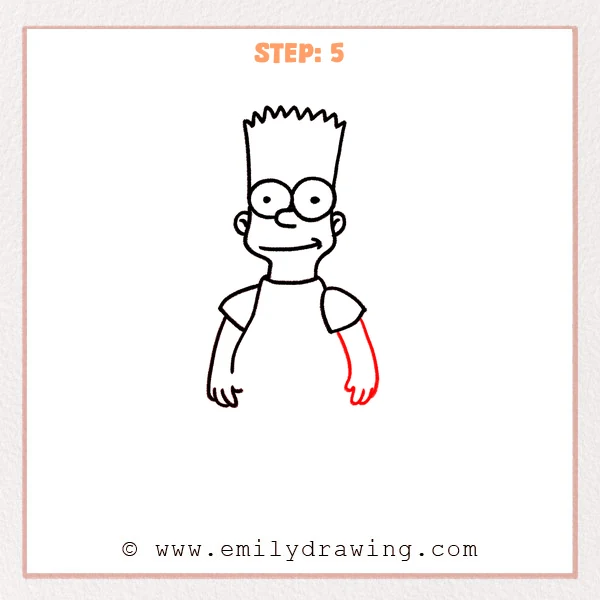
Add the right arm with a similar length and curve so both sides feel even. Finish the right hand with three rounded fingers hanging downward.
Pro Tip: Shape the palm first, then split it into three fingers.
[Alt Text: Step 5: Bart Simpson’s right arm and three-finger hand added beneath the right sleeve.]
Step 6: Build the Shirt Body Outline
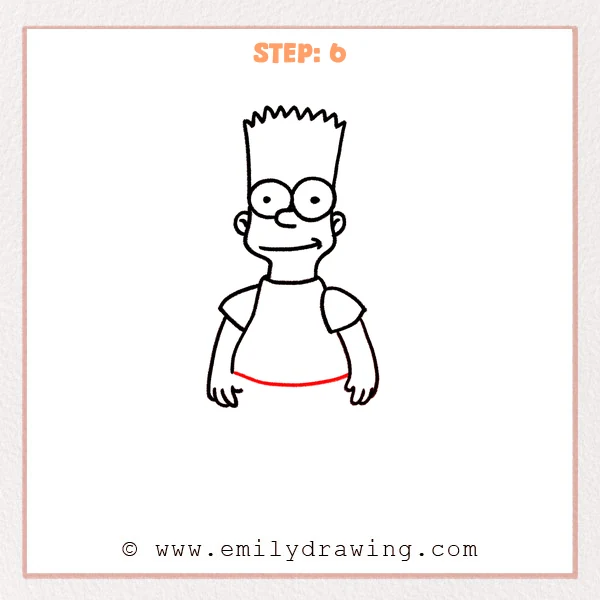
Pull curved side lines down from under the sleeves to form a rounded trapezoid shape. Add a slightly curved hemline so the shirt feels loose and comfortable.
Pro Tip: Use only a gentle curve on the hem for a natural look.
[Alt Text: Step 6: Bart Simpson’s T-shirt body outline completed with a curved hem.]
Step 7: Draw the Shorts and Center Seam
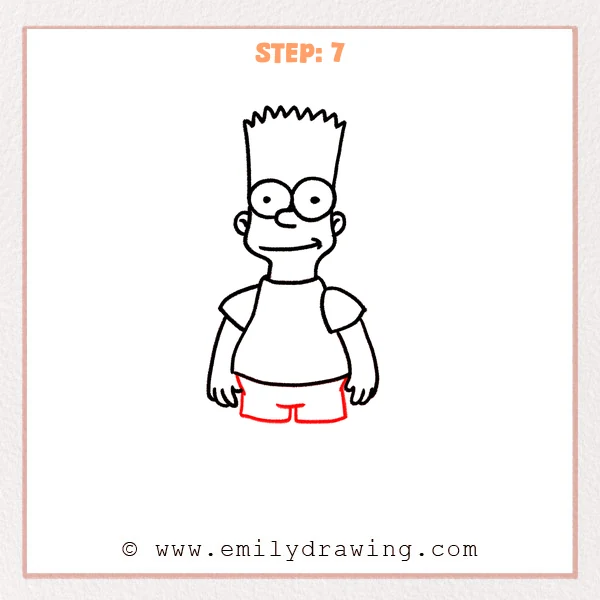
Sketch a wide shorts shape under the shirt, flaring slightly to each side. Add a short center seam to separate the two legs.
Pro Tip: Keep the shorts waistband close to the shirt hem.
[Alt Text: Step 7: Bart Simpson’s shorts added beneath the shirt with a simple center seam.]
Step 8: Draw One Leg and One Shoe
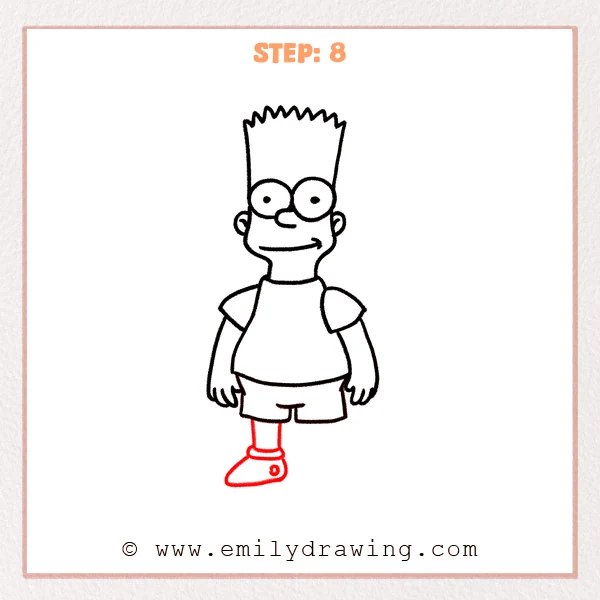
Draw one thin leg from the shorts, then add a small sock cuff near the ankle. Sketch a flat rounded shoe, and place a tiny side dot detail.
Pro Tip: Keep the leg mostly vertical and the sole fairly flat.
[Alt Text: Step 8: Bart Simpson’s first leg, sock cuff, and one rounded shoe added.]
Step 9: Add the Second Leg and Second Shoe
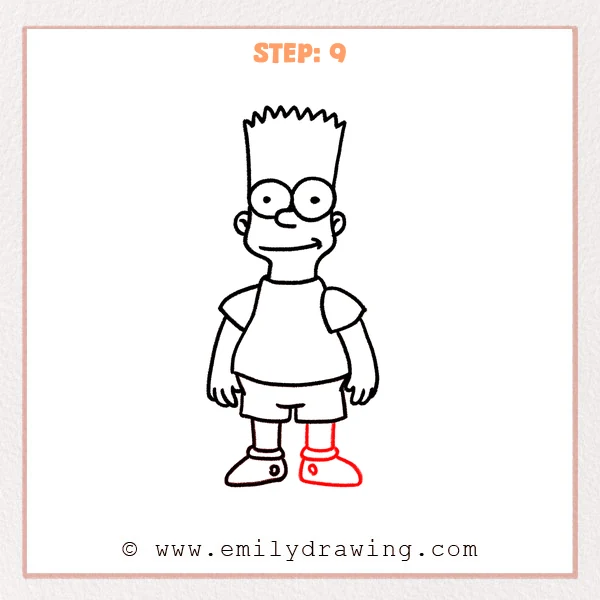
Add the second leg and sock cuff, matching the first leg’s length. Draw the second shoe at a similar size, with the toe slightly turned outward.
Pro Tip: Align both shoes at the same height for a stable stance.
[Alt Text: Step 9: Bart Simpson’s second leg and matching shoe added to complete the full body.]
Step 10: Color in your drawing!
Fun Facts
- Bart Simpson’s look is built from simple shapes, especially circles for eyes.
- His hair is easiest when you repeat evenly sized zigzags.
- Clean outlines help cartoon characters look bold and clear.
Pin it now, Draw later!
You have built Bart Simpson from simple eyes to a full body with shoes. Now trace your final outline with a marker, then erase leftover pencil lines once the ink is dry.
For coloring, start with a light yellow for skin, then add a bright shirt color and simple shoe shading. Try a soft shadow under the chin and along one side of the shirt for gentle depth.
One common beginner mistake is making one eye larger than the other, so compare the circles before you ink. Keep practicing how to draw Bart Simpson, and try new poses to grow your drawing for beginners skills.
Get the FREE Printable Drawing Guide
FREE Download Printable Bart Simpson Drawing Tutorial
Frequently Asked Questions
How do I keep Bart Simpson’s head tall without looking too narrow?
Use straight side lines, then round the jaw slightly before you ink.
What if my hair spikes look uneven?
Lightly draw a top guide line, then repeat similar zigzags across it.
How can I make the arms match in length?
End both arms at the same height before you add the hands.