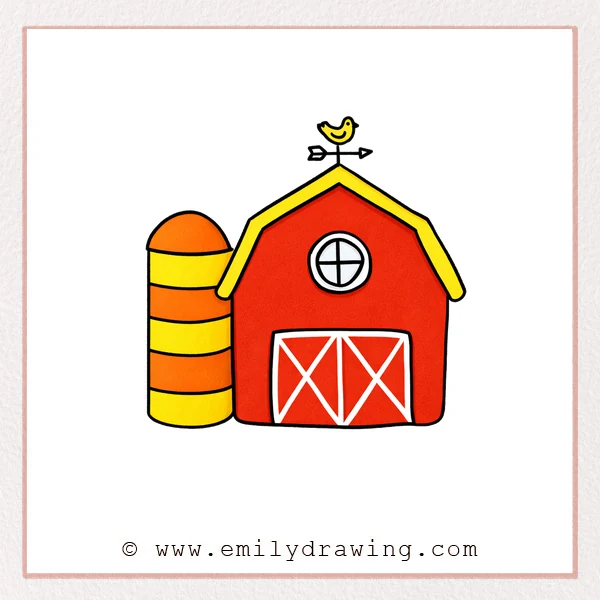
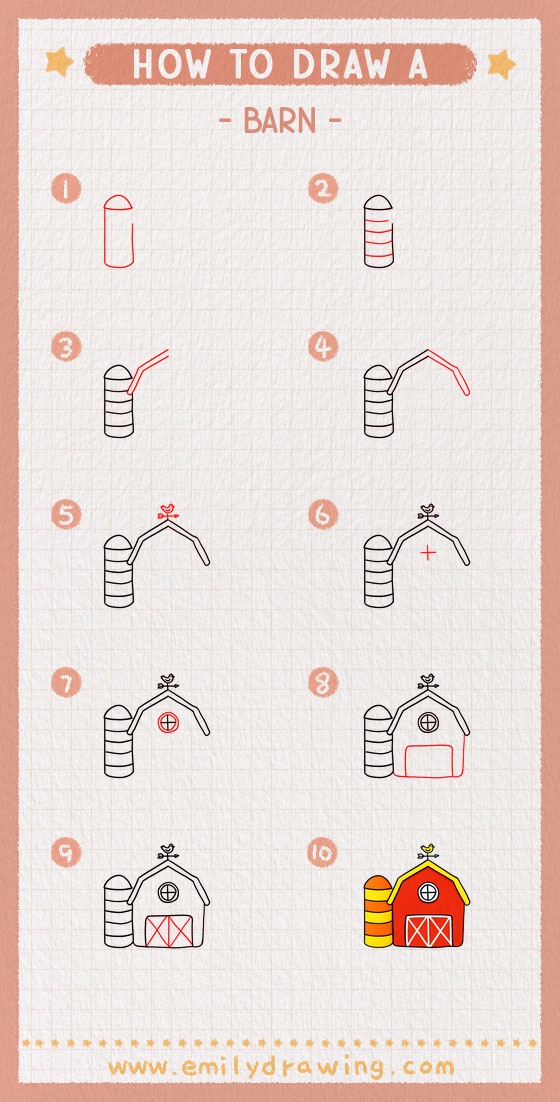
This easy drawing tutorial shows how to draw a barn step by step with a silo, a roof, and simple details. It is a calm drawing for beginners, using clean shapes you can refine as you go.
What You Will Need
- Pencil
- Eraser
- Black pen or marker
- Paper
- Colored pencils or markers (optional)
Here are my RECOMMENDED Art Supplies!
- Crayola Coloring Set (140 Pieces – Mega Value!)
- 24 Colored Crayon Set
- A4 Printer Paper
- Crayola Coloring Pencils
- HP Home Printer with Instant Ink!
Time needed:
26 minutes.
Step-by-Step Drawing Guide
Step 1: Draw the Silo Dome and Body
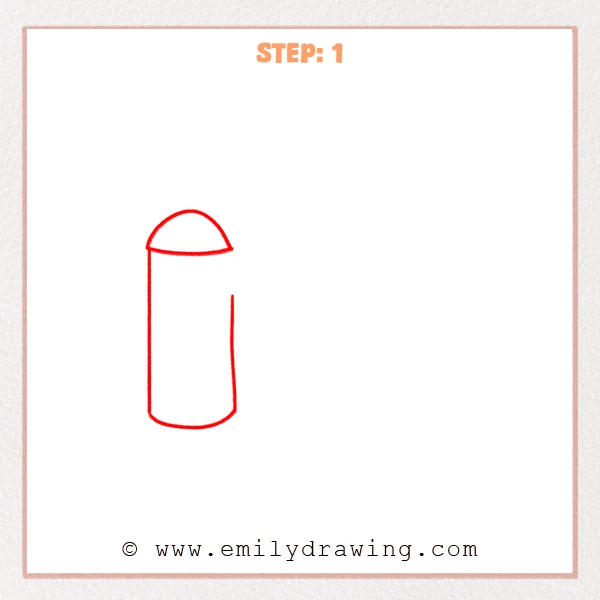
Start with a half-circle for the silo dome on the left. Pull two straight lines downward to form a tall cylinder, then close the bottom with a soft curve.
Pro Tip: Keep both side lines parallel so the silo does not lean.
Step 2: Add Horizontal Bands to the Silo
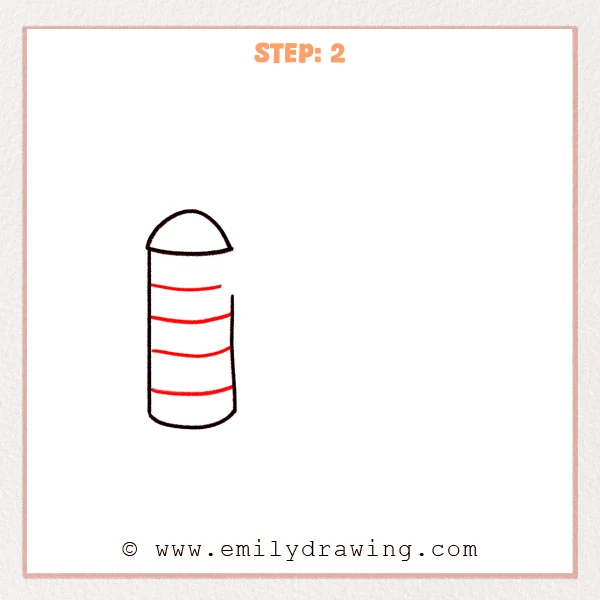
Draw several slightly curved horizontal lines across the silo to create bands. Space them evenly so the silo looks neat and rounded.
Pro Tip: Make each band curve the same amount to match the cylinder shape.
Step 3: Sketch the First Roof Slant
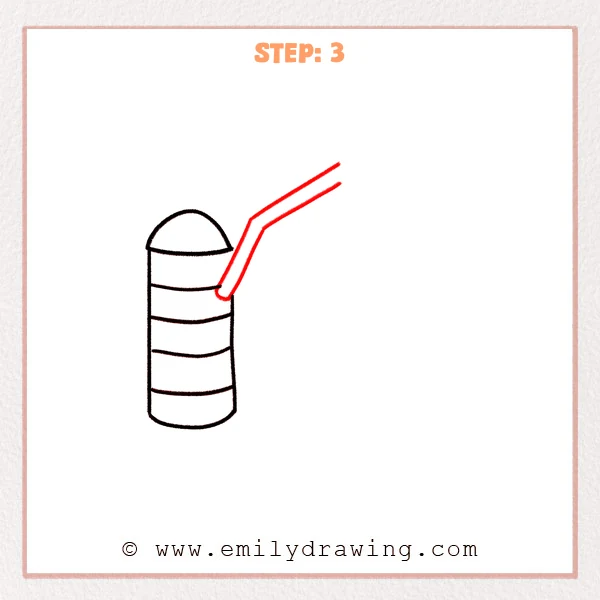
From near the top right side of the silo, draw two parallel slanted lines to begin the barn roof. Let the lines point toward the center where the roof peak will be.
Pro Tip: Extend the roof lines a little long so you can trim them later.
Step 4: Finish the Roof Peak and Right Eave
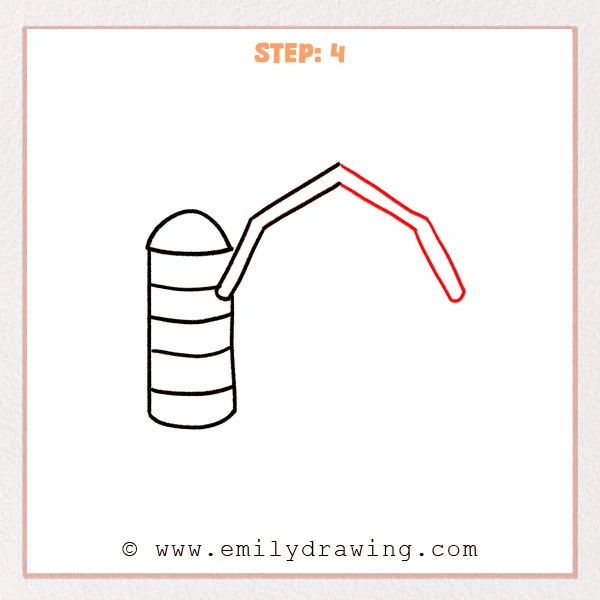
Connect the roof to a centered peak, then draw the second slanted roof edge down to the right. Round the right end slightly to make a smooth eave tip.
Pro Tip: Place the peak near the middle so the barn feels balanced.
Step 5: Add the Weathervane Bird on the Roof
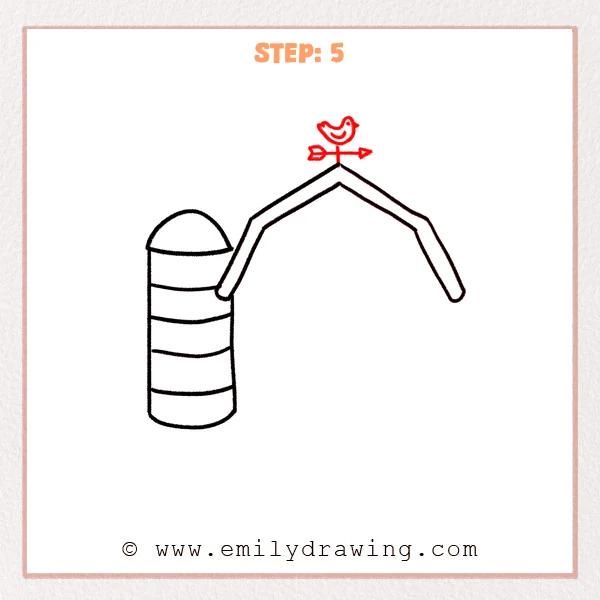
Draw a short post above the roof peak and add a small horizontal bar. Place a tiny bird shape on top to create a simple weathervane decoration.
Pro Tip: Keep the bird small so it does not overpower the barn.
Step 6: Draw a Cross for the Window Panes
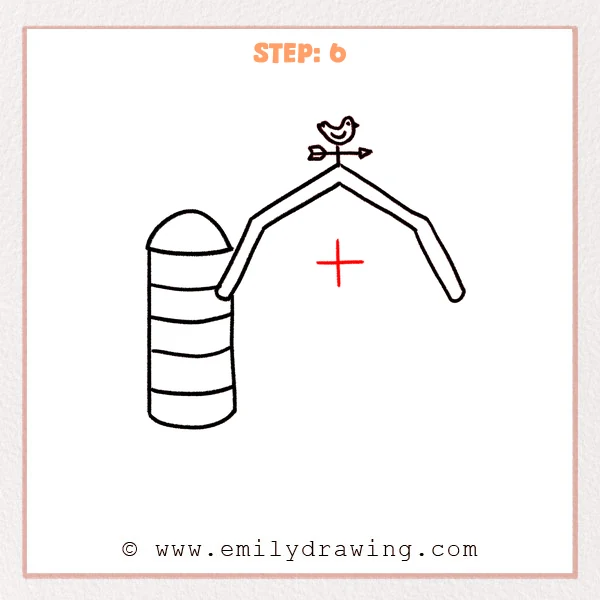
On the upper center of the barn wall area, lightly draw a plus sign. This will guide the panes inside the round window.
Pro Tip: Use very light lines so you can erase them after inking.
Step 7: Draw the Round Window and Complete the Barn Walls
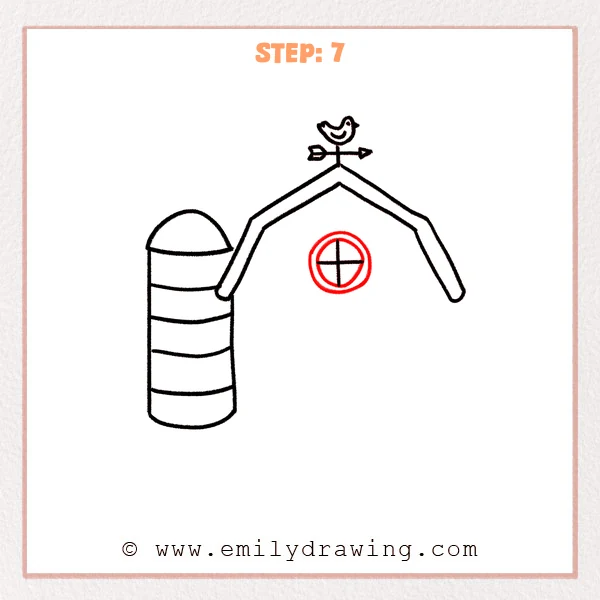
Draw a circle around the cross, then add a second outer ring to form the window frame. Extend the right barn wall downward and finish the bottom edge with a gentle ground curve.
Pro Tip: Rotate your paper while drawing the circle to keep it smooth.
Step 8: Draw the Large Barn Door Opening
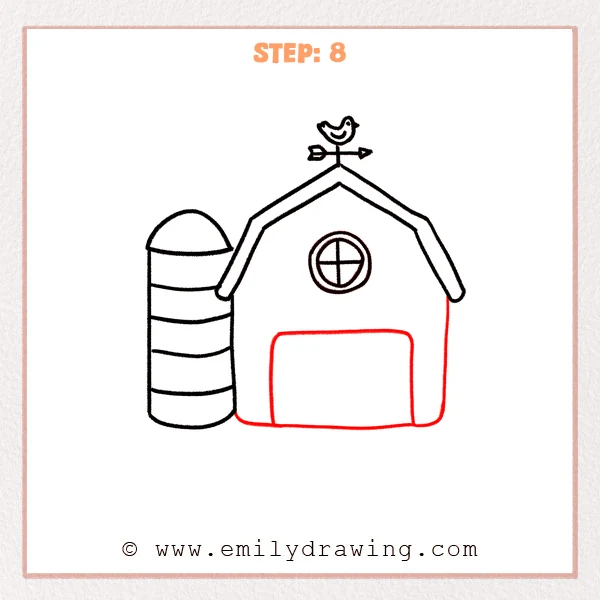
In the lower half of the barn, draw a large rounded-rectangle doorway. Leave a clear border around it and keep the bottom close to the ground curve.
Pro Tip: Keep the left and right margins even so the doorway feels centered.
Step 9: Add the Barn Doors with X Braces
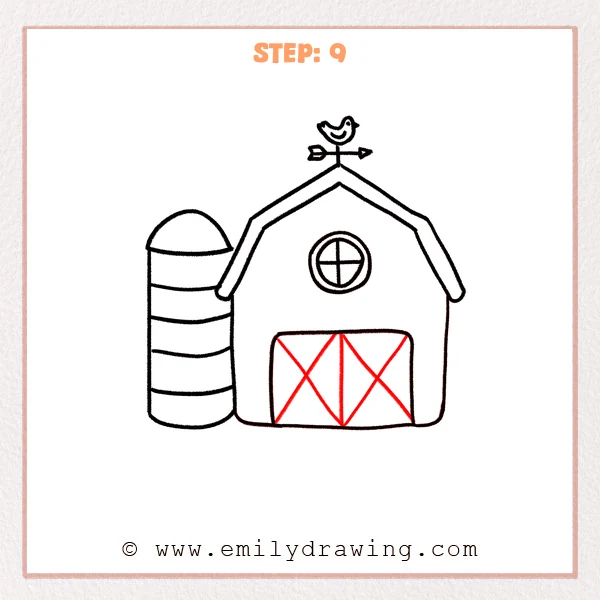
Split the doorway with a vertical line to make two doors. Draw diagonal lines inside each door to form an X-shaped brace, like wooden supports.
Pro Tip: Place each X intersection near the center of its door for symmetry.
Step 10: Color in your drawing!
Fun Facts
- Many barns use X-braced doors because the diagonal supports help keep doors strong.
- A round window is often called an oculus window, and it adds charm to simple buildings.
- A silo is designed to store grain, and its cylinder shape is easy to sketch with curves.
Pin it now, Draw later!
You have learned how to draw a barn step by step by building the silo, roof, window, and doors in simple stages. For coloring, try a warm red for the barn, a light gray for the roof, and a soft tan or silver for the silo bands. Add gentle shading under the roof edge and inside the doorway to give depth. A common beginner mistake is placing the roof peak off-center, so compare both roof slopes before you trace with marker. Keep practicing this easy drawing tutorial, and try adding grass, clouds, or a fence in your next drawing for beginners.
Get the FREE Printable Drawing Guide
FREE Download Printable Barn Drawing Tutorial
Frequently Asked Questions
How do I keep the silo looking round?
Use slightly curved horizontal bands and keep both side lines parallel. The consistent curves help the cylinder feel three-dimensional.
What if my round window looks wobbly?
Draw a light circle first, then slowly refine it with small strokes. Turning the paper as you draw can make the curve smoother.
Can I make the barn door taller or wider?
Yes, adjust the rounded rectangle, but keep a border around it. Make sure the door still fits neatly inside the barn walls.