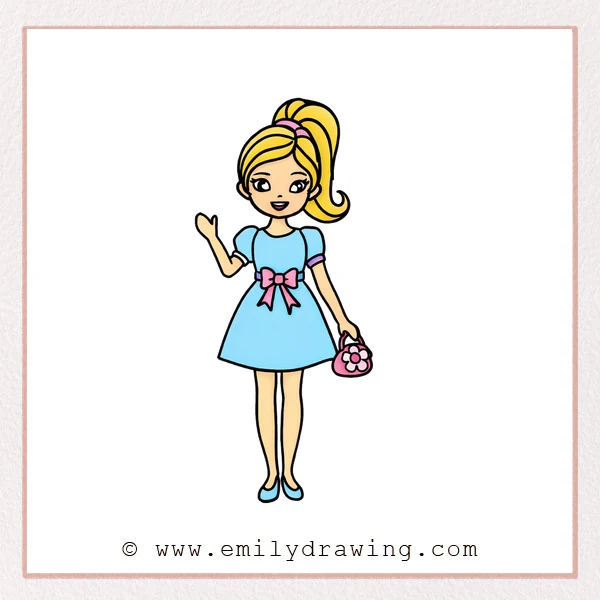
This easy drawing tutorial shows how to draw Barbie step by step in a cute, simple style. It is a calm drawing for beginners, with clear lines you can copy slowly.
What You Will Need
- Pencil
- Eraser
- Black pen or marker
- Paper
- Colored pencils or markers (optional)
Here are my RECOMMENDED Art Supplies!
- Crayola Coloring Set (140 Pieces – Mega Value!)
- 24 Colored Crayon Set
- A4 Printer Paper
- Crayola Coloring Pencils
- HP Home Printer with Instant Ink!
Time needed:
22 minutes.
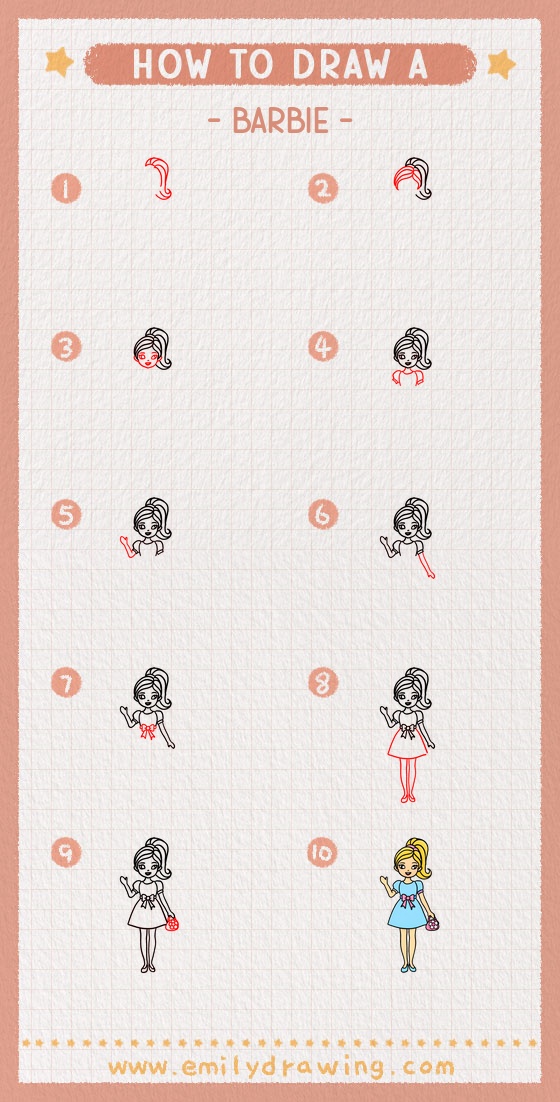
Step-by-Step Drawing Guide
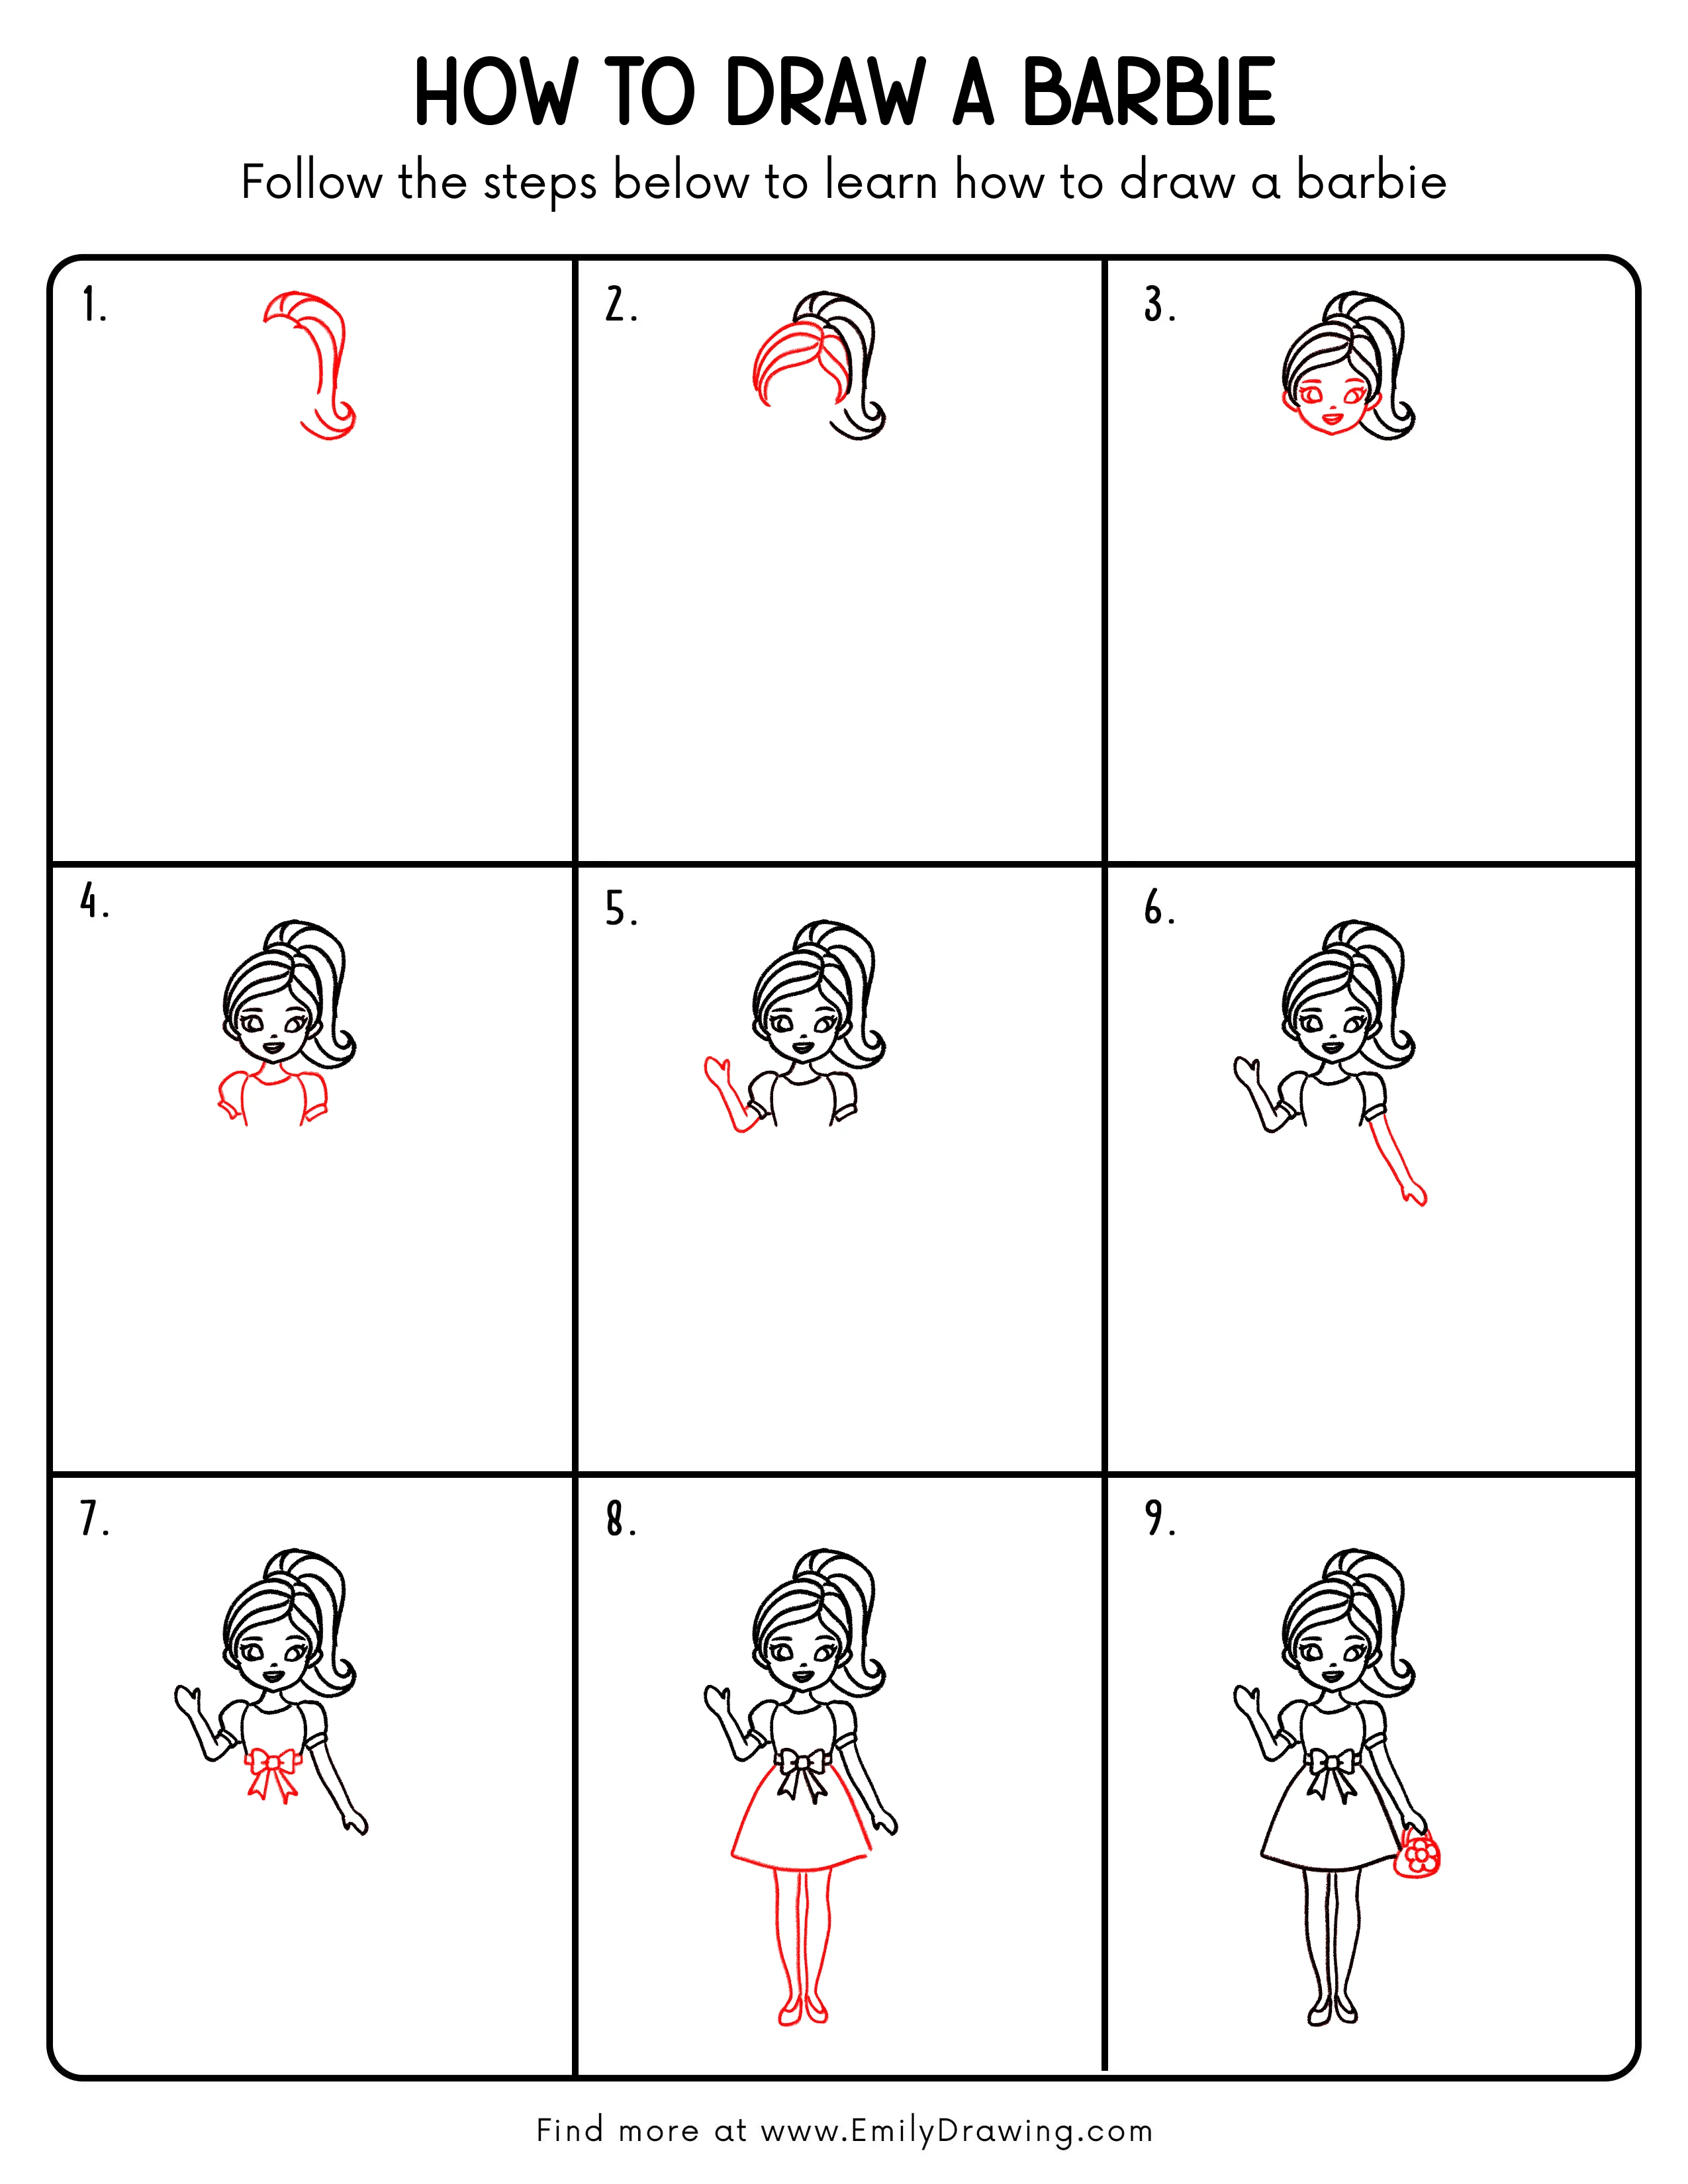
Step 1: Outline the High Ponytail
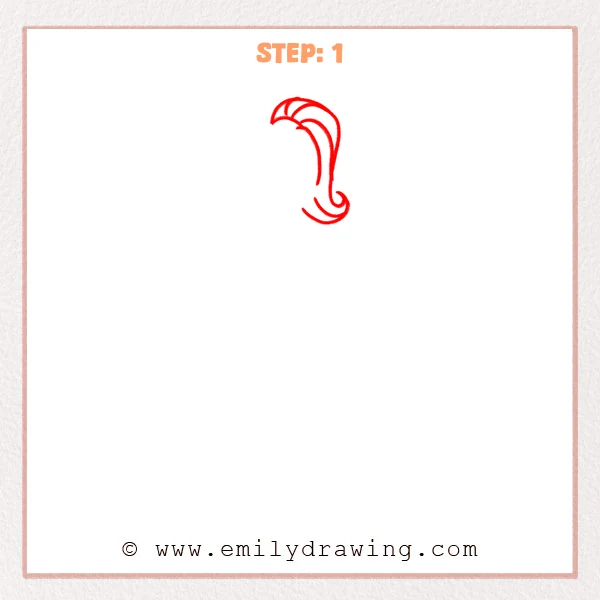
Start with a lifted ponytail shape using two long curved lines. Add a small curl at the tip so the hair ends softly.
Pro Tip: Keep the ponytail top rounded so it looks full.
Step 2: Add Bangs and Hair Sections
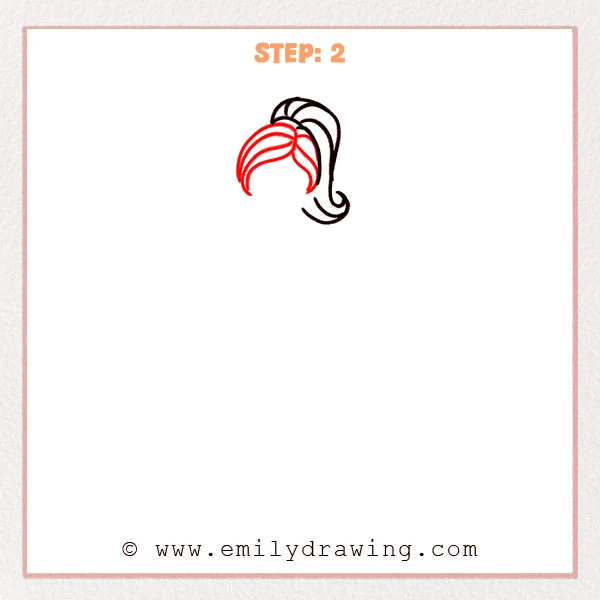
Sketch curved bangs in front of the ponytail, letting two side locks fall down. Add a few section lines on top to show separate hair strands.
Pro Tip: Let the bangs follow the head curve instead of cutting straight across.
Step 3: Draw the Face and Features
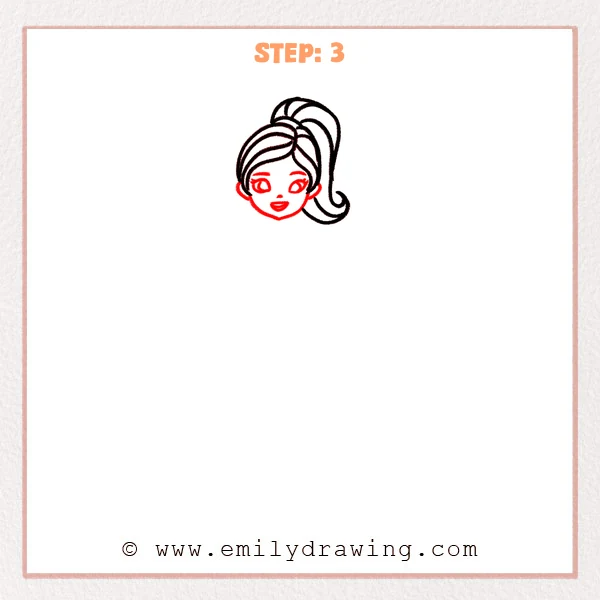
Draw a rounded face shape under the hair with a soft chin. Add big eyes, small eyebrows, a tiny nose, and a smiling mouth in the center.
Pro Tip: Leave about one eye-width of space between the eyes.
Step 4: Add the Neck and Puffy Sleeves
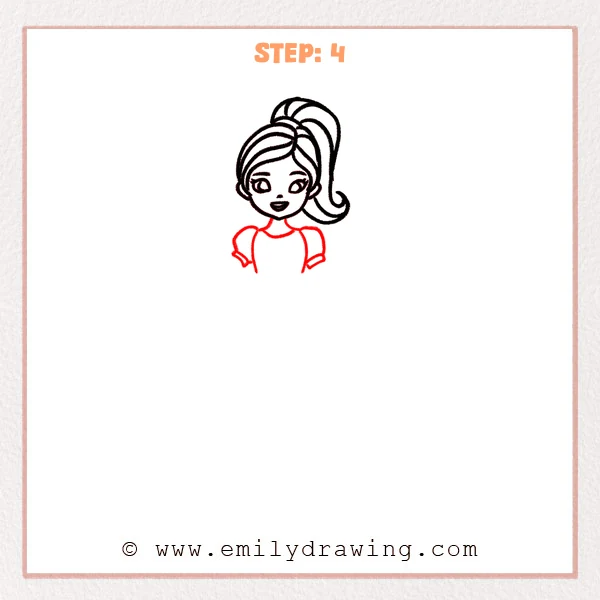
Draw two short neck lines and a rounded neckline. Add puffy sleeves on both sides and a small cuff line on each sleeve.
Pro Tip: Keep the neckline slightly low so the neck does not look cramped.
Step 5: Draw the Waving Left Arm
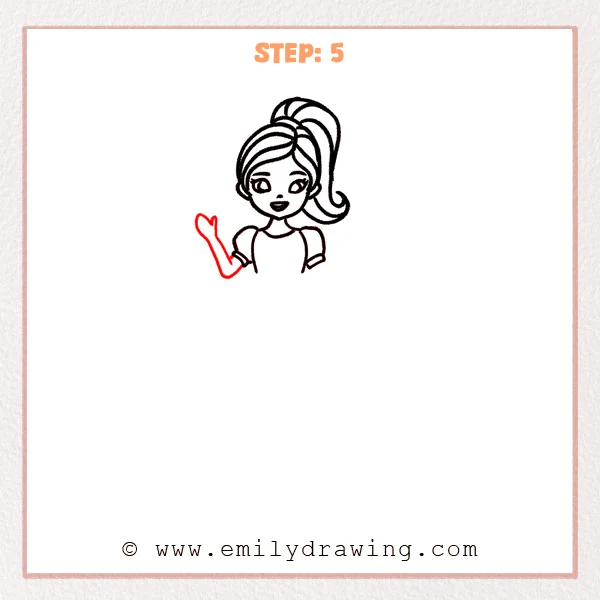
Sketch a curved upper arm near the left shoulder, then add the forearm bending upward. Shape the hand with a rounded form and a small notch for finger separation.
Pro Tip: Block the hand as one shape first, then refine the finger gap.
Step 6: Draw the Right Arm Hanging Down
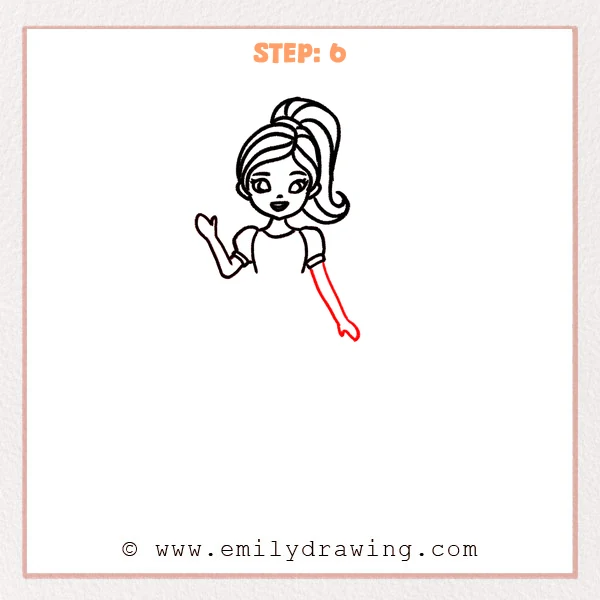
From the right sleeve, draw a long slim arm that narrows slightly at the wrist. Add a small relaxed hand at the end.
Pro Tip: Keep the arm lines smooth and gently tapered.
Step 7: Add the Waist Bow
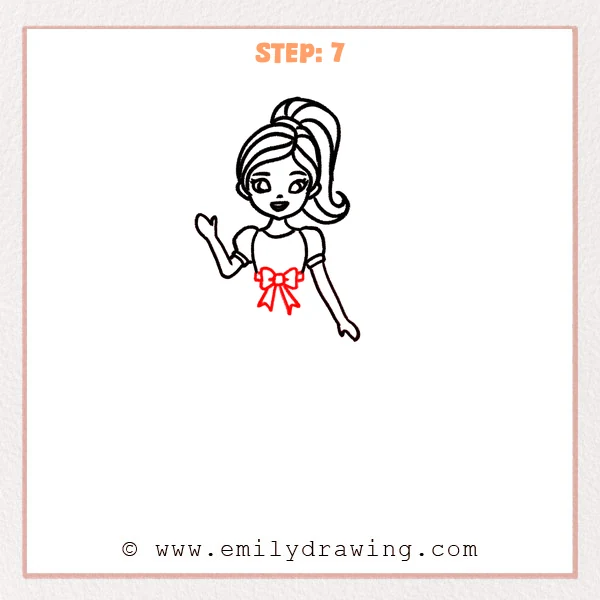
At the waist, draw a small rectangle for the knot center. Add two bow loops on each side and two ribbon tails pointing downward.
Pro Tip: Make both bow loops close in size for a tidy look.
Step 8: Draw the Skirt, Legs, and Shoes
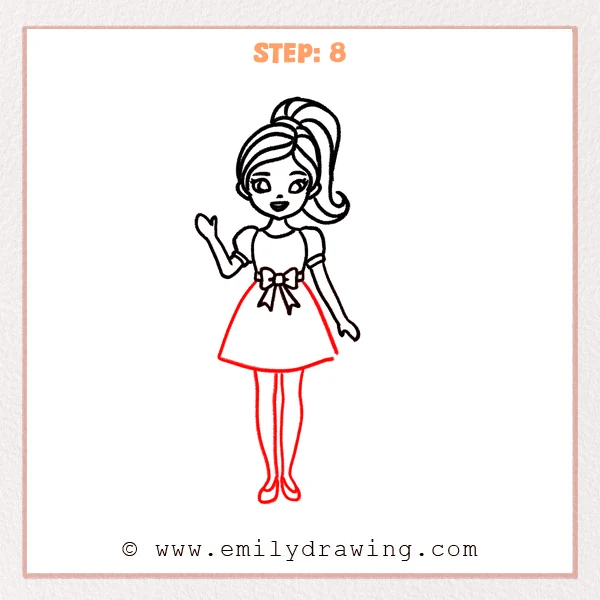
Sketch an A-line skirt that flares slightly and ends with a soft curved hem. Add two slim legs and finish with simple shoe shapes.
Pro Tip: Match the leg lengths and keep both shoes facing the same direction.
Step 9: Add the Handbag and Flower Detail
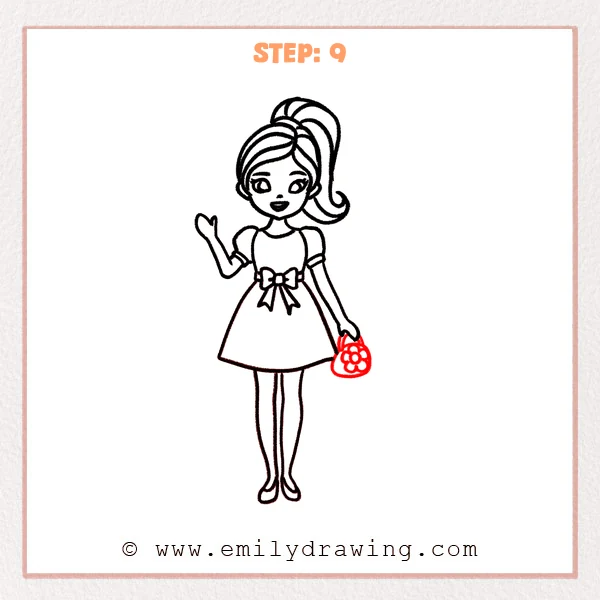
Draw a small handbag beside the right hand and close the top with a short curve. Add a simple flower on the bag using a small center circle and rounded petals.
Pro Tip: Keep the bag no wider than the hand so it feels light.
Step 10: Color in your drawing!
Fun Facts
- A high ponytail is easy to draw because it uses one big hair shape.
- Puffy sleeves look soft when you use round curves instead of sharp corners.
- A small accessory, like a handbag, helps the character feel complete.
Pin it now, Draw later!
You have learned how to draw Barbie step by step by building hair, a face, a dress, and small accessories. For coloring, try a light base color on the dress and add a slightly darker shade under the bow and along the skirt hem. You can also shade under the ponytail to make the hair look fuller. One common beginner mistake is making the arms different thicknesses, so compare both arms before you ink the lines. Keep practicing this step by step drawing, and try drawing Barbie with a different hairstyle or a new dress pattern next time.
Get the FREE Printable Drawing Guide
FREE Download Printable Barbie Drawing Tutorial
Frequently Asked Questions
How can I make the eyes look even?
Draw the eye shapes first, then add the pupils in the same spot on both eyes. A light guideline across the face can help.
What if my skirt looks lopsided?
Check the waist center and measure the skirt width on both sides. Erase and adjust the hem curve until it feels balanced.
Can I change the pose but keep the same style?
Yes, keep the head and dress the same, then redraw the arms with simple curved lines. Start with light shapes before adding hands.