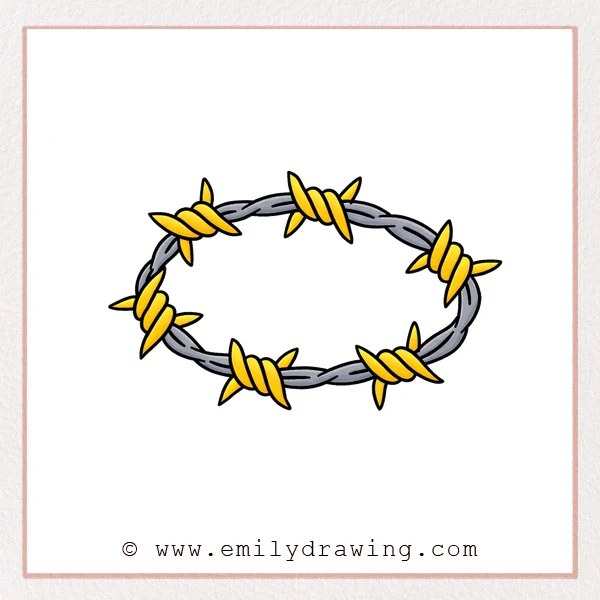
This easy drawing tutorial shows how to draw barbed wire step by step. It is a clear, beginner-friendly way to sketch a twisted wire oval with barbs.
What You Will Need
- Pencil
- Eraser
- Black pen or marker
- Paper
- Colored pencils or markers (optional)
Here are my RECOMMENDED Art Supplies!
- Crayola Coloring Set (140 Pieces – Mega Value!)
- 24 Colored Crayon Set
- A4 Printer Paper
- Crayola Coloring Pencils
- HP Home Printer with Instant Ink!
Time needed:
12 minutes.
Step-by-Step Drawing Guide
Step 1: Draw the First Barb Knot
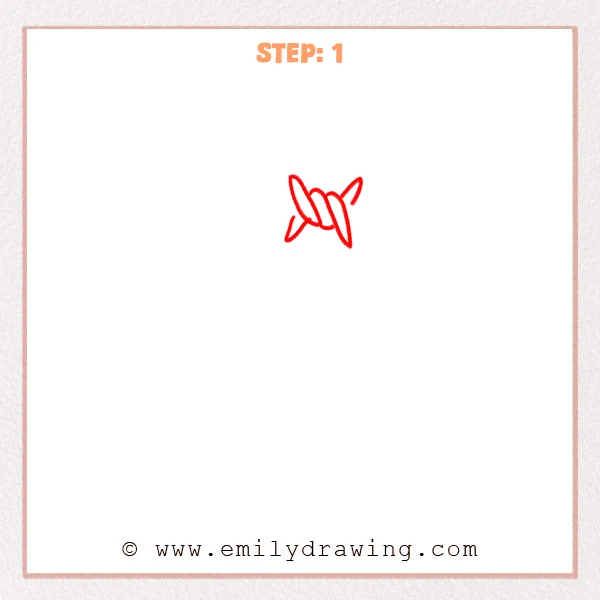
Start with a small knot shape, like two strands looping once. Add two sharp, leaf-like points on opposite sides for the first barbs.
Pro Tip: Keep the barb tips long and pointed, not rounded.
Step 2: Extend the Twisted Wire to the Right
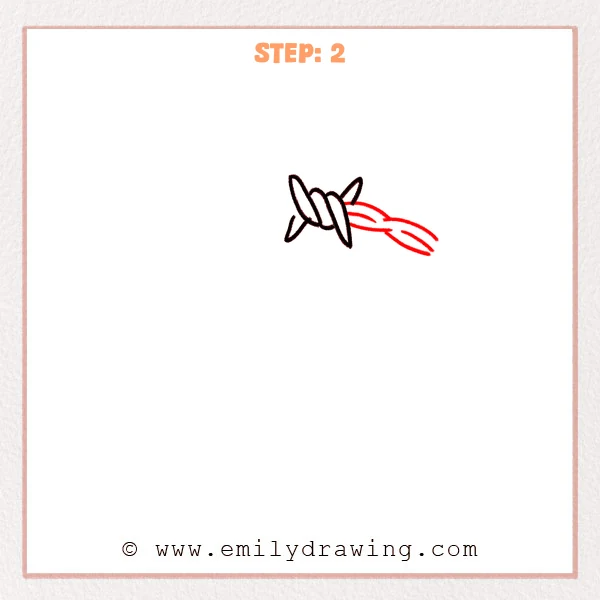
From the first knot, sketch two slightly separated curved lines heading to the right. Add a few short inner strokes to suggest the twisted texture.
Pro Tip: Keep the gap between the two strands consistent as you draw.
Step 3: Add the Second Barb Knot
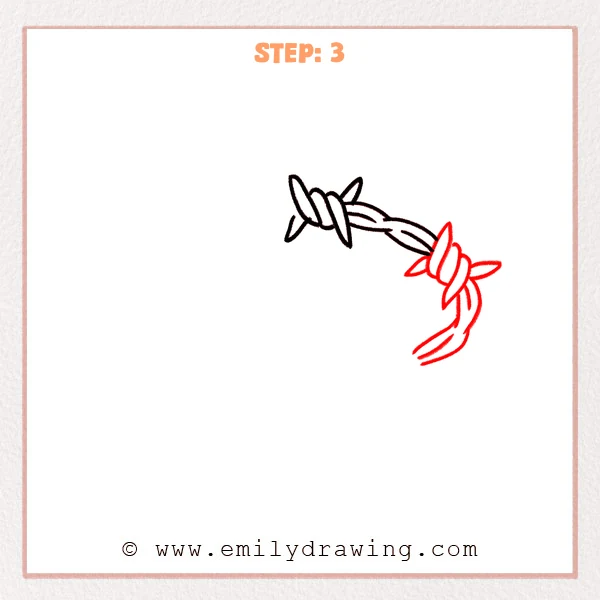
At the right end, draw another wrapped knot that hugs the wire. Add a few sharp barb points around it to match the style of the first knot.
Pro Tip: Make this knot about the same size as the first one.
Step 4: Curve Down and Draw the Third Barb Knot
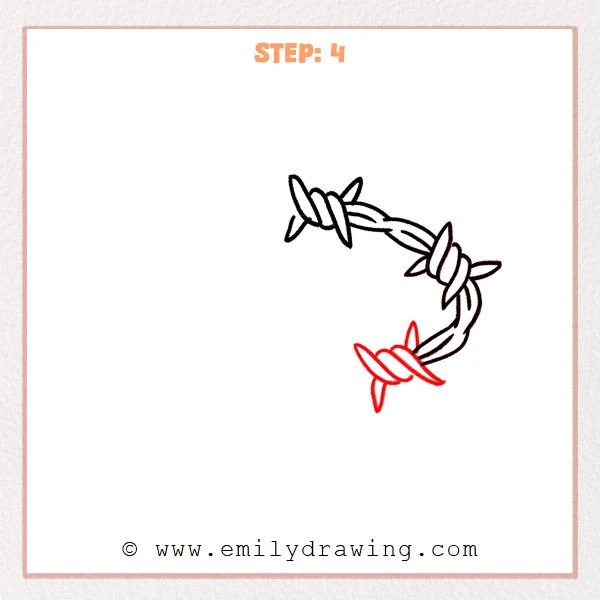
Continue from the right knot and bend the two strands downward in a smooth arc. Place a third knot along this curve, then add barbs that angle in different directions.
Pro Tip: Keep the bend rounded, and leave breathing room around the third knot.
Step 5: Extend the Bottom Wire to the Left
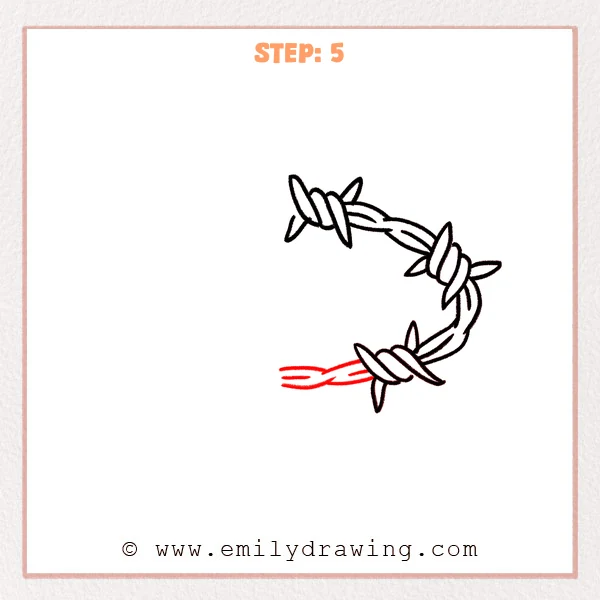
From the third knot, draw the two strands leftward to form the bottom edge of the oval. Add a few short twist marks between the strands to keep the texture consistent.
Pro Tip: Make the bottom section slightly flatter to help the oval feel balanced.
Step 6: Draw the Fourth Barb Knot on the Lower Left
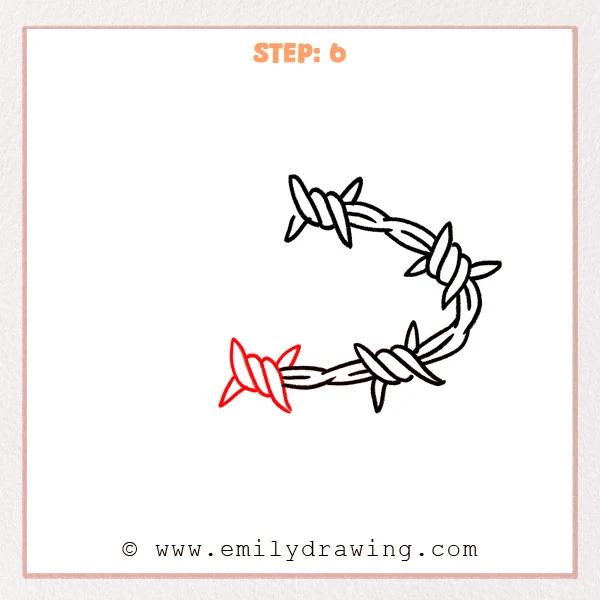
On the lower left section, draw a fourth knot wrapped tightly around the wire. Add sharp barbs and show overlaps by breaking lines where one strand passes over another.
Pro Tip: Use small line breaks at overlaps to create clear layers.
Step 7: Curve the Wire Upward
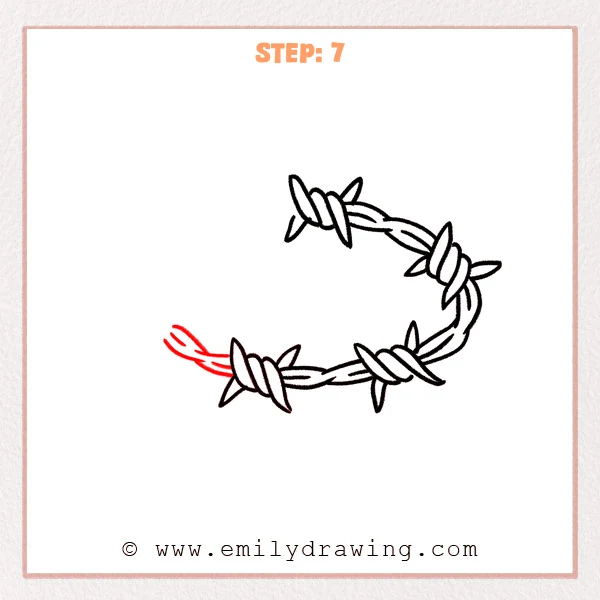
From the lower left, curve the two strands upward to build the left side of the oval. Add a few short inner strokes so the twist direction stays continuous.
Pro Tip: Keep the left curve smooth with no sudden corners.
Step 8: Add the Fifth Barb Knot and Curve Back to the Right
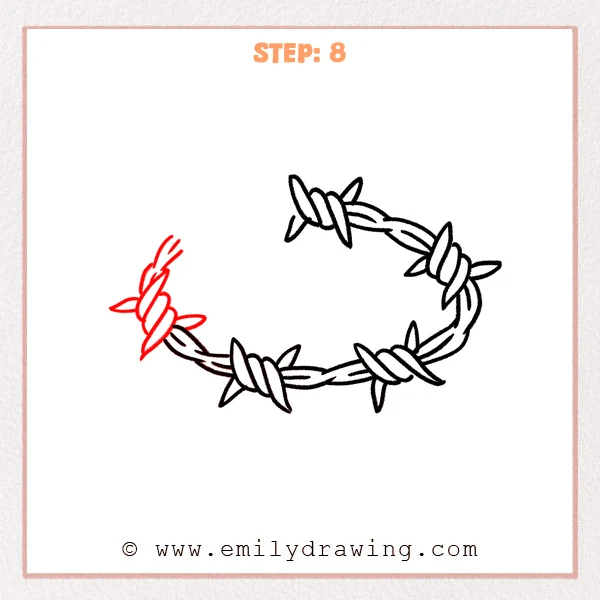
Near the upper left, add a fifth wrapped knot and place its barbs at varied angles. Extend the two strands to the right to form the top edge, aiming back toward the starting area.
Pro Tip: Keep the top strand spacing even so the closure looks natural.
Step 9: Close the Oval and Finish the Line Art
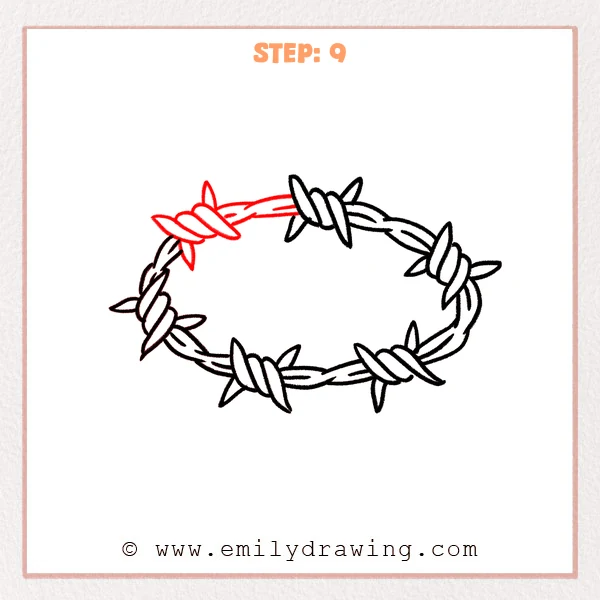
Connect the top strands back to the beginning so the barbed wire oval is complete. Refine barb tips, clean up stray lines, and slightly thicken the outer contour for a crisp finish.
Pro Tip: Thicken only the outer contour and keep inner texture lines thin.
Step 10: Color in your drawing!
Fun Facts
- Barbed wire is usually drawn as two twisted strands to show strength.
- Overlap breaks make knots look wrapped instead of flat.
- Changing barb angles helps the wire look more natural and less repetitive.
Pin it now, Draw later!

You have drawn barbed wire step by step by building knots, twisting strands, and closing an oval frame. If you color it, try a light gray base and add darker shading under knots and inside curves. A common beginner mistake is letting the two strands spread too far apart, so compare the spacing as you go. Keep practicing this drawing for beginners, and try making a longer barbed wire line or a tighter circle in your next easy drawing tutorial.
Get the FREE Printable Drawing Guide

FREE Download Printable Barbed Wire Drawing Tutorial
Frequently Asked Questions
How do I make the wire look more twisted?
Add short texture strokes that alternate sides along the strands. Keep the strokes small so they do not overpower the outline.
How do I draw cleaner barbed knots?
Draw the knot as a simple wrapped loop first, then erase and re-outline overlaps. Breaking the line at crossings makes the wrap clearer.
Can I change the shape from an oval to a straight line?
Yes, keep the same knots and twists, but draw the strands mostly straight. Place barbs at regular intervals to keep it consistent.