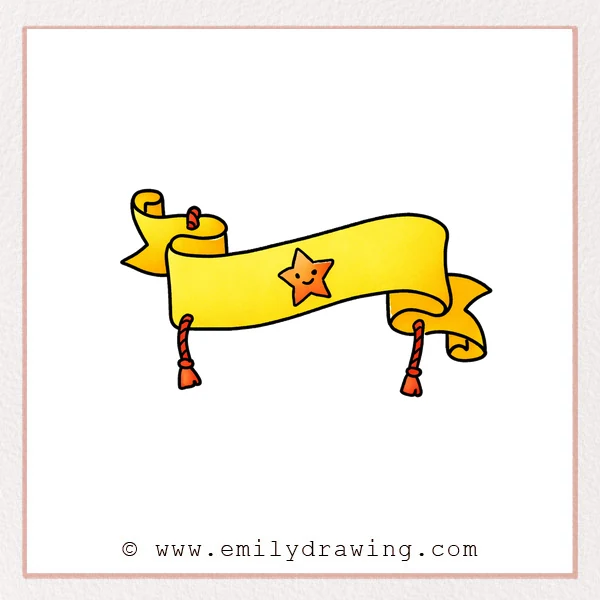
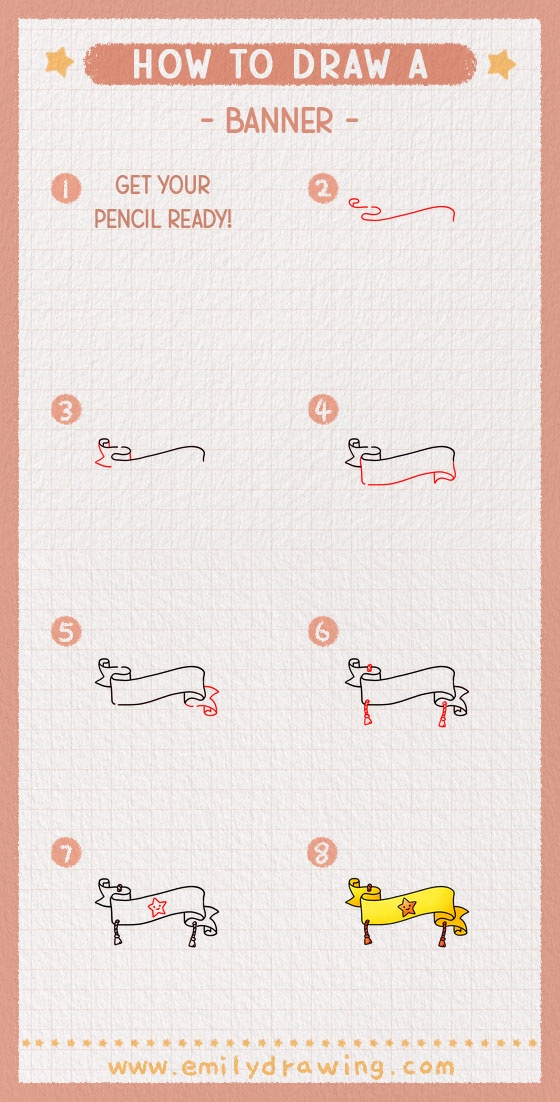
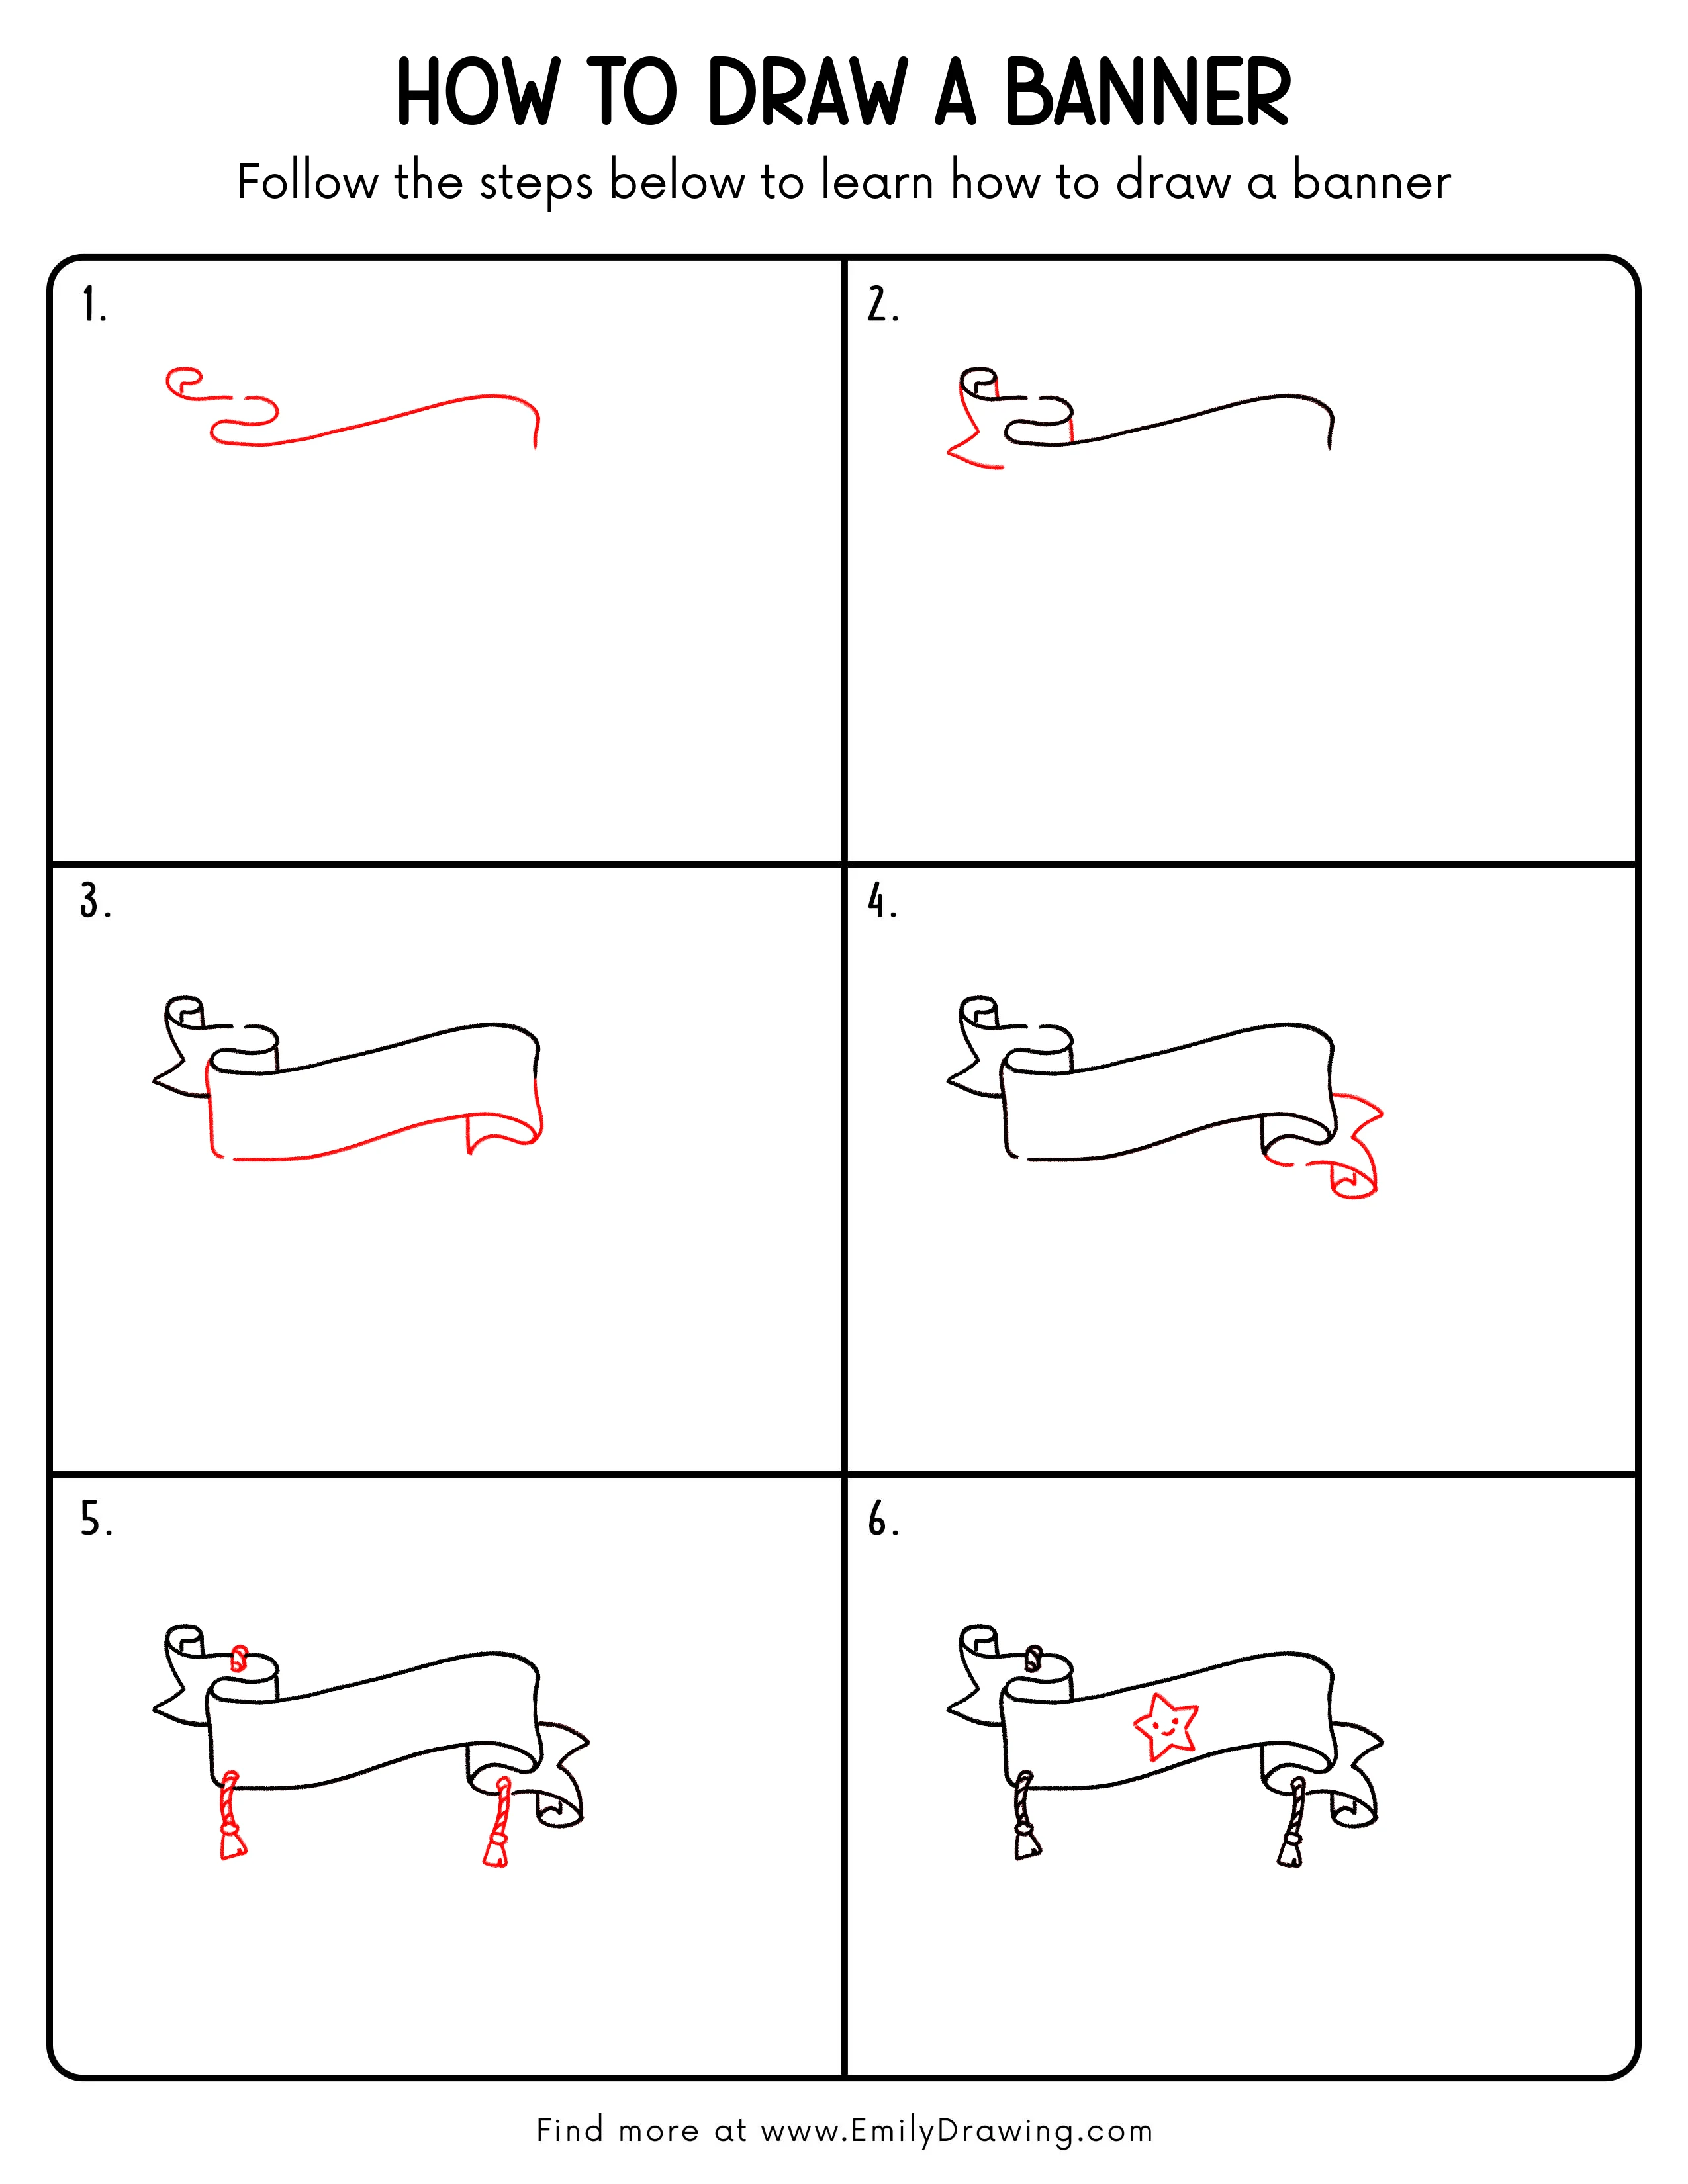
This easy drawing tutorial shows how to draw a ribbon banner step by step. It is a calm, friendly drawing for beginners, with simple shapes and smooth curves.
What You Will Need
- Pencil
- Eraser
- Black marker or pen
- Paper
- Coloring pencils or markers (optional)
Here are my RECOMMENDED Art Supplies!
- Crayola Coloring Set (140 Pieces – Mega Value!)
- 24 Colored Crayon Set
- A4 Printer Paper
- Crayola Coloring Pencils
- HP Home Printer with Instant Ink!
Time needed:
20 minutes.
Step-by-Step Drawing Guide
Step 1: Sketch the Main Flow Line
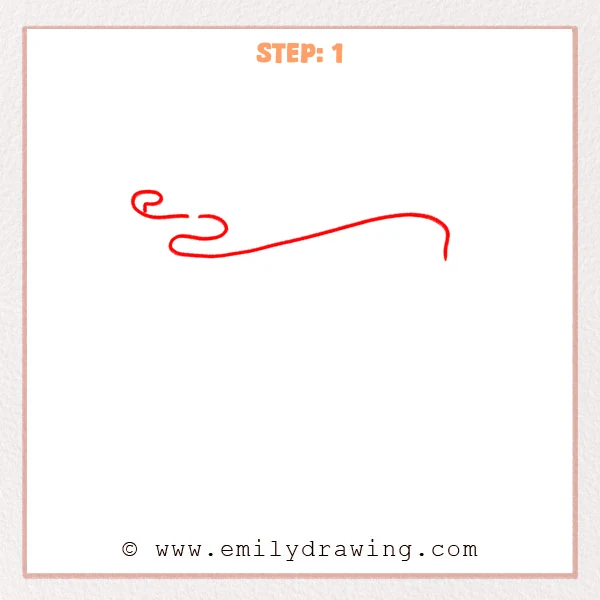
Start with a long, smooth wavy line for the top edge of the banner. Add a small curl on the left, like paper beginning to roll.
Pro Tip: Keep the line very light so you can adjust the curve easily.
Step 2: Build the Left Rolled End
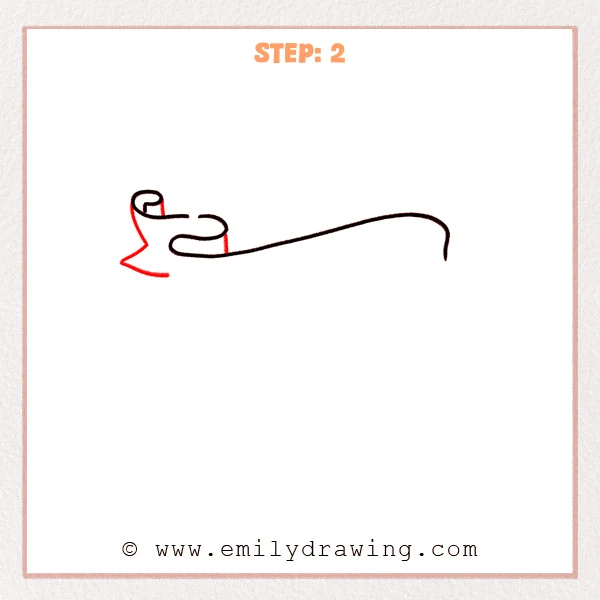
Add a short curved line under the left curl to show thickness. Sketch the left ribbon tail with two angled lines that meet in a point.
Pro Tip: Make the rolled edge slightly thicker than the flat banner section.
Step 3: Add the Bottom Edge and Right Turn
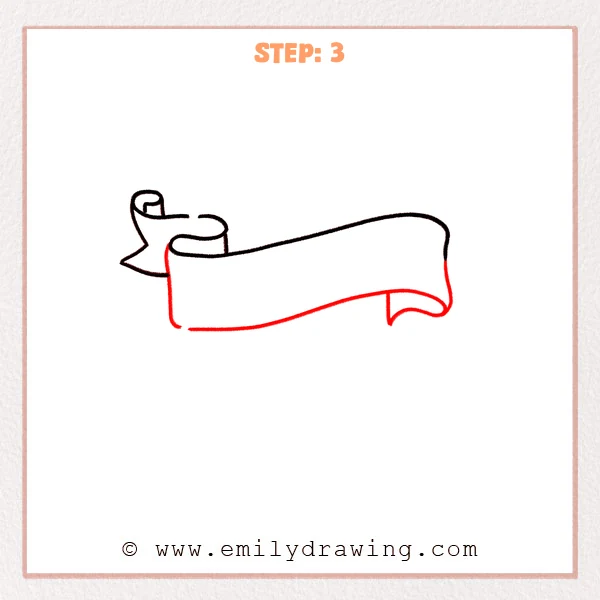
Draw the bottom edge across, keeping a similar distance from the top edge. Let the right side turn downward with a rounded bend.
Pro Tip: Try to keep the top and bottom edges roughly parallel for a tidy look.
Step 4: Finish the Right Curl and Back Tail
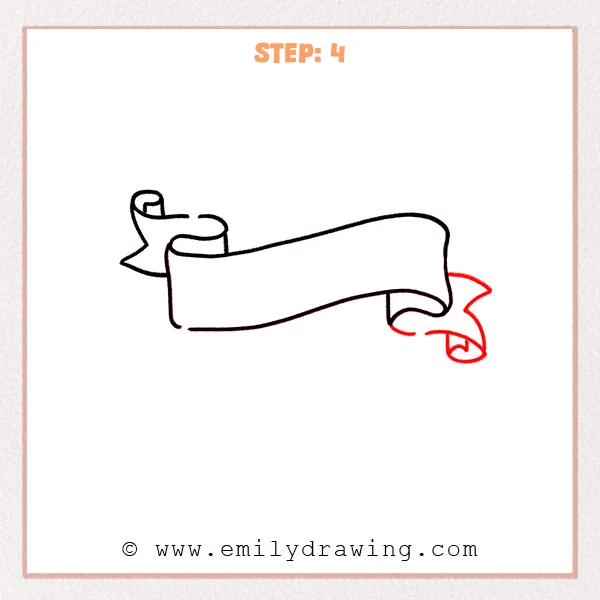
Inside the right bend, add an inner curl line to show the paper rolling back. Draw the right tail peeking from behind the main banner, then refine the fold lines.
Pro Tip: Tuck the inner curl line inside the banner so the fold feels deep.
Step 5: Draw the Hanging Cords and Tassels
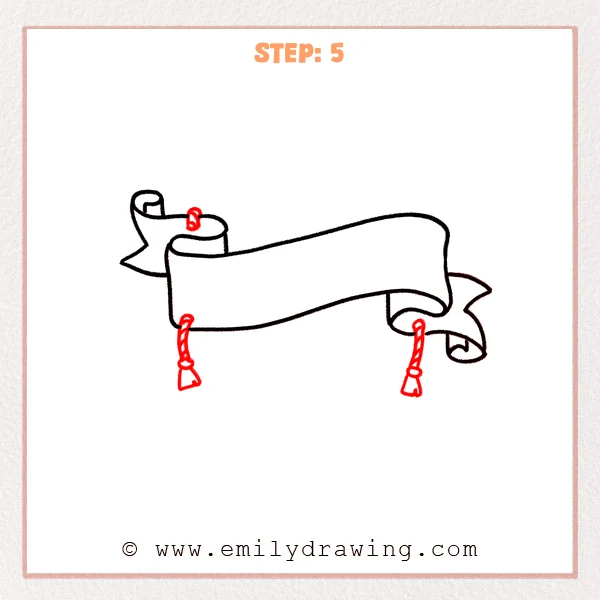
Under the banner, add two short hanging cords, one on each side. Give each cord twisted stripes, then finish with a small tassel shape at the bottom.
Pro Tip: Keep both cords a similar length so the banner feels balanced.
Step 6: Add the Center Star Decoration
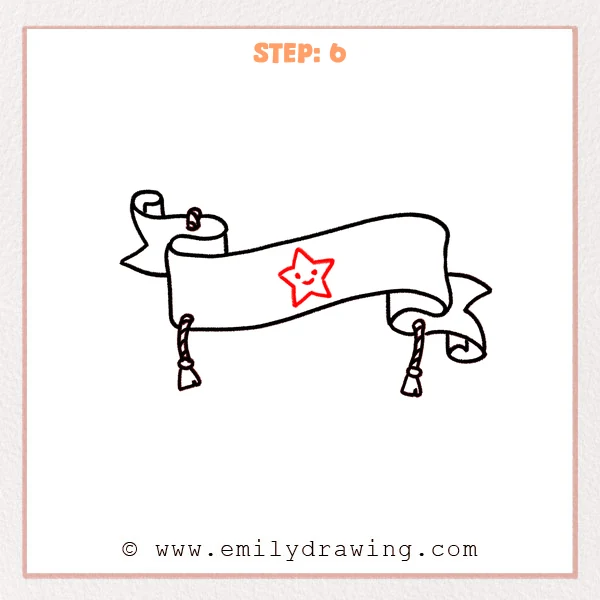
In the middle of the banner, sketch a five-point star using straight, simple edges. Refine the points, then add tiny eyes and a small smile.
Pro Tip: Place the star near the center line so the design looks steady.
Step 7: Color in your drawing!
Fun Facts
- Banners and ribbons are often drawn with curls to show folded paper.
- A small inner line on a curl makes a flat shape look three-dimensional.
- Simple center icons, like stars, help a banner feel complete and readable.
Pin it now, Draw later!
You now have a clear ribbon banner with curled ends, hanging cords, and a cheerful star. For coloring, try a light base color on the banner and add a darker shade under each fold and curl. A common beginner mistake is making the top and bottom edges uneven, so pause and compare the spacing as you refine. Keep practicing this step by step drawing, and try changing the center icon or adding simple words on the banner for your next easy drawing tutorial.
Get the FREE Printable Drawing Guide
FREE Download Printable Banner Drawing Tutorial
Frequently Asked Questions
How do I keep the banner edges smooth?
Draw slowly with your shoulder and elbow, not only your wrist. If a curve wobbles, erase just that small section and redraw it lightly.
How do I make the curls look more realistic?
Add a second inner line to show thickness, and shade the inside of the curl slightly darker. Keep the fold lines shorter than the outer edges.
Can I add text on the banner?
Yes, leave extra space in the center panel and write simple block letters. Keep the letters level by drawing a faint guideline first.