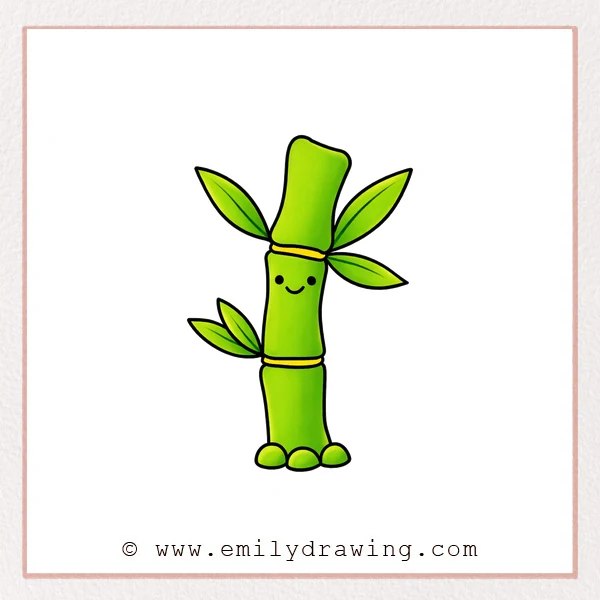
This easy drawing tutorial shows you how to draw bamboo step by step using simple shapes. If you are drawing for beginners, bamboo is a calm subject with clean curves and repeating segments. Start lightly, and refine your lines as the stalk takes shape.
What You Will Need
- Pencil
- Eraser
- Black marker or fineliner
- Paper
- Colored pencils or crayons (optional)
Here are my RECOMMENDED Art Supplies!
- Crayola Coloring Set (140 Pieces – Mega Value!)
- 24 Colored Crayon Set
- A4 Printer Paper
- Crayola Coloring Pencils
- HP Home Printer with Instant Ink!
Time needed:
26 minutes.
Step-by-Step Drawing Guide
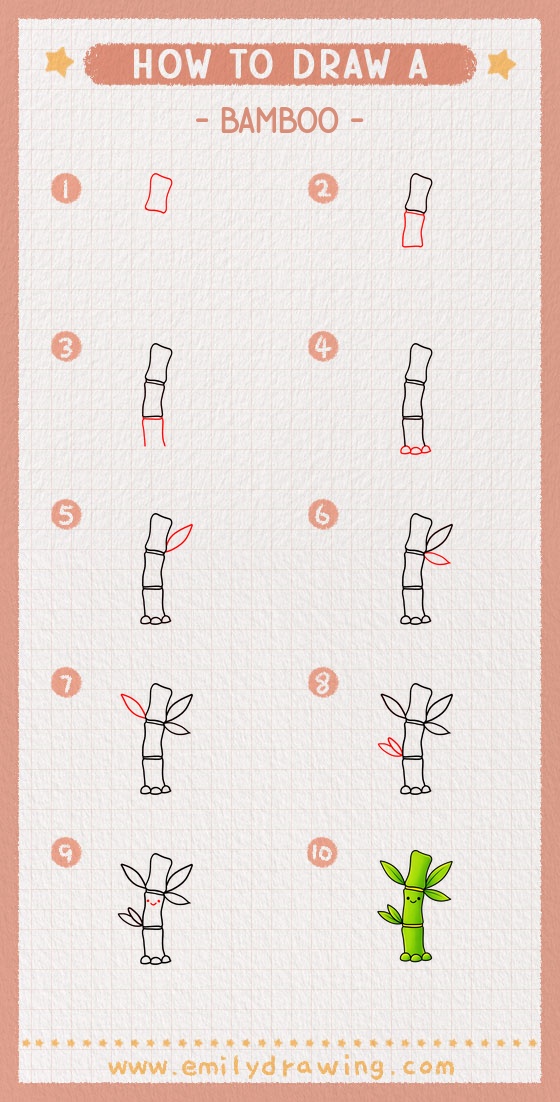
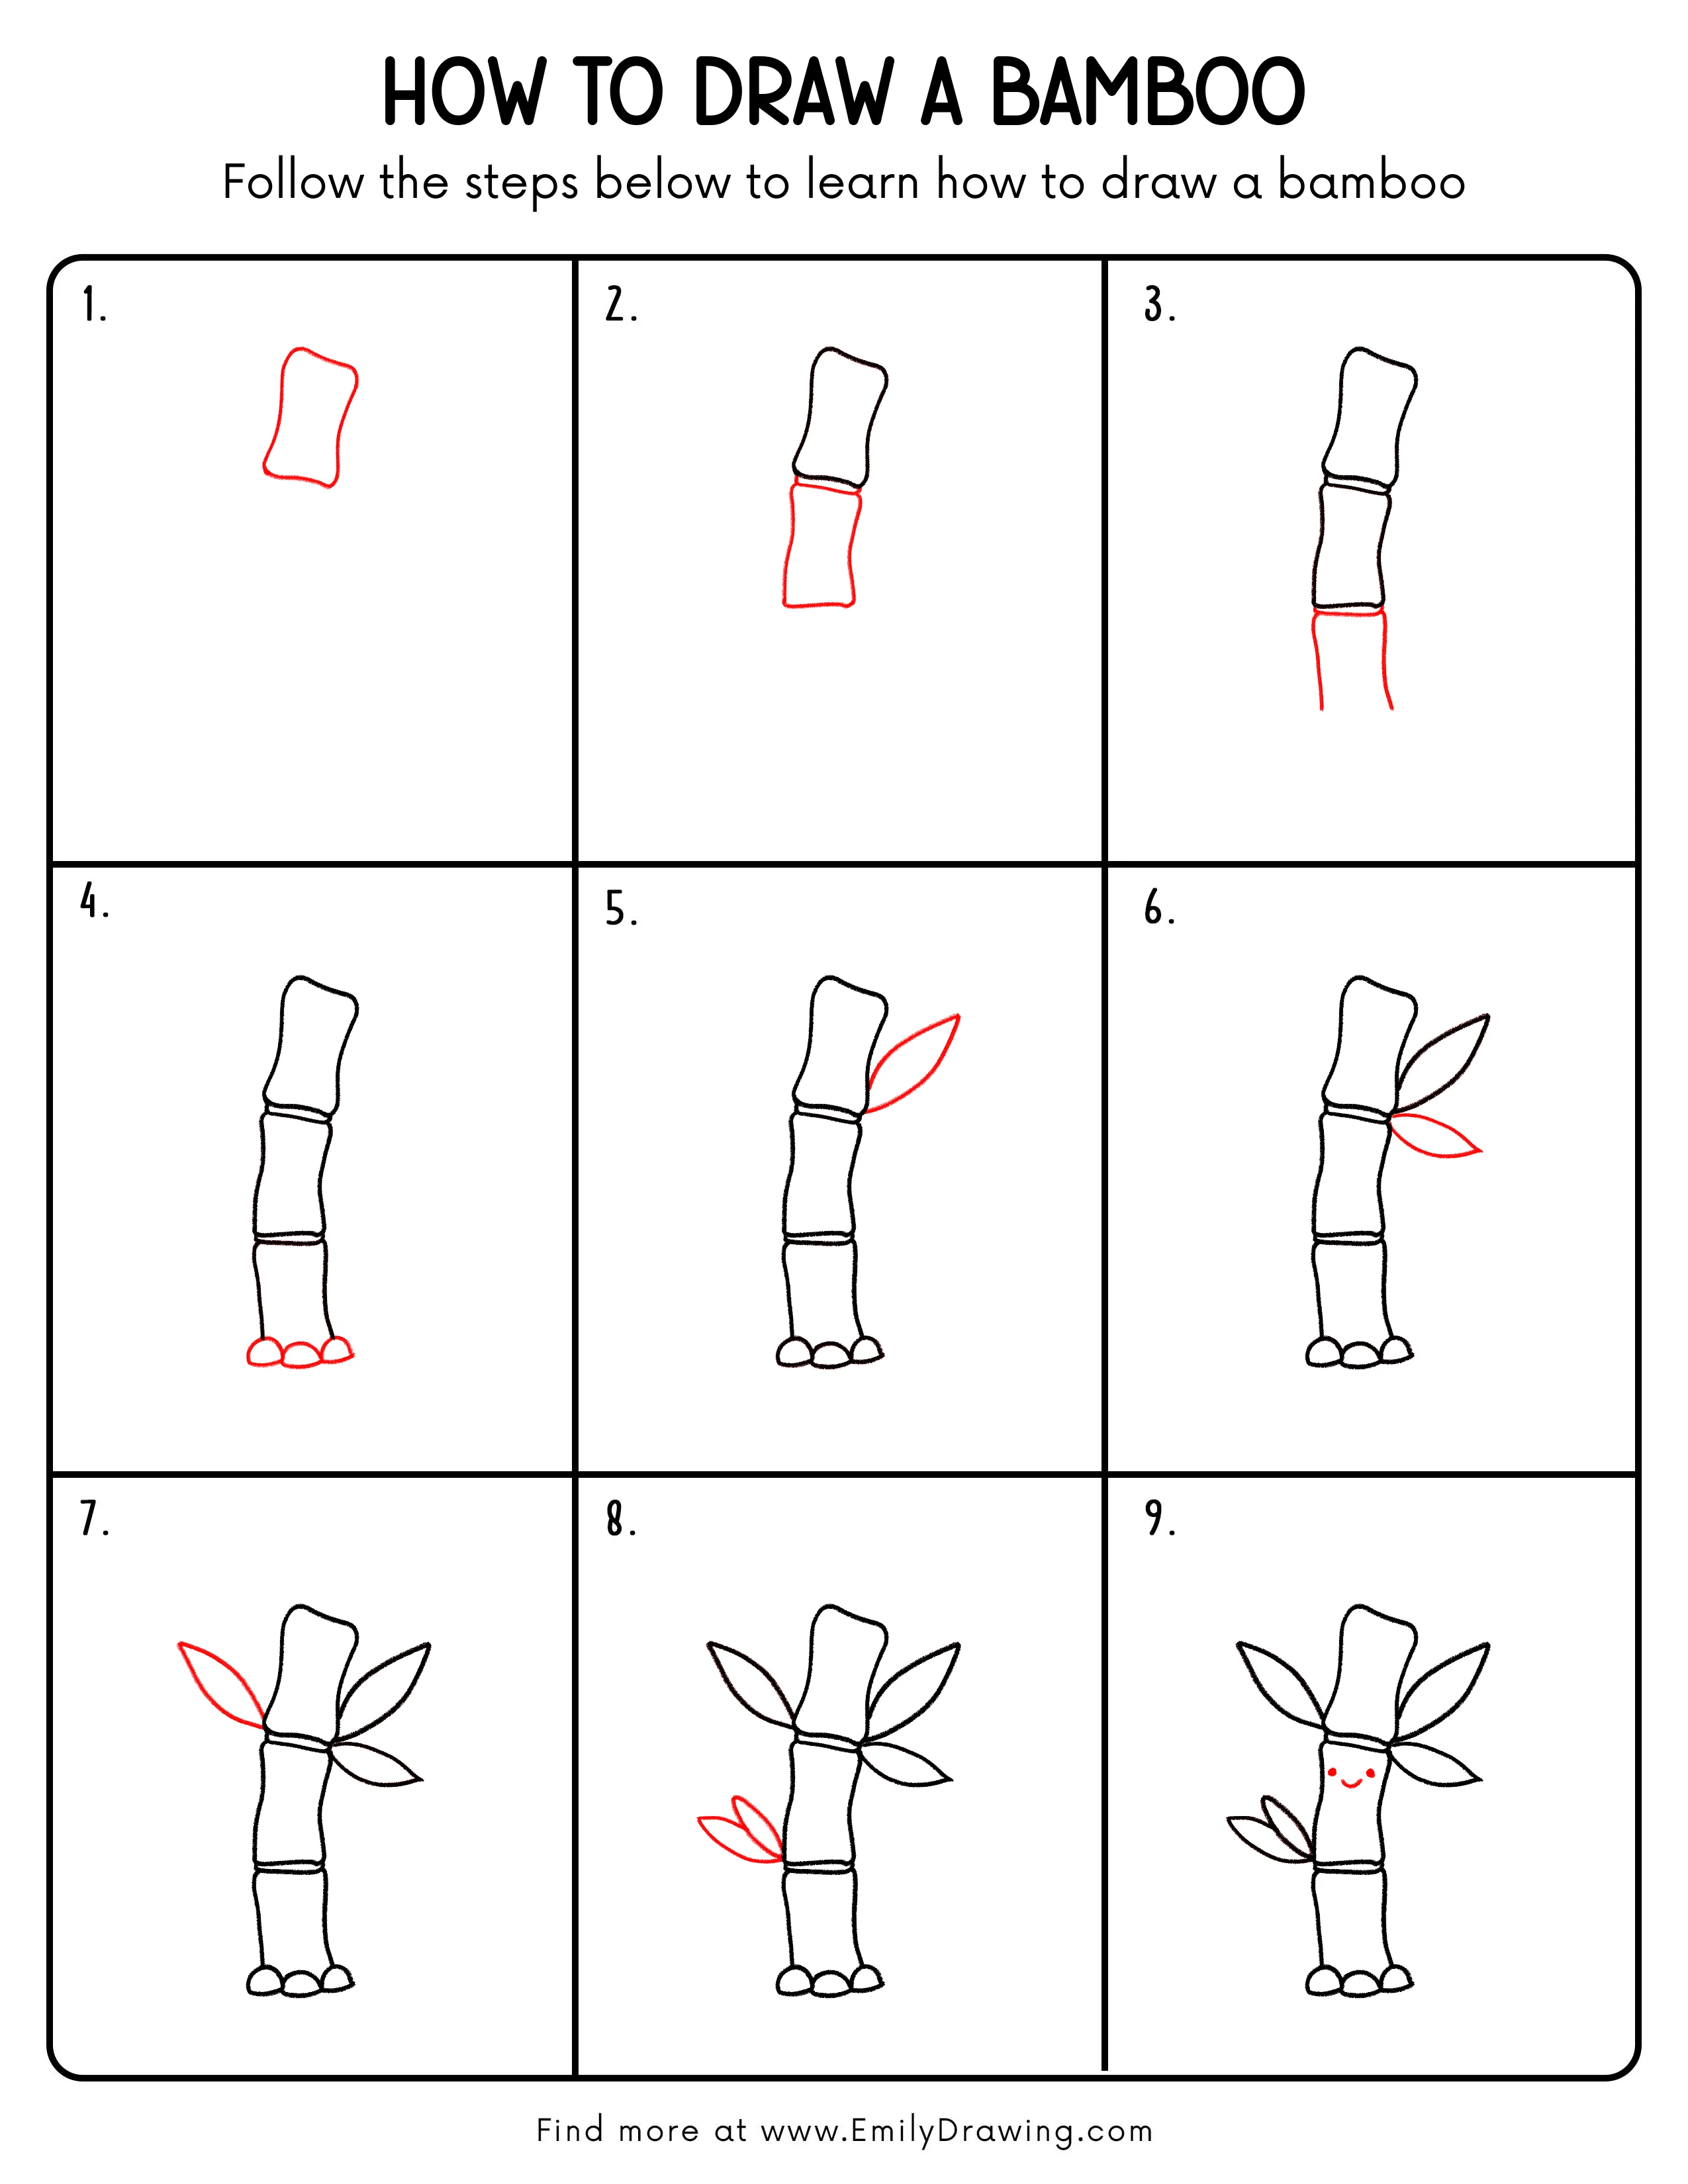
Step 1: Draw the First Bamboo Segment
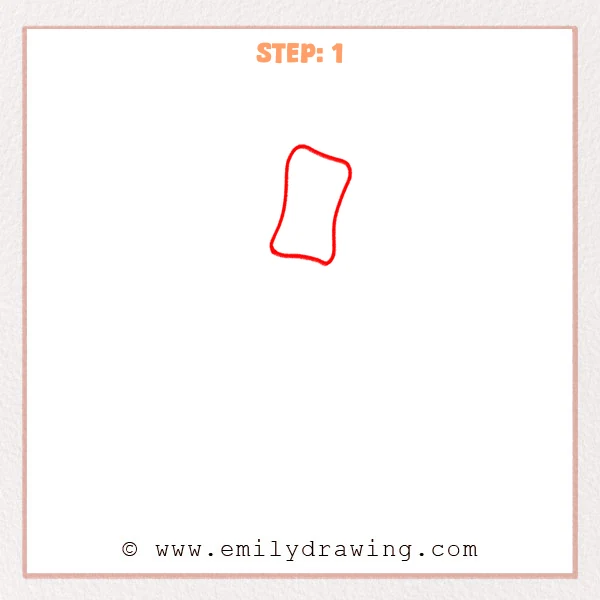
Start with a tall, rounded rectangle shape, slightly wider at the top. Let the sides bow outward a little to keep it soft. Keep the corners smooth, not sharp.
Pro Tip: Rounded corners make bamboo look natural and friendly.
Step 2: Add the Second Segment and Joint Rings
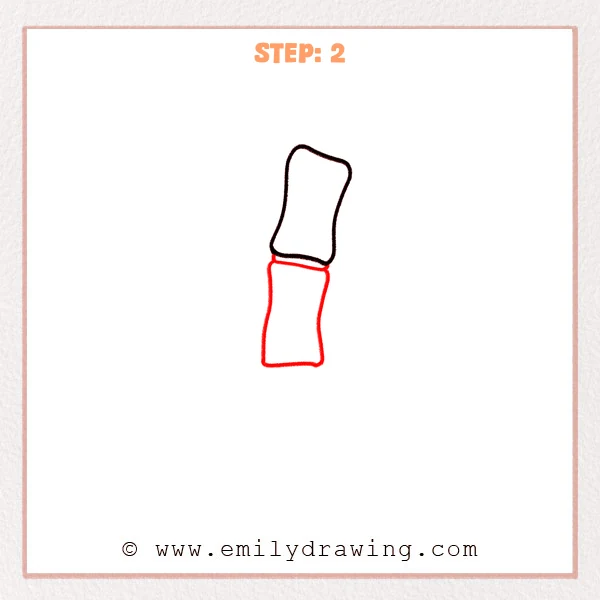
Draw a second bamboo segment below the first, aligned with a slight tilt. Between the two segments, add two short curved lines to form a joint ring. Keep the ring narrow so it reads like a bamboo node.
Pro Tip: Keep both segments similar in width so the stalk feels steady.
Step 3: Add the Third Segment and Base Edge
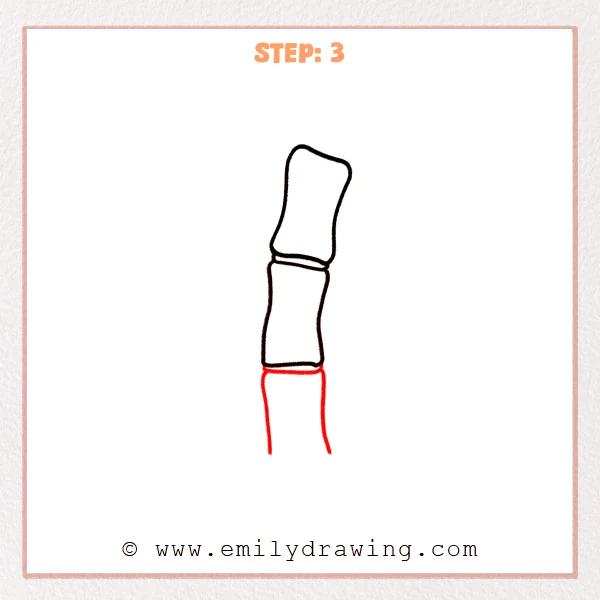
Draw a third segment at the bottom to create a three-part bamboo stalk. Add another pair of curved joint lines between the second and third segments. Flatten the very bottom with a soft curve so it feels grounded.
Pro Tip: Vary the segment lengths slightly, but keep the joints clear.
Step 4: Draw the Pebbles at the Base
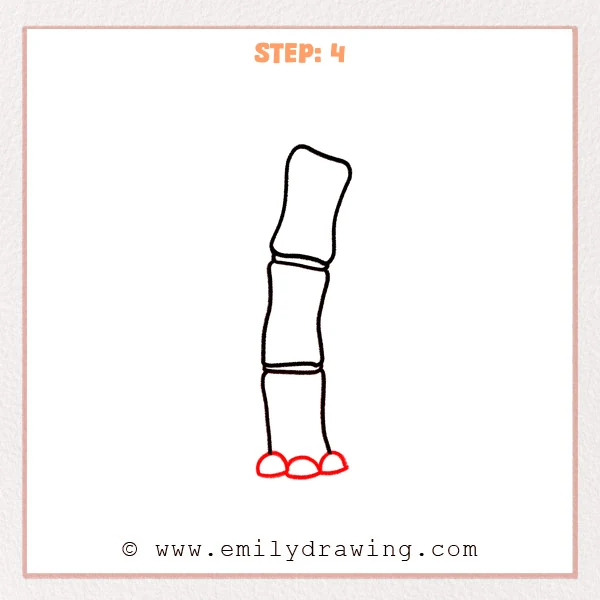
Add three rounded pebble shapes at the bottom, like small half-ovals sitting side by side. Make the middle pebble slightly larger and the side pebbles a bit smaller. Let the pebbles touch the bamboo base to support it.
Pro Tip: Keep the pebbles low and wide so they do not steal attention.
Step 5: Draw One Right-Side Leaf
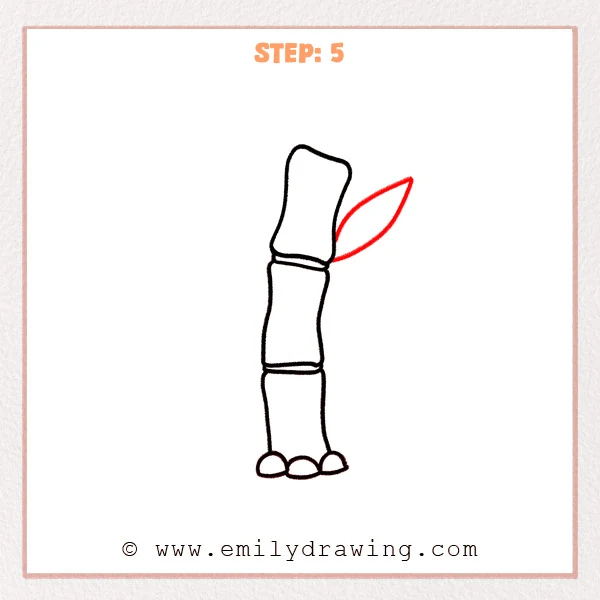
On the upper right side near the top joint, draw one long leaf shaped like a slim teardrop. Point the tip up and to the right, and keep the base narrow. Connect the base to the joint area with a clean touch.
Pro Tip: A thin leaf base helps the leaf look like it grows from the node.
Step 6: Add the Second Right-Side Leaf
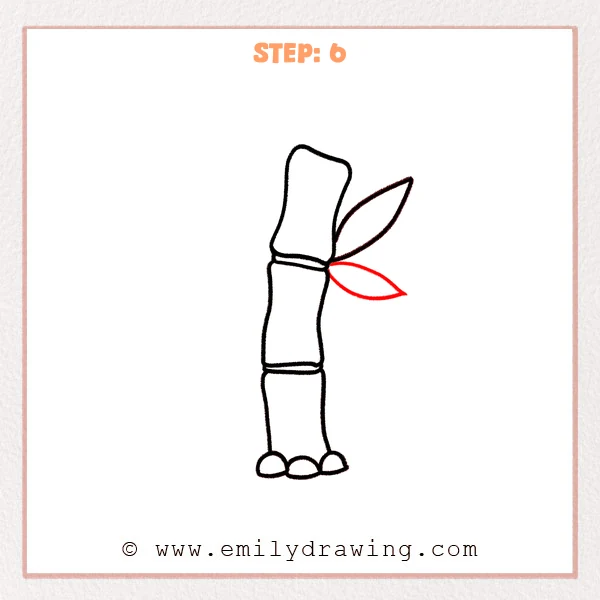
Draw a second right-side leaf starting near the same spot, but angle it slightly lower. Make it a little shorter so the two leaves do not overlap too much. Keep both leaf tips pointed and clean.
Pro Tip: Change the angle between leaves to create depth and variety.
Step 7: Add One Large Left-Side Leaf
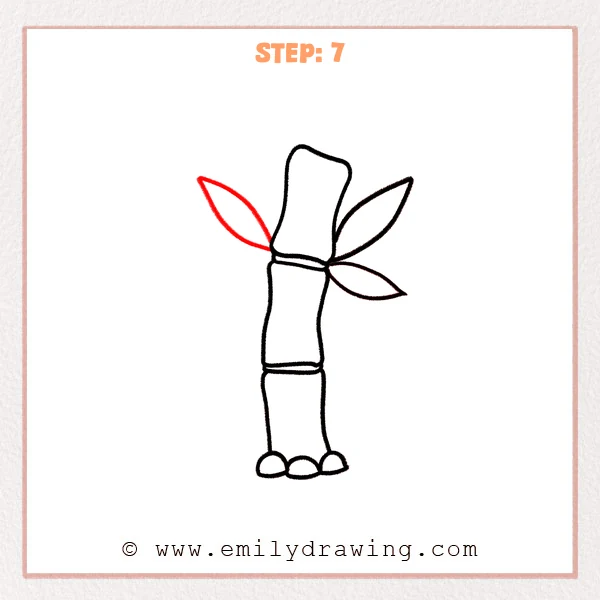
On the upper left side, draw one larger leaf that reaches up and left. Use two smooth curves that meet in a gentle point. Balance it against the right-side leaves without touching the stalk top.
Pro Tip: Leave a small gap between the leaf and the stalk top for breathing room.
Step 8: Add the Lower-Left Leaf Cluster
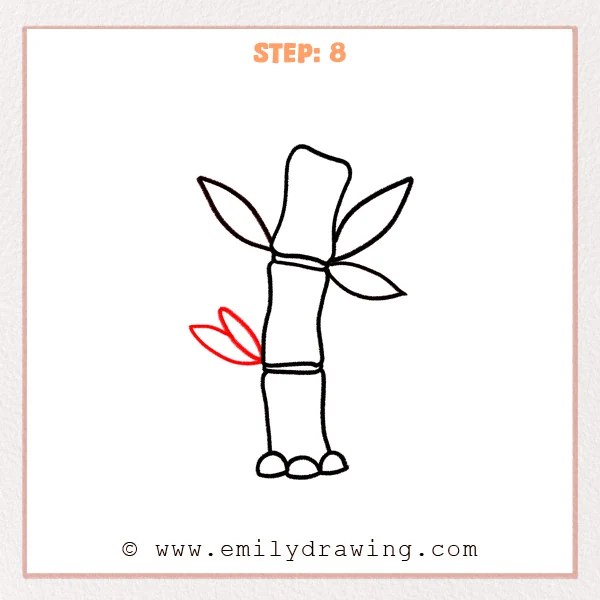
Near the middle-left area, draw two smaller leaves as a little cluster. Keep them shorter and thinner than the top leaves. Angle them outward to the left, and leave a small space between their tips.
Pro Tip: Smaller leaves should be slimmer so the size difference is easy to see.
Step 9: Draw a Cute Face on the Bamboo
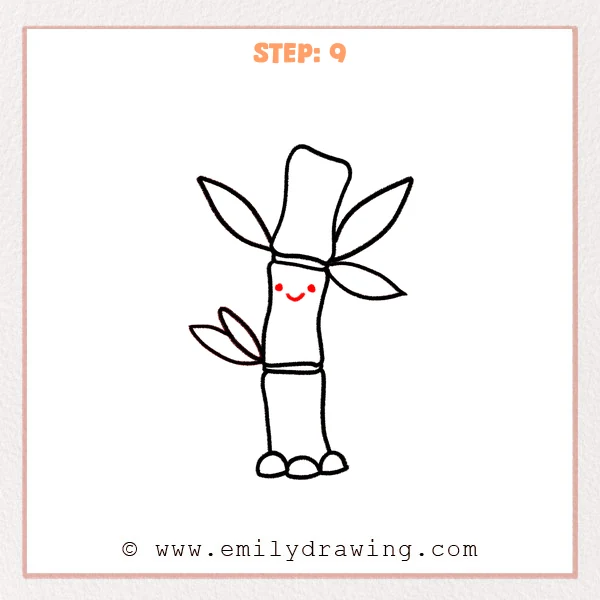
On the middle segment, add two small dot eyes with even spacing. Below them, draw a short curved smile that lifts gently at the ends. Place the face slightly above the segment center for a cuter look.
Pro Tip: Lightly mark eye placement first to keep the face centered.
Step 10: Color in your drawing!
Fun Facts
- Bamboo is a grass, not a tree, and it grows in tall hollow stems.
- The ring-like bumps on bamboo are called nodes, where new growth can form.
- Some bamboo species can grow very quickly in warm, wet seasons.
Pin it now, Draw later!
You learned how to draw bamboo by building three soft segments, adding clear joint rings, and placing leaves in a balanced cluster. For color, try light green on the stalk with darker green along one side for shading. Add a gentle shadow under the pebbles, and a slightly darker tone near each joint ring to show depth.
One common beginner mistake is making the stalk edges too straight and stiff. Keep the sides slightly curved, and bamboo will look more natural. Practice this step by step drawing a few times, then try drawing bamboo with more stalks or extra leaves.
Get the FREE Printable Drawing Guide
FREE Download Printable Bamboo Drawing Tutorial
Frequently Asked Questions
How do I make the bamboo joints look more real?
Keep the joint rings thin, and darken just beneath them with light shading.
What if my leaves look uneven?
Match the leaf bases near the same node, then vary the angles for balance.
Can I draw more bamboo stalks in the background?
Yes, draw lighter, thinner stalks behind the main one to create depth.