Learning how to draw Bambi can feel calm and simple when you build it in small shapes. This step by step drawing guide keeps the lines clean and friendly, so drawing for beginners stays enjoyable. Take your time, and let each line stay light until you like the shape.

What You Will Need
- Pencil
- Eraser
- Black marker or fineliner
- Paper
- Colored pencils or crayons (optional)
Here are my RECOMMENDED Art Supplies!
- Crayola Coloring Set (140 Pieces – Mega Value!)
- 24 Colored Crayon Set
- A4 Printer Paper
- Crayola Coloring Pencils
- HP Home Printer with Instant Ink!
Time needed:
12 minutes.
Step-by-Step Drawing Guide
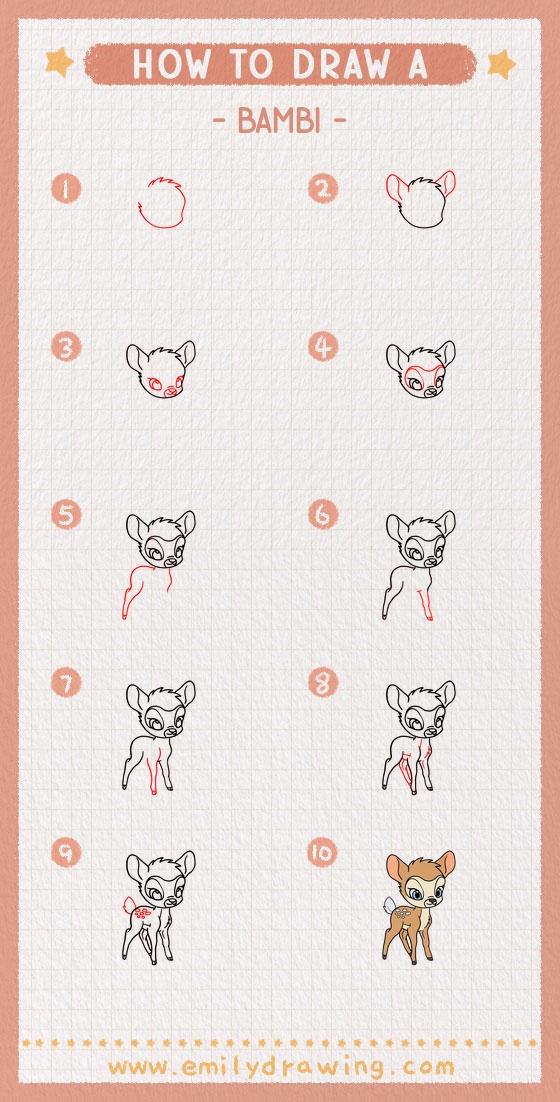
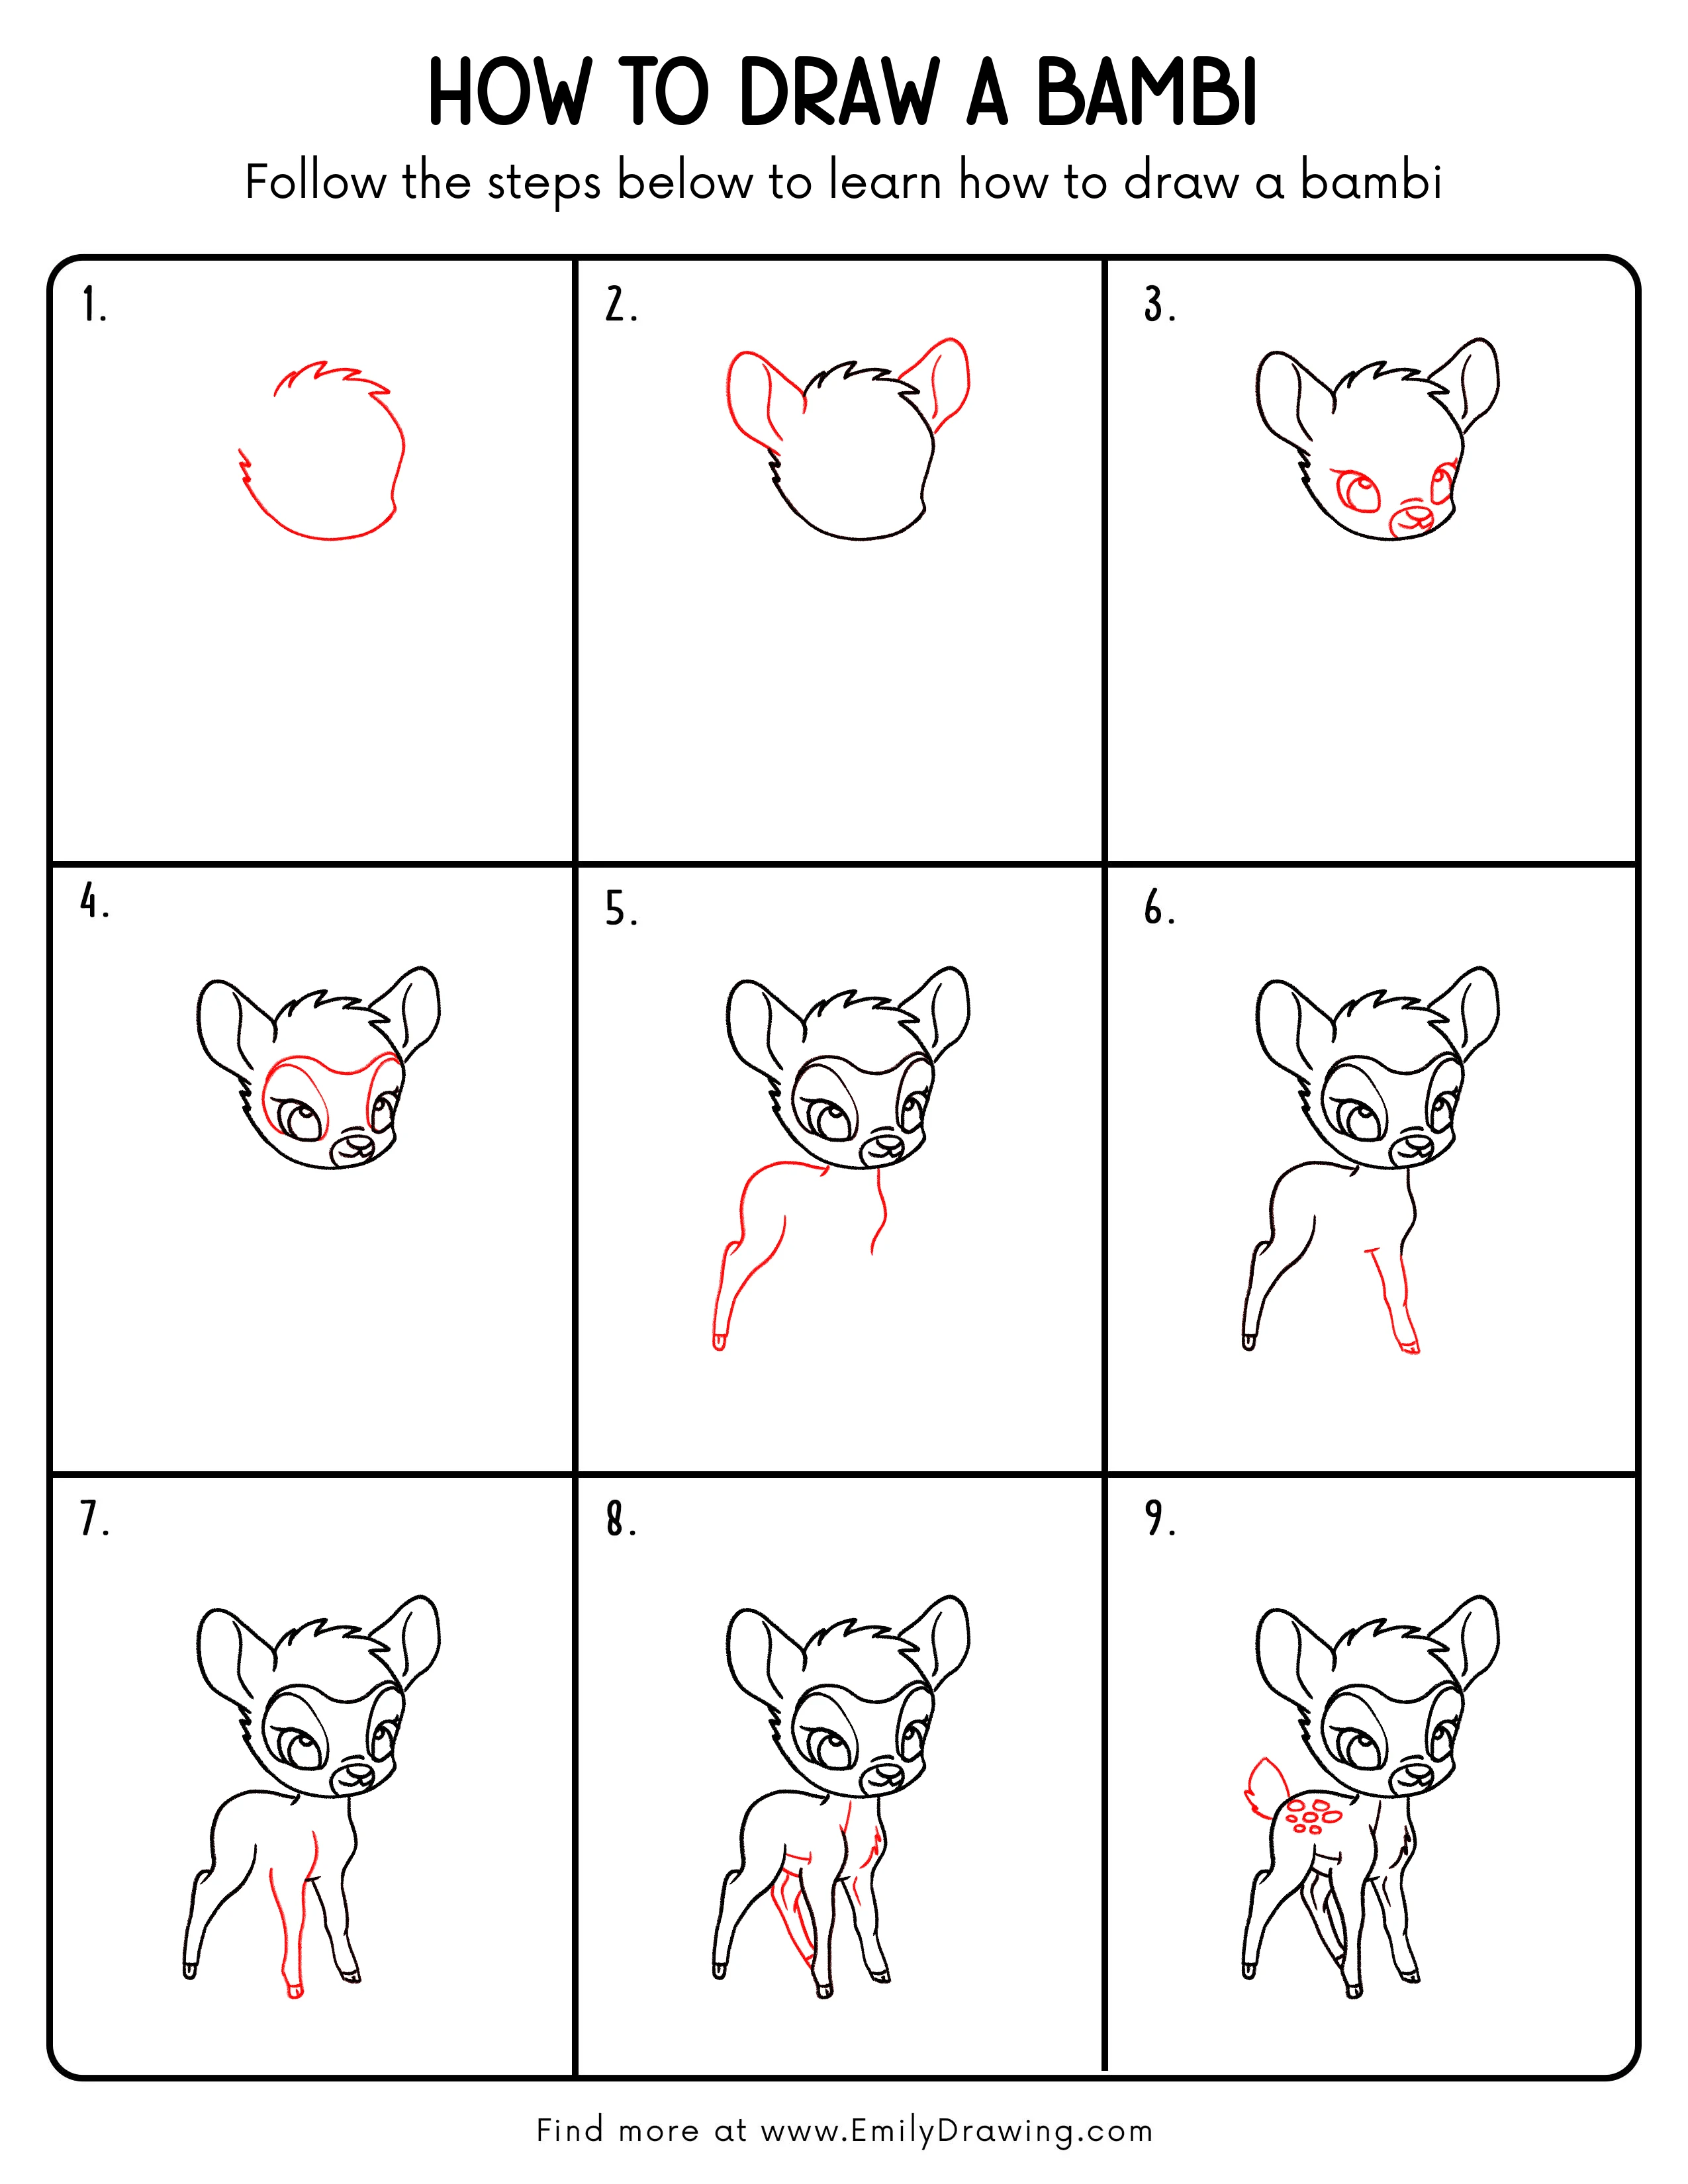
Step 1: Sketch the Head Outline
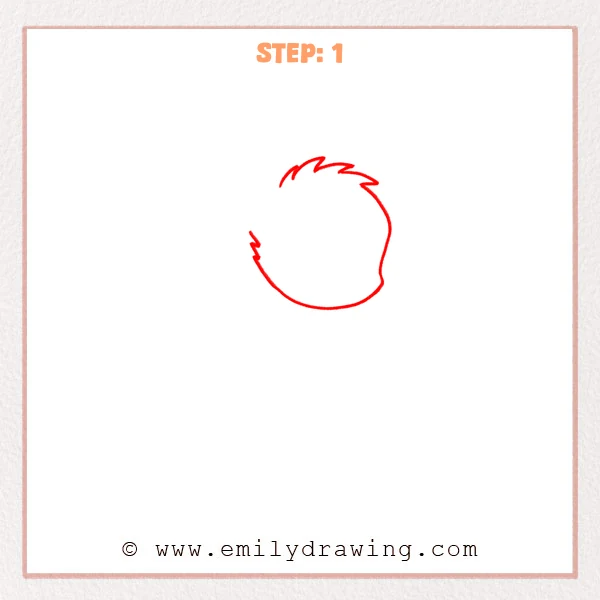
Start with a rounded head shape, like an upside-down egg with a soft bottom. Add a few small, pointed bumps on top for a fluffy hair tuft. Keep the right cheek slightly fuller to show Bambi turning.
Pro Tip: Keep your first lines light so you can adjust the head size easily.
Step 2: Add the Big Ears
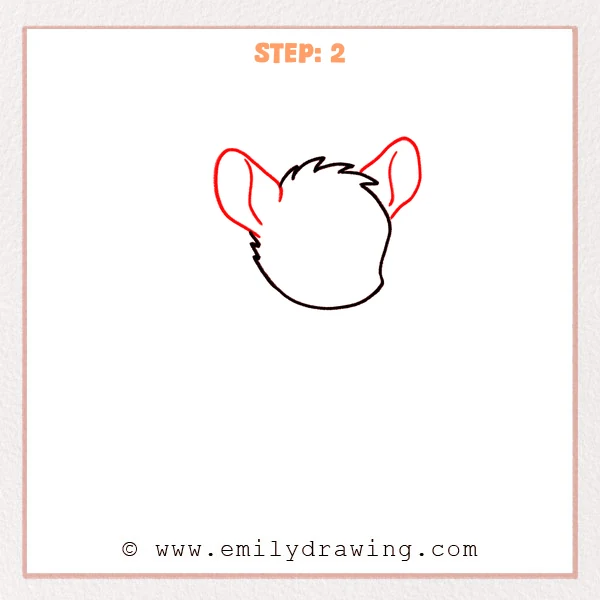
Place two large, leaf-shaped ears on the top sides of the head. Let each ear curve outward and end in a gentle point. Draw a second inner curve inside each ear to show the ear rim.
Pro Tip: Match the ear heights, but let the angles differ a little for a natural look.
Step 3: Draw the Eyes and Small Nose-Mouth
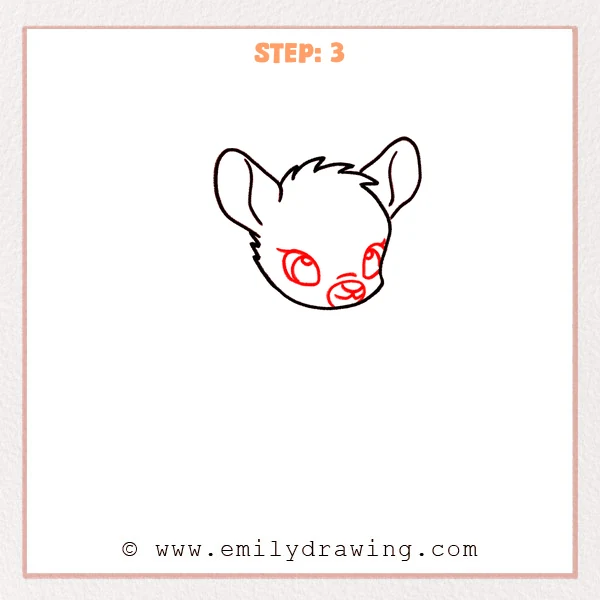
Add a small oval nose on the lower right area of the face. Under it, draw a short curved line for a soft smile. Place two big eyes on the face, with slightly curved lids for a sweet expression.
Pro Tip: Make the eyes large compared to the face to keep Bambi looking young.
Step 4: Refine the Face Markings and Eye Details
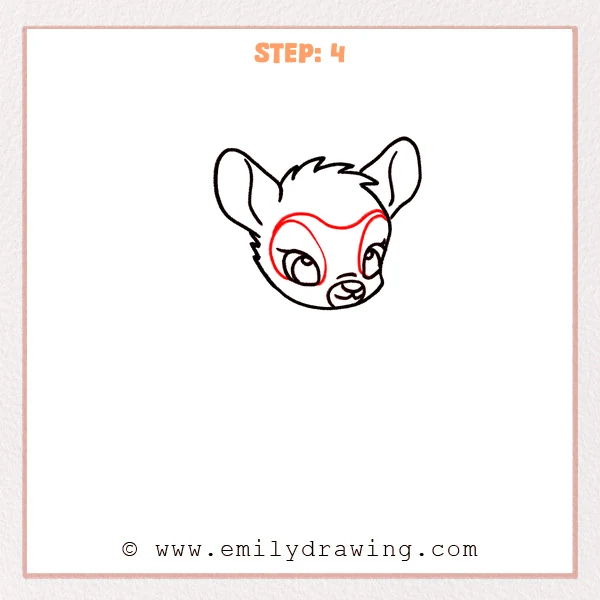
Sketch a smooth curved line across the forehead to frame the lighter face area. Add a few inner lines around the eyes to build depth and direction. Gently thicken the outer head line so the face reads clearly.
Pro Tip: Aim for near symmetry on the face markings, but do not force perfect matches.
Step 5: Draw the Back Body Outline and One Hind Leg
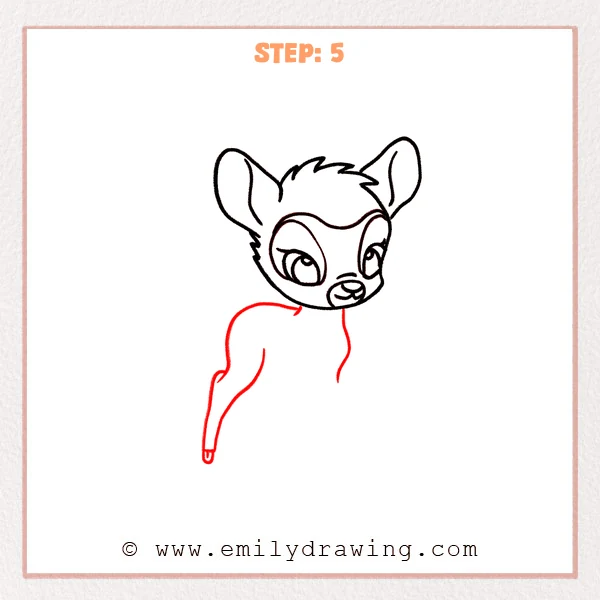
Extend a slim neck line down from the head and lead it into the back. Draw one long, relaxed curve for the back and rump, keeping the shape rounded. From the rump, add one hind leg with a light bend at the knee.
Pro Tip: Keep the back curve smooth and wide so Bambi stays soft and youthful.
Step 6: Add One Front Leg and Hoof
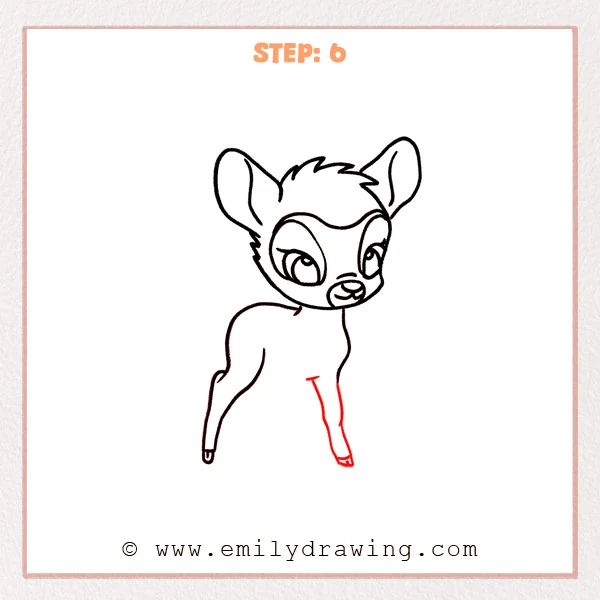
From the chest area, draw one thin front leg that narrows slightly as it goes down. Add a small hoof shape at the bottom, like a tiny block with a flat base. Keep the leg line smooth without sharp corners.
Pro Tip: A slimmer front leg helps the body look light and balanced.
Step 7: Add the Other Front Leg and Hoof

Draw the second front leg beside the first, set a little farther back for depth. Give it a matching hoof, keeping the size close to the first one. Leave a small gap between the legs so the stance feels steady.
Pro Tip: Tilt the second leg slightly so both legs are not perfectly parallel.
Step 8: Draw the Other Hind Leg
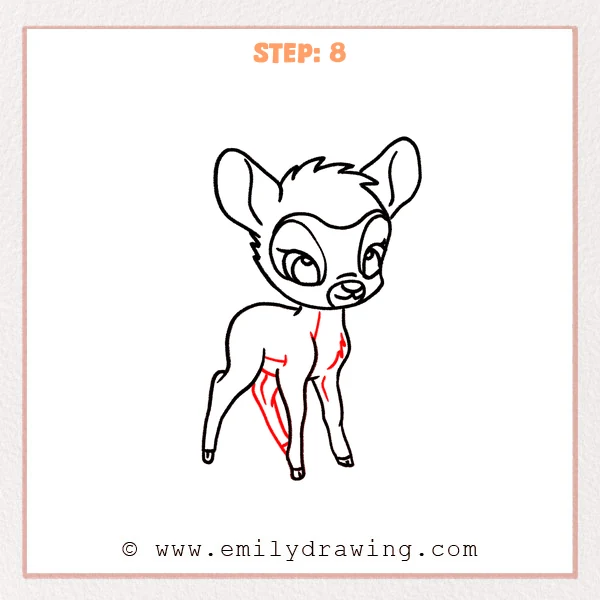
Return to the back and sketch the second hind leg so it overlaps or sits slightly forward. Make the far leg a touch thinner to show it is behind. Narrow the bottom end and leave space for the hoof area.
Pro Tip: Overlap the hind legs a little to make the standing pose feel real.
Step 9: Add the Tail, Spots, and Final Lines
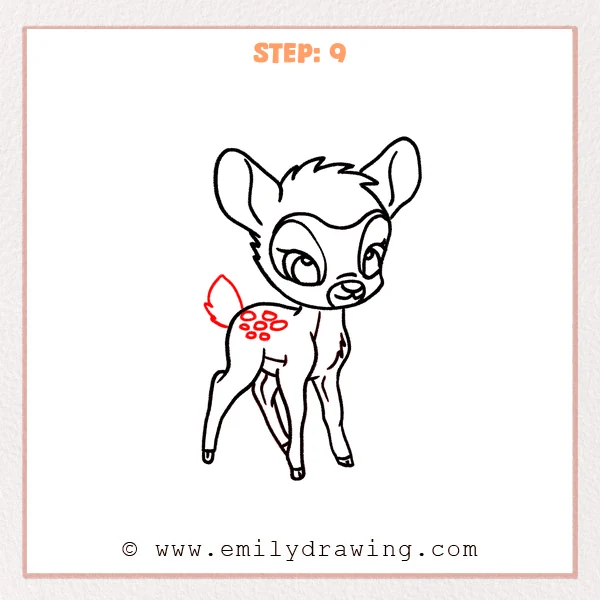
Add a small fluffy tail at the rump, shaped like a soft leaf or cloud. Draw several oval spots on the upper back, varying the sizes and spacing. Finish with a small chest fur tuft and a few short inner leg lines, then ink the final outline.
Pro Tip: Scatter the spots instead of lining them up, so they look more natural.
Step 10: Color in your drawing!
Fun Facts
- Young deer are called fawns, and many fawns have white spots for camouflage.
- A fawn’s legs look long and thin, which helps it stand and walk early.
- Deer ears are large and mobile, so they can listen in many directions.
Pin it now, Draw later!
You built Bambi by starting with the head, then adding ears, face details, and a simple standing body. For coloring, try warm light brown for the coat and a creamy tan for the face and belly. Add gentle shading under the chin, inside the ears, and along the legs to show form.
One common beginner mistake is making the legs too thick, which can make Bambi look heavy. Keep the legs slim and the body curves soft, and your drawing will stay fawn-like. Practice this easy drawing tutorial a few times, and then try drawing Bambi in a new pose next.
Get the FREE Printable Drawing Guide
FREE Download Printable Bambi Drawing Tutorial
Frequently Asked Questions
How do I make Bambi’s eyes look gentle?
Use big eye shapes with curved upper lids, and keep the pupils slightly rounded.
What if my ears do not match?
Make the ear heights similar, then adjust the inner ear lines to balance them.
How can I keep the body proportions cute?
Draw a larger head, a slim neck, and thin legs for a young fawn look.