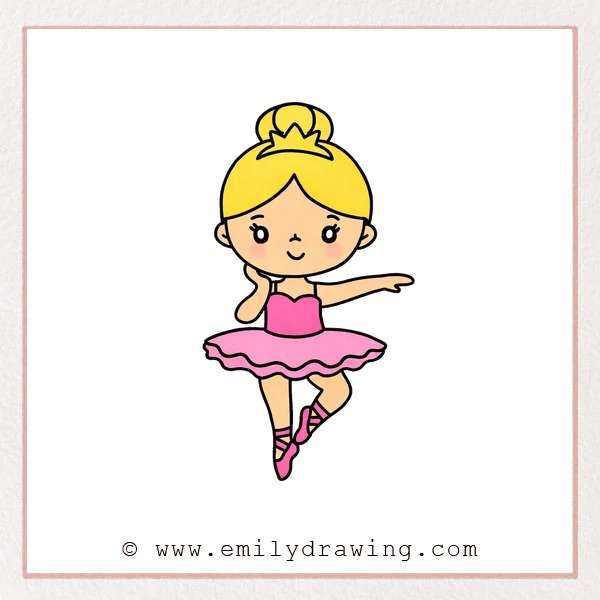
This easy drawing tutorial shows how to draw a ballerina step by step. We will build the picture slowly, using simple shapes and smooth lines. Take your time, and enjoy watching your ballerina come to life.
What You Will Need
- Pencil
- Eraser
- Black pen or marker (optional, for final lines)
- Paper
- Colored pencils or crayons (optional)
Here are my RECOMMENDED Art Supplies!
- Crayola Coloring Set (140 Pieces – Mega Value!)
- 24 Colored Crayon Set
- A4 Printer Paper
- Crayola Coloring Pencils
- HP Home Printer with Instant Ink!
Time needed:
11 minutes.
Step-by-Step Drawing Guide
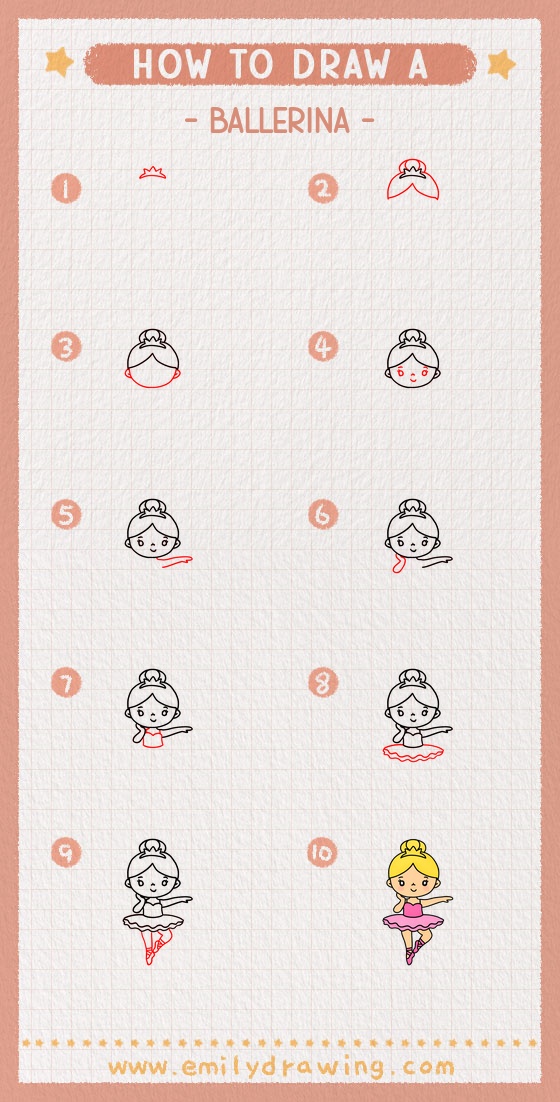
Step 1: Draw the Hair Accessory
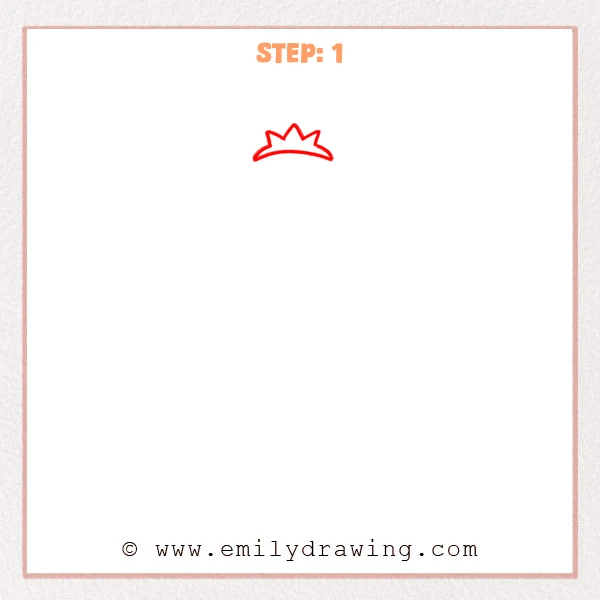
Start near the top of the page with a small crown made of three points. Keep the base slightly curved, like it sits on hair.
Pro Tip: Keep the crown a bit small first, so it aligns with the hair easily.
Step 2: Add Bangs and the Hair Outline
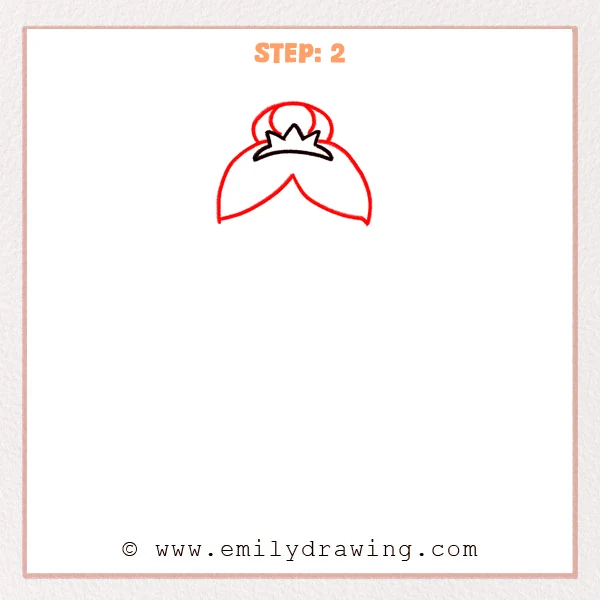
Under the crown, draw a wide curved shape for the top hair. Let the sides slope down like two hair panels, leaving a small point in the center for a part.
Pro Tip: Keep the side curves similar, so the face looks balanced.
Step 3: Draw the Round Face and Ears
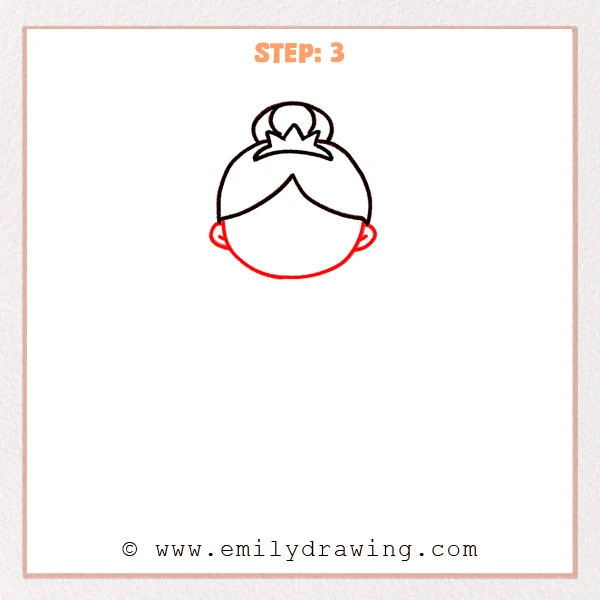
Sketch a large rounded face under the hair, with a slightly flatter bottom for the chin. Add small half-circle ears on both sides, a little above the face’s midpoint.
Pro Tip: Don’t place ears too low; they look natural near eye level.
Step 4: Add the Facial Features
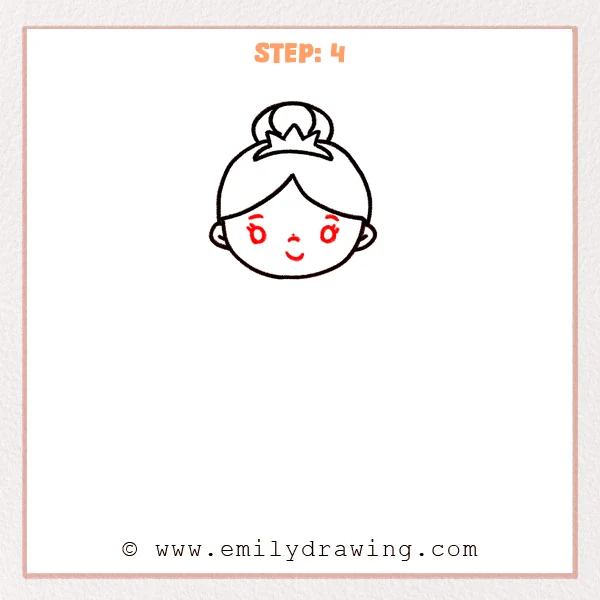
Place two round eyes in the center, leaving small highlight circles inside. Add short eyebrows, a tiny nose, and a curved smile for a gentle look.
Pro Tip: Leave about one eye’s width between the eyes for a pleasant spacing.
Step 5: Draw the Neck and One Arm Pose
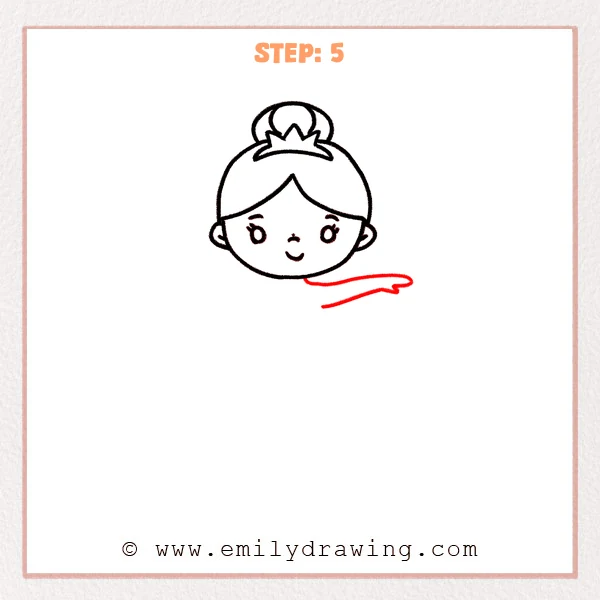
Add two short lines under the head for the neck. From the right side, draw a long curved arm reaching outward, ending in a small hand with a pointed fingertip.
Pro Tip: Keep the arm line smooth, like a gentle arc.
Step 6: Add the Other Arm
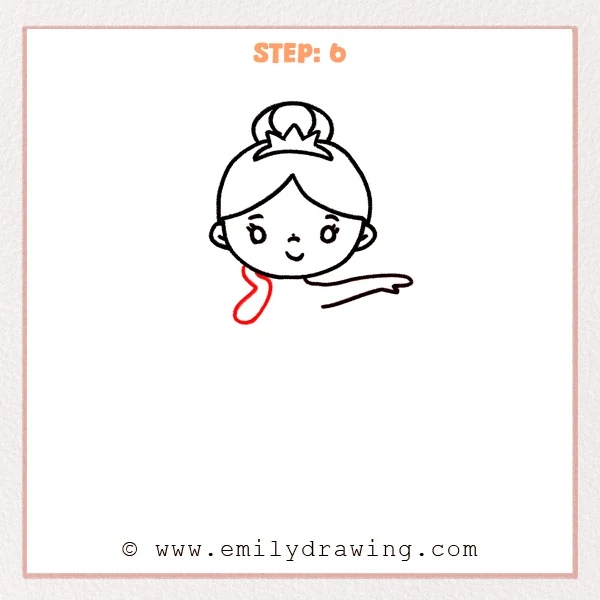
Draw a curved arm on the left, close to the body like a ballet arm position. End it with a small rounded curve to suggest the hand direction.
Pro Tip: Keep both arms similar in length for a balanced pose.
Step 7: Draw the Bodice Outline
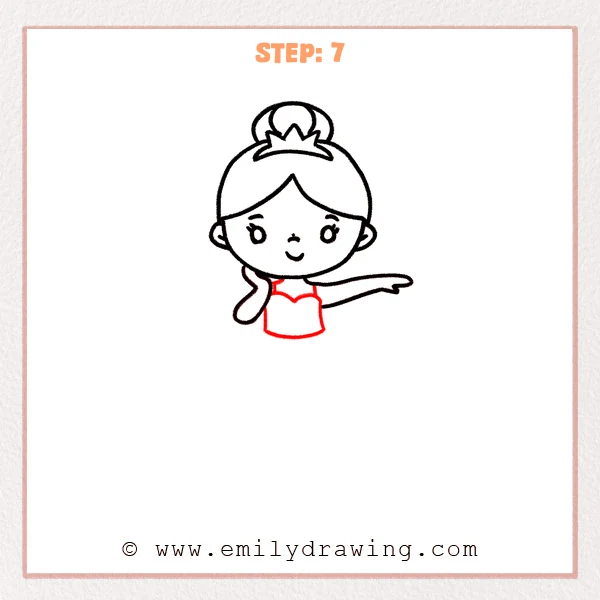
Under the neck, draw a simple neckline, like a small wave or heart shape. Add two slightly inward side lines to form the bodice shape.
Pro Tip: Keep both sides of the neckline level for a neat upper body.
Step 8: Draw the Tutu Skirt
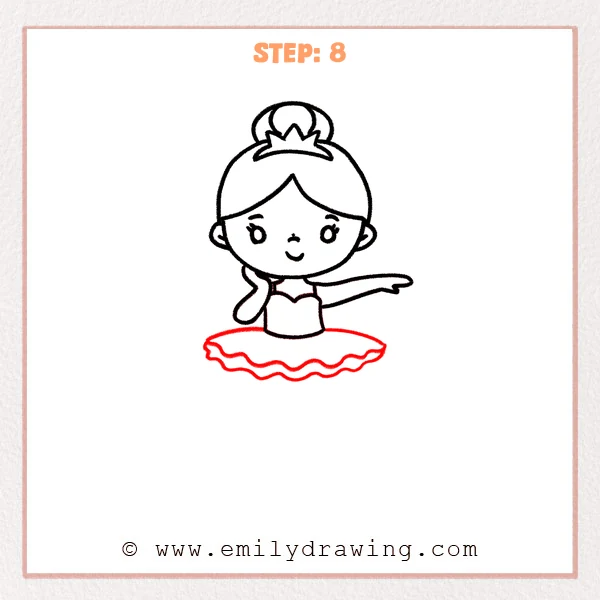
Draw a wide oval under the bodice to shape the tutu, letting it spread to both sides. Add rounded wavy edges along the bottom to show soft ruffles.
Pro Tip: Use smaller waves so the tutu feels light and airy.
Step 9: Add the Legs and Pointed Feet
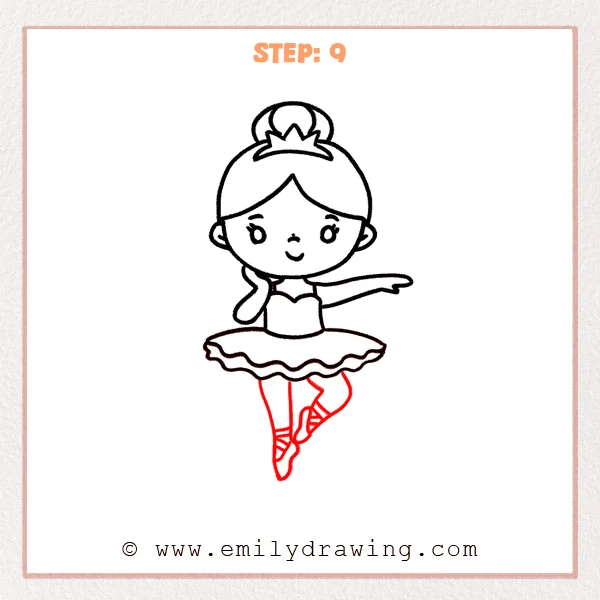
Draw one straight leg below the tutu and end it with a pointed ballet shoe. Add a second bent leg with the knee forward, and finish with another pointed foot.
Pro Tip: Keep both legs the same thickness for a graceful pointe look.
Step 10: Color in your drawing!
Fun Facts
- Ballerinas often practice turning and balancing for many years.
- A tutu is designed to show clear leg shapes during dancing.
- Ballet shoes can have ribbons that wrap the ankles for support.
Pin it now, Draw later!
You now have a sweet ballerina with a crown, a tutu, and pointed feet. Trace your favorite lines with a pen if you want a clean cartoon look. For coloring, try a light pink tutu, soft peach skin, and gentle gray shading under the chin and tutu for depth.
One common beginner mistake is making one arm much longer than the other. If that happens, shorten the longer arm with a slightly higher curve.
Keep practicing this step by step drawing, and try changing the pose next time. When you are ready, draw another dancer with a different skirt or hairstyle.
Get the FREE Printable Drawing Guide
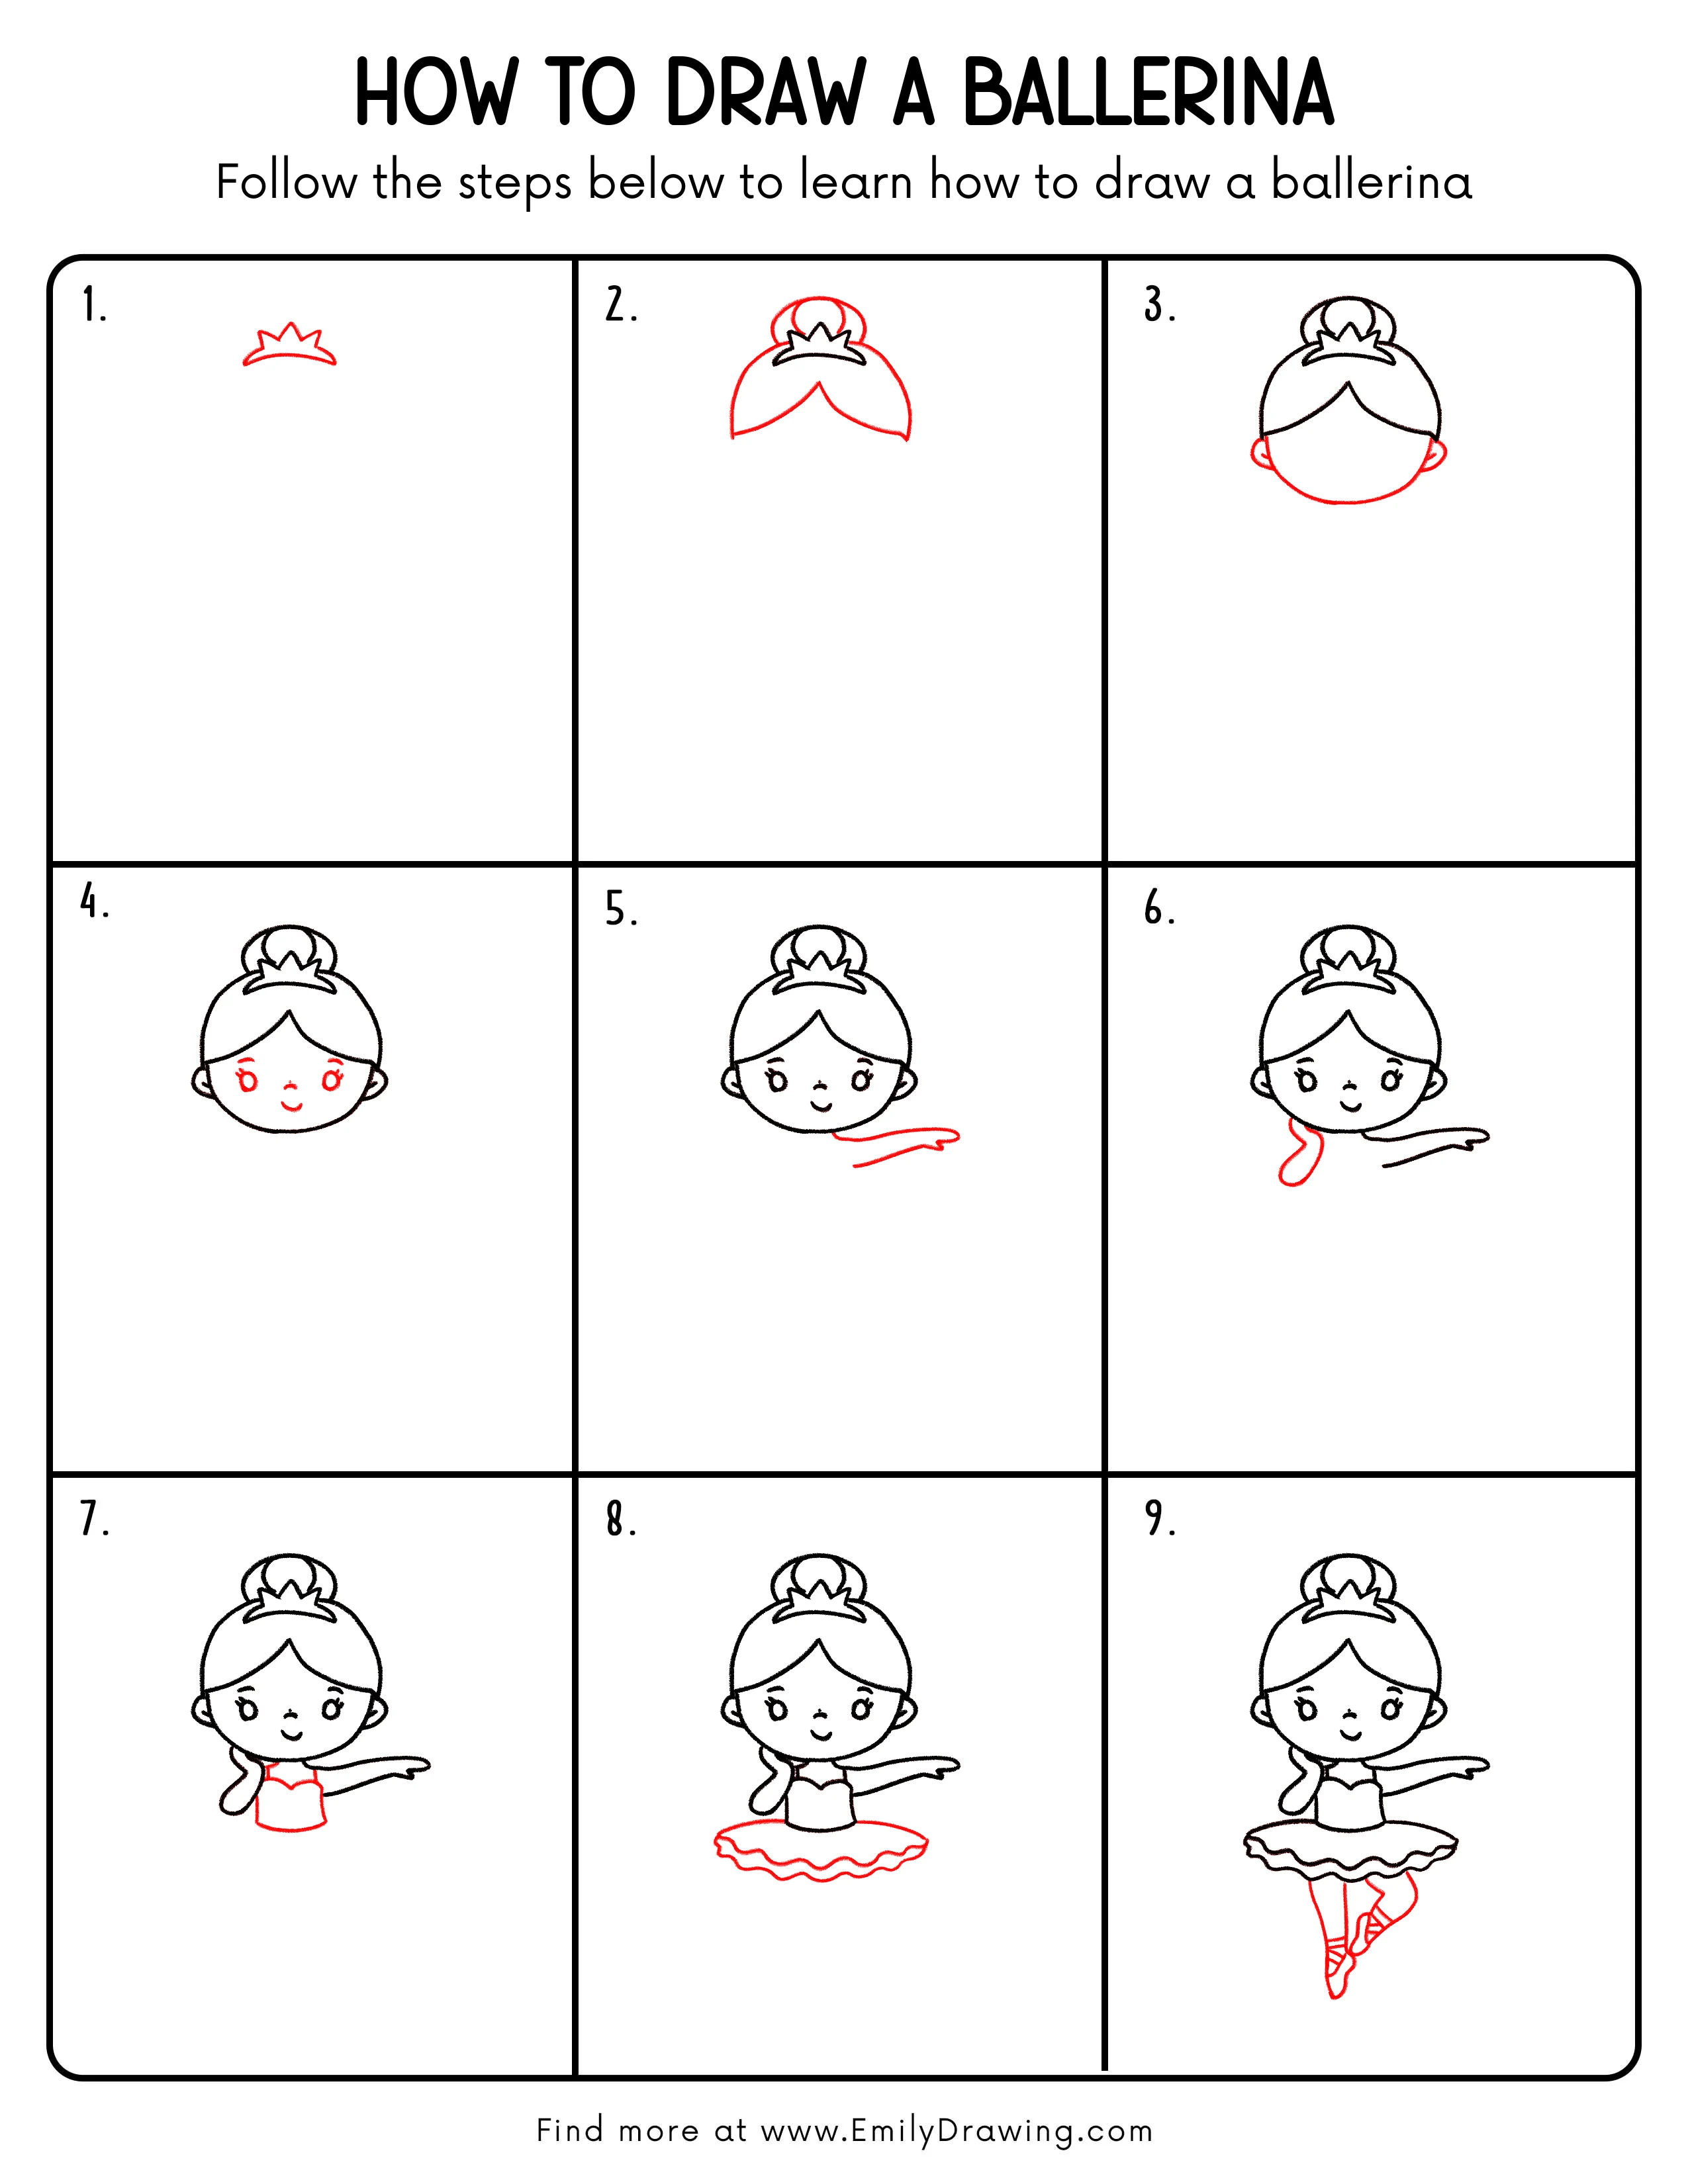
FREE Download Printable Ballerina Drawing Tutorial
Frequently Asked Questions
How do I make the ballerina look more balanced?
Keep the head centered above the tutu, and make both arms similar in length.
What if my tutu looks too wavy or messy?
Use fewer, rounder waves, and keep the ruffles evenly spaced.
How can I draw the pointed feet more clearly?
Make the shoe end like a small triangle tip, then add one curved line for the sole.