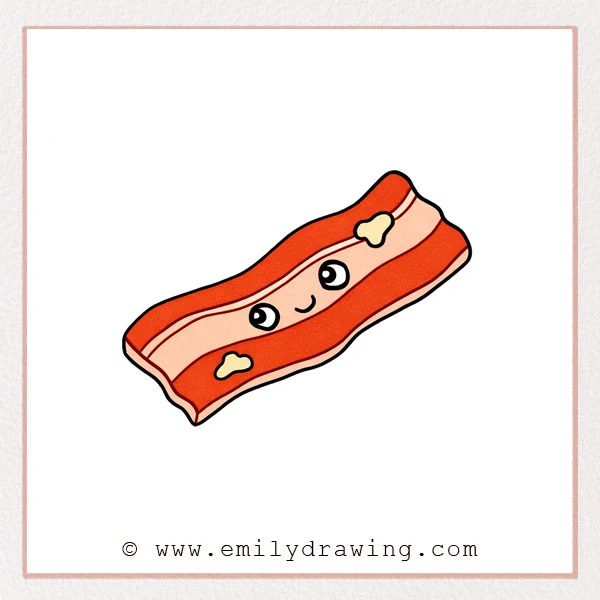
This easy drawing tutorial shows how to draw bacon step by step.
You will sketch a wavy bacon slice, then add simple layers and a cute face.
Take your time and keep your lines light and smooth.
What You Will Need
- Pencil
- Eraser
- Black pen or fine liner
- Paper
- Colored pencils or markers (optional)
Here are my RECOMMENDED Art Supplies!
- Crayola Coloring Set (140 Pieces – Mega Value!)
- 24 Colored Crayon Set
- A4 Printer Paper
- Crayola Coloring Pencils
- HP Home Printer with Instant Ink!
Time needed:
24 minutes.
Step-by-Step Drawing Guide
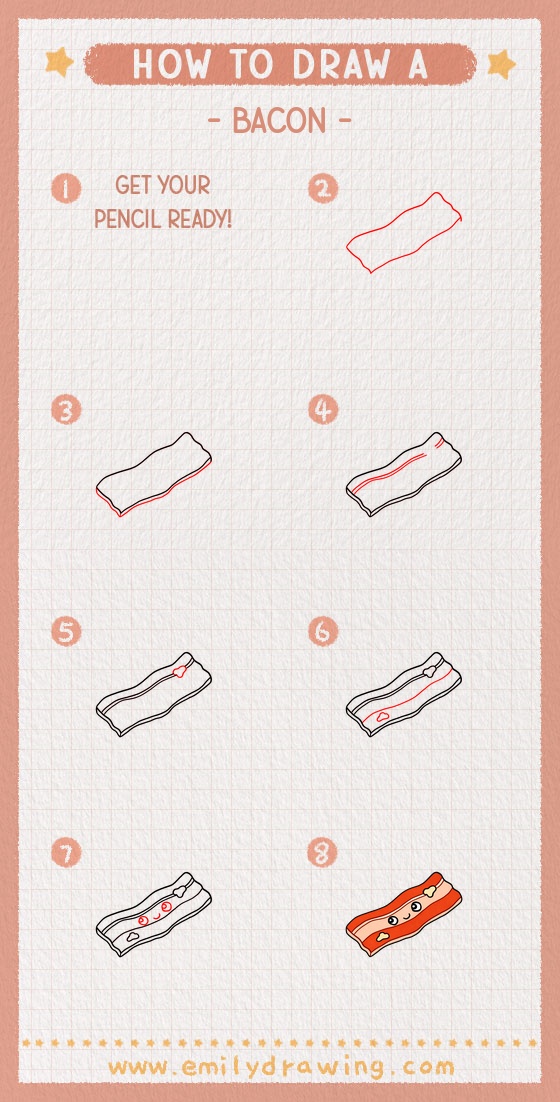
Step 1: Outline the Bacon Slice
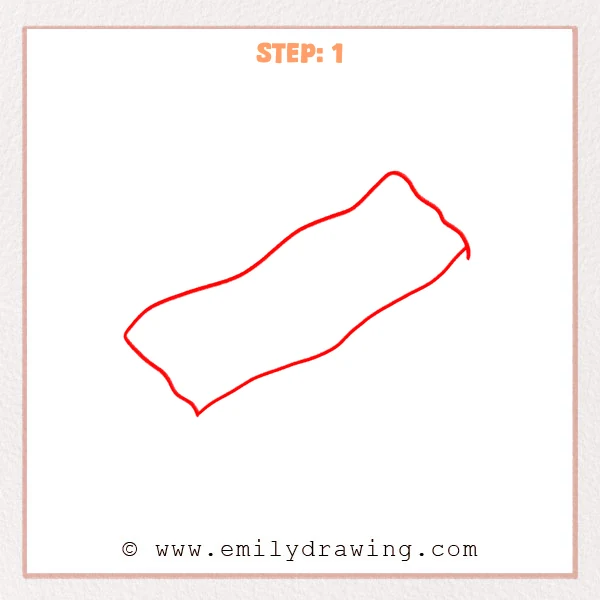
Start with one long wavy edge and a small pointed bend at the lower-left end.
Draw a second wavy edge and connect both ends to form the bacon slice.
Tilt it slightly so the shape feels lively on the page.
Pro Tip: Keep both waves similar so the slice feels even.
Step 2: Add the Bottom Thickness Edge
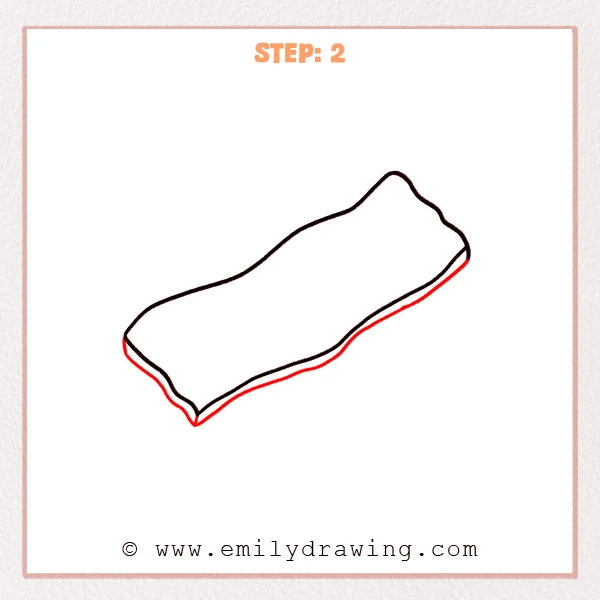
Draw a second inner line along the lower edge to show thickness.
Connect it at the lower-left corner with a short line so it reads as a 3D slice.
Keep the inner line close and flowing with the outer shape.
Pro Tip: A close inner edge line makes the thickness look natural.
Step 3: Draw the First Bacon Layer Line
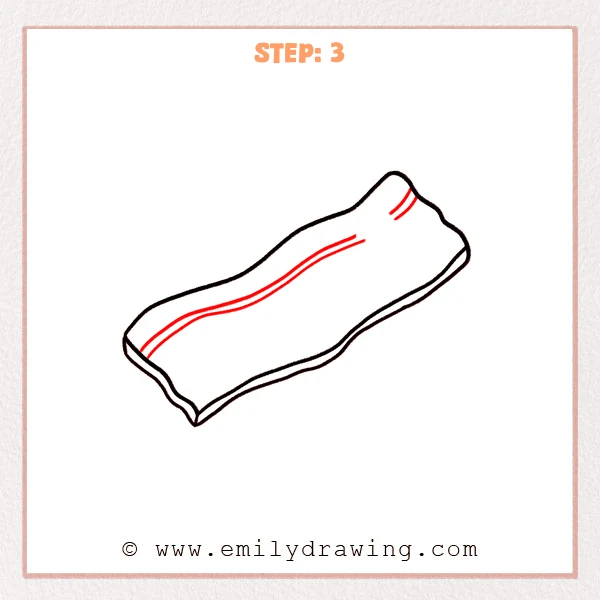
Add a long curved band line through the center, following the same wave direction.
Add a short curved segment near the upper-right end to keep it continuous.
This creates the first fat-and-meat layer on the bacon.
Pro Tip: Avoid straight lines; follow the outer waves for a bacon look.
Step 4: Add Small Surface Crease Lines
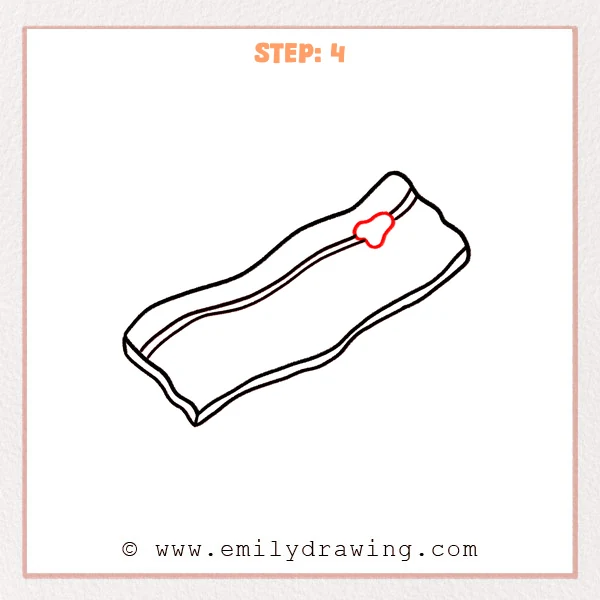
Add two or three short curved lines on the bacon to suggest soft creases or shine.
Place them near the top or middle area and keep them minimal.
Make each line short and gentle so the drawing stays clean.
Pro Tip: Short texture lines look cuter and cleaner than long ones.
Step 5: Add a Second Layer Line and One Texture Blob
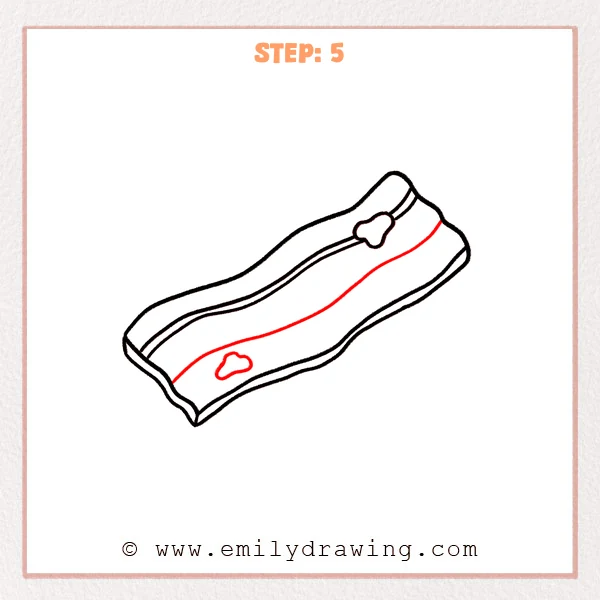
Draw another wavy layer line closer to one side to create a second bacon stripe.
Then add one small rounded “cloud” blob for meat texture in an open area.
Keep both details flowing in the same direction as the bacon.
Pro Tip: Keep the second layer line roughly parallel to the first for a tidy look.
Step 6: Draw the Cute Face
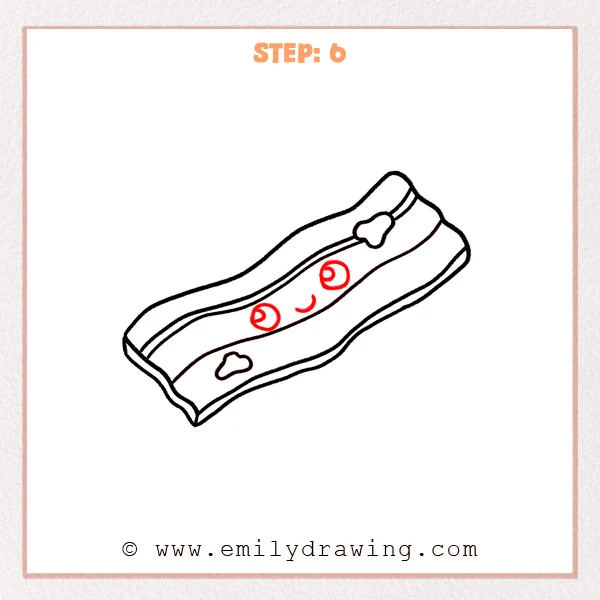
Draw two round eyes in the center area and add pupils with tiny highlights.
Add a small smiling mouth below the eyes and keep it centered.
Darken the face lines so the expression stands out clearly.
Pro Tip: Set both eyes on the same level for a cuter, balanced face.
Step 7: Color in your drawing!
Fun Facts
- Bacon often has wavy edges when it cooks and curls slightly.
- Artists use curved layer lines to show fat and meat without heavy shading.
- Cute food drawings look best with big eyes and simple faces.
Pin it now, Draw later!
You have drawn a cute bacon slice using smooth waves and simple layers.
Erase extra sketch lines and keep the outer edge bold and clear.
For coloring, try pink for the meat and a lighter beige for the fat strips.
Add soft shading along one edge to make the slice feel thicker.
One common beginner mistake is making the layer lines too straight.
If that happens, gently redraw them to match the bacon’s waves.
Keep practicing this step by step drawing, and try more easy food drawings next.
Get the FREE Printable Drawing Guide
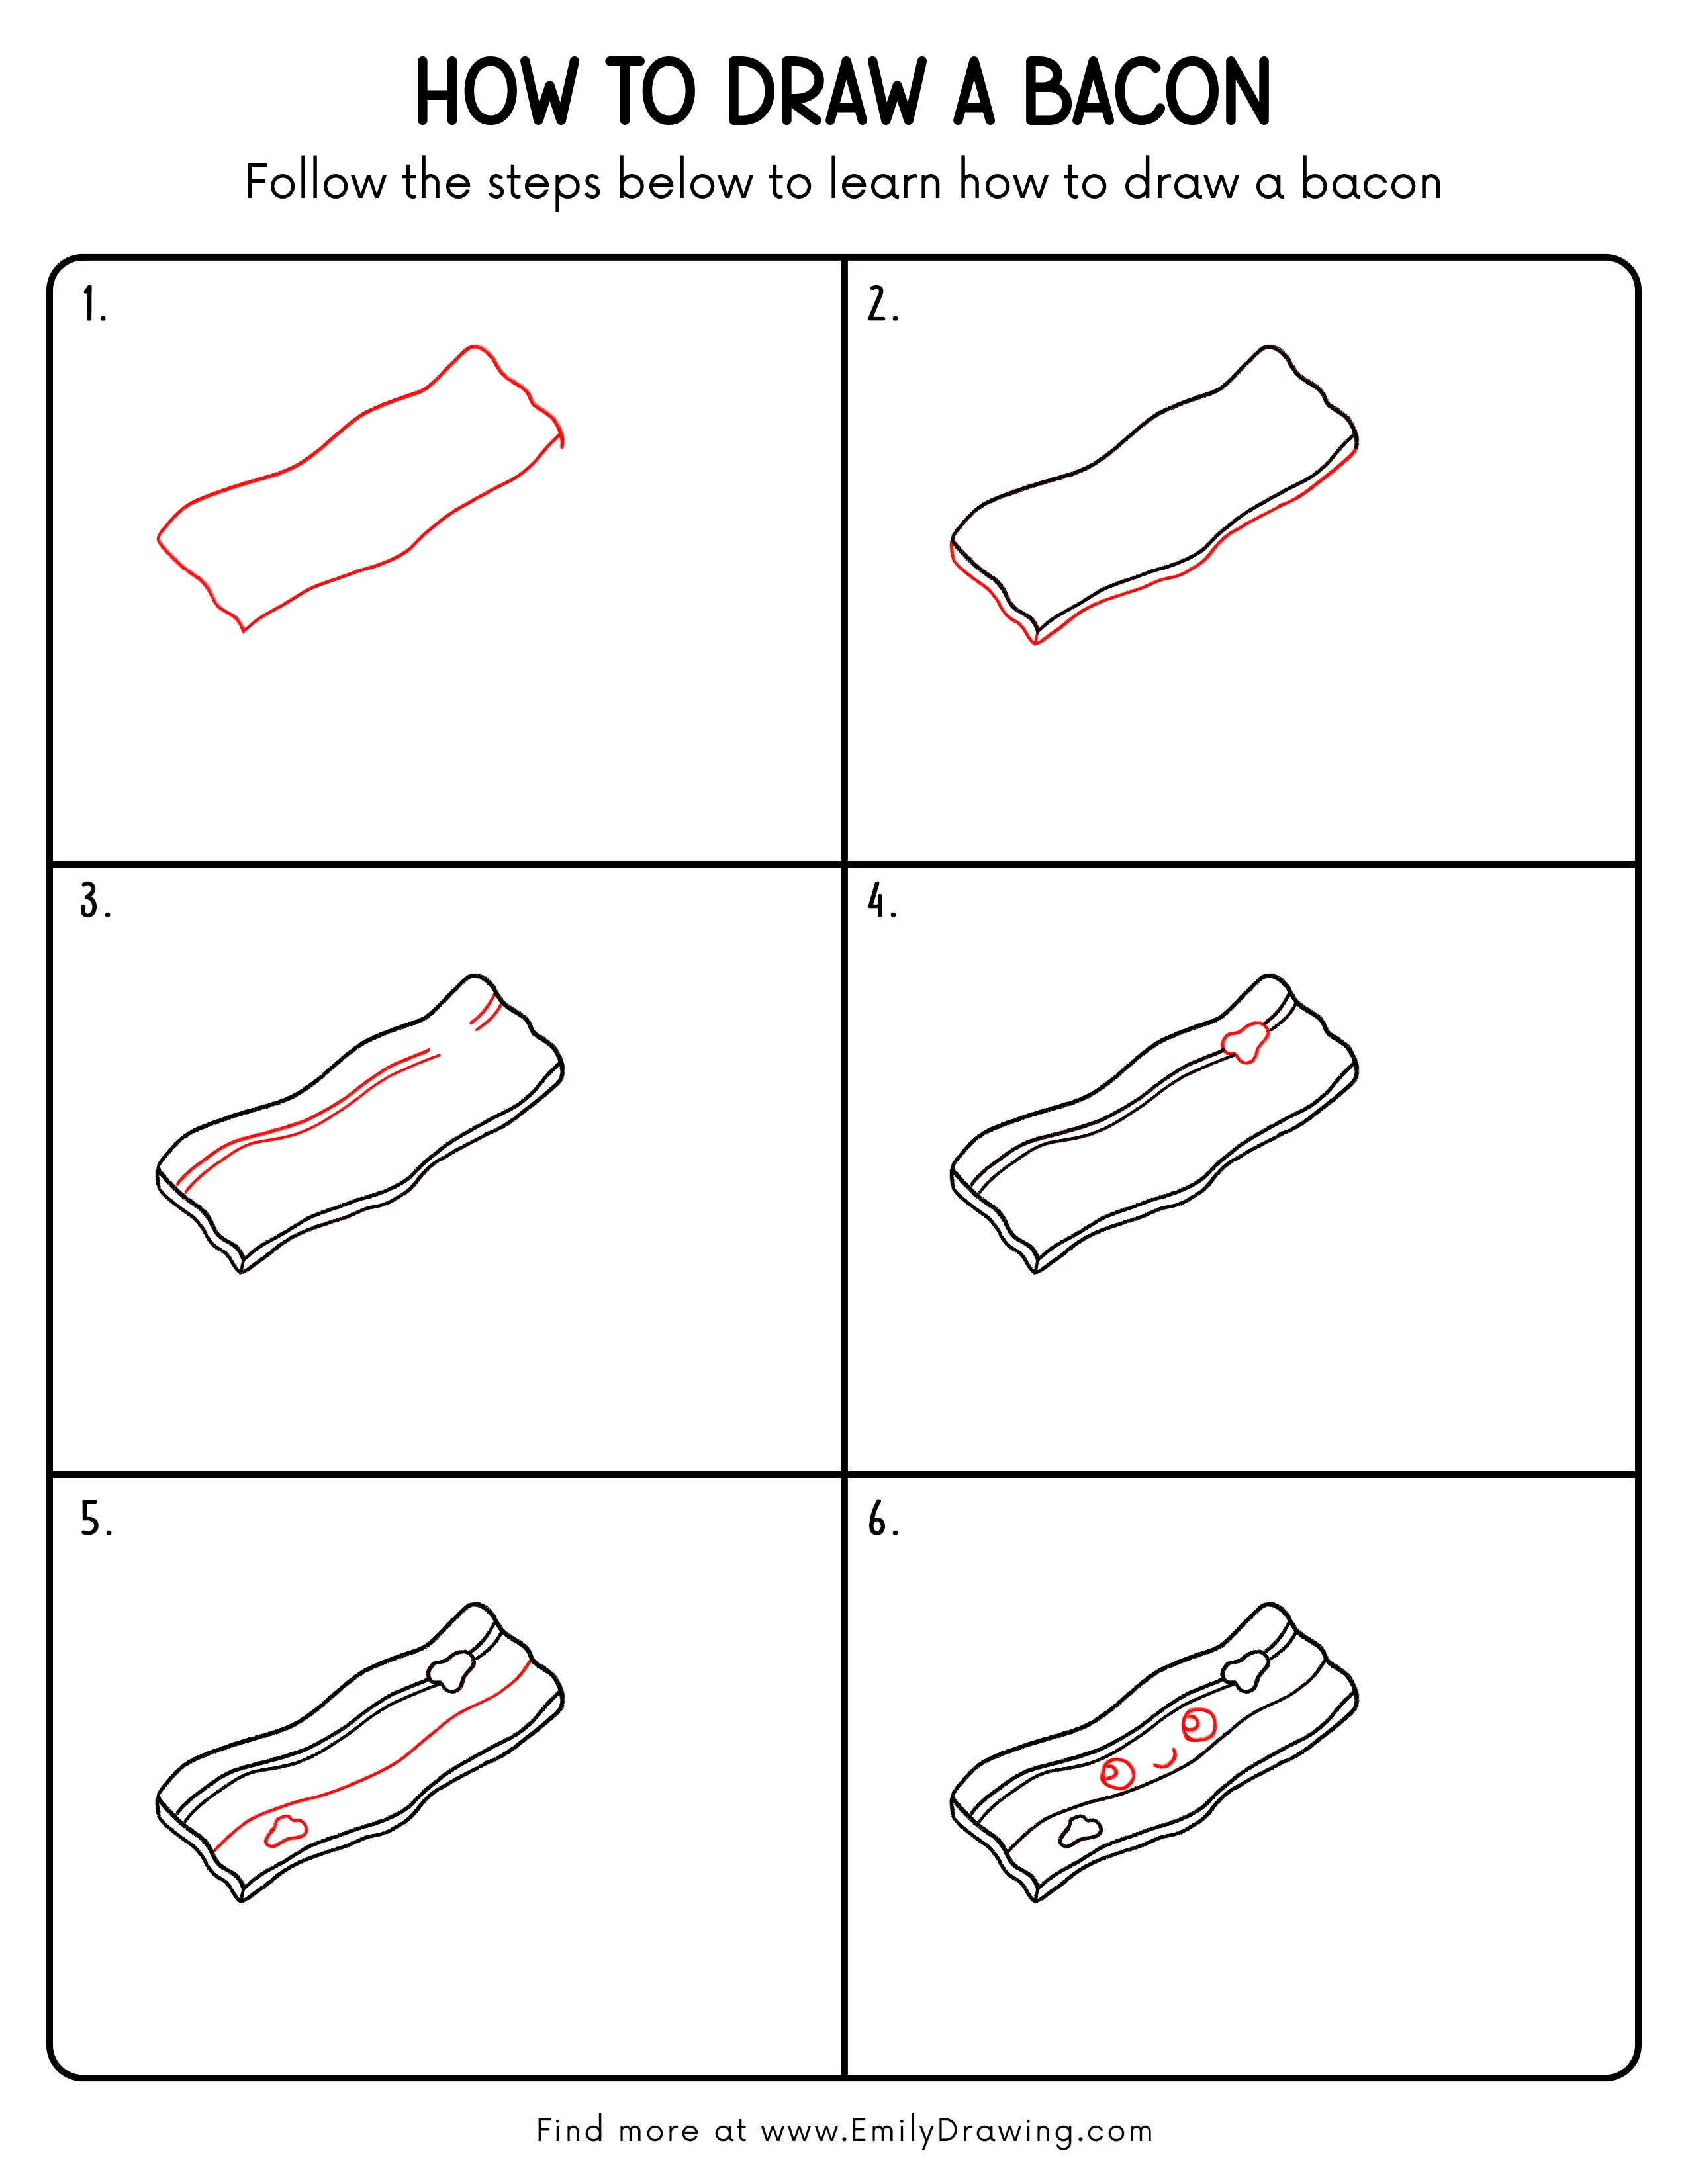
FREE Download Printable Bacon Drawing Tutorial
Frequently Asked Questions
How do I make my bacon look more wavy?
Add slightly bigger curves on the outer edges and keep them smooth.
What if my thickness line looks uneven?
Draw it lightly first, then adjust the distance from the outer edge.
How can I make the face look cuter?
Make the eyes a little bigger and keep the mouth small and centered.