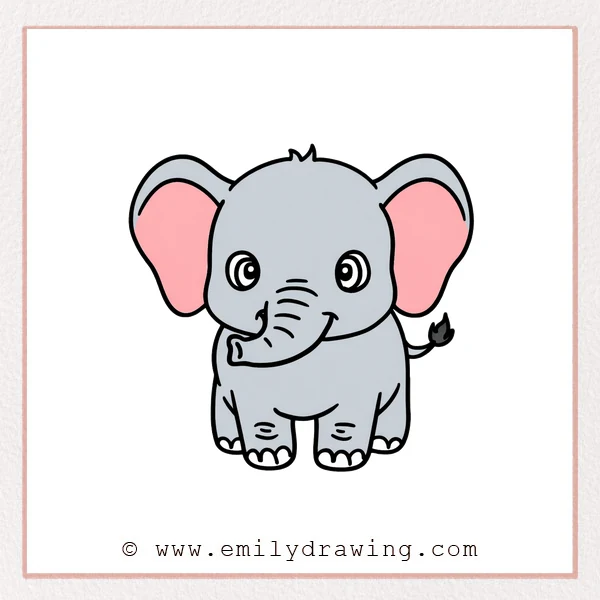
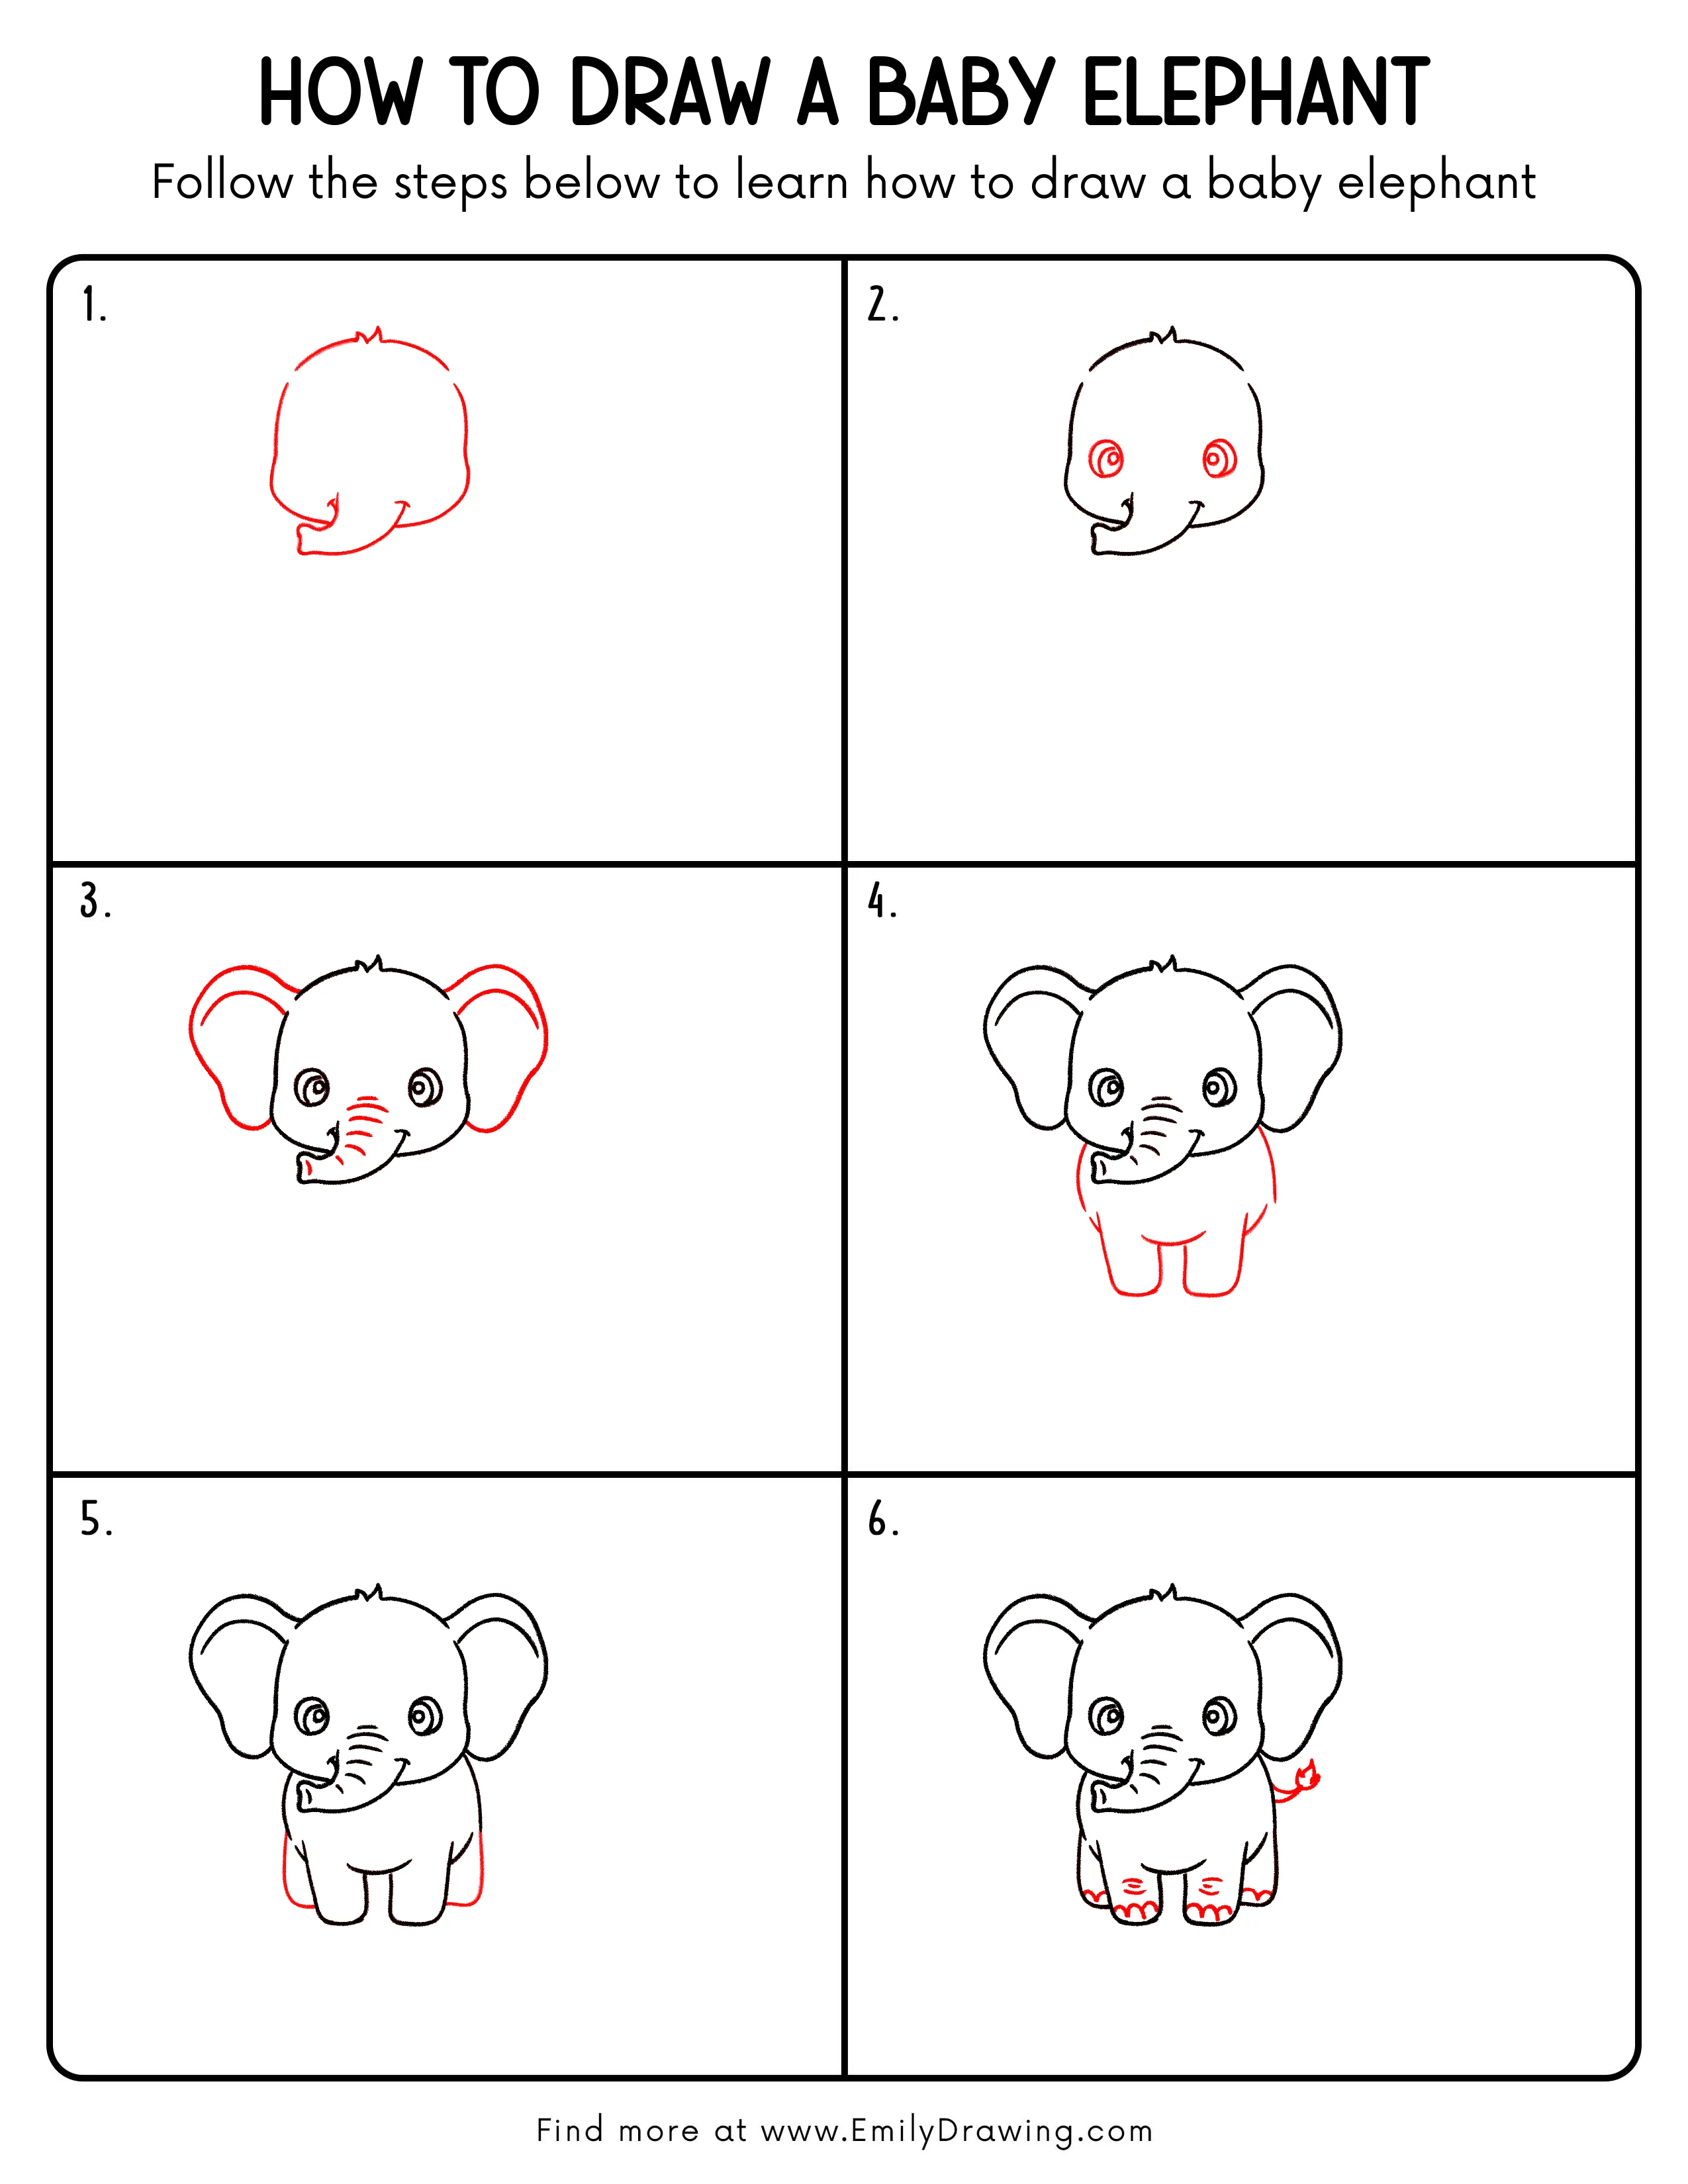
This easy drawing tutorial shows how to draw a baby elephant step by step. It uses simple shapes and gentle lines, so it works well for drawing for beginners. Take your time, and let each step build on the last.
What You Will Need
- Pencil
- Eraser
- Black marker or pen (optional, for final lines)
- Paper
- Colored pencils or crayons (optional)
Here are my RECOMMENDED Art Supplies!
- Crayola Coloring Set (140 Pieces – Mega Value!)
- 24 Colored Crayon Set
- A4 Printer Paper
- Crayola Coloring Pencils
- HP Home Printer with Instant Ink!
Time needed:
26 minutes.
Step-by-Step Drawing Guide
Step 1: Draw the Head and Little Trunk
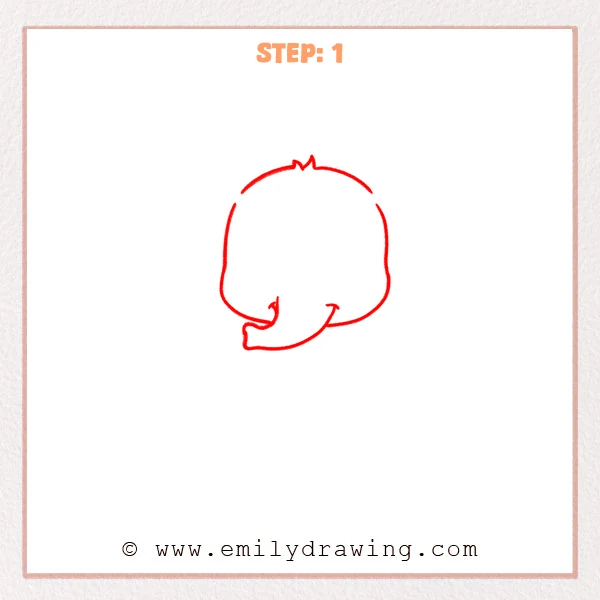
Start with a big rounded head shape, leaving a tiny hair bump on top. Add a curved trunk from the center, ending with a soft rounded tip.
Pro Tip: Keep the trunk slightly thick now, then refine it later.
Step 2: Add Big Eyes and Expression
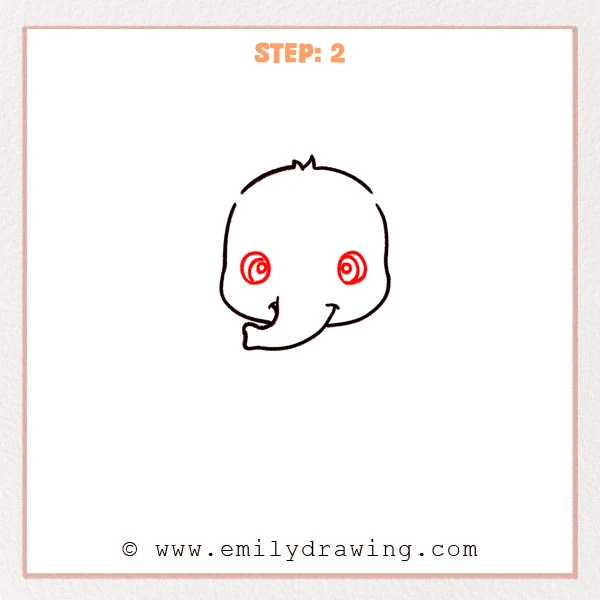
Draw two round eyes on the face, keeping them level. Add small highlight circles inside to make the baby elephant look friendly.
Pro Tip: Keep one eye-width of space between the two eyes.
Step 3: Draw the Big Ears
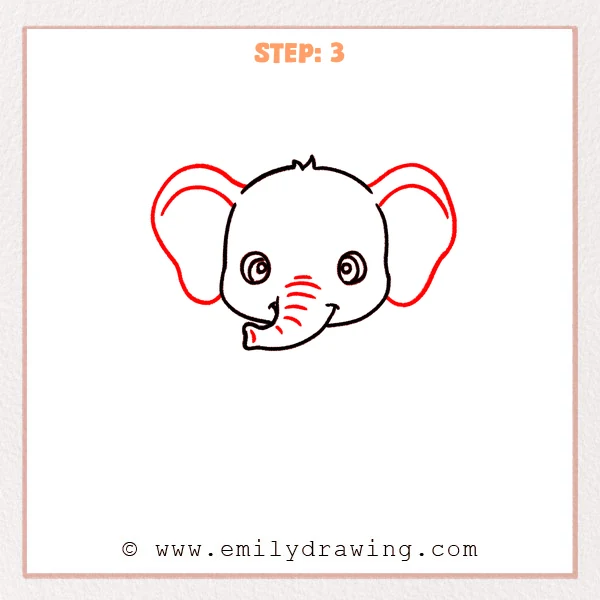
Add one large ear on each side, shaped like a soft teardrop. Draw a second inner curve to show the ear’s thickness.
Pro Tip: Place the ear bottoms just below the eyes for balance.
Step 4: Add the Body and Front Legs
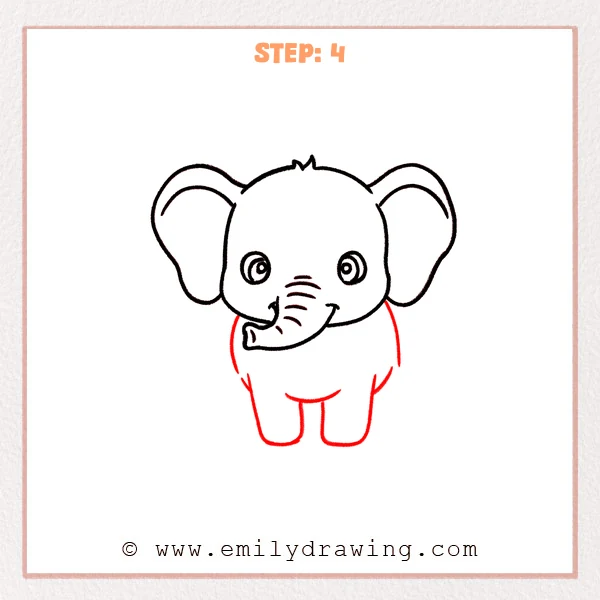
Sketch a rounded body under the head, like a big bean shape. Add two short front legs with curved bottoms for the feet.
Pro Tip: Avoid a long body; baby elephants look rounder.
Step 5: Add Back Legs and Belly Line
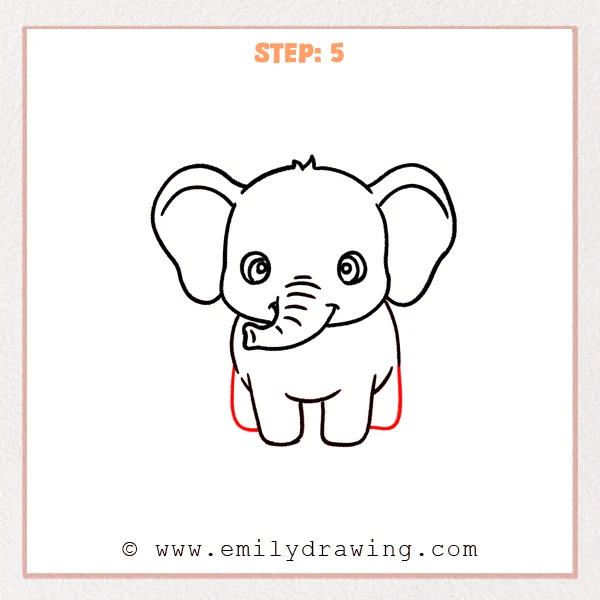
Add two back legs behind the body, keeping the spacing even. Draw a gentle belly curve to show a soft, rounded tummy.
Pro Tip: Place the back legs slightly back to feel more stable.
Step 6: Add the Tail and Leg Details
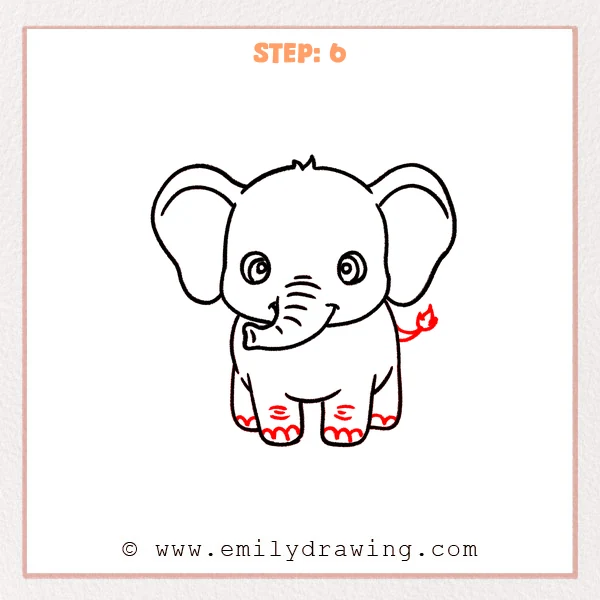
Add a thin tail on the right side of the body, finishing with a small tuft. Then draw short wrinkle lines on the legs and rounded toe bumps on each foot to give your baby elephant more detail.
Pro Tip: Use only a few short leg wrinkles, and place them evenly on both sides.
Step 7: Color in your drawing!
Fun Facts
- Baby elephants are called calves, and they stay close to their families.
- An elephant’s trunk is like a nose and a hand combined.
- Elephants use their big ears to help cool down on warm days.
Pin it now, Draw later!

You now have a complete baby elephant: big head, wide ears, a curved trunk, and sturdy legs. If you want to ink your drawing, trace the final lines slowly and erase pencil marks afterward. For coloring, try light gray with slightly darker shading under the ears, belly, and legs, and keep a small white highlight in each eye.
A common beginner mistake is making the body too long and narrow. If that happens, round the sides more so the baby elephant looks soft and sturdy. Keep practicing this step by step drawing, and try drawing the baby elephant in different poses next time.
Get the FREE Printable Drawing Guide
FREE Download Printable Baby Elephant Drawing Tutorial
Frequently Asked Questions
How do I make the baby elephant look cuter?
Make the eyes a little larger, keep the cheeks round, and use gentle curves instead of sharp corners.
What if my ears look uneven?
Lightly sketch the ear shapes first, then compare their height and width before darkening the lines.
How can I shade the trunk without making it messy?
Use a very light layer first, then add a few darker strokes near the underside and between wrinkle lines.