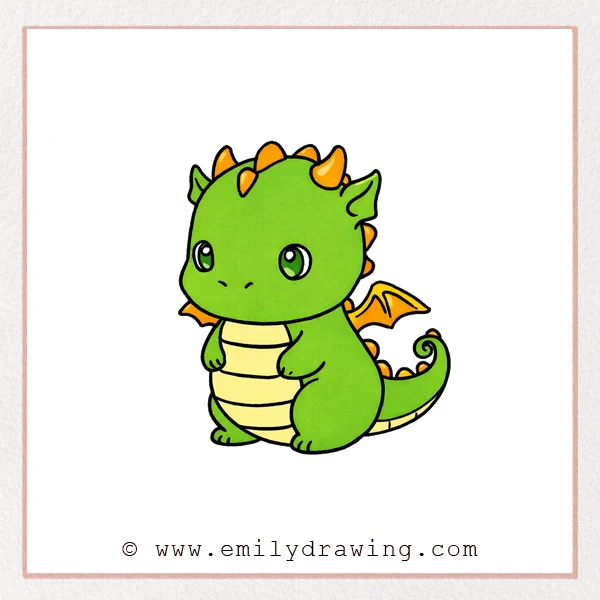
This easy drawing tutorial shows how to draw a baby dragon step by step. We will build the face first, then add the body, wings, and details in a calm, simple way. Take your time and enjoy this drawing for beginners.
What You Will Need
- Pencil
- Eraser
- Black pen or marker (optional)
- Paper
- Colored pencils or crayons (optional)
Here are my RECOMMENDED Art Supplies!
- Crayola Coloring Set (140 Pieces – Mega Value!)
- 24 Colored Crayon Set
- A4 Printer Paper
- Crayola Coloring Pencils
- HP Home Printer with Instant Ink!
Time needed:
16 minutes.
Step-by-Step Drawing Guide
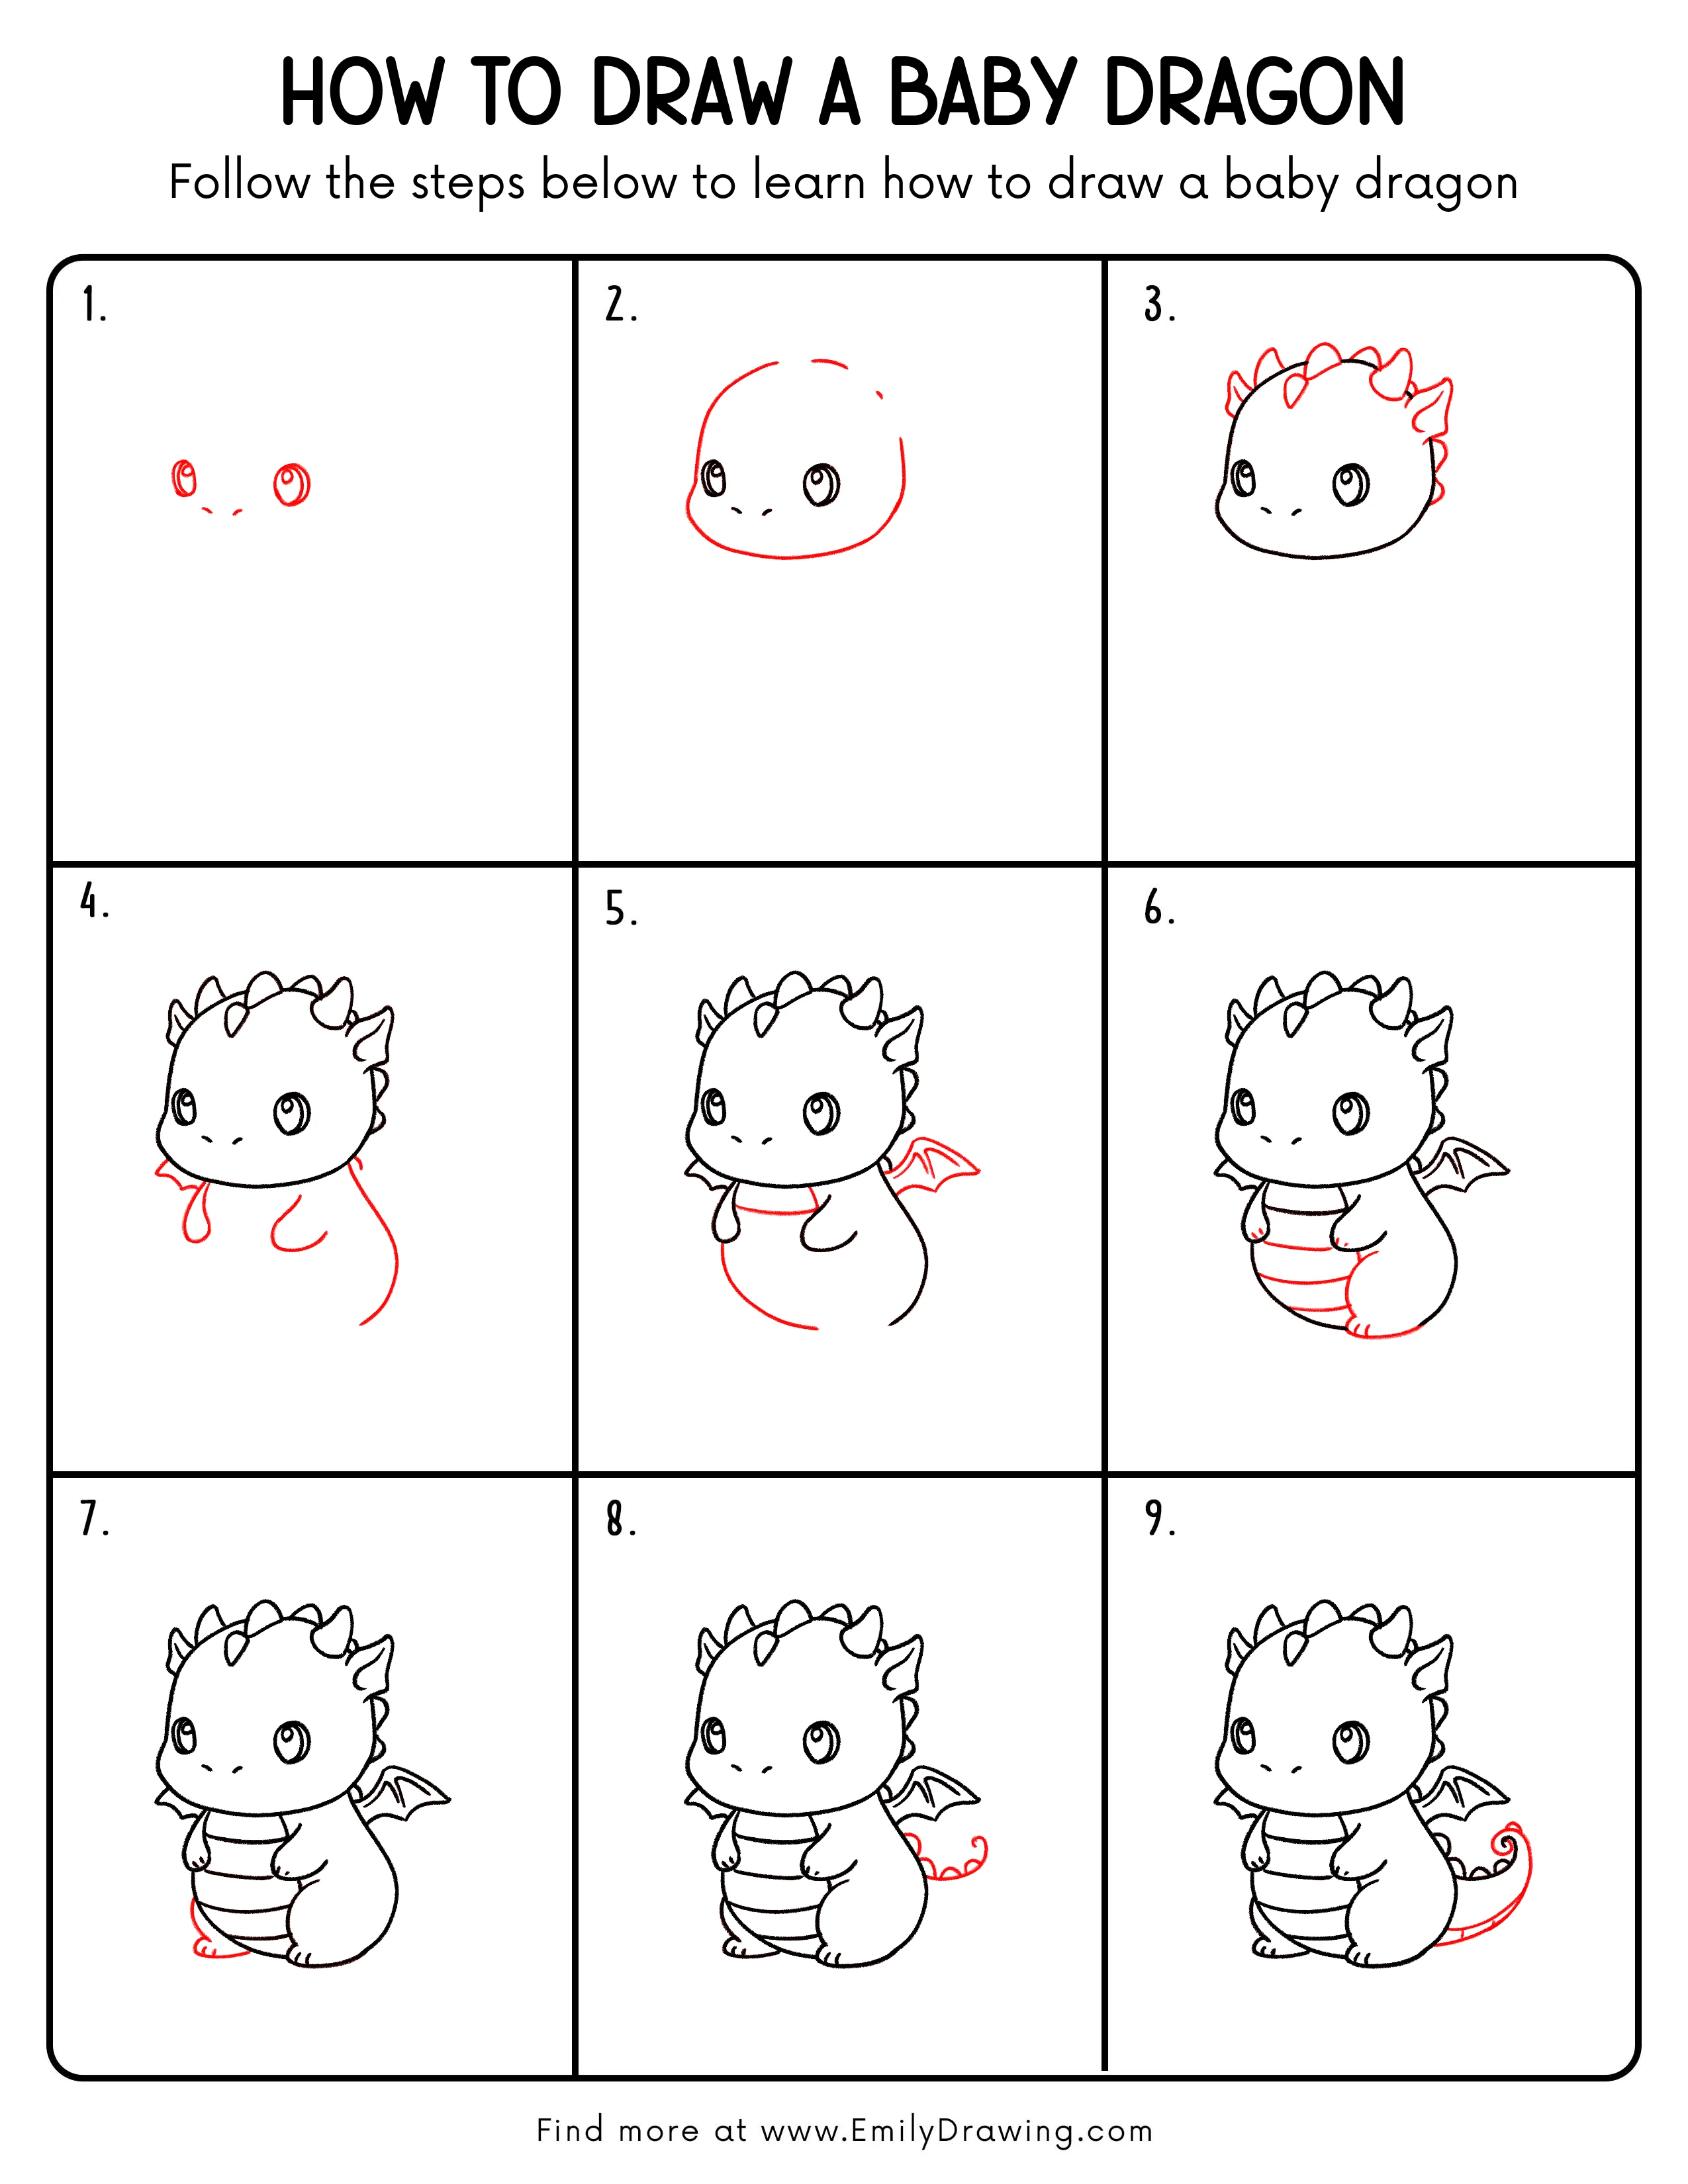
Step 1: Start with the Eyes and Nostrils
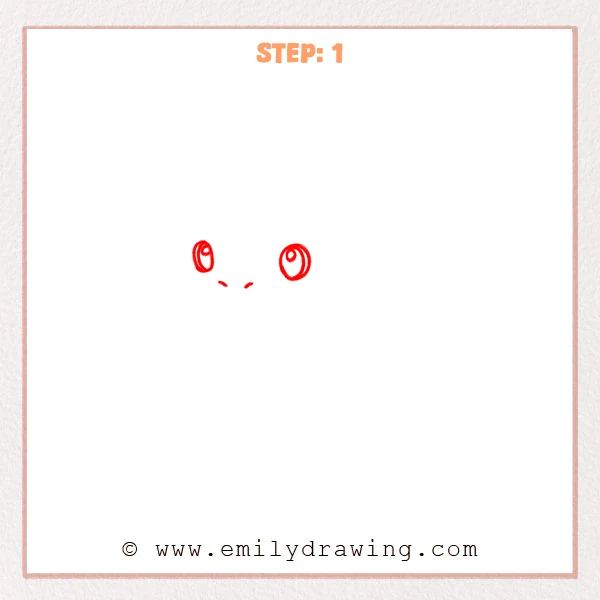
Place two oval eyes near the upper middle of the page, leaving a small gap between them. Add two tiny nostrils below, centered between the eyes.
Pro Tip: Check both eyes sit at the same height before moving on.
Step 2: Draw the Round Head Outline
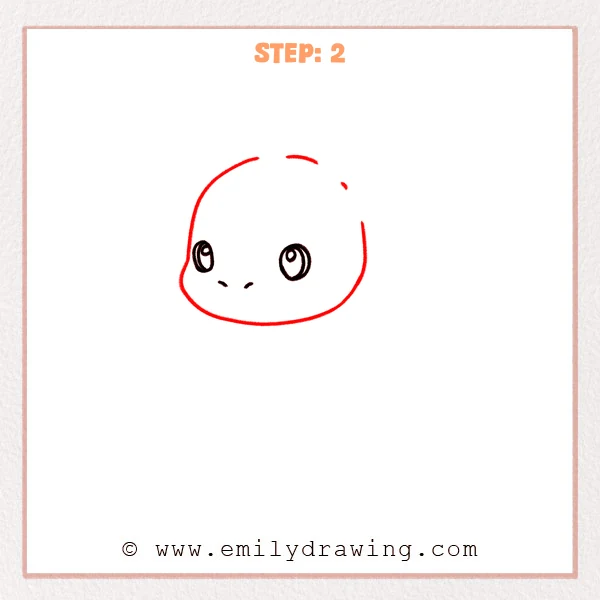
Connect the top with a smooth arc, then curve down into chubby cheeks and a wide chin. Keep the bottom line gently flattened so the baby dragon looks extra cute.
Pro Tip: Avoid a pointy chin to keep the baby-like proportions.
Step 3: Add Small Horns and Spikes on Top
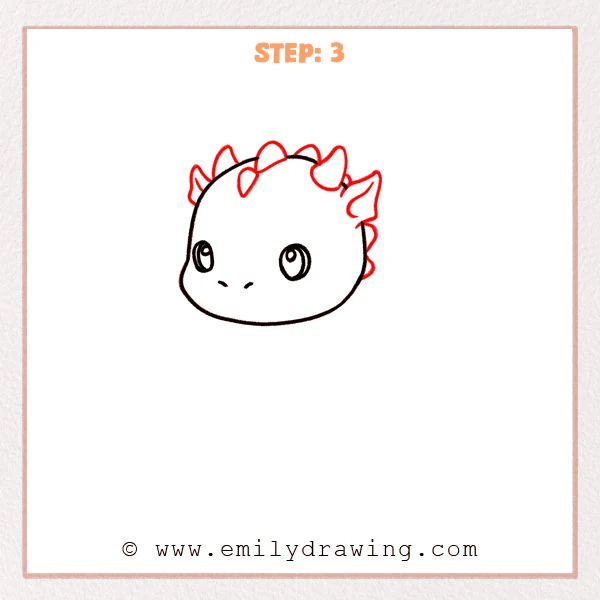
Draw several rounded horn shapes along the top of the head, like soft triangles. Add a few small spikes just behind the head to strengthen the dragon silhouette.
Pro Tip: Keep horns and spikes slightly rounded so they feel friendly.
Step 4: Draw the Body Outline and Front Claws
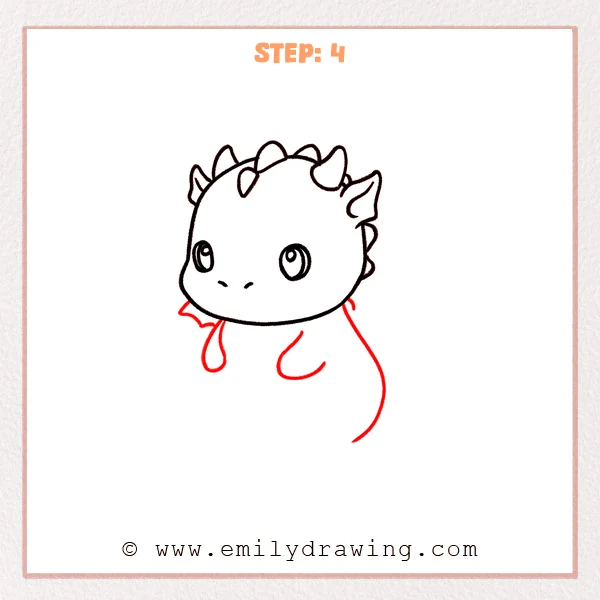
Extend a rounded body below the head, with a wider curve to show a sitting pose. Add two small front claws resting in front, ending with smooth curved tips.
Pro Tip: Leave more space at the bottom so the sitting pose feels stable.
Step 5: Add the Small Wing Shapes
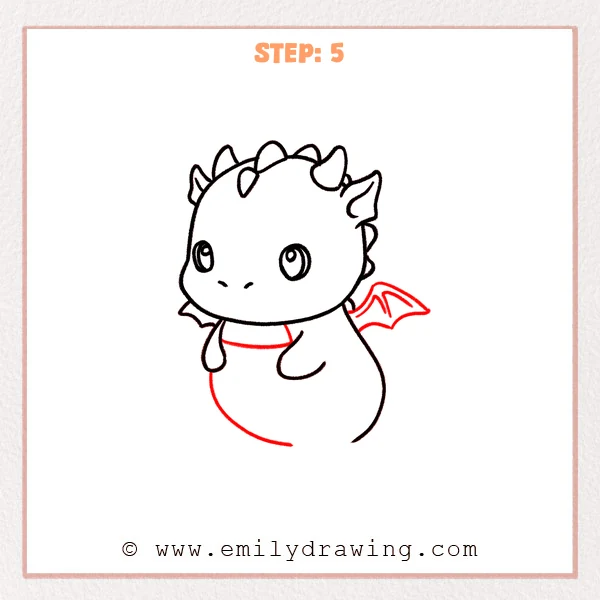
Draw small wing outlines behind the body on both sides, like short bat wings. Keep them tucked close to the back so the baby dragon stays small and sweet.
Pro Tip: Place both wings at the same height before refining the points.
Step 6: Add the Belly Stripe Segments

Draw several curved horizontal lines across the belly area, following the roundness of the body. Let each stripe bow gently to show a plump tummy.
Pro Tip: Keep the stripe spacing similar so the belly looks neat.
Step 7: Draw the Feet and Sitting Base
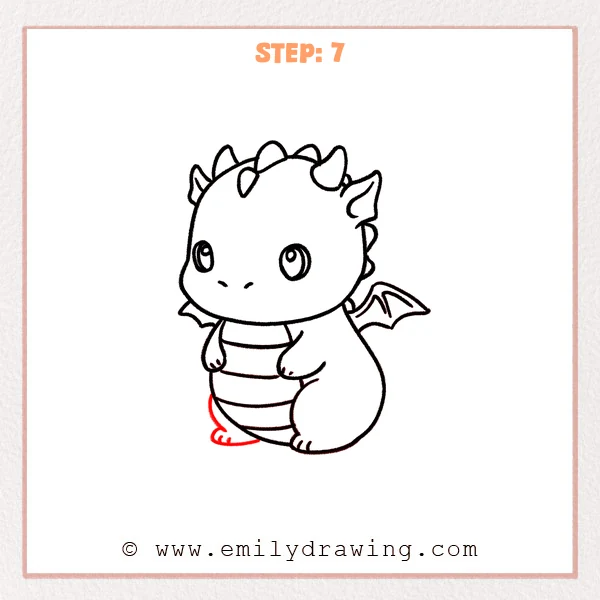
Add two small feet at the bottom, using short curved toe lines. Refine the base curve under the body so the dragon looks like it is sitting firmly.
Pro Tip: Use only a few toe lines to keep the drawing clean.
Step 8: Add the Back Spikes
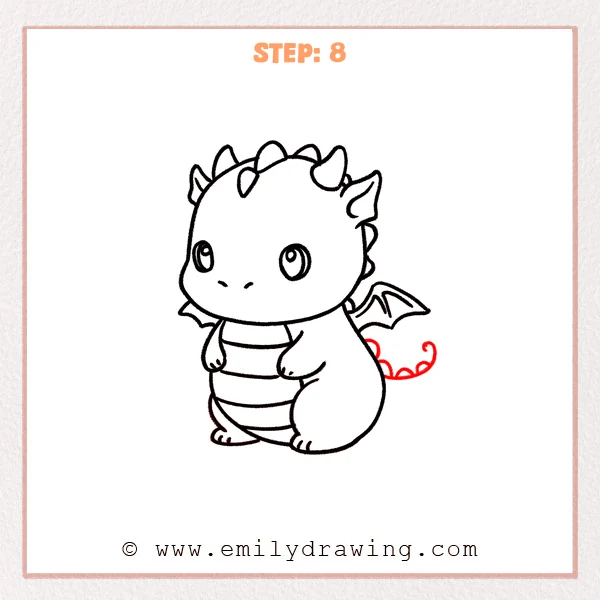
Add a row of small spikes along the back edge from behind the head downward. Vary their size slightly and follow the curve of the back for a gentle rhythm.
Pro Tip: Leave small gaps between spikes so the outline stays clear.
Step 9: Refine the Tail Details
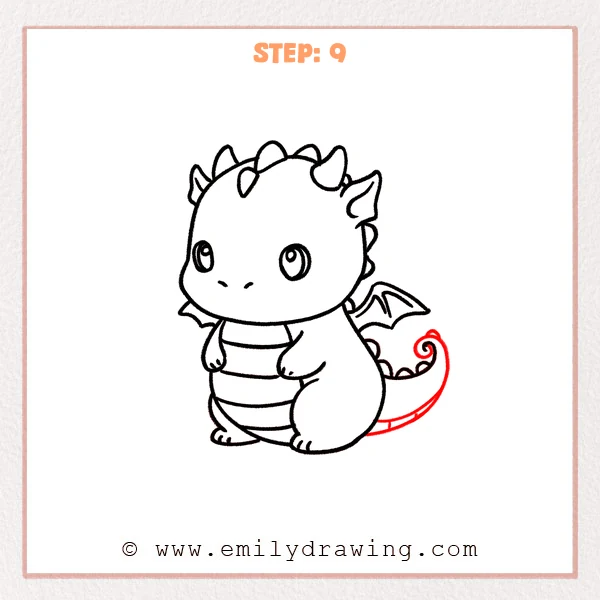
Extend a curved tail from the back and curl the tip into a small spiral. Add a few short segment lines to give the tail structure and depth.
Pro Tip: Curve the tail segments slightly so they match the tail’s flow.
Step 10: Color in your drawing!
Fun Facts
- Many dragon stories describe baby dragons as playful and curious.
- Small wings can make a dragon look younger, even without flying.
- A curled tail often makes a character feel friendlier and softer.
Pin it now, Draw later!
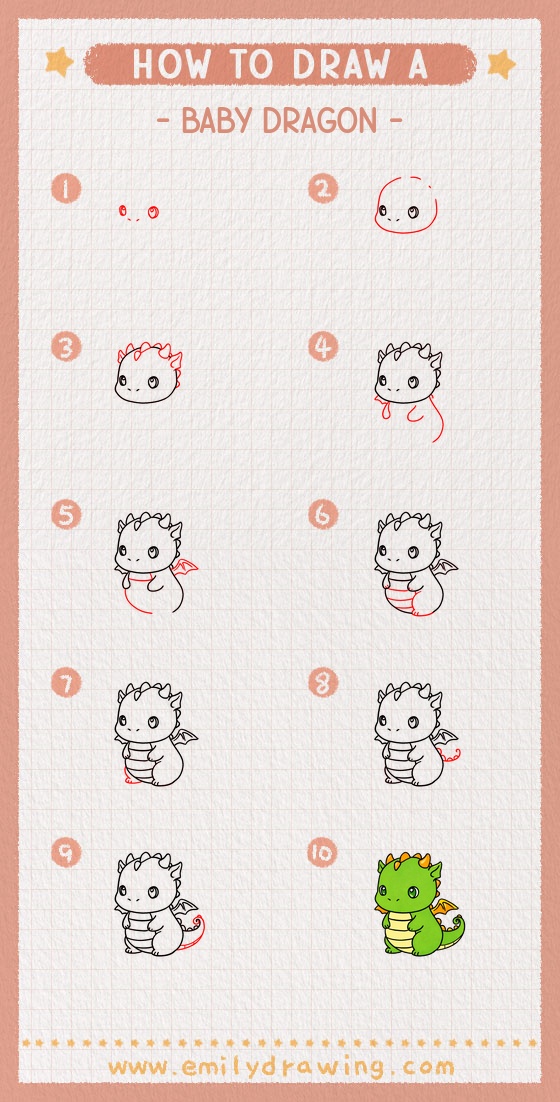
You have drawn a baby dragon by building the face, then adding the body, wings, spikes, and tail details. For coloring, try a light green or sky blue body, then shade under the chin and belly stripes with a slightly darker tone. One common beginner mistake is making the wings too large, which can overpower the cute baby body. Keep practicing this step by step drawing, and try drawing another baby dragon with different horn shapes and tail curls.
Get the FREE Printable Drawing Guide
FREE Download Printable Baby Dragon Drawing Tutorial
Frequently Asked Questions
How do I make the baby dragon look cuter?
Make the head larger than the body and keep the features round and soft.
What if my wings look uneven?
Lightly sketch both wings first, then adjust the curves before outlining.
How can I add simple shading?
Shade on one side only, and keep the darkest areas under the chin and belly.