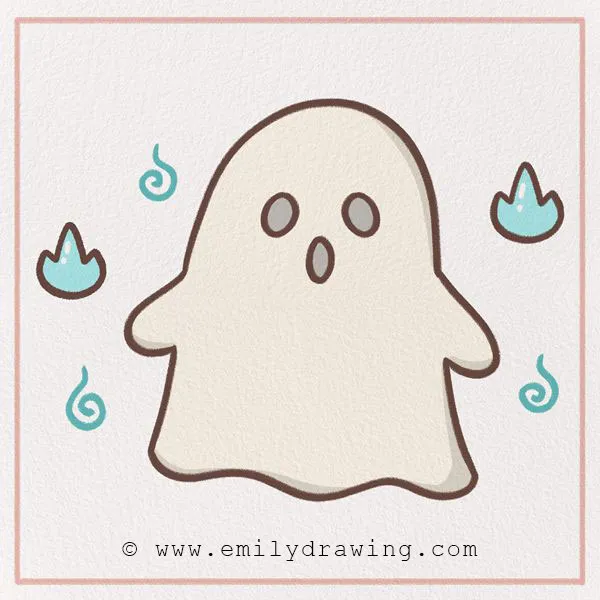
Boo! Welcome to our slightly spooky but very fun drawing tutorial today: how to draw a Halloween ghost — a perfect spooky ghost drawing for kids and beginners!
Ghosts are thought of as spooky, but they can be nice, too — especially in ghost art for kids like this one! For example, have you ever heard of Casper the Friendly Ghost? He is a well-loved children’s cartoon and book character.
Ghost costumes are a long-time Halloween favorite for kids because they are very easy to make at home as a costume. All you need is just a white sheet with holes cut out for the eyes and nose, and you’re ready to trick-or-treat for Halloween sweets! You’ll also see a lot of ghosts in Halloween decorations! So, in many ways, ghosts are often associated with the holiday of Halloween. This goes way back to the origin of the Halloween tradition.
So, are you ready to try this easy Halloween drawing and sketch your own ghost? Collect some drawing materials, and let’s go!
Materials:
- a piece of paper
- a pencil for the guiding lines and sketching
- an eraser
- a black sharpie or a pen for the outlines
- markers or colored pencils for coloring
- our printable drawing guide (Join my Email List below to get this Tutorial)
Here are my RECOMMENDED Art Supplies!
- Crayola Coloring Set (140 Pieces – Mega Value!)
- 24 Colored Crayon Set
- A4 Printer Paper
- Crayola Coloring Pencils
- HP Home Printer with Instant Ink!
Time needed:
10 minutes.
How to Draw a Halloween Ghost — Let’s get started!
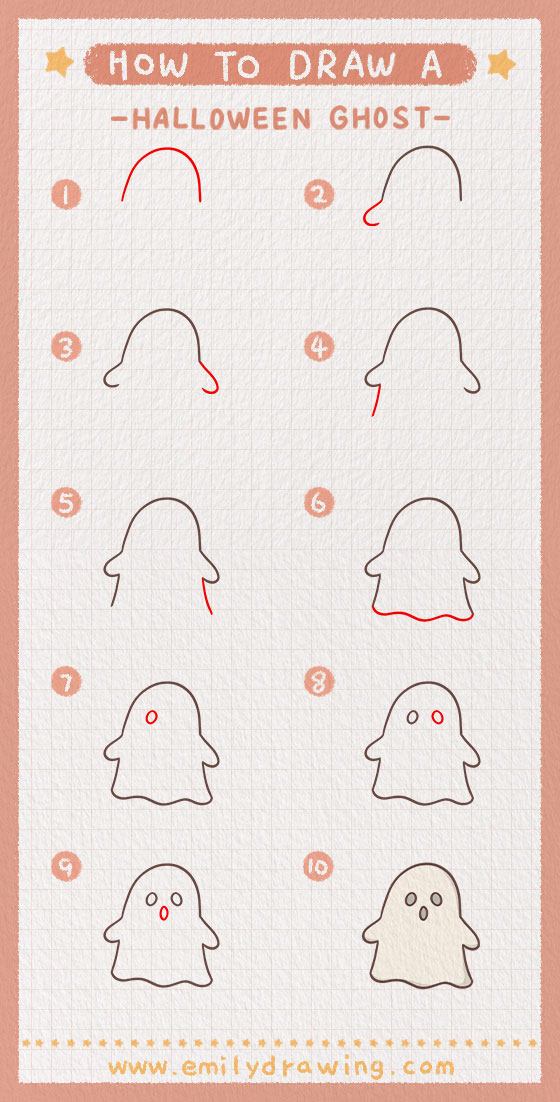
Step 1 – Draw the ghost’s head.
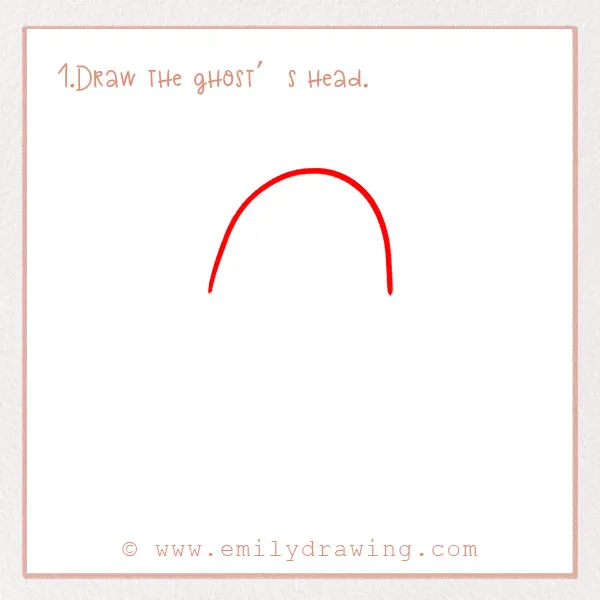
Let’s start by forming the top of the ghost’s head. Draw a large, curved line, like a wide upside-down U shape. It should take up about half of the page, so that there’s plenty of room for the rest of the ghost.
Step 2 – Add an arm on the left.
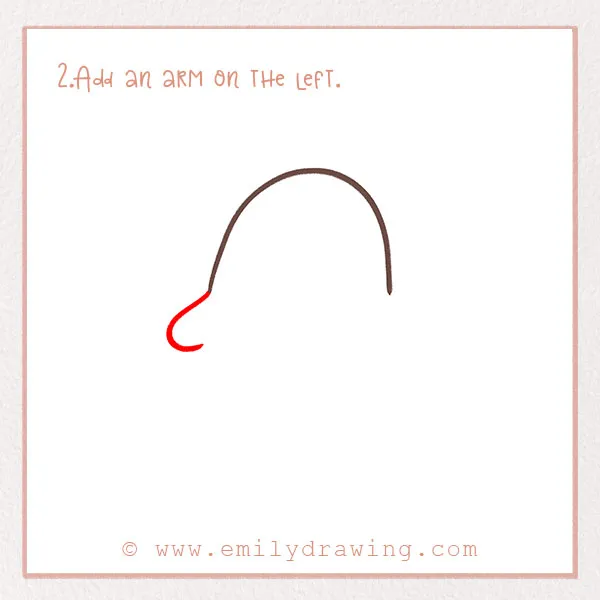
Let’s move on to the arms of our ghost! Draw a very small rounded shape on the left side of the body. It should be pretty short—make it just about an inch long. Loop it back around towards the body.
Step 3 – Draw an arm on the right.
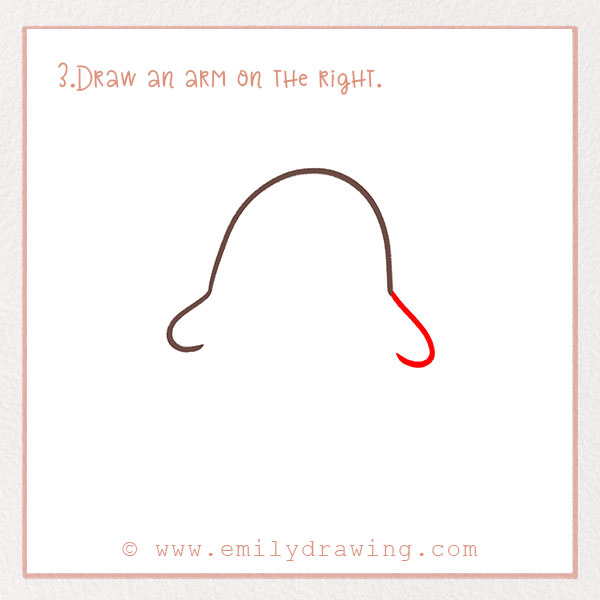
Repeat everything from Step 2, but this time on the right side! Draw another arm on the other side of the body. Now we have both arms! Good job!
Step 4 – Add more of the ghost’s body.
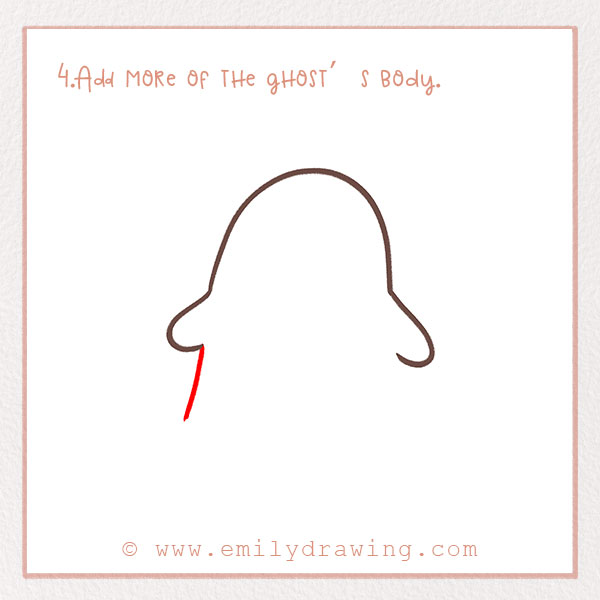
Let’s continue to form the shape of the ghost’s body. Go back to the left side, and below the arm, draw a short and slightly curved line going downwards.
All done? Move on to the next step!
Step 5 – Add another line on the right.
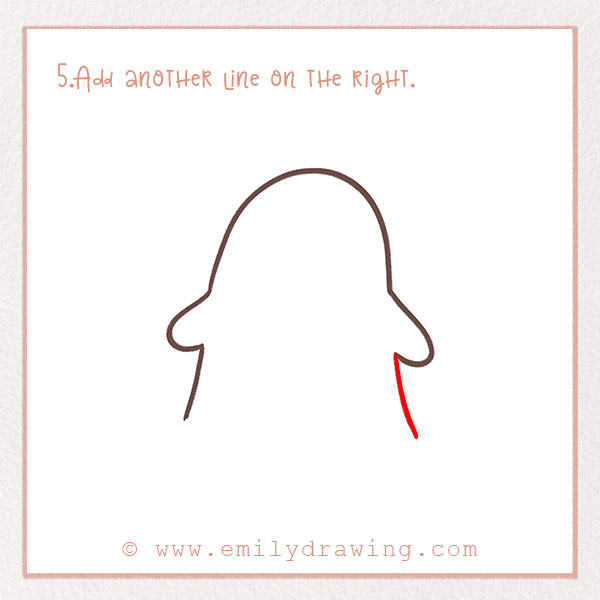
Do the same exact thing as the last step, but on the right side. Just below the arm, draw a short and slightly curved line. At this point, the ghost’s body should be nearly symmetrical. Refer to the image of this step!
We’re nearly done with the shape of the ghost. Good job!
Step 6 – Draw the bottom of the ghost!
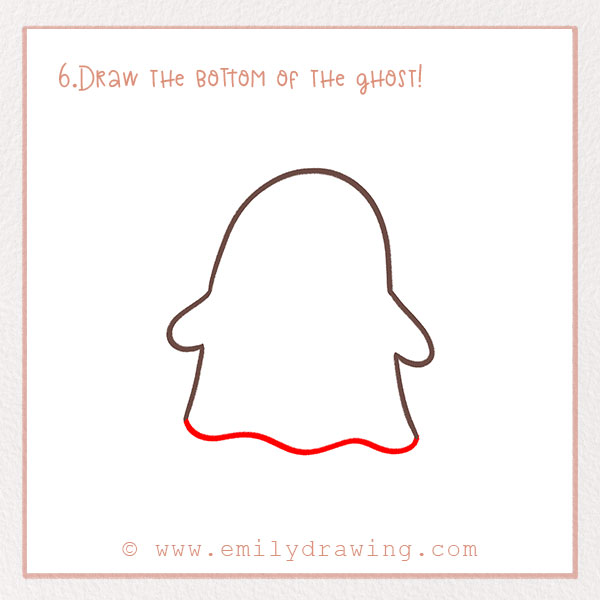
Ghosts can fly of course, and their legs aren’t normally distinguishable because they are usually floating! Often in cartoons they appear to have a wavy line at the bottom to form their body (the same visual effect happens in real life when people wear sheets to dress up like a ghost)!
So, let’s add the wavy bottom detail now to make our ghost look like it’s floating! Draw a long squiggly line from one side to the other. Now it looks like our ghost is floating!
For more spooky drawing guides, check out How to Draw a Bat and How to Draw a Monster.
Step 7 – Draw the first eye.
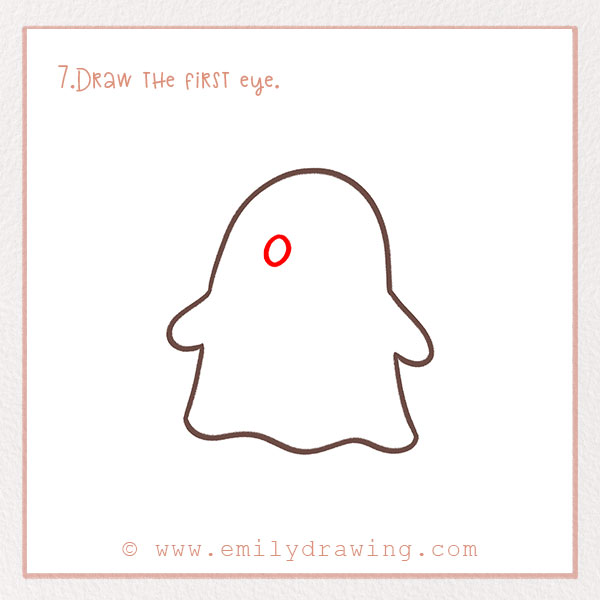
Of course our ghost has to have eyes! Let’s draw them now. They will be very simple and easy to add.
Draw a circle on the left side, near the top of the head. It should be an imperfect circle—refer to the photo to see what we mean!
Step 8 – Draw another eye!
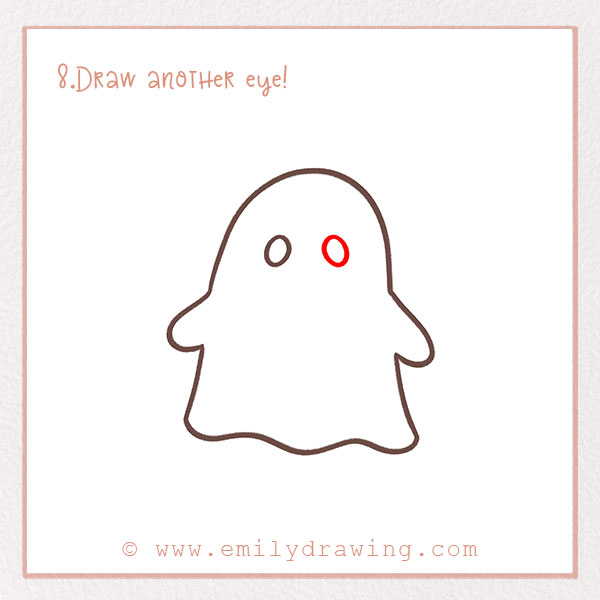
Draw the other eye the same way as you did the first. Draw the shape on the right side of the ghost this time, at the same level as the first eye.
Now our ghost has eyes! Good job! Let’s move on to the last step before we color it all in!
Step 9 – Add the nose of the ghost!
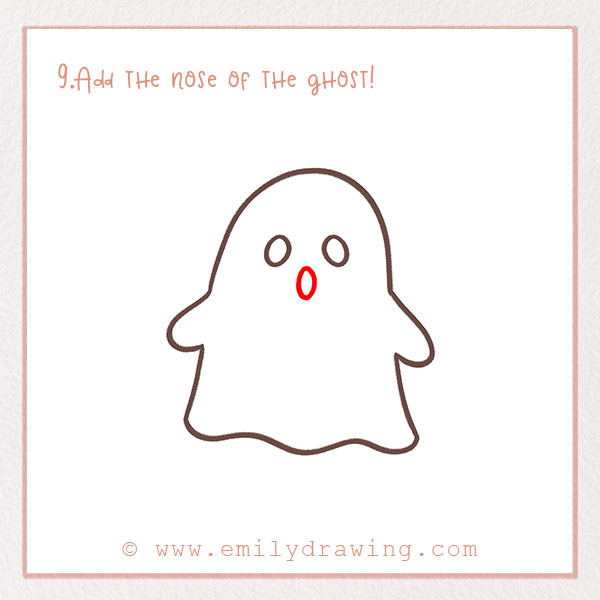
Lastly, let’s add a bit more detail to the ghost’s face. In between the eyes but just a little bit lower, draw one last shape for the nose. It should be an oval. This represents the nose and mouth of the ghost and completes the face.
There you go! Almost done.
Step 10 – Color!
Even though ghosts are typically white, let’s still add some color to our drawing! Fill in the background of your drawing however you want. Maybe you want to continue with the Halloween theme and add some fall colors, like orange and maroon, or maybe you want to do something else entirely! Grab some colors and have fun.
Now that you’ve drawn your Halloween ghost, you might enjoy our Ghost Coloring Page to add more spooky fun to your art collection.
All done? Good job! Thanks for following along for our Halloween ghost art project! We hope you loved this step-by-step drawing tutorial….we did!
We also have a Halloween pumpkin tutorial, also known as a jack-o-lantern, if you want to expand your Halloween art collection! Look around our site for these additional tutorials.
If you’re interested in more Halloween-themed drawings, you might also enjoy our tutorials on How to Draw Halloween Sweets.
Pin it now, Draw later!
Get the FREE Printable Drawing Guide