Hello, and welcome to another ten-step tutorial. Today, we are going to learn how to draw a car together with some easy car drawing steps!
Cars, or automobiles, were technically invented in 1886. However, it wasn’t until 1908 that the first mass-produced car came onto the market: Ford Motor Company’s Model T. They quickly became popular in the USA and, later, in the rest of the world.
Nowadays, cars come in all sorts of shapes and sizes. Some are tall and roomy, like SUVs, while others are small and sporty, like sports cars. Of course, most cars use gasoline to run, but some actually use electricity and don’t produce exhaust fumes. There are cars everywhere now, so surely you’ve seen many different kinds. Some cars are incredibly fast and can even go up to 300 miles per hour! If you’ve ever seen a car race in person, like the Indy 500, you know how fast they can go.
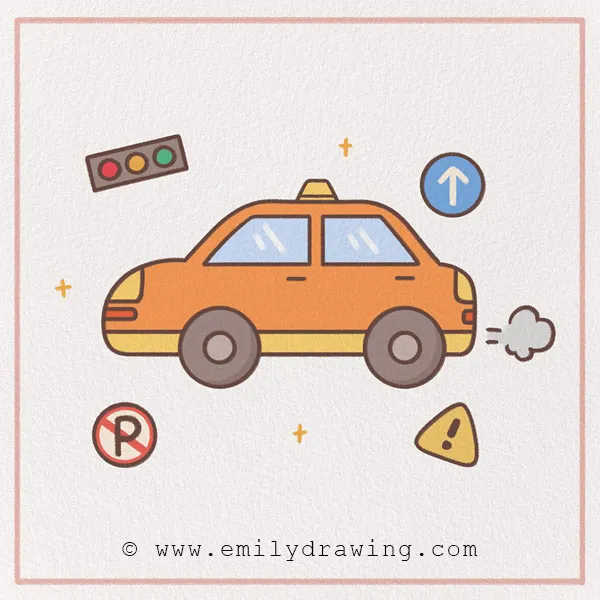
For this drawing, we are going to draw a small sedan that looks like a taxi. Are you ready? Let’s get started!
Materials:
- a piece of paper
- a pencil for the guiding lines and sketching
- an eraser
- a black sharpie or a pen for the outlines
- markers or colored pencils for coloring
- our printable drawing guide (Join my Email List below to get this Tutorial)
Here are my RECOMMENDED Art Supplies!
- Crayola Coloring Set (140 Pieces – Mega Value!)
- 24 Colored Crayon Set
- A4 Printer Paper
- Crayola Coloring Pencils
- HP Home Printer with Instant Ink!
Time needed:
12 minutes.
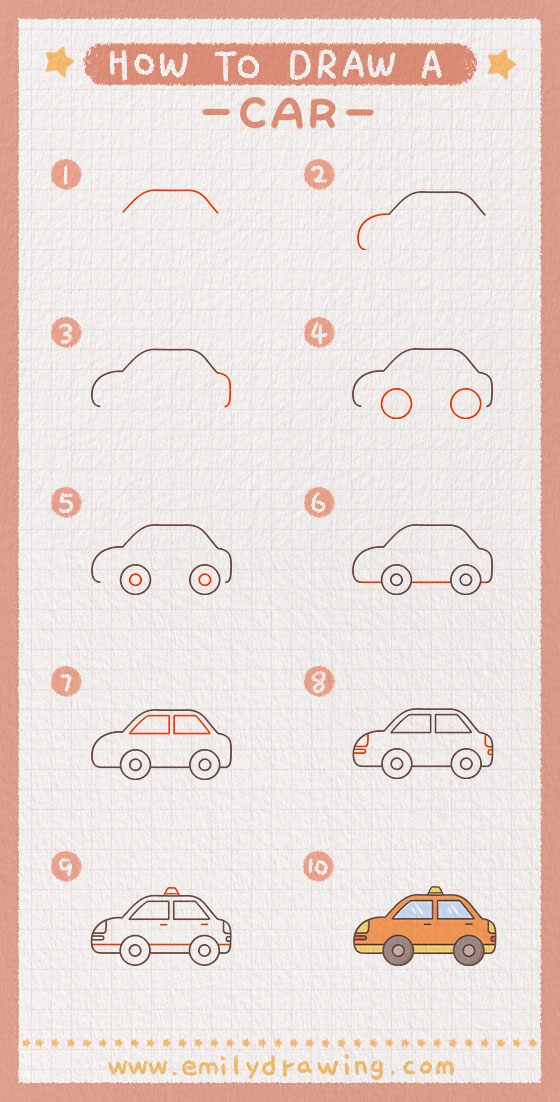
How to Draw a Car — Let’s get started!
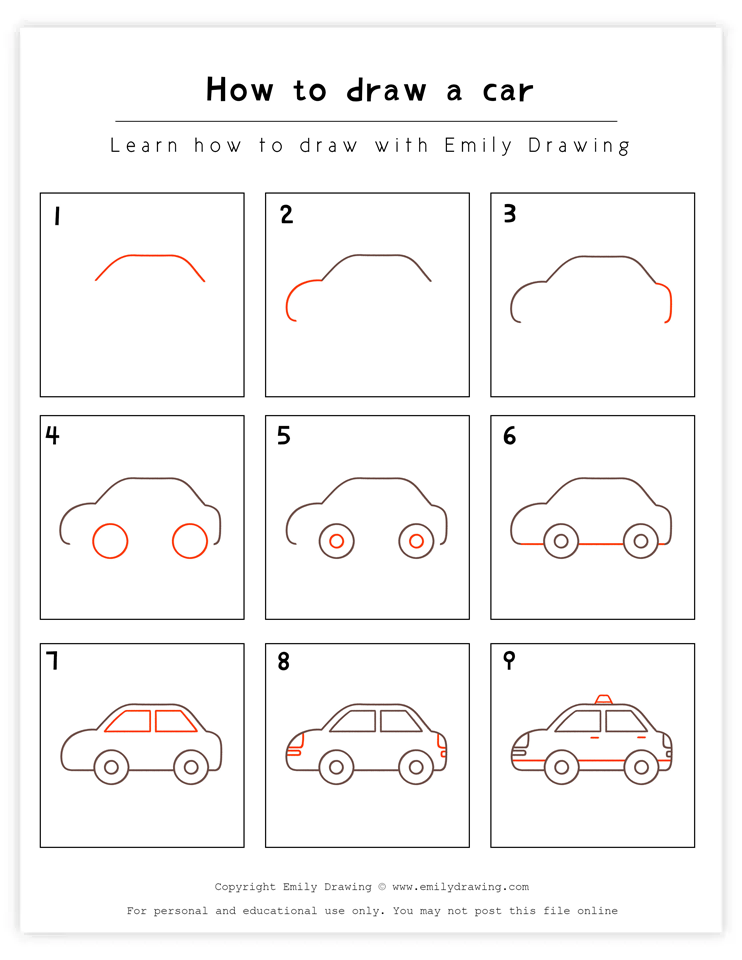
Step 1 – Draw the top of the car.
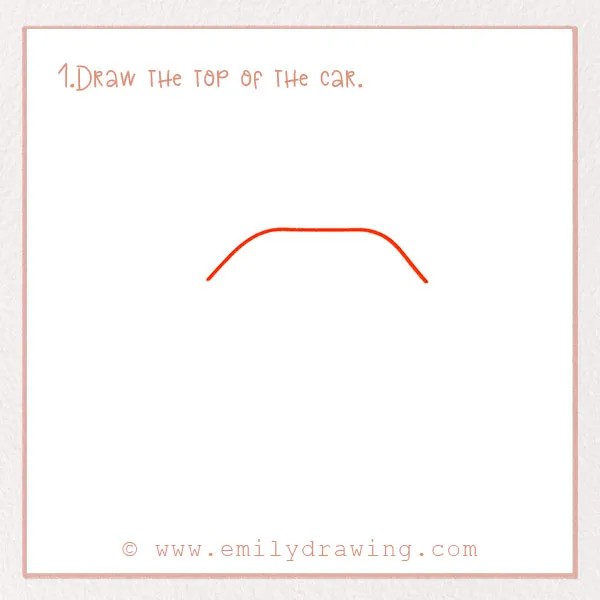
Let’s begin with the top of the car in this simple car illustration for beginners. Draw a diagonal line about two-thirds up the page. Have it flatten out before turning back into a diagonal again on the other side. You should have a roof shape now. Great job!
Step 2 – Draw the front of the car.

Let’s move on to the front of the car. We are drawing it in profile view. Draw a large curve on the left side since that is the direction the car is facing.
Step 3 – Draw the back of the car.
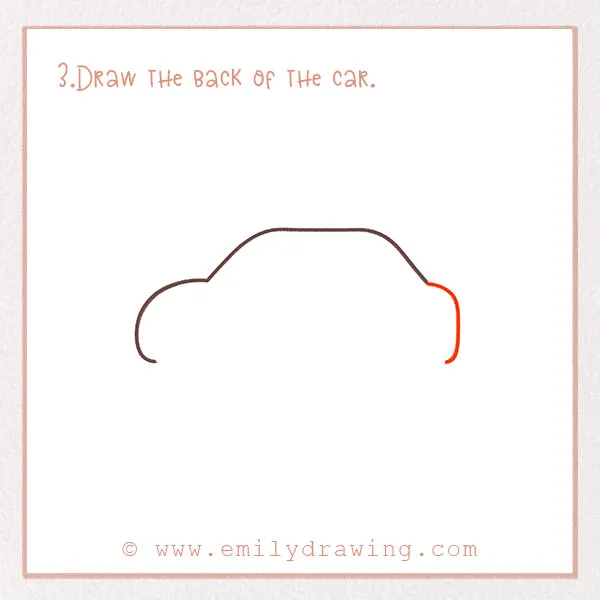
Moving to the back of the car, draw a curved line. It should be slightly narrower than the front. Great job!
Step 4 – Add the wheels!
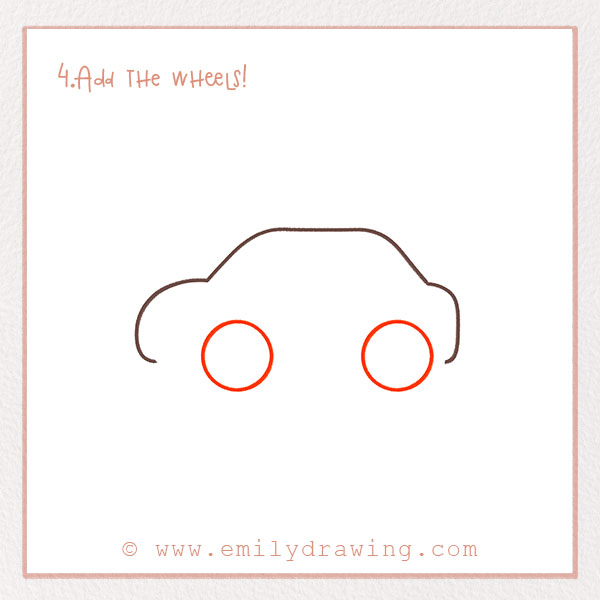
If you look closely at car tires, you’ll see different patterns on them. These patterns help the tires grip the road and drive safely, especially in rain or snow. Those patterns are called the tread, and they are on the wheels.
Let’s add the wheels now! Since this is a profile view of a car, you can only see two wheels. Draw two circles exactly the same size. Place them a few inches apart at the bottom of the car. We will connect them in later steps.
Step 5 – Add more details to the wheels.
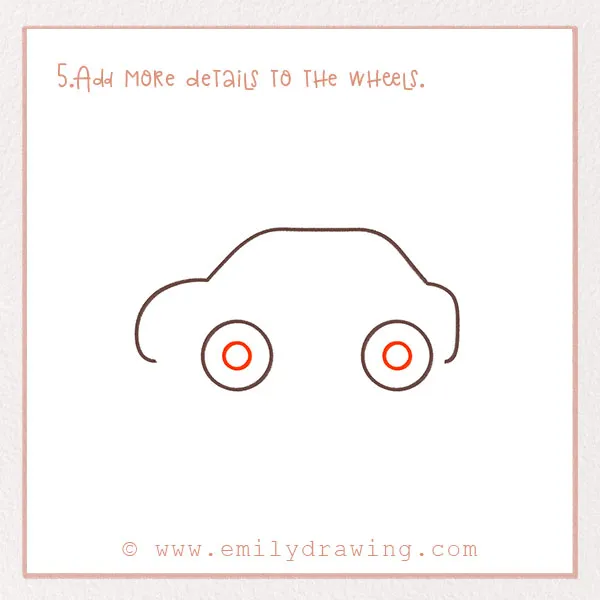
Let’s add more detail to the middle of the wheels. In each wheel, draw a smaller circle centered inside the larger one—just like the shape you’d use in this tutorial on how to draw a basketball.
If you enjoy adding finer details to your drawings, try How to Draw a Basketball.
Step 6 – Add the bottom of the car.
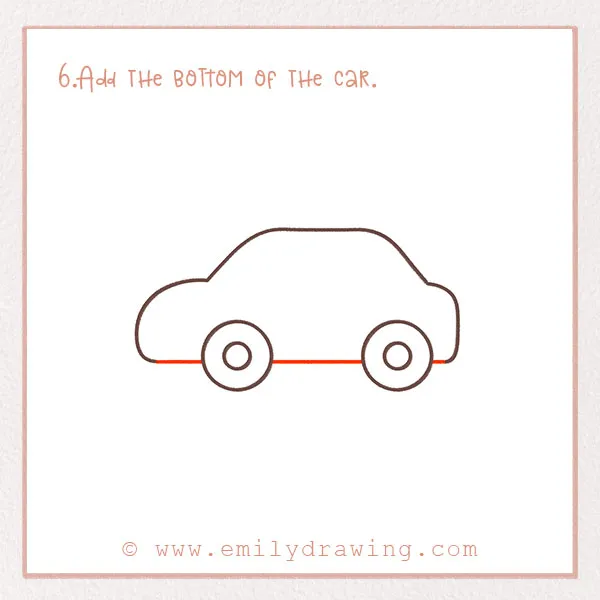
Next, let’s complete the overall shape of the car. Draw a horizontal line that connects the front curve of the car to the front wheel. Next, draw a horizontal line that connects the wheels. Finally, connect the back wheel to the back bumper of the car. Refer to the photo.
Step 7 – Draw the windows.

Let’s move on to adding detail to the interior shape of the car. In this step, we will add windows! Draw two trapezoids side by side in the upper portion of the car. The front window should be just a little bit wider than the back window.
Step 8 – Add more detail to the front and back.
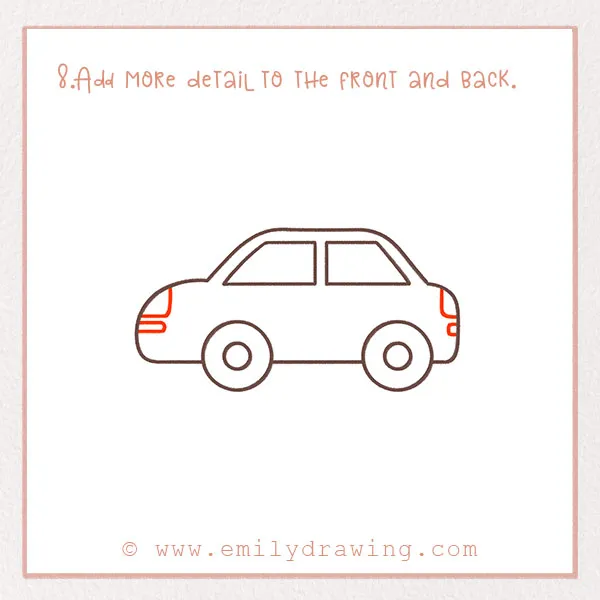
Next, let’s add some detail to the front and back of the car. We’re going to add details that represent the lights and the license plate. Every car has a license plate with numbers and letters, although they will look different depending on what country you’re in. Let’s add some details now.
First, at the front of the car, draw two lines that form a triangle at the front curve of the car. Draw a small and narrow rounded rectangle right below it. Check out the photo. Next, do the same at the back of the car, but make the shapes smaller.
Great job!
Step 9 – Add the finishing touches.
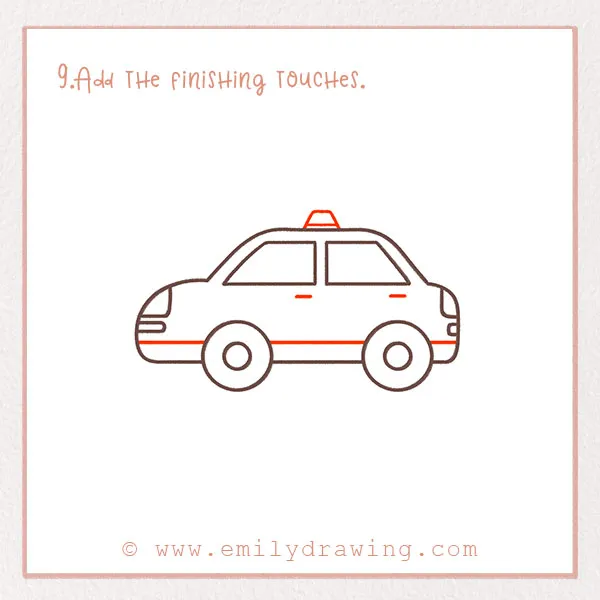
We are almost done! We just need to add several markings around the car to give it the finishing touches—this part really brings the vehicle to life, just like in our how to draw a truck tutorial.
First, draw a horizontal line across the whole bottom of the car. It should go all the way from the front bumper to the back bumper, only interrupted by the wheels.
Next, add two small dashes underneath each window to indicate door handles. Our car is also going to have a little detail on the top, like a taxi or a police car. Draw a small trapezoid centered on top of the car.
Step 10 – Color!
Cars are available in all sorts of colors, from bright red to shiny blue. Some cars even have patterns on them.
Have fun in this step—make your car totally yours! Don’t forget to fill in the background with color, too.
You are all done—fantastic job completing this step-by-step car drawing! We hope you loved the tutorial and are proud of your final drawing. If you enjoyed this format, you can find many more exactly like it on our page! Be sure to browse around the site to find different plant, animal, and food tutorials!
If you enjoy drawing vehicles, you might also like our full guide on how to draw a plane, which walks you through each step just like this one.
Pin it now, Draw later!
Get the FREE Printable Drawing Guide