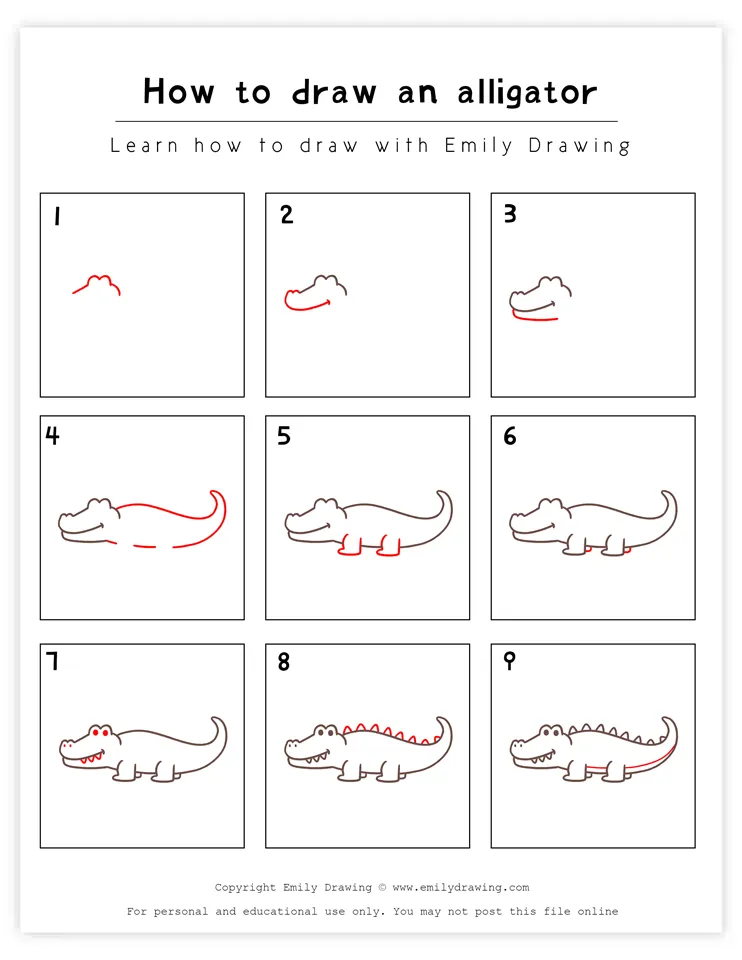
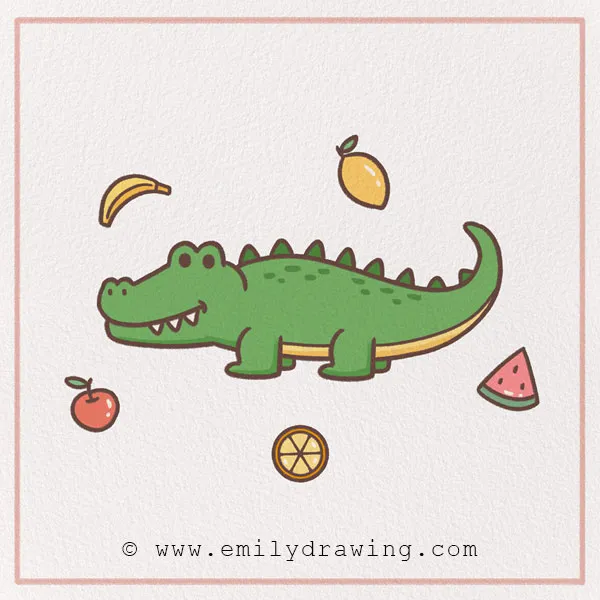
Today, we are going to learn how to draw an alligator together with this fun alligator drawing tutorial! Like all of our drawings on our site, this kids drawing guide includes ten simple steps to create your work of art.
Let’s learn some things about alligators. First off, they have been around for more than 37 million years! They have changed very little since the time of dinosaurs. Additionally, there are different kinds of alligators (not to be confused with a crocodile!) with the American alligator being the largest. They can grow up to 19 feet long! Have you ever seen one in person?
They also have a very long lifespan. In the wild, they can live from 35–50 years! Some have lived even longer in captivity. Alligators are native to United States and China and thrive in freshwater environments—quite different from creatures like deer, which we explore in our how to draw a deer tutorial.
Let’s move on to making art! Grab some drawing materials and keep reading for Step 1.
Materials:
- a piece of paper
- a pencil for the guiding lines and sketching
- an eraser
- a black sharpie or a pen for the outlines
- markers or colored pencils for coloring
- our printable drawing guide (Join my Email List below to get this Tutorial)
Here are my RECOMMENDED Art Supplies!
- Crayola Coloring Set (140 Pieces – Mega Value!)
- 24 Colored Crayon Set
- A4 Printer Paper
- Crayola Coloring Pencils
- HP Home Printer with Instant Ink!
Time needed:
14 minutes.
How to Draw an Alligator — Let’s get started!
Step 1 – Draw the top of the head.

Let’s start with the head. First, draw two semicircles for ears about two-thirds of the way up the page. These form the shapes of the eyes. Draw short lines on either side to start forming the top of the head.
Did you know that alligators have amazing hearing and can detect low-frequency sounds while in water? This helps them find prey and stay aware of potential danger.
Step 2 – Draw the snout and upper jaw.
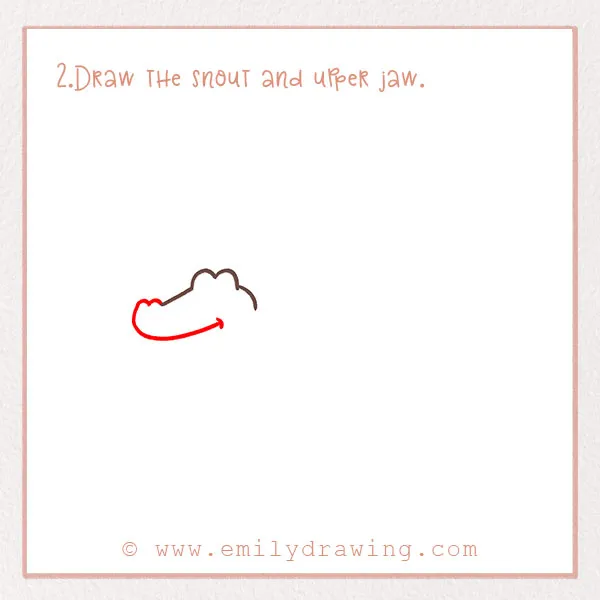
Let’s continue drawing the outline of the head. Draw two bumps for the nostrils at the end of the line you drew in Step 1. Continue this line into a curve—this forms the upper jaw. Alligators have a very powerful bite and their jaws are one of their most recognizable features.
Step 3 – Draw the alligator’s lower jaw.
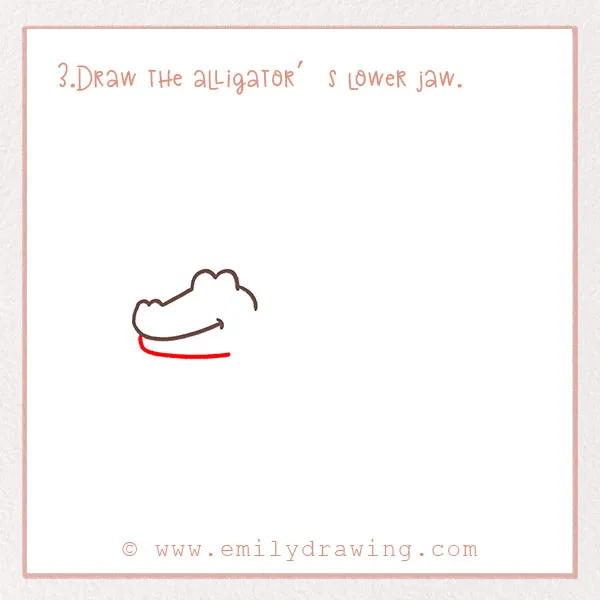
Let’s keep drawing the outline of the head. Draw the lower jaw by forming a long line underneath the last one from Step 2. It should look like the alligator is smiling! Even though they are powerful animals, we can make ours look like a friendly cartoon alligator.
You should still have plenty of space on the right side of the page for the rest of the body.
Great job!
Step 4 – Draw the body and the tail!
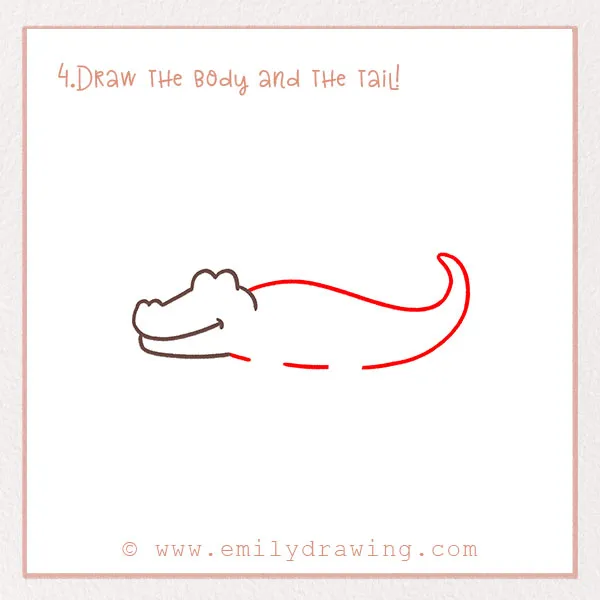
Alligators are recognizable for their long bodies. If you’ve ever seen one in person, you probably noticed how gracefully it glides through the water because of its languid shape.
Check out the photo for this step. For the top of the back, draw a long curve that ends with a curve upwards near the right side of the page—similar to how we start in our chipmunk drawing tutorial. Draw another curve that forms the point of the tail. Next, draw the belly. Leave some space to add the legs!
Great job.
Step 5 – Add the alligator’s feet.
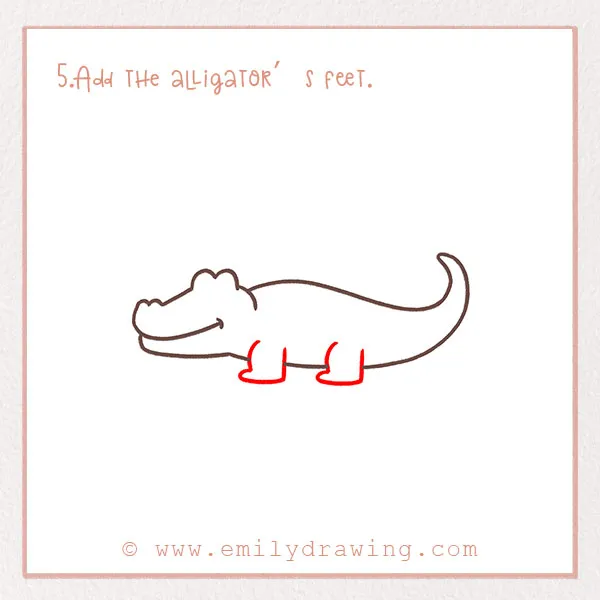
Let’s add the legs and feet for the alligators. They have quite short legs, but they can still run fast! Sometimes, they can reach up to 35 miles an hour on land, but they certainly aren’t built for long distance running.
In the gaps we left in Step 5, draw two legs. They should be short and wide. At the bottom, draw some toes. Just draw two legs for now.
Step 6 – Draw the alligator’s other feet.
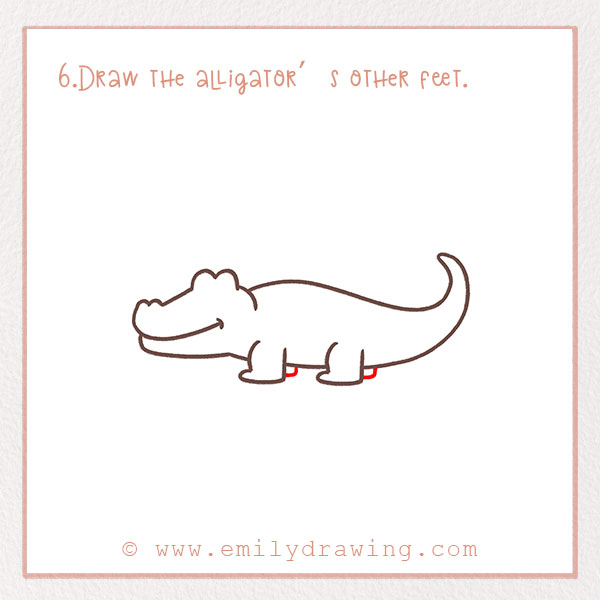
Our alligator needs two more legs! Since we are drawing the alligator in a profile view, we can only barely see the legs on the other side of the body.
Simply draw two small curves to the right of each leg from Step 5. Now, it should look like the alligator has four legs and is walking to the left side of the page.
Great job!
Step 7 – Draw the face!
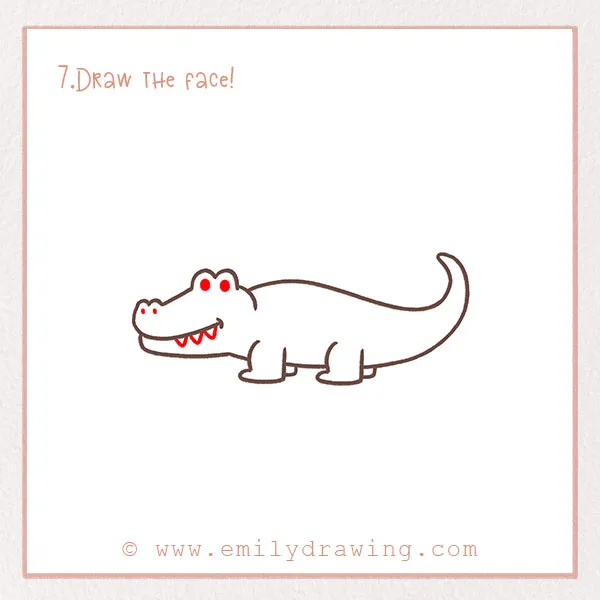
Alligators have up to 80 teeth in their mouths, and they keep growing new ones throughout their lives. If they lose a tooth, a new one grows! An alligator’s bite is very strong. They can bite down with a force of over 2,000 pounds per square inch—stronger than a lion’s bite! Crazy, right?
For this step, draw two small dots for eyes. Next, draw three small upside-down triangles for teeth. Finally, draw two small dots for nostrils at the very end of the alligator’s long nose.
Step 8 – Add to the alligator’s spine.
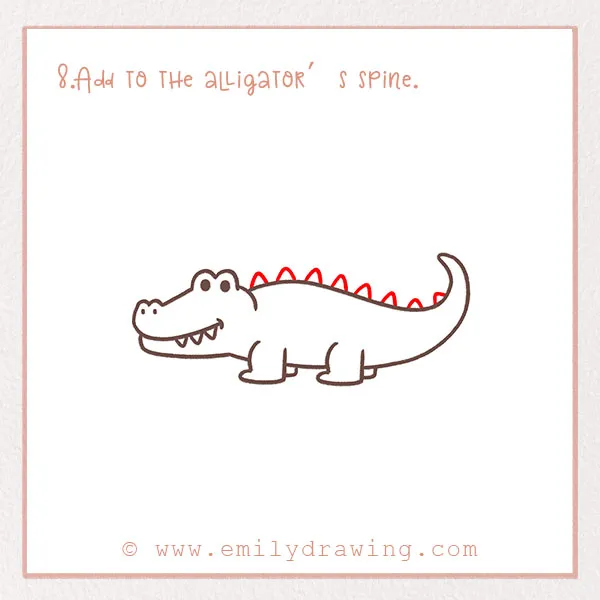
Let’s add more detail to the alligator by drawing its spine! This is one of the most recognizable features. Have you ever seen an alligator’s spine up close? It has an armor-like appearance.
So, for this step, draw about eight little triangles along the length of the back. The last one should be near the end of the tail. Check out the photo!
Step 9 – Add detail to the belly.
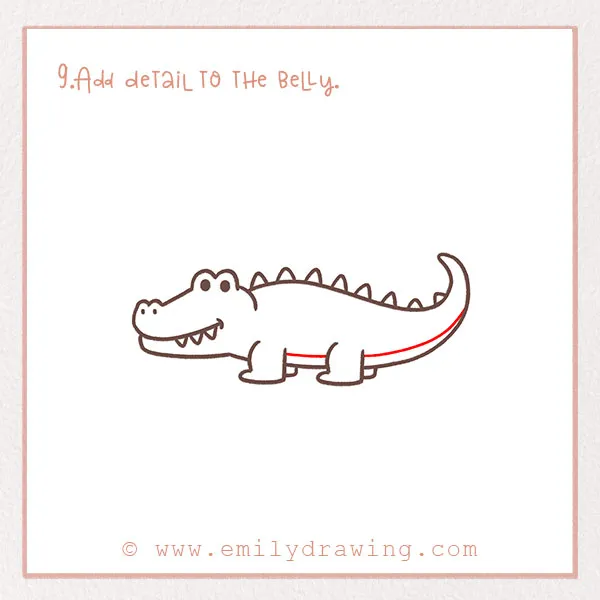
Finally, let’s finish off our alligator artwork by adding a tiny bit more detail. Draw a line from the end of the tail to the front leg. It should be parallel to the bottom of the belly. This also makes the profile view look more realistic.
Step 10 – Color in your alligator!

Baby alligators are bright green with yellow stripes, which help them blend in with their surroundings. As they grow older, their color gradually darkens.
However, you can color in your alligator however you like. It doesn’t need to be realistic! Fill in the background, too!
Pin it now, Draw later!
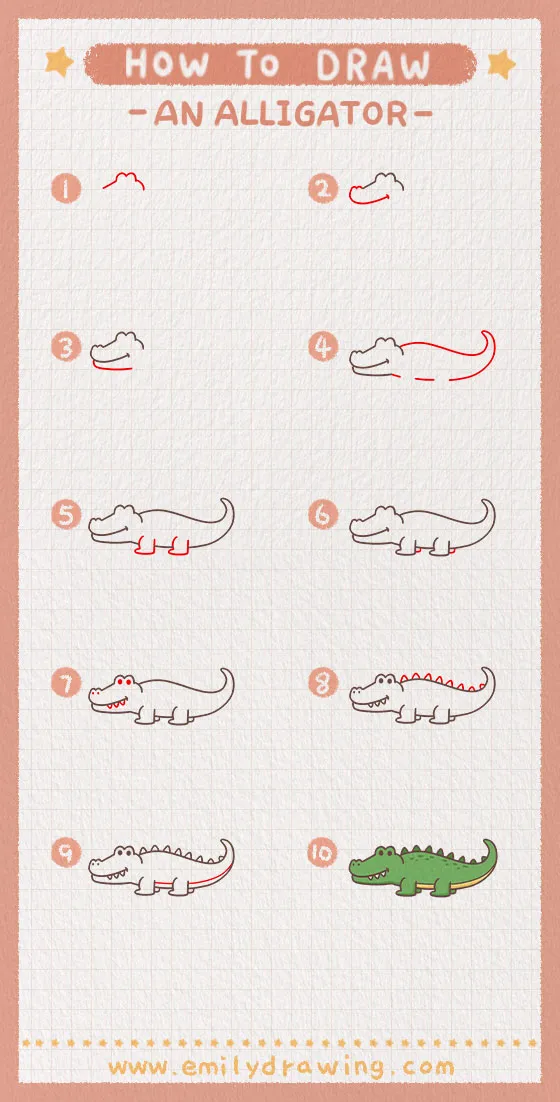
Fantastic job! Thanks so much for following along with us. We hope you liked this project—if you did, we have so many more waiting for you on our website, including a lovely step-by-step on how to draw a deer. like this tutorial on how to draw a bobcat. Lots of animals, pop-culture inspired subjects, food, holiday, and more art projects are available, including this guide on drawing a bobcat. We always use the same format, making it easy to follow—see this fun tutorial on how to draw a chipmunk for another great example.
