Welcome to today’s tutorial: how to draw a bird illustration!
Surely you have seen a little bird where you live since they exist everywhere in the world. There are tons of different kinds of birds of various shapes, sizes, and colors. From the tiny flitting hummingbird to the cold-weathered arctic penguin, the bird kingdom has many beautiful members, all with their own qualities, making our world a more vibrant place. They have truly amazing qualities, from a parrot mimicking and talking like a human to a hummingbird flapping its wings 80 times per second!
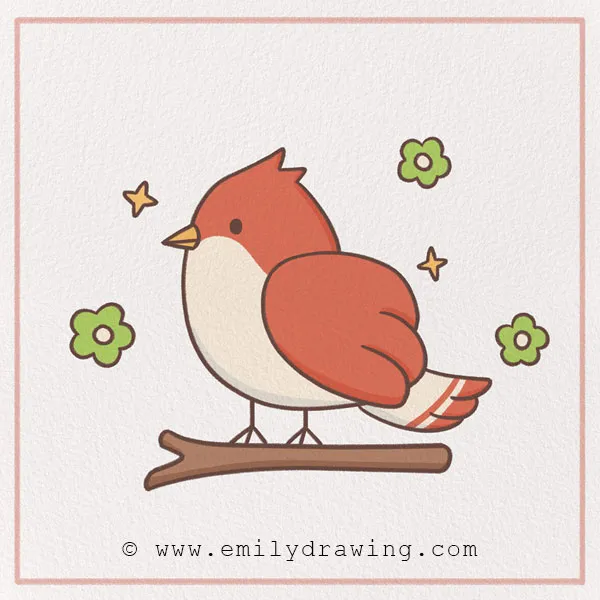
Today, we will draw a little cartoon bird drawing perched on a branch. Find a comfy spot and some art materials for this bird sketch tutorial, and let’s get started! Keep reading for Step 1.
If you love drawing animals, you might also like How to Draw a Butterfly or How to Draw a Ladybug.
Materials:
- a piece of paper
- a pencil for the guiding lines and sketching
- an eraser
- a black sharpie or a pen for the outlines
- markers or colored pencils for coloring
- our printable drawing guide (Join my Email List below to get this Tutorial)
Here are my RECOMMENDED Art Supplies!
- Crayola Coloring Set (140 Pieces – Mega Value!)
- 24 Colored Crayon Set
- A4 Printer Paper
- Crayola Coloring Pencils
- HP Home Printer with Instant Ink!
Time needed:
10 minutes.
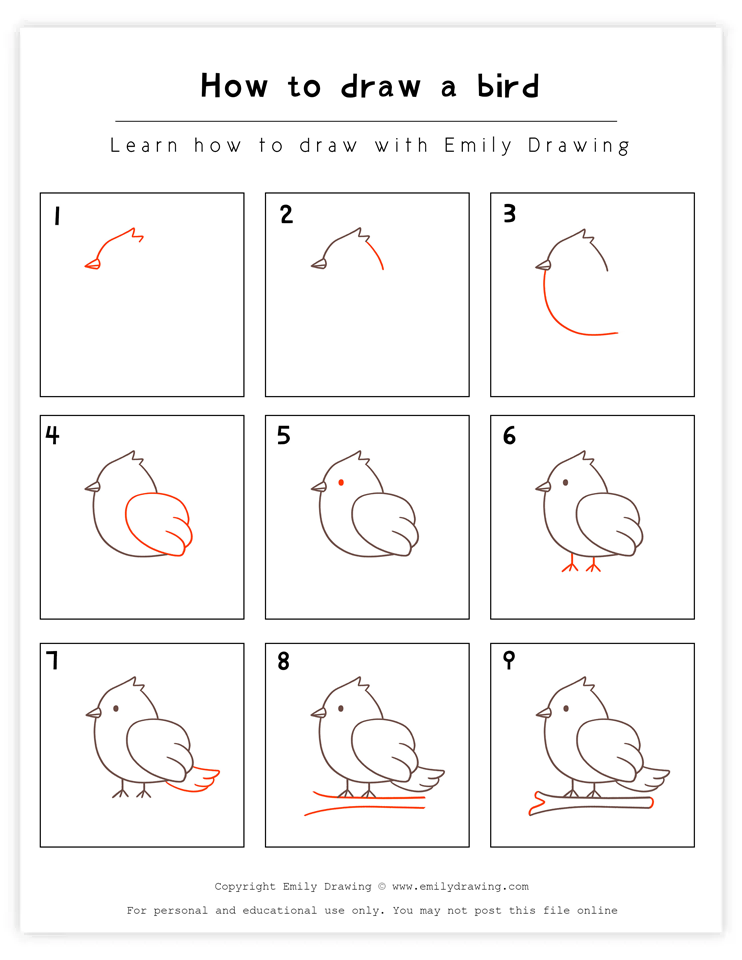
How to Draw a Bird — Let’s get started!
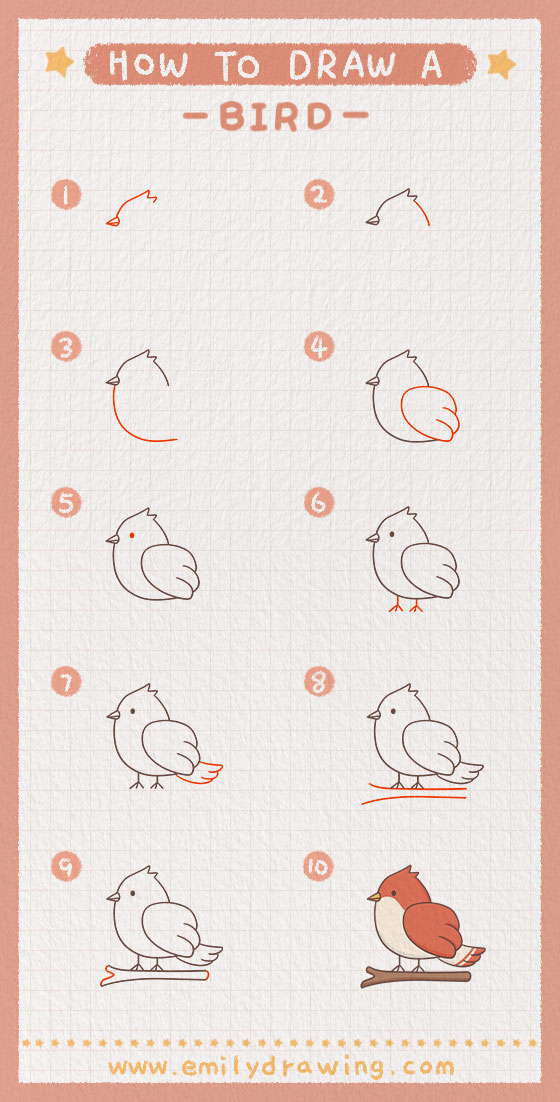
Step 1 – Draw the bird’s beak and head.
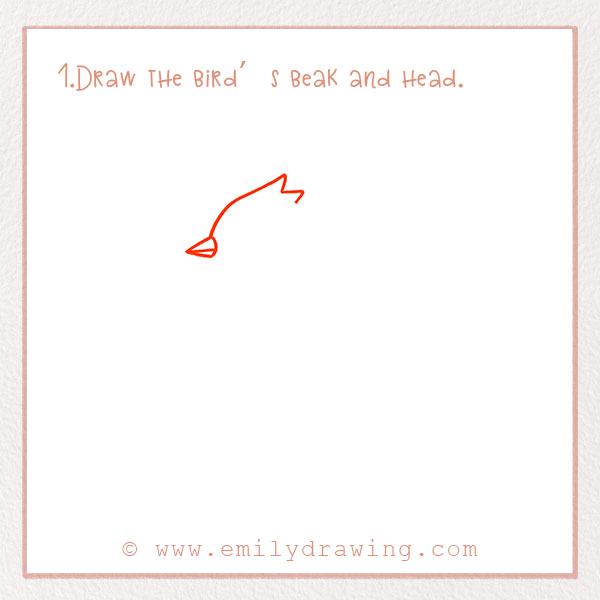
Let’s start at the top of the bird with its beak and head. A bird’s beak lets it eat small seeds, berries, insects, and more. To draw it, create a small triangle pointing to the left. Add a line down the middle to show the top and bottom of the beak. Refer to the photo.
Next, from the beak, draw a curved line going to the right. Add some feather tufts. This is the top of the bird’s head. Good job!
Step 2 – Continue drawing the head.
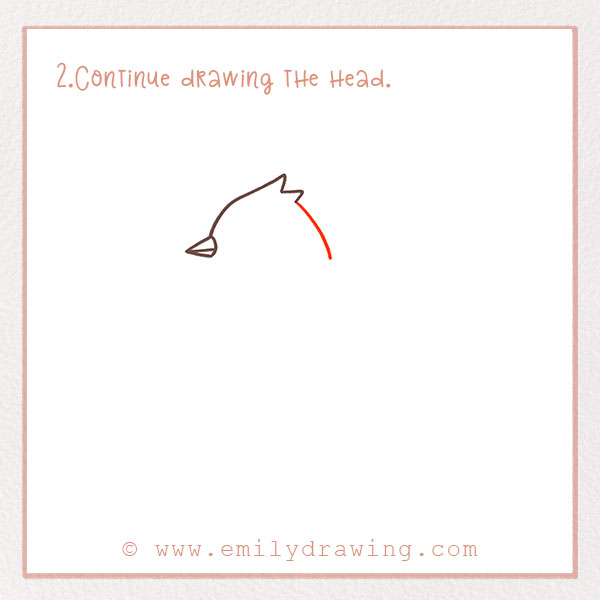
From where you left off in Step 1, draw another line going downwards for the back of the head. Make it even with the bottom of the beak.
Step 3 – Draw the bird’s belly!
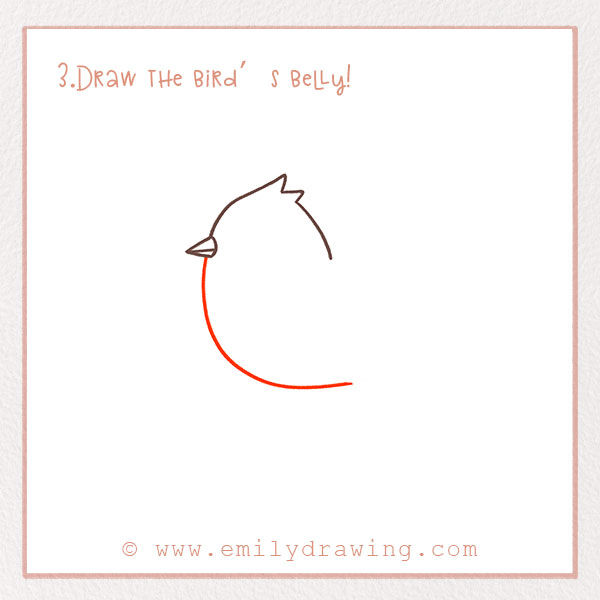
Let’s continue drawing the shape of the bird. From the bottom of the beak, draw a large curved line going to the right. It should take up quite a bit of space. This is the bird’s belly.
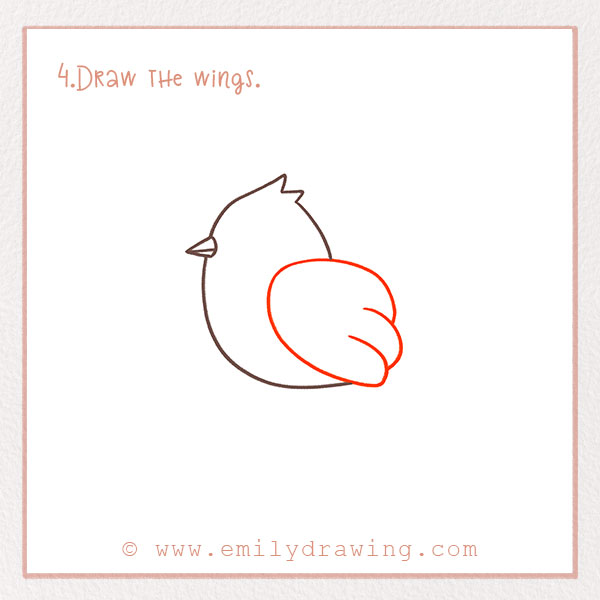
Step 4 – Draw the wings.
All birds have wings (although not all can fly, like the penguin and ostrich). Birds can have quite large wingspans, too. Did you know the wandering albatross has a mind-boggling wingspan of 12 feet, allowing them to fly for hours without even flapping their wings?
We need to add wings to our birdy! Since the bird is facing sideways, we can only see one wing. In the gap between the belly and the head, draw a large curve. Draw several tufts on the right to show the feathers. Check out the photo.
Step 5 – Add the bird’s eye.
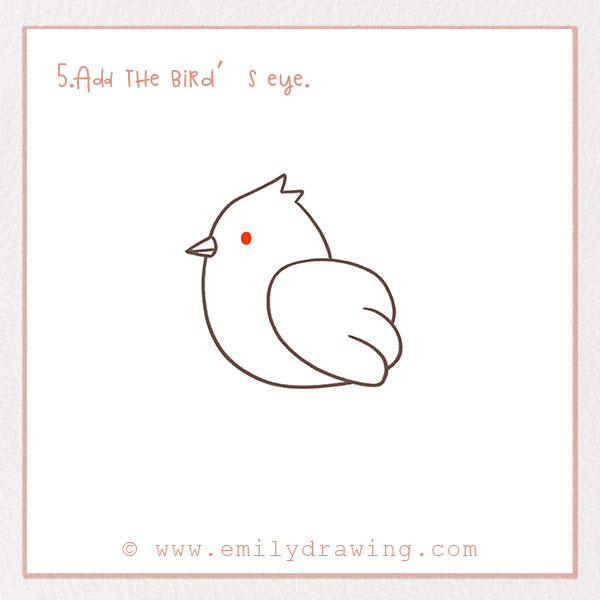
Let’s start adding detail to our bird, beginning with the eye. Again, since we’re drawing our bird from a profile point of view, we can only see one eye. Did you know that most birds have better eyesight than humans?
So, for the eye, draw one small dot a few inches to the right of the beak. Great job!
Step 6 – Draw the bird’s feet.
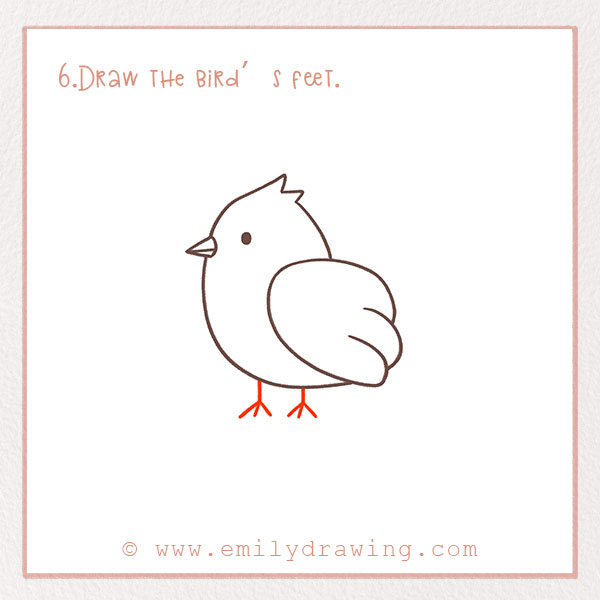
Next, let’s add some feet to our bird! Birds range from having two to four toes, which help them perch on trees.
For your bird’s feet, draw two short vertical lines underneath the belly. At the end of each line, draw three shorter ones that branch out for the toes. Great job!
Step 7 – Add the bird’s tail.
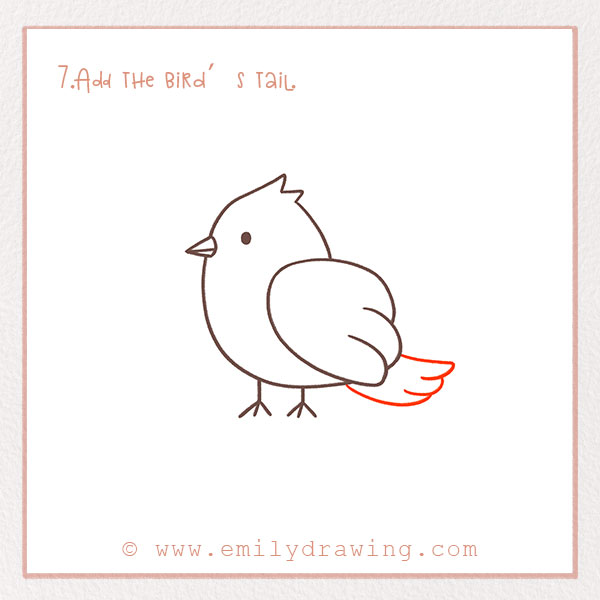
Let’s add the bird’s tail now! To the right of the wing, draw several curved lines stacked on top of each other to represent feathers. Connect the top and the bottom ones back to the wing. It should look like your bird has a tail with several feathers now.
For more detailed tutorials, check out How to Draw a Flamingo.
Step 8 – Add a branch!

We need to add some more context to our drawing. Our bird is going to be sitting on a branch like we so often see them doing in the world. Draw two long horizontal lines stacked on top of each other. On the left, make them curve outward to vary the thickness of the branch.
Step 9 – Complete the branch.
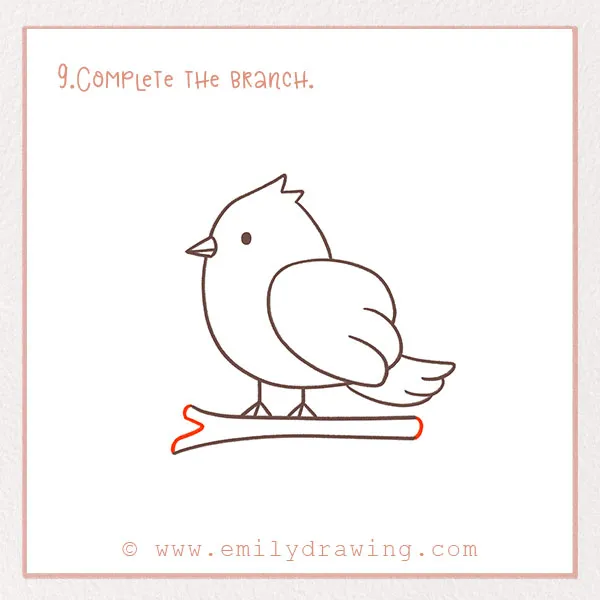
Complete the shape of the branch by adding a jagged edge at the left—draw two lines pointing inward. Complete the branch on the right side with a short curved line. Almost done!
Step 10 – Color in your bird!
Last but not least, color in your drawing. The avian world is amazingly diverse—birds come in every color you can imagine, so have fun with it! Fill in the background of your drawing, too.
Now that you’ve mastered drawing a bird, try your hand at How to Draw a Tree to create a natural background or How to Draw a Squirrel for more forest-themed drawings.
Fantastic job—thanks for following along! If you enjoyed this tutorial, you can find countless more like it on our website. We have animals, plants, characters, food, and more, so you’ll surely find one you like! See you next time.
Pin it now, Draw later!
Get the FREE Printable Drawing Guide