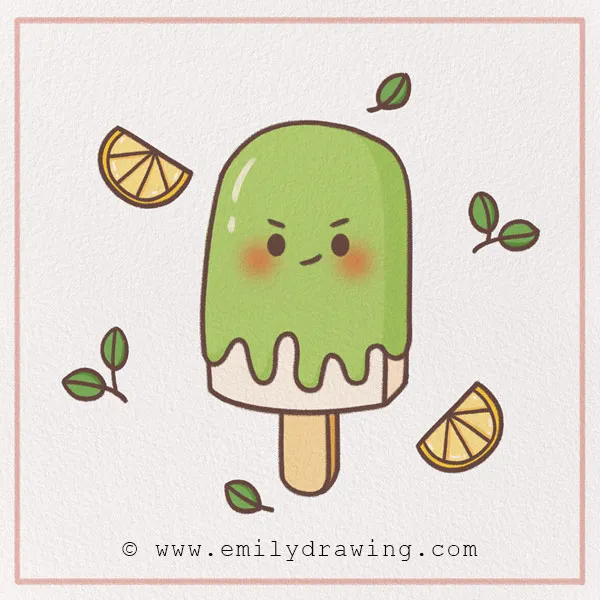
Hi! Welcome to another fun 10-step popsicle drawing tutorial—today, we are going to learn how to draw a popsicle together.
Have you ever had a popsicle? They are great treats on a hot summer day—perfect for any summer treats drawing project—but just like an ice cream cone, you have to eat it really fast before it melts! Popsicles can be a bunch of flavors, but most often they are fruity—the most popular flavor today is cherry. They are a great easy treat to make, too.
Let’s learn a tiny bit of history. They were invented in 1905 by a kid who accidentally left some soda and a stirring stick outside overnight. He woke up to a revolutionary invention—the popsicle! He started selling his invention around the street, and now they are very popular treats everywhere.
Get in a comfy spot, pick out your favorite drawing materials and let’s get on with this tutorial. Are you ready? Happy drawing!
If you enjoy drawing sweet treats, you might also like How to Draw an Ice Cream Cone or How to Draw a Cupcake.
Materials:
- a piece of paper
- a pencil for the guiding lines and sketching
- an eraser
- a black sharpie or a pen for the outlines
- markers or colored pencils for coloring
- our printable drawing guide (Join my Email List below to get this Tutorial)
Here are my RECOMMENDED Art Supplies!
- Crayola Coloring Set (140 Pieces – Mega Value!)
- 24 Colored Crayon Set
- A4 Printer Paper
- Crayola Coloring Pencils
- HP Home Printer with Instant Ink!
Time needed:
12 minutes.
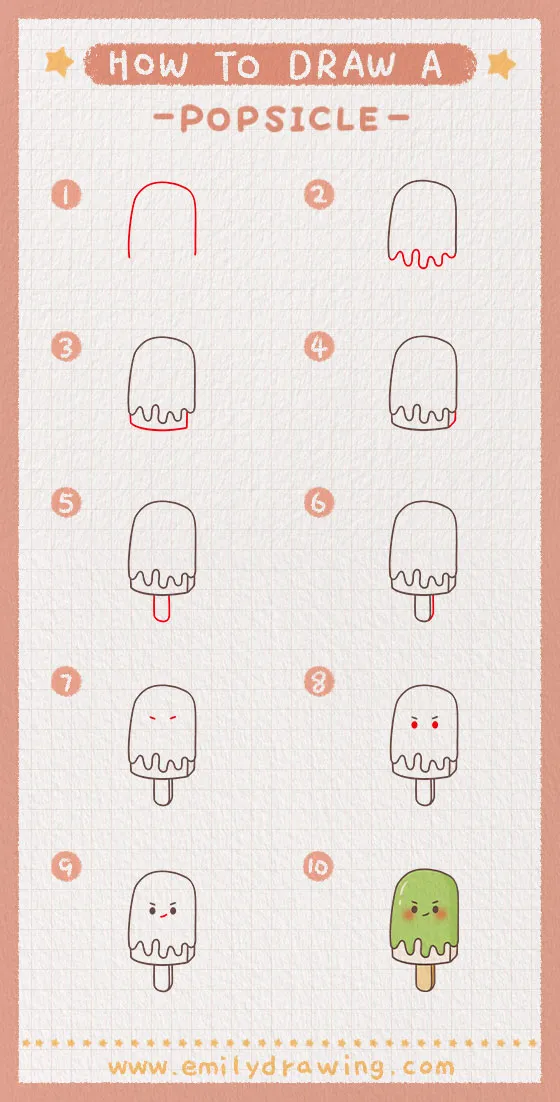
How to Draw a Popsicle — Let’s get started!
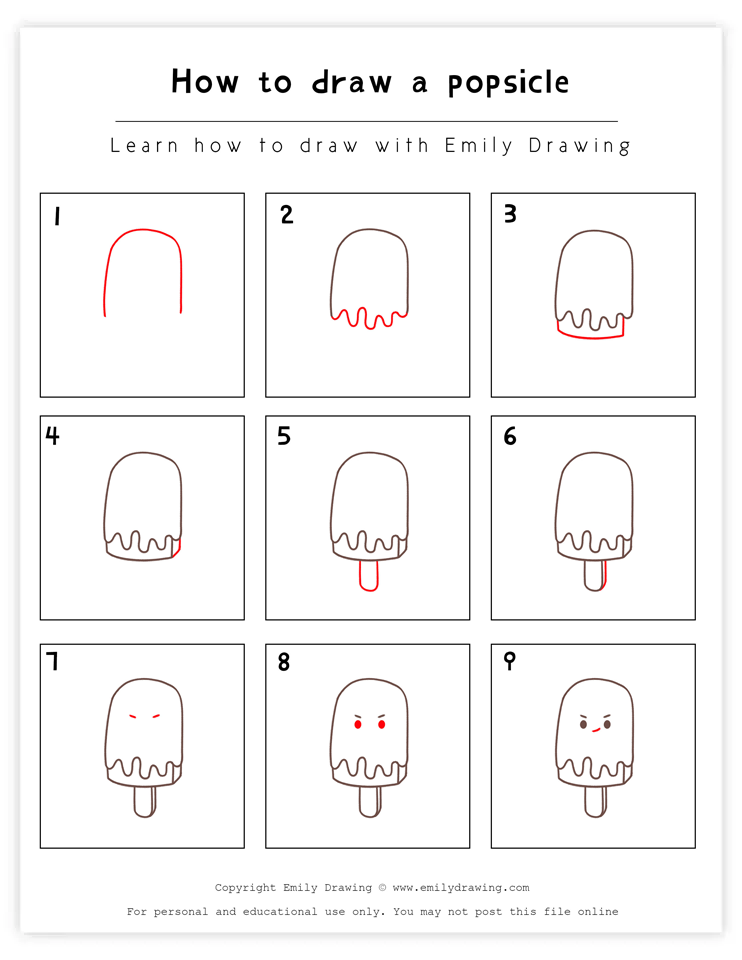
Step 1 – Draw the shape of the popsicle stick.
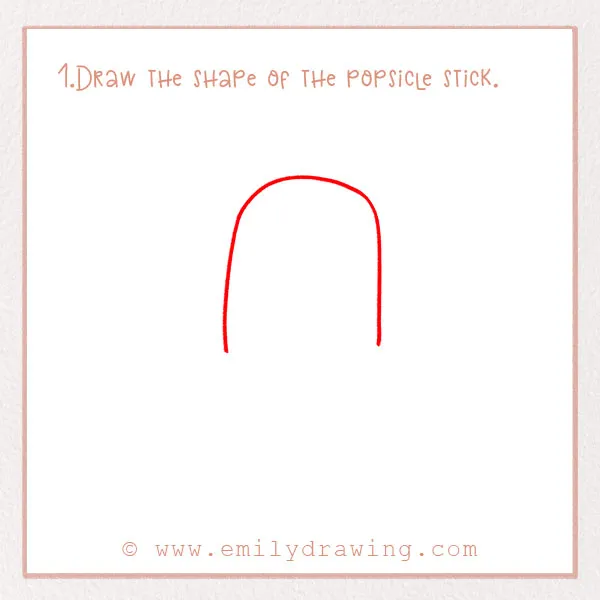
Let’s start with the basic shape of the popsicle. Draw a big arced line, like a rainbow, filling up about half the page. We’ll finish the bottom of the page in the next step.
Step 2 – Draw a drippy bottom.
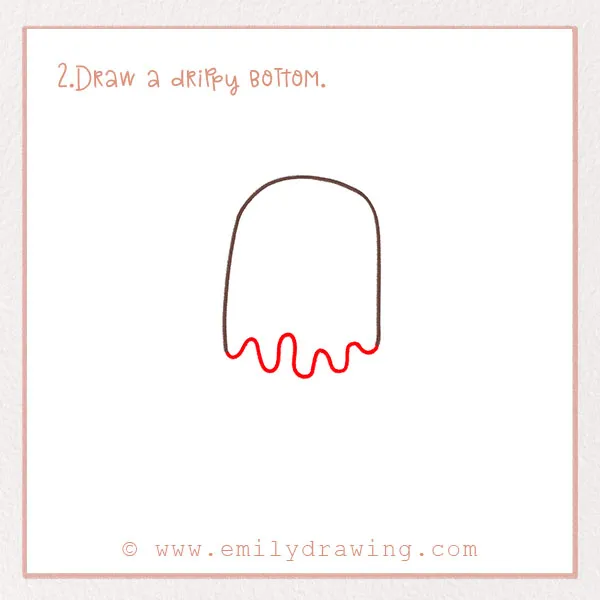
We mentioned that you have to eat a popsicle fast on a summer’s day, or else your popsicle will start to melt! That’s what it looks like is happening to this popsicle!
At the bottom of the arc from Step 1, draw a squiggly line connecting the two ends. These are the drips. Make it a bit uneven to make it look realistic! Check out the photo. Good job!
For more tutorials that involve symmetry, try How to Draw a Star or How to Draw a Snowflake.
Step 3 – Draw the base of the popsicle.
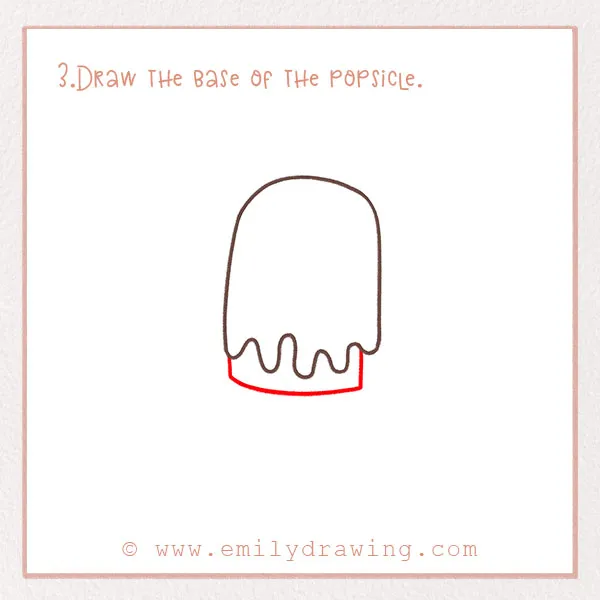
Below the drippy line from the last step, draw another horizontal line. This is the very base of the popsicle. Leave a tiny bit of room on the right side (we’ll get to this in the next step)!
Step 4 – Add some perspective!
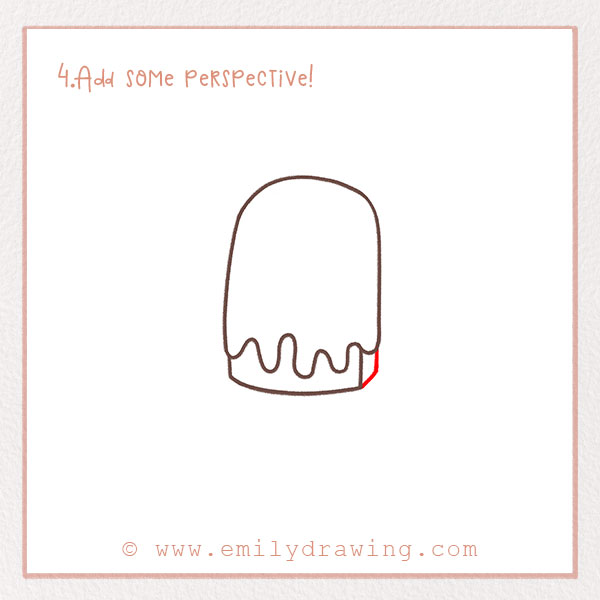
We always like to add a bit of perspective to make drawings look just a tad more realistic. It’s a great technique to use in art! Let’s add some perspective to our popsicle now. Don’t worry, it’s simple.
In the space we left in the last step, draw a very short vertical line. This basically makes the popsicle look a bit more dimensional, because we can only see one side of the popsicle. Look at the photo to see what we mean. Good job!
For tutorials with similar structured elements, check out How to Draw a Watermelon or How to Draw a Diamond.
Step 5 – Add the popsicle stick!
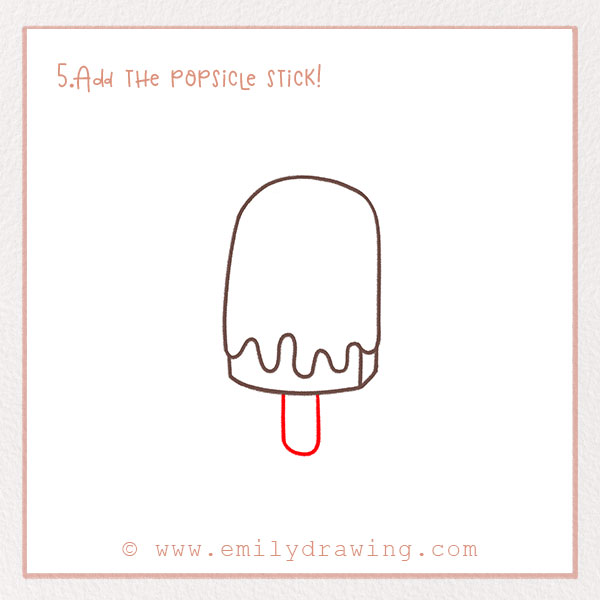
One of the most distinct features of popsicles are their sticks! Popsicles are made by sticking a wooden stick, often made of birch or something similar, into a cup filled with fruit juice.
So, let’s add that now. Draw a long skinny curve centered below the popsicle. It should be a few inches long.
Step 6 – Add some perspective to the stick!
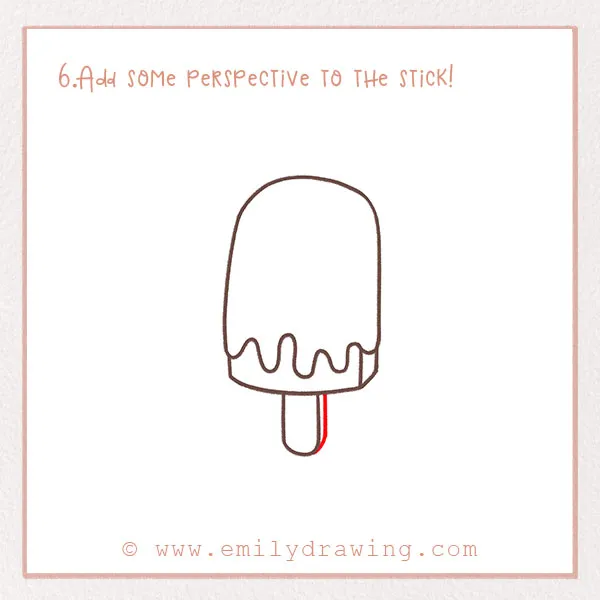
Once again, let’s add a small detail to create some dimension. On the right side of the stick, just barely over from the line, draw another line. Look at the photo! Now the popsicle stick has some perspective to match the popsicle.
Step 7 – Start drawing a face.
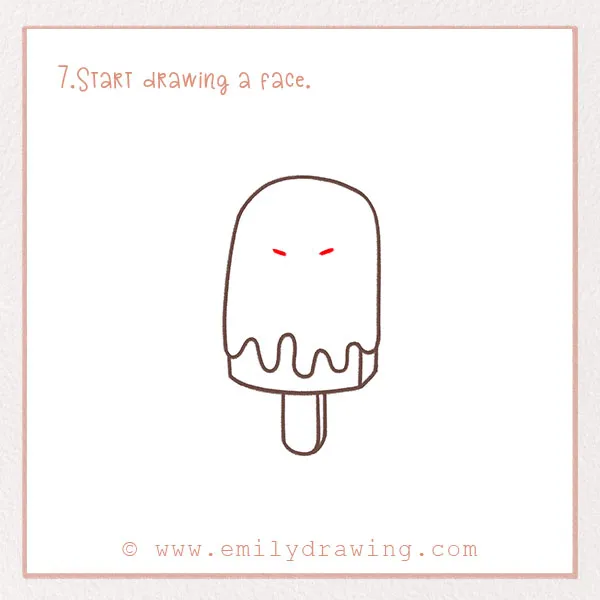
Here at Emily Drawing, we like to add some cute faces to our drawings—perfect for your next cute food illustration! Let’s add a face to our popsicle now.
About halfway up the popsicle, draw two short slanted lines about an inch apart. These are the eyebrows. We’ll finish the face in the next few steps. Good job!
Step 8 – Add two eyes!
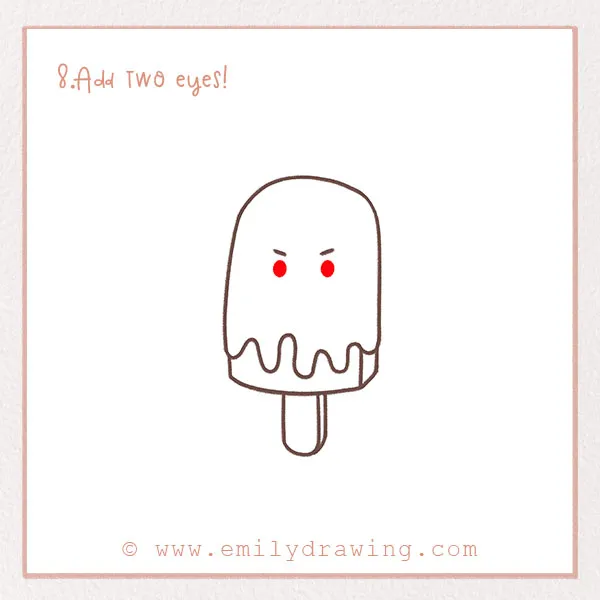
Of course we need to add eyes. Underneath the eyebrows, draw two dots for the eyes. One more step until we’re done with the face.
Step 9 – Draw the mouth.
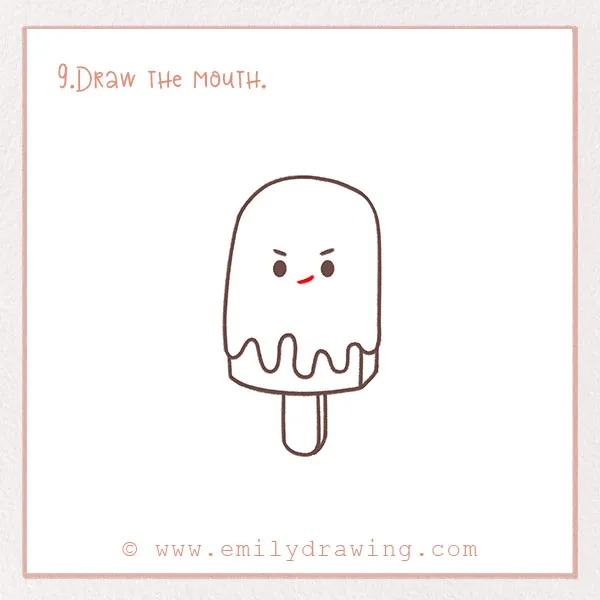
Lastly, let’s add a small smile. Draw a very small curve for the mouth. Now the face is complete!
Good job! You’re almost done. Keep reading for Step 10.
Step 10 – Color in your popsicle!
Last but not least, color! What flavor is your popsicle? Pick your favorite and color it in accordingly. Don’t forget to fill in the background of your drawing, too.
You’re all done! Thanks for following along with our tutorial.
Once you’ve finished your popsicle, continue with How to Draw a Birthday Cake or How to Draw a Strawberry.
We had a good time and we hope you did too! Browse the site for more 10-step drawing projects…we have a bunch of other food tutorials, as well as animals and people. Let us know in the comments if you have any ideas!
Pin it now, Draw later!
Get the FREE Printable Drawing Guide